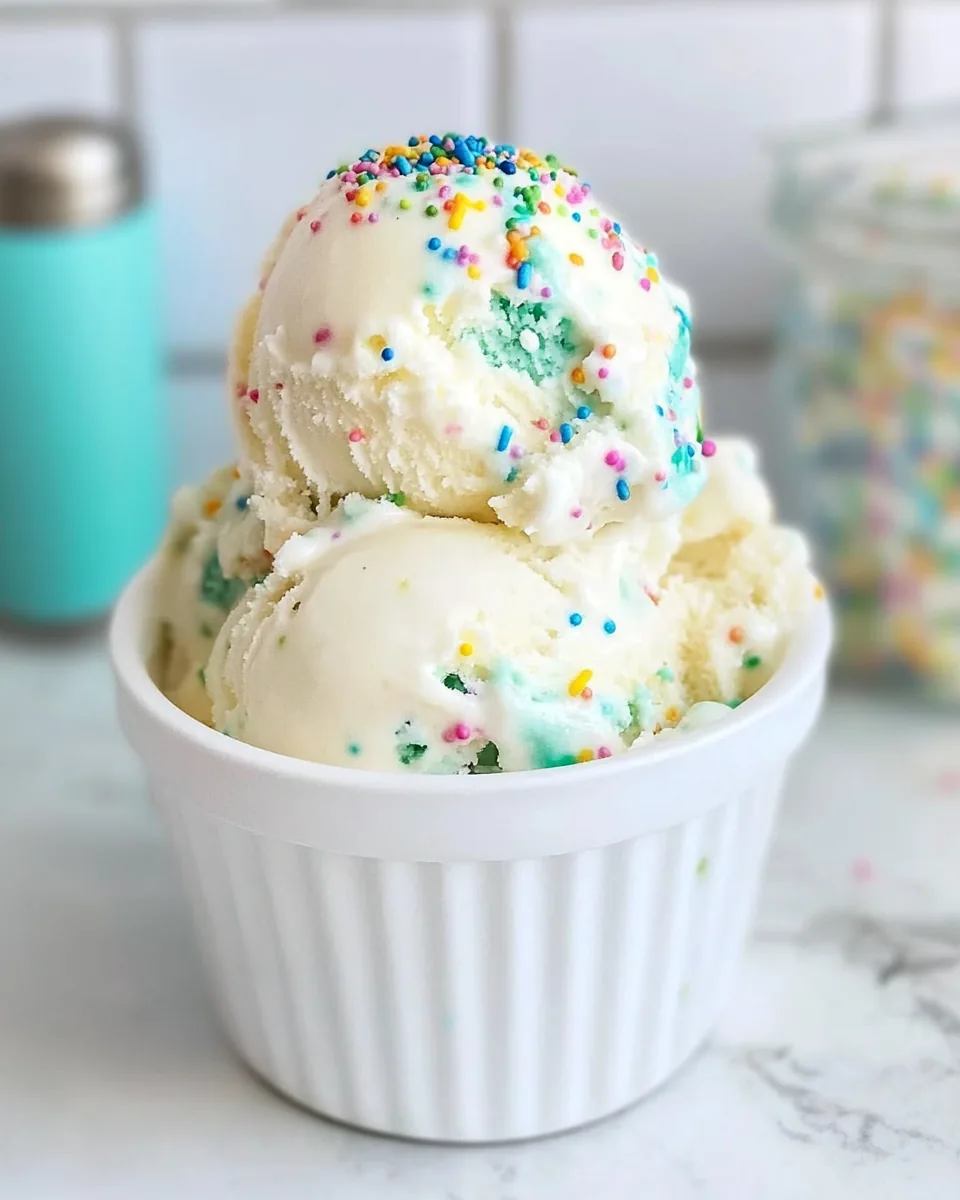
Birthday Cake Ice Cream
There’s something truly magical about Birthday Cake Ice Cream. Each scoop brings back memories of childhood birthdays filled with laughter, colorful decorations, and, of course, the sweetest cake. I remember blowing out the candles on my cake, surrounded by friends and family, and feeling that burst of happiness with every bite. This ice cream captures that joy perfectly, blending the nostalgic flavors of cake and cream into a delightful frozen treat. Imagine sitting on a warm summer day, enjoying a bowl of this luscious ice cream, with rainbow sprinkles dancing on top. You can’t help but smile as you taste all the creamy goodness that reminds you of those carefree days.
Recipe Snapshot
30 mins
30 mins
0 mins
Easy
300 kcal
3 g
Gluten-Free, Low FODMAP
18 g
Mixing Bowl, Blender, Wooden Spoon, Frying Pan, Whisk
What’s Great About This Birthday Cake Ice Cream
A Taste of Celebration
Birthday Cake Ice Cream is not just a dessert; it’s an experience. Made with wholesome ingredients like whole milk and heavy cream, this treat offers a rich and creamy texture that melts in your mouth. The addition of cake batter flavor and vanilla frosting elevates this ice cream into a celebration of flavors!
Customizable Delight
One of my favorite features of Birthday Cake Ice Cream is its versatility. You can easily customize it by adding cake pieces or even mixing in your favorite candies. Whether it’s a birthday celebration or just a regular Tuesday, it brings joy to any occasion.
A DIY Ice Cream Adventure
Making this ice cream at home is straightforward and fun! You can involve your kids or friends in the process, making it a delightful family activity. Watching it churn and transform from a liquid mix to a fluffy, soft-serve texture is mesmerizing!
Perfect for Any Season
Birthday Cake Ice Cream isn’t just for birthdays; it’s a year-round delight. Whether you’re celebrating a holiday, hosting a summer barbecue, or simply indulging yourself, this ice cream fits perfectly. Everyone loves a good ice cream on a hot summer day, or even a cozy winter night!
Unforgettable Flavors
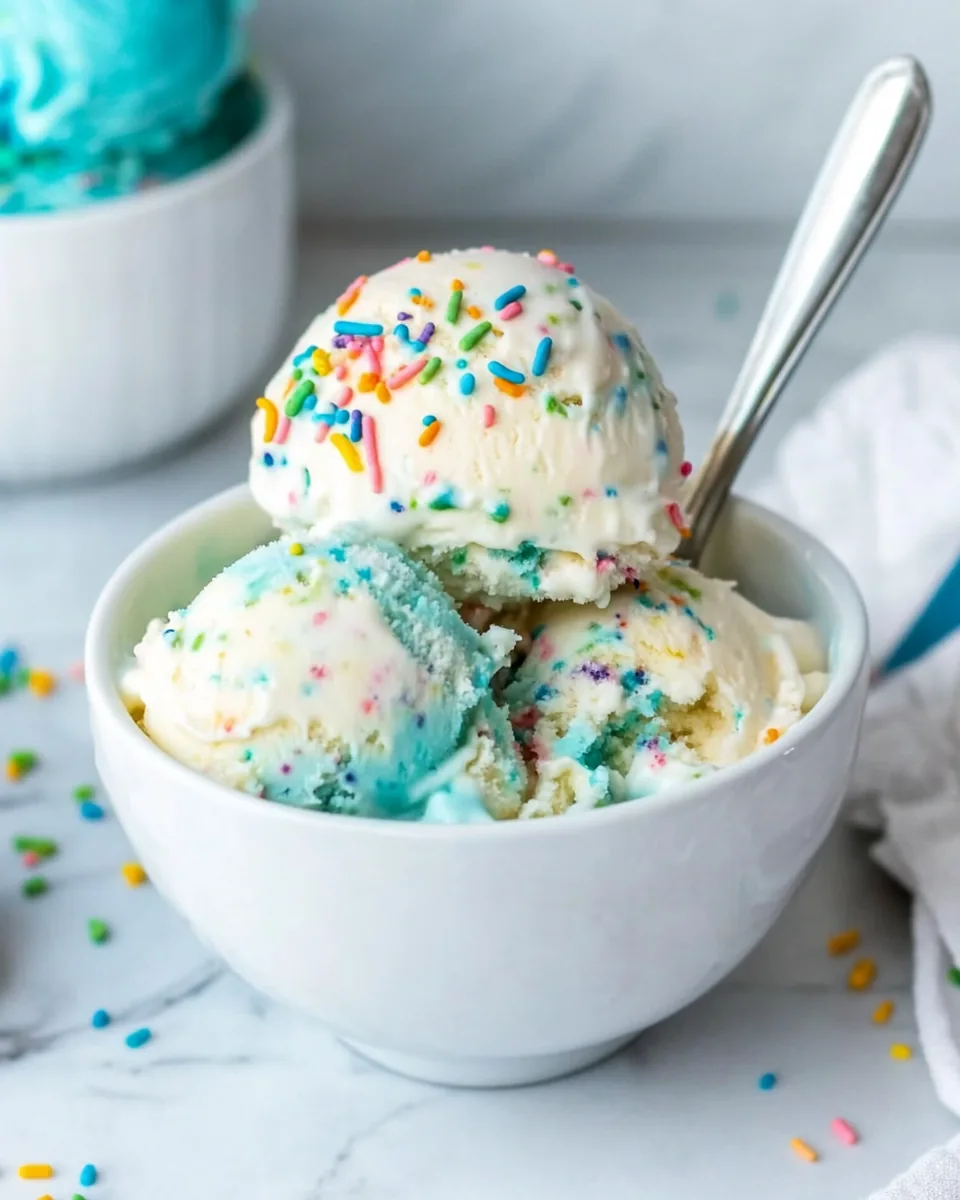
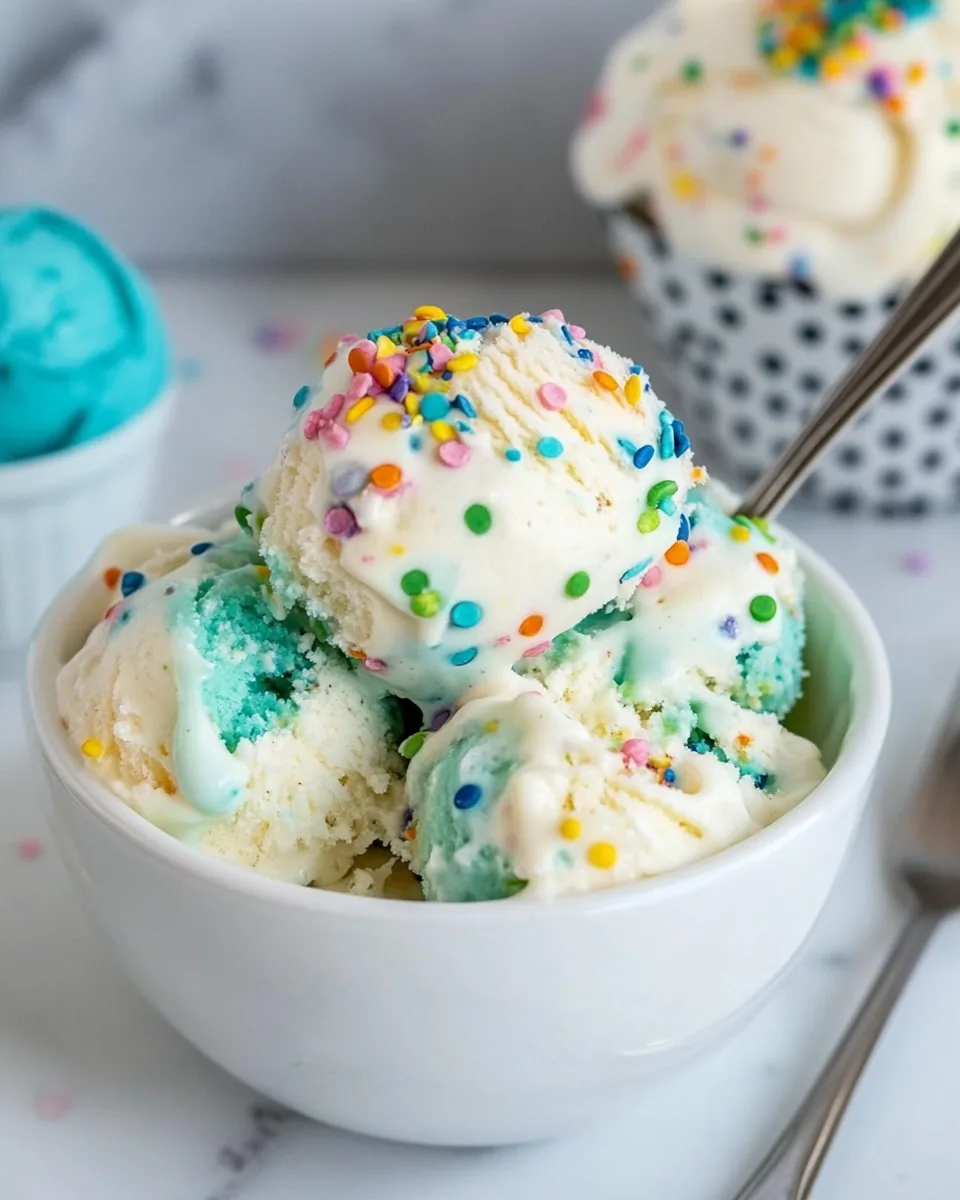
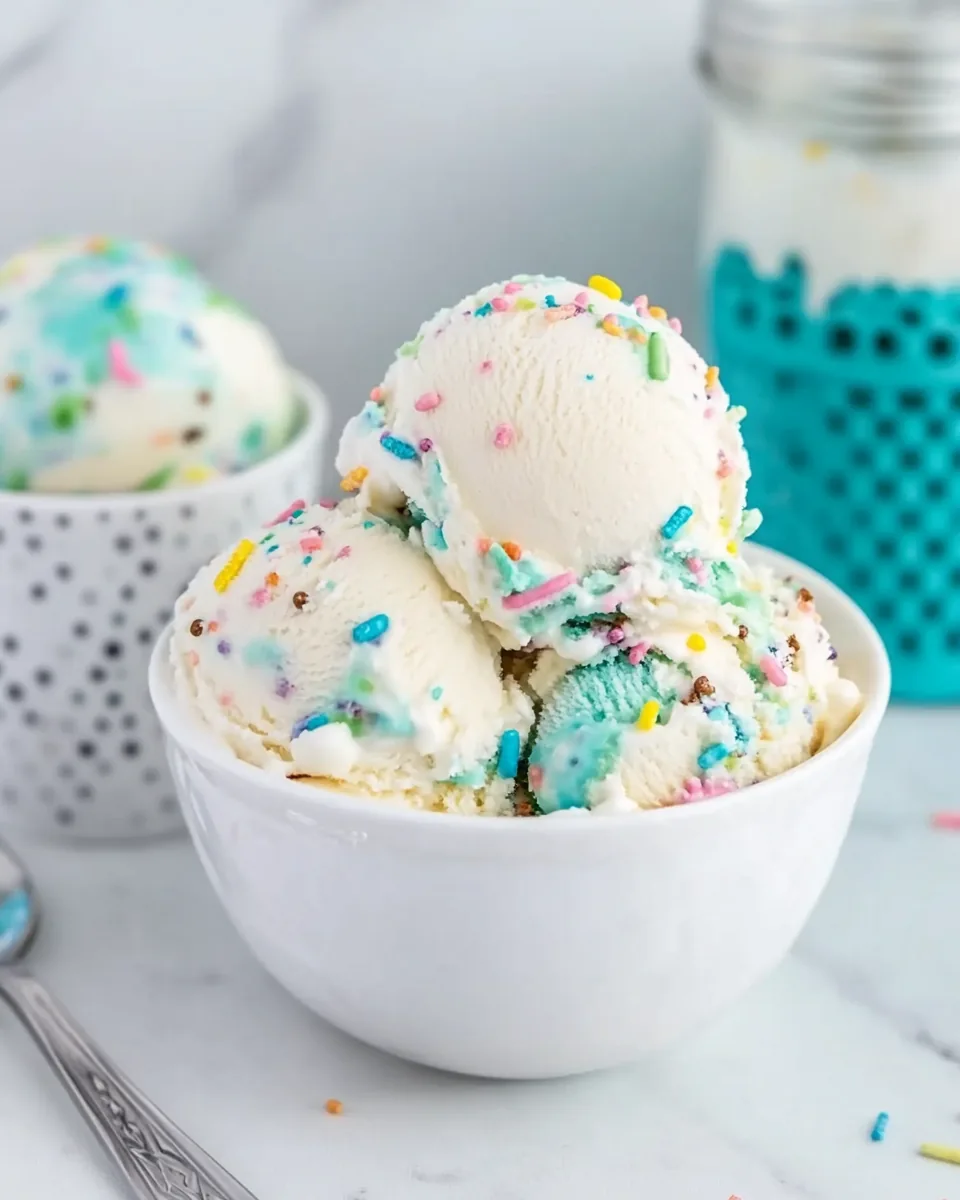
This recipe encapsulates all the flavors of a classic birthday cake. The rainbow sprinkles not only give it a festive look but also add a delightful crunch that complements the creaminess of the ice cream. Each spoonful is a reminder of joyful celebrations!
Texture Meets Taste
The creamy base combined with the soft cake bites you can add makes for a delightful contrast in textures. You’ll find that the balance of smooth cream and soft cake creates a memorable dessert that everyone will love.
Birthday Cake Ice Cream Shopping List
Gathering the right ingredients is key to making a delightful Birthday Cake Ice Cream. The ingredients come together to create a creamy, rich base that is both satisfying and nostalgic. Each component has its role; the whole milk and heavy cream offer a rich creaminess, while the cake batter flavor and vanilla frosting ensure that every bite feels like a celebration. Let’s take a closer look at what you’ll need!
- 1½ cups whole milk: This forms the base of your ice cream, providing creaminess and sweetness.
- 1½ cups heavy cream: Adds a rich texture and enhances the creaminess of the ice cream.
- ½ cup granulated sugar: Sweetens the mixture, balancing the flavors perfectly.
- 2 teaspoons cake batter flavor: Infuses the ice cream with that delightful birthday cake taste.
- 1 teaspoon pure vanilla extract: A classic flavor that enhances the overall profile of the ice cream.
- ¾ cup vanilla frosting: Adds sweetness and a creamy texture, embodying the cake flavor.
- 1 drop blue food coloring: Use this to give your icing a festive color; feel free to choose any color you like!
- ⅓ cup rainbow sprinkles: Essential for that fun, festive touch!
Birthday Cake Ice Cream Instructions
Making Birthday Cake Ice Cream is a fun and rewarding process. Follow these steps closely, and you’ll have a delightful treat ready to enjoy! Each step is filled with fun and excitement, especially as you see the ice cream come to life.
- Start by freezing your ice cream maker bowl according to the manufacturer’s instructions. This is a crucial step; if it’s not cold enough, your ice cream won’t churn properly.
- In a large mixing bowl, whisk together the whole milk, heavy cream, granulated sugar, cake batter flavor, and vanilla extract until the sugar is fully dissolved. Take your time with this step; it’s important for a smooth texture.
- If you’re having trouble dissolving the sugar, you can blend this mixture on high speed in a blender for around 30 seconds. This ensures that every bite of your ice cream is perfectly smooth and creamy.
- Now it’s time to transfer the mixture to your ice cream maker. Churn according to the manufacturer’s instructions until it reaches a soft-serve consistency; this typically takes around 15 to 25 minutes.
- While the ice cream is churning, place the frosting in a small bowl and heat it in the microwave for about 5 to 10 seconds, just until it’s barely pourable. Add a drop of blue food coloring and stir to combine, adjusting the color to your liking.
- When the ice cream is ready, transfer one-third of it to a 9” x 5” loaf pan. Drizzle the prepared blue frosting over the ice cream and use a butter knife to gently swirl it throughout the mixture. Top with rainbow sprinkles to add that cake-like fun.
- Repeat this layering process with the remaining ice cream, frosting, and sprinkles two more times, ensuring that the final layer is topped with frosting and sprinkles for a beautiful finish.
- Cover the loaf pan tightly with plastic wrap and freeze the ice cream for at least 6 hours, or until it’s fully set. Patience is key! The waiting will be worth it when you scoop into this creamy delight.
- Once set, scoop generously into bowls and enjoy your homemade Birthday Cake Ice Cream. Don’t forget to share with friends and family; after all, it’s all about celebrating together!
Things Worth Knowing
- The churning process is crucial. Make sure your ice cream maker is prepped and cold enough to ensure a smooth texture.
- To achieve the best flavor, allow your ice cream to harden for at least 6 hours. This will help the flavors meld beautifully.
- Try different food coloring to match themes or occasions; it adds a personal touch to your dessert.
- For a richer flavor, consider adding small chunks of your favorite cake into the ice cream during the last few minutes of churning.
Tips for Success
Creating the perfect Birthday Cake Ice Cream can be a rewarding experience. Here are some essential tips to ensure your dessert turns out wonderfully:
- Storage: Keep any leftover ice cream in an airtight container in the freezer. It’s best enjoyed within two weeks for optimal freshness.
- Freezing: If you plan to freeze the ice cream for more than a week, consider wrapping the container in plastic wrap to prevent freezer burn.
- Pairing: This ice cream pairs wonderfully with fresh fruits like strawberries or bananas for a refreshing contrast.
- Experiment: Don’t hesitate to try different frosting flavors or add-ins like chocolate chips or cookie dough pieces!
- Serving: Serve this ice cream in fun bowls or cones for a festive feel, perfect for parties or celebrations.
Best Served With
Wondering how to serve your Birthday Cake Ice Cream? Here’s a list of fantastic pairings and occasions:
- Fresh Fruits: Serve alongside slices of strawberries, raspberries, or bananas for a fruity twist.
- Birthday Parties: This ice cream is a perfect addition to any birthday gathering, complementing cakes and cupcakes!
- Summer Barbecues: It’s a crowd-pleaser at summer events and picnics, providing a sweet treat to cool down.
- Sundae Bars: Set up a sundae bar with toppings like nuts, chocolate syrup, and extra sprinkles for a DIY dessert experience.
- Family Movie Nights: Enjoy this ice cream while watching your favorite films for a cozy at-home cinema feel.
- Seasonal Celebrations: Whether it’s a winter holiday or a sunny summer day, this ice cream is delightful all year round!
FAQ
Conclusion
The Birthday Cake Ice Cream is a special treat that brings joy and nostalgia with every scoop. It’s a delicious way to celebrate life’s moments, big or small. I encourage you to try making it; you might just find it becomes a new family favorite. Treat yourself to this delightful ice cream and make your celebrations even sweeter!
Birthday Cake Ice Cream
Ingredients
Equipment
Method
- Freeze your ice cream maker bowl according to the manufacturer’s instructions. In a large bowl, whisk together the whole milk, heavy cream, granulated sugar, cake batter flavor, and vanilla extract until the sugar is dissolved. Make sure the sugar is fully dissolved, otherwise your ice cream will have a gritty texture. If you’re having trouble dissolving the sugar, blend the mixture on high speed in a blender for 30 seconds. Transfer the mixture to your ice cream maker and churn according to the manufacturer's instructions until it reaches a soft-serve consistency. Depending on your ice cream maker, this should take 15-25 minutes. Place the frosting in a small bowl and heat in the microwave for 5-10 seconds, or until it is just barely pourable. Add a drop of blue food coloring to the frosting and stir to combine. Add more if desired. When the ice cream is done churning, transfer ⅓ of it to a 9" x 5" loaf pan and drizzle the blue frosting over the ice cream. Use a butter knife to swirl the frosting into the ice cream. Top with rainbow sprinkles. Repeat with the remaining ice cream, frosting, and sprinkles two more times – creating another two layers, ending with frosting and sprinkles on top for garnish. Cover the loaf pan tightly with plastic wrap and freeze for at least 6 hours, or until the ice cream is fully set. Then scoop and enjoy.
Notes
- Tip 1: To include cake pieces into the ice cream, bake a boxed vanilla cake mix or use two regular sized vanilla cupcakes. Cut the baked cake into small bites, about 1/2" in size, to equal 1 cup. Then quickly yet gently fold the cake bites into the finished ice cream, right in the ice cream maker bowl.