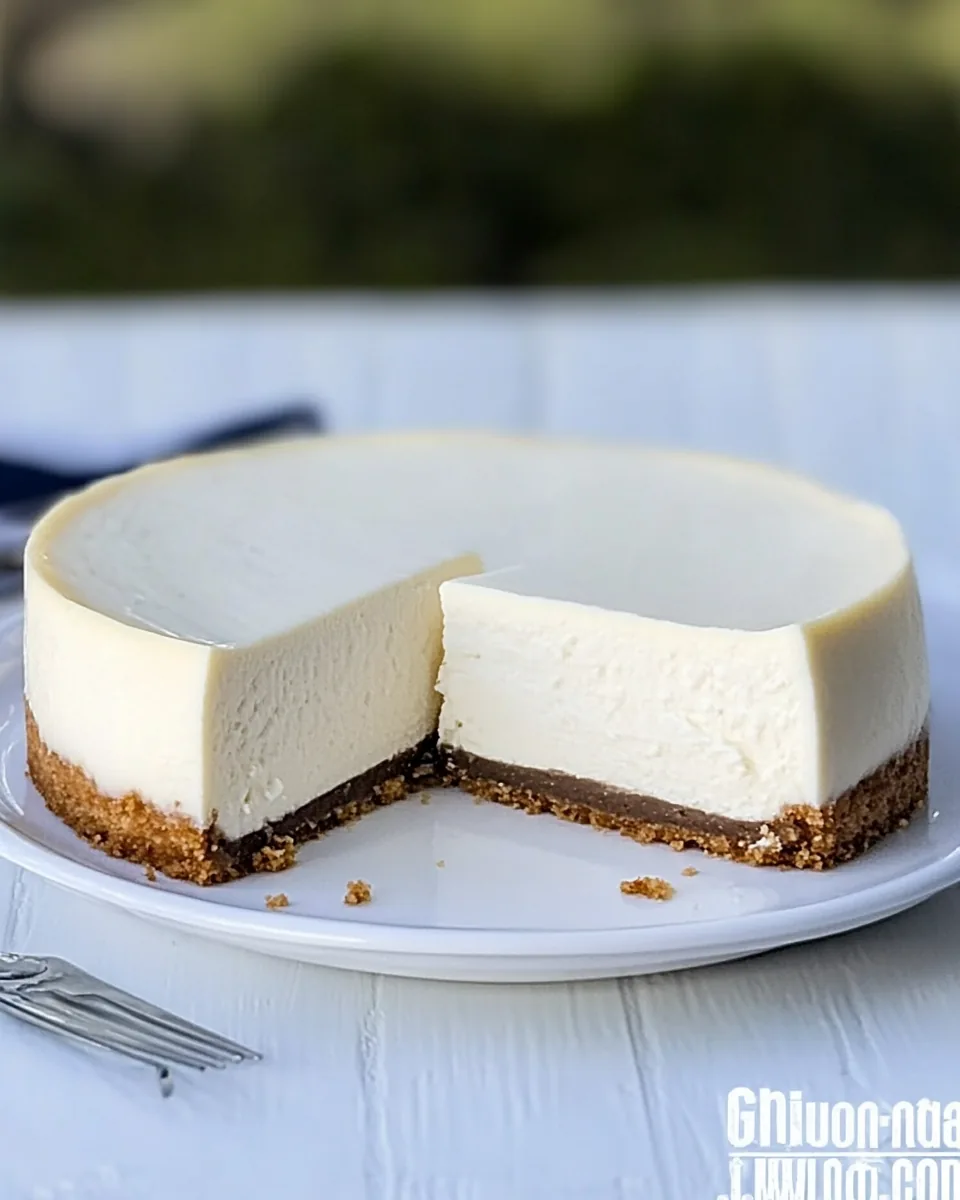
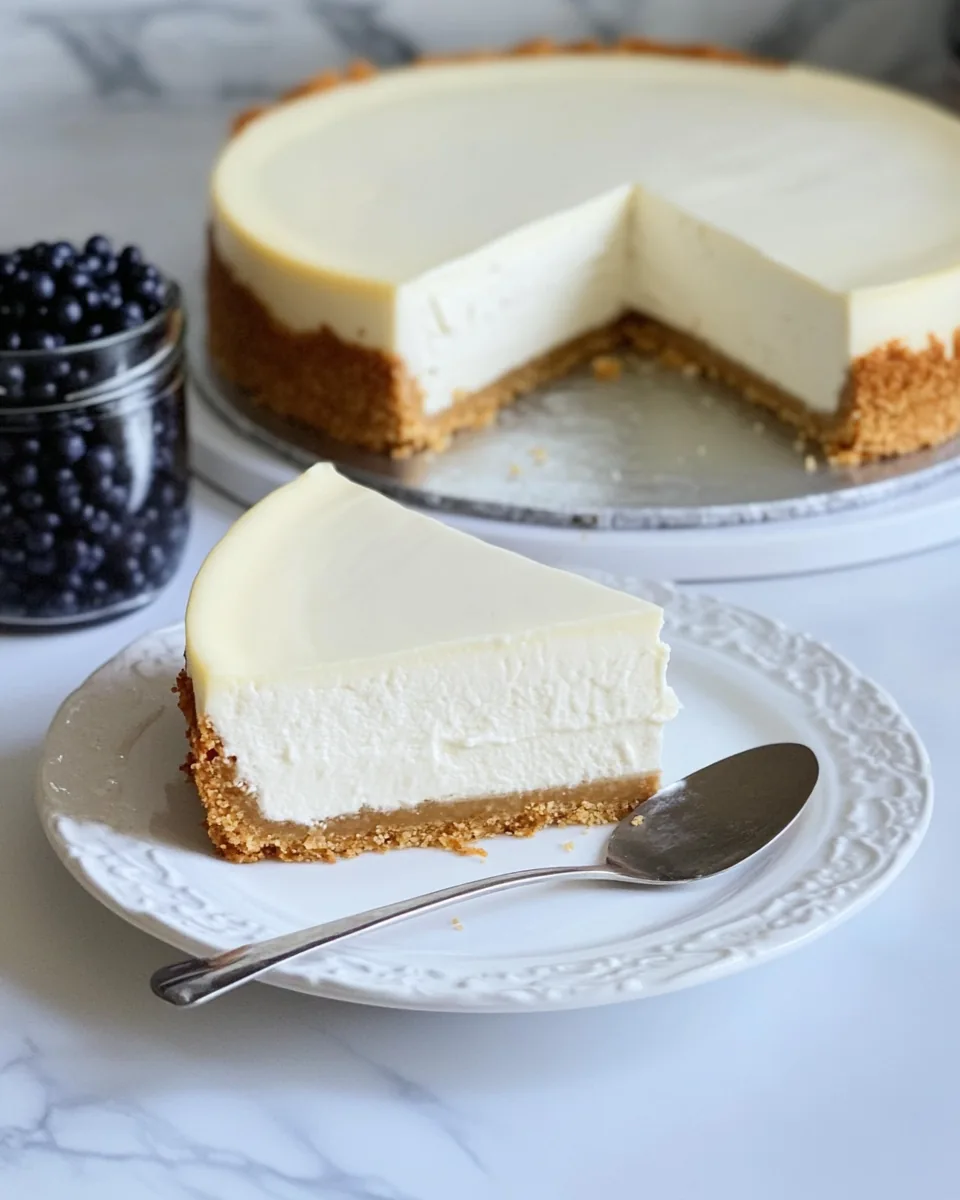
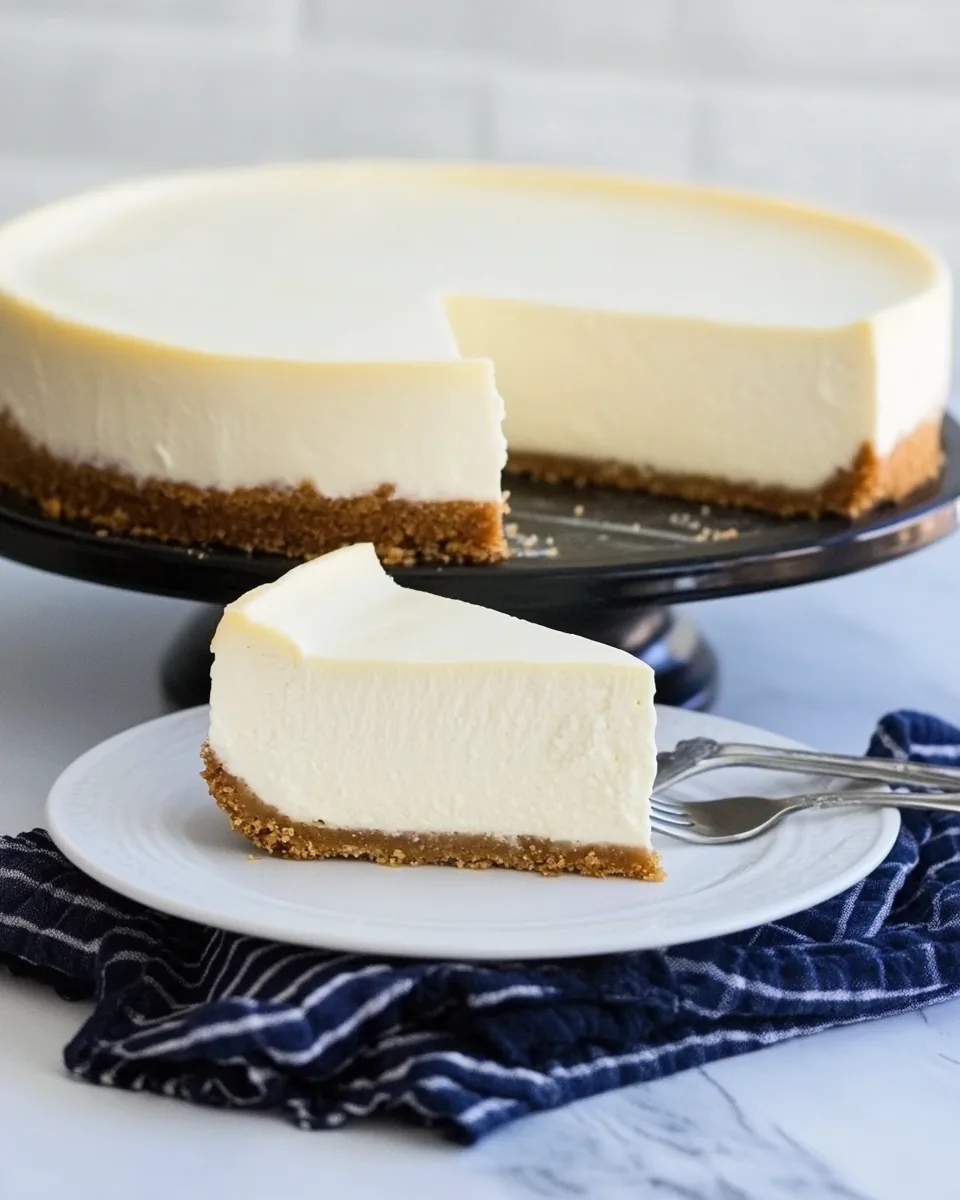
Classic Cheesecake
The Classic Cheesecake holds a special place in my heart. I remember the first time I tasted it—a creamy, dreamy slice at my grandmother’s kitchen table, surrounded by family stories and laughter. Every celebration was incomplete without this delectable dessert. The way the smooth, rich cheese melds with the buttery crust creates an indulgent experience that takes you back to those cherished memories. As I began my own culinary journey, I knew I had to master this recipe. Each bite is like a warm hug, an invitation to slow down and savor the moment. Making a Classic Cheesecake isn’t just about mixing ingredients; it’s about creating a connection, a tradition to share with loved ones.
Recipe Snapshot
4 hr 30 mins
30 mins
240 mins
Hard
410 kcal
7 g
Gluten-Free
24 g
Oven, Large Pot, Mixing Bowl, Baking Sheet, Chef’s Knife, Blender, Food Processor, Frying Pan, Wooden Spoon
What Sets This Classic Cheesecake Apart
Why It’s a Family Favorite
The Classic Cheesecake is a staple at family gatherings. Its creamy texture and rich flavor make it irresistible, and it pairs beautifully with various toppings—think fresh fruit or chocolate ganache. It can be dressed up or down, making it suitable for casual dinners or festive occasions.
Simple Ingredients, Incredible Flavor
This cheesecake uses simple ingredients that work harmoniously together. The combination of cream cheese and sour cream provides a luscious, tangy flavor that keeps you coming back for more. The buttery graham cracker crust adds a lovely crunch, balancing out the smooth filling.
Perfect for Any Occasion
Whether it’s a birthday, holiday, or just a regular Wednesday, the Classic Cheesecake fits right in. It’s versatile enough to adapt to any season, and you can easily customize it with your favorite toppings to make it your own.
Easy to Make
With just a few steps, you can create this dessert in your kitchen. It’s perfect for beginner bakers who want to impress their family and friends. The process may seem intimidating, but I promise it’s simpler than you think!
Make-Ahead Friendly
One of the best things about the Classic Cheesecake is that it’s a make-ahead dessert. You can prepare it a day or two in advance, allowing the flavors to meld beautifully. This is a game-changer for busy schedules, especially when hosting.
A Slice of Joy
Every slice of this cheesecake is like a little piece of joy. It brings people together, igniting conversations and laughter. The Classic Cheesecake isn’t just a dessert; it’s an experience filled with love and happiness, making it a must-try for everyone.
What Goes Into Classic Cheesecake
When crafting a Classic Cheesecake, the ingredients are key to achieving that perfect balance of flavors and textures. Each ingredient serves a purpose, working together to create a rich, creamy filling and a delicious crust. The star of the show, cream cheese, provides that signature creaminess, while the graham crackers deliver a satisfying crunch. Let’s dive into these ingredients and see how they contribute to this classic dish.
- Honey Graham Crackers: 10 full-size crackers yield about 1 cup of pulverized crumbs that form the base of your cheesecake. Their sweet and slightly nutty flavor enhances the overall taste.
- Walnut Pieces: 1/2 cup adds a delightful crunch and a hint of earthiness, complementing the sweet crust perfectly.
- Powdered Sugar: 1/4 cup sweetens the crust while keeping it tender and light.
- Cinnamon: 1 1/2 teaspoons introduces a warm, aromatic flavor to the crust, elevating its profile.
- Nutmeg: 1/4 teaspoon adds a subtle depth, enhancing the overall taste of the crust.
- Salt: A pinch of salt brings all the flavors together, balancing the sweetness.
- Melted Unsalted Butter: 2 tablespoons act as a binding agent, ensuring the crust holds together beautifully.
- Cream Cheese: 2 pounds or 4 bricks are the heart of the cheesecake, providing its rich and creamy texture. Be sure to let it soften to room temperature for easier blending.
- Eggs: 4 large eggs add structure and stability to the filling, ensuring a smooth, rich texture.
- Granulated Sugar: 1 1/2 cups sweetens the cheesecake and enhances its creamy consistency.
- Sour Cream: 3/4 cup contributes to the tangy flavor and creamy texture, making each bite irresistible.
- Half and Half: 1/2 cup keeps the filling rich and creamy; you can substitute with heavy cream if desired.
- Sweetened Condensed Milk: 1/4 cup adds extra sweetness and richness, making the filling even more luscious.
- All Purpose Flour: 1/4 cup helps to stabilize the filling, preventing it from cracking during baking.
- Vanilla: 2 teaspoons of vanilla extract infuses a warm, sweet flavor throughout the cheesecake.
- Water: 1/3 cup is crucial for creating steam in the oven during baking, helping the cheesecake cook evenly.
- Granulated Sugar: 1/4 cup is used in the blueberry topping, enhancing their natural sweetness.
- Cornstarch: 4 teaspoons help thicken the blueberry sauce for a perfect topping.
- Fresh Blueberries: 1 1/2 cups provide a burst of flavor and color, making the cheesecake even more inviting.
- Lemon Juice: 1 tablespoon brightens the blueberry topping, balancing the sweetness.
Classic Cheesecake Instructions
Making a Classic Cheesecake might seem like a daunting task, but I assure you it’s a rewarding experience. Follow these steps, and you’ll create a creamy masterpiece that will impress everyone. Let’s get started!
- About 45 minutes before baking, take the cream cheese out of the refrigerator to soften to room temperature. This ensures a smooth filling without lumps.
- Preheat your oven to 325 degrees F. This temperature is perfect for baking the cheesecake evenly.
- Prepare your springform pan by placing a piece of parchment paper over the bottom and sealing the edges around the base. This will prevent sticking.
- Grease the inner sides of the springform pan with butter or cooking spray. Make sure to coat the sides thoroughly but avoid spraying the parchment paper.
- In a food processor, pulse together the honey graham crackers, powdered sugar, walnuts, cinnamon, nutmeg, and a pinch of salt until you get a crumbly powder. This should take about 30 seconds.
- Pour the melted butter over the crumbs, and process everything together for about 10 seconds. Ensure the crumbs are evenly coated and have a moist texture.
- Press the crumb mixture firmly into the bottom of the springform pan to create a solid crust.
- Thoroughly clean and dry the food processor. Pulse the softened cream cheese until smooth, about 10 times.
- Add the remaining cheesecake ingredients: eggs, granulated sugar, sour cream, half and half, sweetened condensed milk, flour, and vanilla. Blend using short pulses for about 15 seconds. Be careful not to over-mix!
- Pour the cheesecake filling into the prepared crust and smooth the surface with a spatula. Pop any large bubbles that may rise to the top.
- While the oven preheats, fill a teapot with water and heat it on the stovetop. This will be used to create steam in the oven.
- Once the water is boiling, carefully fill a wide roasting pan with the hot water. Place this pan on the bottom rack of your oven.
- Put the springform pan with the cheesecake on the middle rack of the oven above the roasting pan. Bake for one hour at 325 degrees F.
- After the hour is up, remove the roasting pan with water and turn off the oven, allowing the cheesecake to cool slowly inside the oven for 3 hours. This slow cooling will help prevent cracks.
- Once cooled, place the cheesecake in the refrigerator and chill for at least 12 hours before serving.
- When ready to serve, gently remove the cheesecake from the springform pan and top with your choice of toppings.
- For the blueberry topping, heat 1/3 cup of water in a small saucepan. Dissolve the granulated sugar and cornstarch as the water heats.
- Once boiling, add the fresh blueberries. Stir slowly for about 4 to 5 minutes until thick and bubbly. Remove from heat and mix in the lemon juice.
- Let the blueberry topping cool to room temperature, then refrigerate for 1 hour before spreading it over the cheesecake.
Things Worth Knowing
- Room Temperature Ingredients: Always use room temperature cream cheese and eggs for a smooth batter. Cold ingredients can lead to lumps.
- Don’t Over-Mix: When blending your filling, avoid over-mixing to ensure a creamy texture without air bubbles.
- Water Bath Technique: Using a water bath helps keep the cheesecake moist and prevents cracks during baking.
- Cooling Process: Allowing the cheesecake to cool in the oven gradually reduces the risk of cracks and helps maintain its richness.
Helpful Hints

When it comes to making the perfect Classic Cheesecake, a few tips can help elevate your dish and ensure success. Whether you’re a novice or a seasoned baker, these pointers will guide you in the right direction.
- Storage: Store leftover cheesecake in the refrigerator, covered, for up to 5 days.
- Freezing: You can freeze cheesecake for up to 3 months. Wrap it well in plastic wrap and foil for best results.
- Pairing: Enjoy your cheesecake with a side of fresh fruit or a drizzle of chocolate sauce for an extra indulgent treat.
- Serving Temperature: Serve the cheesecake cold for the best texture and flavor.
- Variations: Experiment with different toppings, like caramel, nuts, or different fruits to keep things exciting!
Serving Suggestions
Serving a Classic Cheesecake is just as important as making it. Here are some delightful suggestions to enhance your experience:
- Garnish: Top with fresh berries or a dollop of whipped cream to add a pop of color and flavor.
- Occasions: Perfect for birthdays, anniversaries, or holiday gatherings, it’s a crowd-pleaser at any event.
- Pairings: Serve alongside a cup of coffee or tea for a delightful afternoon treat.
- Storage Tips: Keep any leftovers in an airtight container in the fridge to maintain freshness.
- Seasonal Variations: Use seasonal fruits like strawberries in spring or pears in fall for a seasonal twist on this classic recipe.
FAQ
Conclusion
The Classic Cheesecake is a timeless dessert that brings joy to any gathering. Its creamy, rich texture paired with the crunchy graham cracker crust makes it a favorite for dessert lovers everywhere. I encourage you to give this recipe a try, whether for a special occasion or simply to satisfy your sweet tooth. You’ll be delighted with the results and may even create some lovely memories in the process.
Classic Cheesecake
Ingredients
Equipment
Method
- About 45 minutes before baking, take the cream cheese out of the refrigerator so it can return to room temperature.
- Preheat oven to 325 degrees F. Place a piece of parchment paper over the bottom of a 9 inch springform pan, then seal the springform pan edge around the base.
- Grease the inner sides of the springform pan with butter or cooking spray, making sure the sides are fully coated.
- In a food processor, pulse together honey graham crackers, powdered sugar, walnuts, cinnamon, nutmeg, and salt until a crumbly powder forms (about 30 seconds of processing).
- Pour the melted butter over the crumbs and continue to process for another 10 seconds.
- Press crumb mixture firmly in an even layer across the bottom of the springform pan.
- Thoroughly clean and dry the food processor. Pulse the cream cheese about 10 times.
- Add the rest of the cheesecake ingredients (eggs, granulated sugar, sour cream, half and half, sweetened condensed milk, flour, and vanilla). Continue to process for about 15 seconds total mixing time.
- Pour the cheesecake filling carefully into the prepared springform pan.
- While water is heating, pour the cheesecake filling carefully into the prepared springform pan. Smooth the surface with a spatula.
- When the teapot boils, fill a wide roasting pan with the hot water. Carefully place the roasting pan on the bottom of the oven.
- Place the springform pan onto the middle rack of the oven above the pan of water. Close the oven and bake at 325 degrees F for one hour.
- At the end of one hour, take the roasting pan with water out of the oven. Close the oven, turn off the heat, and let the cheesecake cool slowly inside the oven for 3 hours.
- After 3 hours, remove the pan from the oven. Let it return to room temperature, then place in the refrigerator to chill for at least 12 hours.
- Gently remove the cake from the springform pan after it is thoroughly chilled. If using a topping, spread it on after chilling the cake. Serve cold.
- In a small saucepan, heat 1/3 cup of water. Slowly dissolve granulated sugar and cornstarch as the water heats up.
- When mixture boils, add blueberries. Stir slowly for 4-5 minutes until thick and syrupy.
- Remove from heat and stir in lemon juice. Let the topping return to room temperature, then chill for 1 hour.
Notes
- Springform pan: Essential for easy removal of the cheesecake.
- Parchment paper: Prevents sticking.
- Food processor: Makes crust preparation a breeze.
- Roasting pan: Used for the water bath to keep cheesecake moist.
- Teapot: Handy for boiling water.