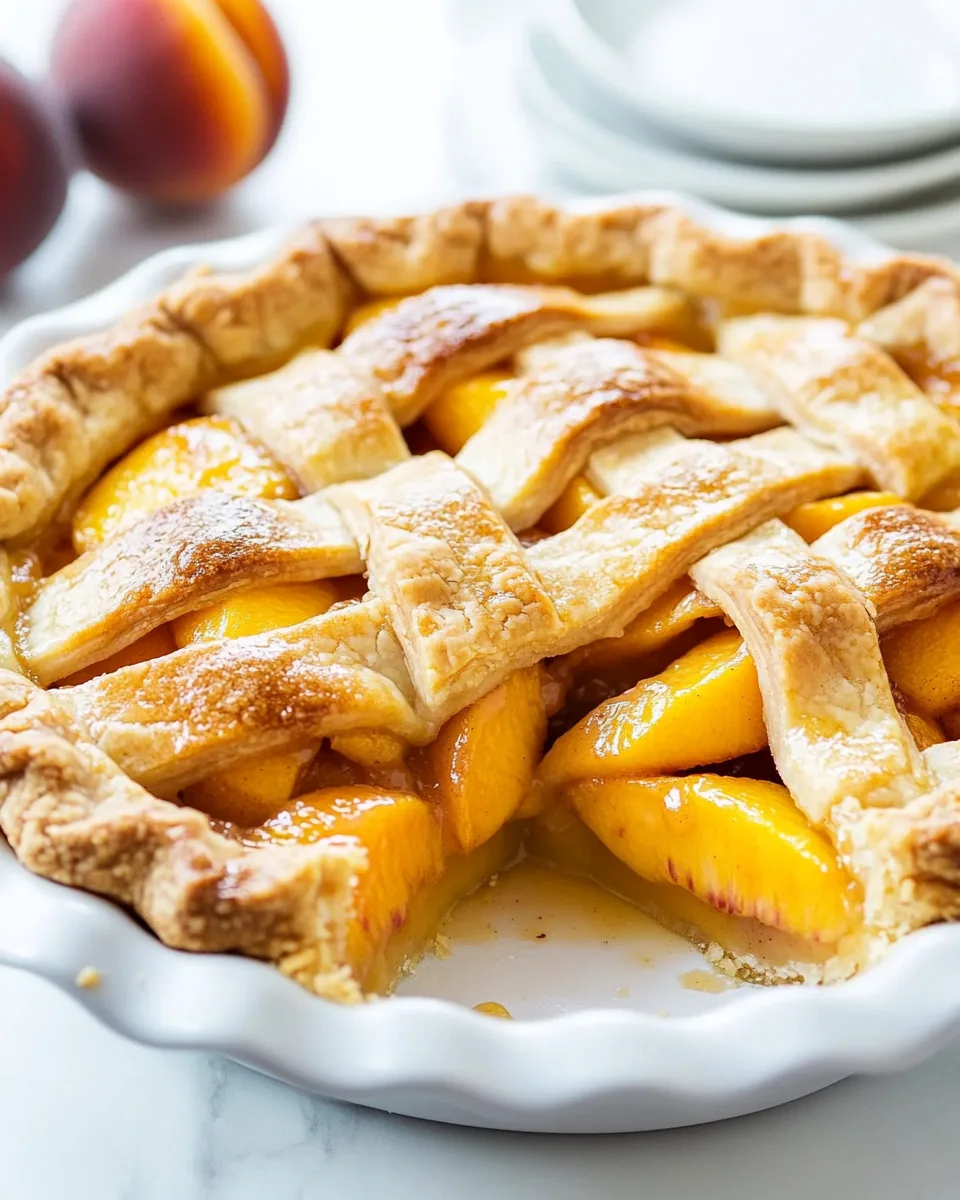
Peach Pie
Nothing says summer quite like a classic Peach Pie. I remember the first time I tried my hand at baking one; the sun was shining, and the aroma of fresh, juicy peaches filled the kitchen. The excitement was palpable as I rolled out the dough, eager to replicate the delicious pie my grandmother used to make. Each bite of that sweet, warm filling, nestled beneath a golden lattice crust, transported me back to those sun-drenched afternoons spent in her garden. Every summer, I found myself searching for the ripest peaches at the farmer’s market, dreaming of that perfect Peach Pie. It’s a dish that brings family together, a dessert that reflects the warmth of shared moments and laughter.
Recipe Snapshot
1 hr 20 mins
20 mins
60 mins
Medium
250 kcal
2 g
Gluten-Free, Low FODMAP
12 g
9-inch pie dish
The Appeal of This Peach Pie
It’s a Childhood Favorite
The reason I adore this Peach Pie is deeply rooted in nostalgia. Growing up, each summer was marked by a visit to my grandmother’s house, where she would involve me in the entire pie-making process. The excitement of peeling peaches and mixing them with sugar was unparalleled. This pie isn’t just about the recipe; it’s about the memories and love that go into it.
Fresh Ingredients Make a Difference
Using fresh, ripe peaches truly elevates this pie. When you bite into the warm filling, you can taste the sweetness and juiciness of the peaches at their peak. During summer, when peaches are in season, you owe it to yourself to make this pie.
A Perfect Balance of Flavors
The combination of sugar, cinnamon, and a hint of nutmeg complements the natural sweetness of the peaches. The cinnamon adds warmth, while the nutmeg introduces a subtle earthiness. This balance makes the pie a sensational treat.
Easy to Make
Don’t be intimidated by the thought of making a pie from scratch; it’s easier than you think! With just a few steps, you’ll create a stunning dessert that looks and tastes impressive. You can even use store-bought pie crust if you want to save time.
Perfect for Any Occasion
This pie is versatile enough for any gathering, whether it’s a summer barbecue, holiday feast, or just a cozy family dinner. Each slice offers a taste of summer, making it a delightful addition to any table.
Serve it Warm
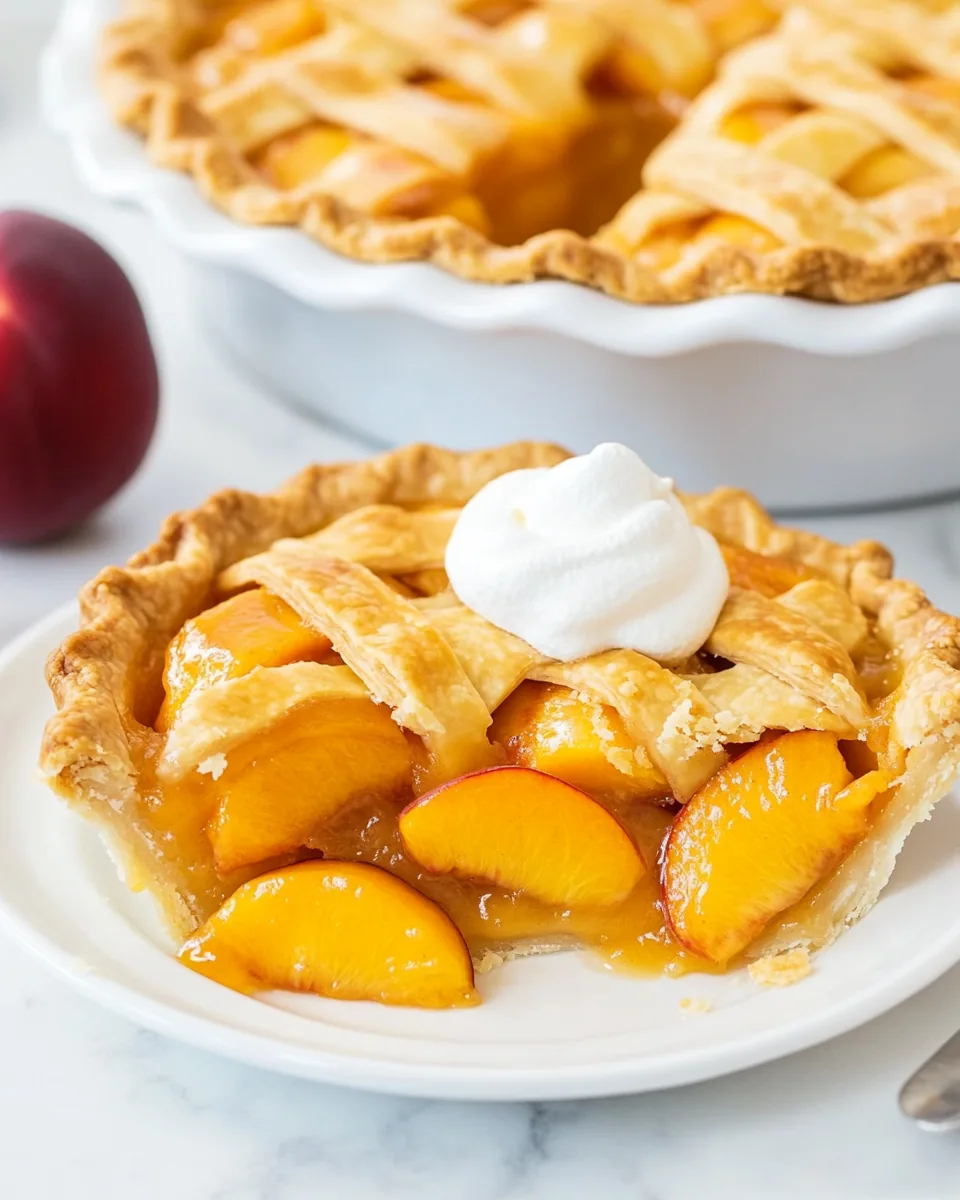
Serving this Peach Pie warm with a scoop of vanilla ice cream is, in my opinion, a little slice of heaven. The cold ice cream melting down the warm pie creates a delightful contrast that you simply can’t resist!
What You Need for Peach Pie

When it comes to making a delicious Peach Pie, the ingredient quality is critical. Fresh, ripe peaches are the star of the show, while the supporting cast of flour, sugar, and spices create a perfect symphony of flavors. Each ingredient plays a vital role in achieving that perfect pie texture and taste.
- Double Pie Crust: Essential for a lovely flaky texture, you can either make your own or buy a pre-made version to save time.
- Egg: For the egg wash, it helps to achieve a beautiful golden crust.
- Peaches: Freshly peeled and sliced peaches are the foundation of this pie, providing sweetness and juiciness.
- Granulated Sugar: Adds sweetness to balance the tartness of the peaches.
- All-Purpose Flour: Helps to thicken the pie filling, ensuring it holds together beautifully.
- Salt: A pinch enhances the flavors of the filling.
- Ground Cinnamon: Adds warmth and depth to the flavor profile.
- Ground Nutmeg: Offers a subtle spiciness that rounds out the flavor.
- Lemon Juice: Brightens the filling with a zesty note.
- Pure Vanilla Extract: Enhances the overall flavor of the pie.
How to Prepare Peach Pie
Preparing a Peach Pie is a joyful experience. With a few simple steps, you can create a dessert that reflects the beauty of summer. Follow these detailed instructions to ensure your pie turns out perfectly.
Preheat your oven to 425°F/220°C. This initial high temperature is essential for creating a lovely crust.
Roll out half of the pie dough into a 12-inch circle. Place this carefully in a 9-inch pie dish. Make sure it fits snugly against the bottom and sides.
Brush the base of the pie crust with an egg wash made from a beaten egg mixed with a tablespoon of water. This step prevents the bottom from becoming soggy.
Chill the crust in the fridge while preparing the filling. This step ensures the crust remains flaky.
In a large bowl, combine the sliced peaches with granulated sugar. Let them sit for 30 minutes to an hour to release their natural juices.
After the peaches have rested, use a colander to discard the excess juices. This prevents your pie from becoming watery.
In another bowl, combine flour, salt, cinnamon, and nutmeg. Add the prepared peaches, along with lemon juice and vanilla extract. Toss everything gently to coat the peaches evenly.
Pour the filling into the prepared pie dish, spreading it out evenly. Put it back in the fridge while you work on the top crust.
Roll out the remaining dough into another 12-inch circle. Cut this dough into long strips to create a lattice top. Weave the strips over the filling, trimming any excess dough as necessary.
Brush the lattice top with the egg wash to achieve a glossy finish. This step is crucial for that beautiful golden color.
Bake the pie for 20 minutes at the preheated temperature, then reduce the heat to 375°F/190°C and bake for an additional 30 minutes. Keep an eye on it; the crust should be golden and the filling bubbly.
Allow the pie to cool for at least three hours before serving. This cooling time helps the filling set properly. Serve it warm with a scoop of ice cream for a delightful treat!
Things Worth Knowing
- Choosing the Right Peaches: Use ripe, juicy peaches for the best flavor. Clingstone peaches are easier to work with than freestone.
- Thickening Agents: While flour works well, cornstarch can also be used for a gluten-free option. Adjust the amount based on the juiciness of your peaches.
- Chilling the Crust: Cold dough is key to achieving a flaky crust. Don’t skip the chilling step before baking.
- Serving Temperature: Consider serving the pie warm, as the flavors shine best when the filling is warm and the crust is flaky.
Ways to Customize
There’s always room for creativity when it comes to making a Peach Pie. Here are some tips to make this recipe your own!
- Add Other Fruits: Mix in some blueberries or strawberries for a delightful fruit medley.
- Adjust Sweetness: Depending on the ripeness of your peaches, you may want to adjust the amount of sugar used in the filling.
- Spice It Up: Experiment with spices like cardamom or allspice for a unique flavor profile.
- Top with Crumble: Instead of a lattice top, consider a crumb topping made with oats and brown sugar for added texture.
- Ice Cream Pairing: Try different flavors of ice cream like cinnamon or peach for an extra touch.
Serving Suggestions
When it comes to serving your Peach Pie, the options are almost endless! Here are some ideas to inspire you:
- Serve Warm: Enjoy the pie warm right out of the oven, allowing the filling to ooze from beneath the golden crust.
- With Ice Cream: A scoop of vanilla or peach ice cream on top creates a heavenly combination.
- Perfect for Picnics: Slice it up for a delightful addition to any summer picnic or barbecue.
- Pair with Coffee: Serve alongside a hot cup of coffee during brunch for a comforting afternoon treat.
- Enjoy for Celebrations: This pie is perfect for celebrating summer gatherings, birthdays, or family reunions.
- Garnish: Consider garnishing with fresh mint leaves for a pop of color and freshness.
FAQ
Conclusion
The Peach Pie is a beloved dessert that captures the essence of summer in every bite. With its flaky crust and delicious filling, it’s sure to bring happiness to any gathering. I encourage you to try making this pie for your family and friends, and enjoy the smiles it brings! Celebrate those sweet moments by creating this delightful dessert today.

Peach Pie
Ingredients
Equipment
Method
- Preheat your oven to 425°F/220°C. This initial high temperature is essential for creating a lovely crust.
- Roll out half of the pie dough into a 12-inch circle. Place this carefully in a 9-inch pie dish. Make sure it fits snugly against the bottom and sides.
- Brush the base of the pie crust with an egg wash made from a beaten egg mixed with a tablespoon of water. This step prevents the bottom from becoming soggy.
- Chill the crust in the fridge while preparing the filling. This step ensures the crust remains flaky.
- In a large bowl, combine the sliced peaches with granulated sugar. Let them sit for 30 minutes to an hour to release their natural juices.
- After the peaches have rested, use a colander to discard the excess juices. This prevents your pie from becoming watery.
- In another bowl, combine flour, salt, cinnamon, and nutmeg. Add the prepared peaches, along with lemon juice and vanilla extract. Toss everything gently to coat the peaches evenly.
- Pour the filling into the prepared pie dish, spreading it out evenly. Put it back in the fridge while you work on the top crust.
- Roll out the remaining dough into another 12-inch circle. Cut this dough into long strips to create a lattice top. Weave the strips over the filling, trimming any excess dough as necessary.
- Brush the lattice top with the egg wash to achieve a glossy finish. This step is crucial for that beautiful golden color.
- Bake the pie for 20 minutes at the preheated temperature, then reduce the heat to 375°F/190°C and bake for an additional 30 minutes. Keep an eye on it; the crust should be golden and the filling bubbly.
- Allow the pie to cool for at least three hours before serving. This cooling time helps the filling set properly. Serve it warm with a scoop of ice cream for a delightful treat!
Notes
- Tip 1: Canned peaches can be substituted for fresh peaches, the flavor will be a bit different and you have to make sure to drain or rinse any syrup before using.
- Tip 2: Storing: Wrap well with plastic wrap and store in the fridge for up to 5 days, if it lasts that long.
- Tip 3: Nutrition: Calculated per slice without ice cream. This is a rough estimate calculated using an online calculator.