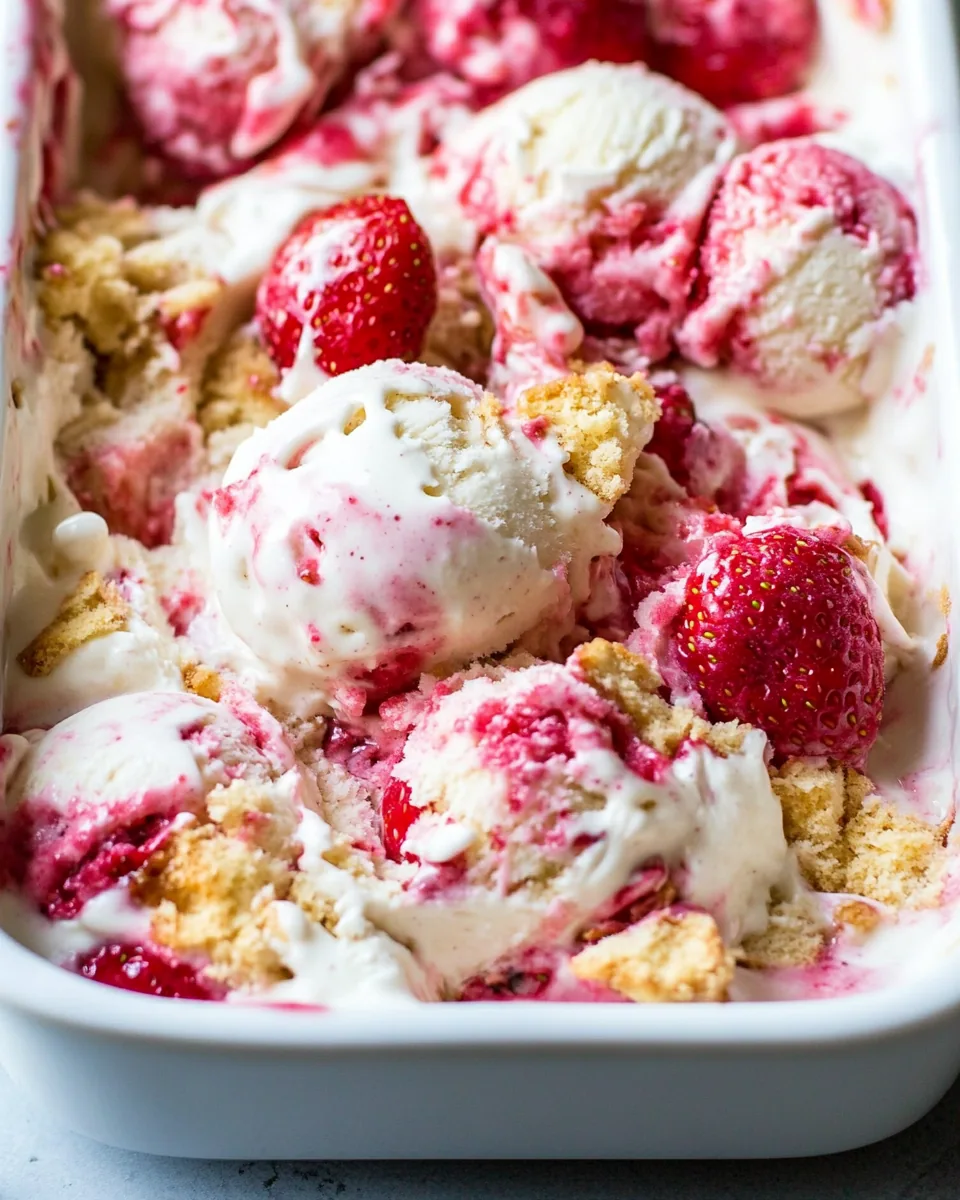
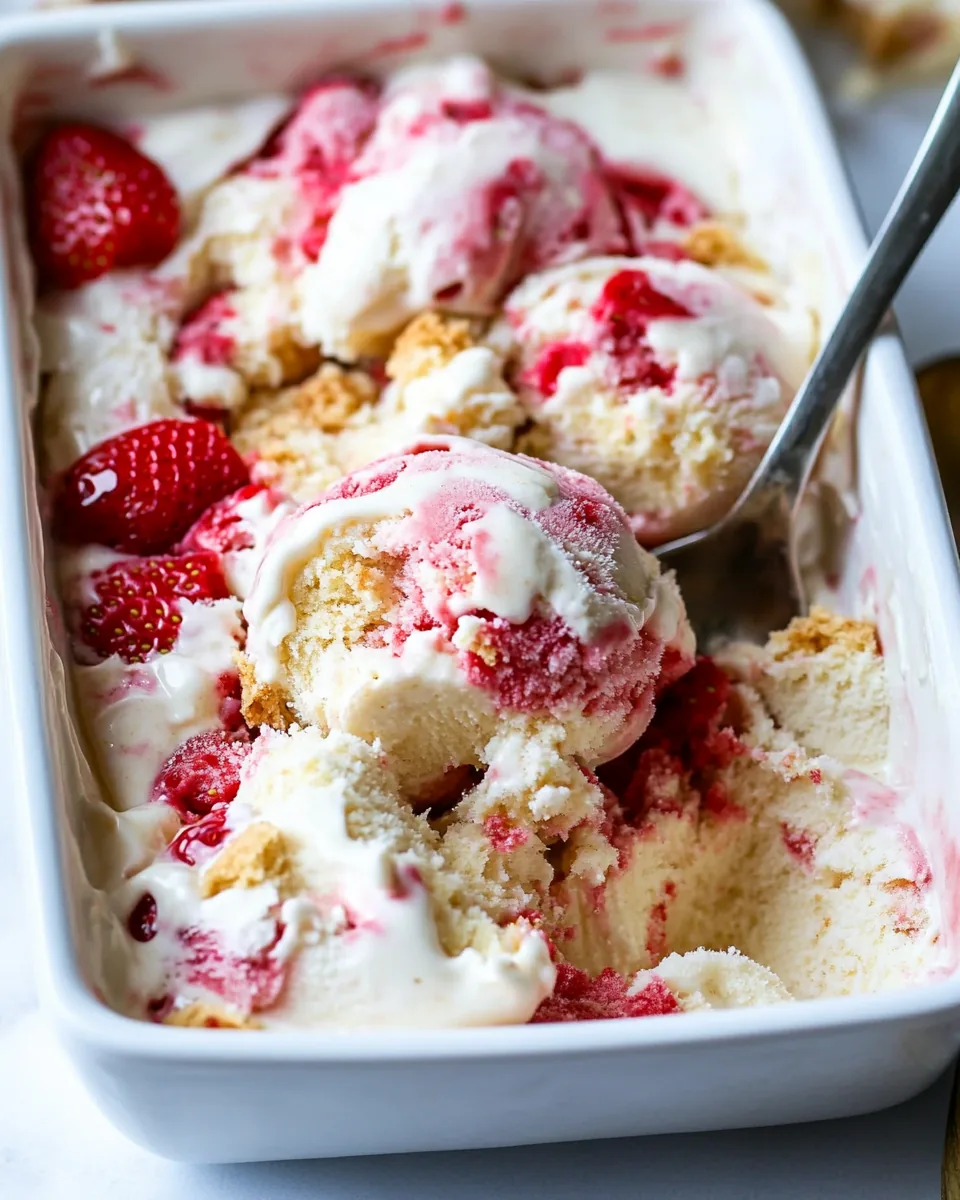
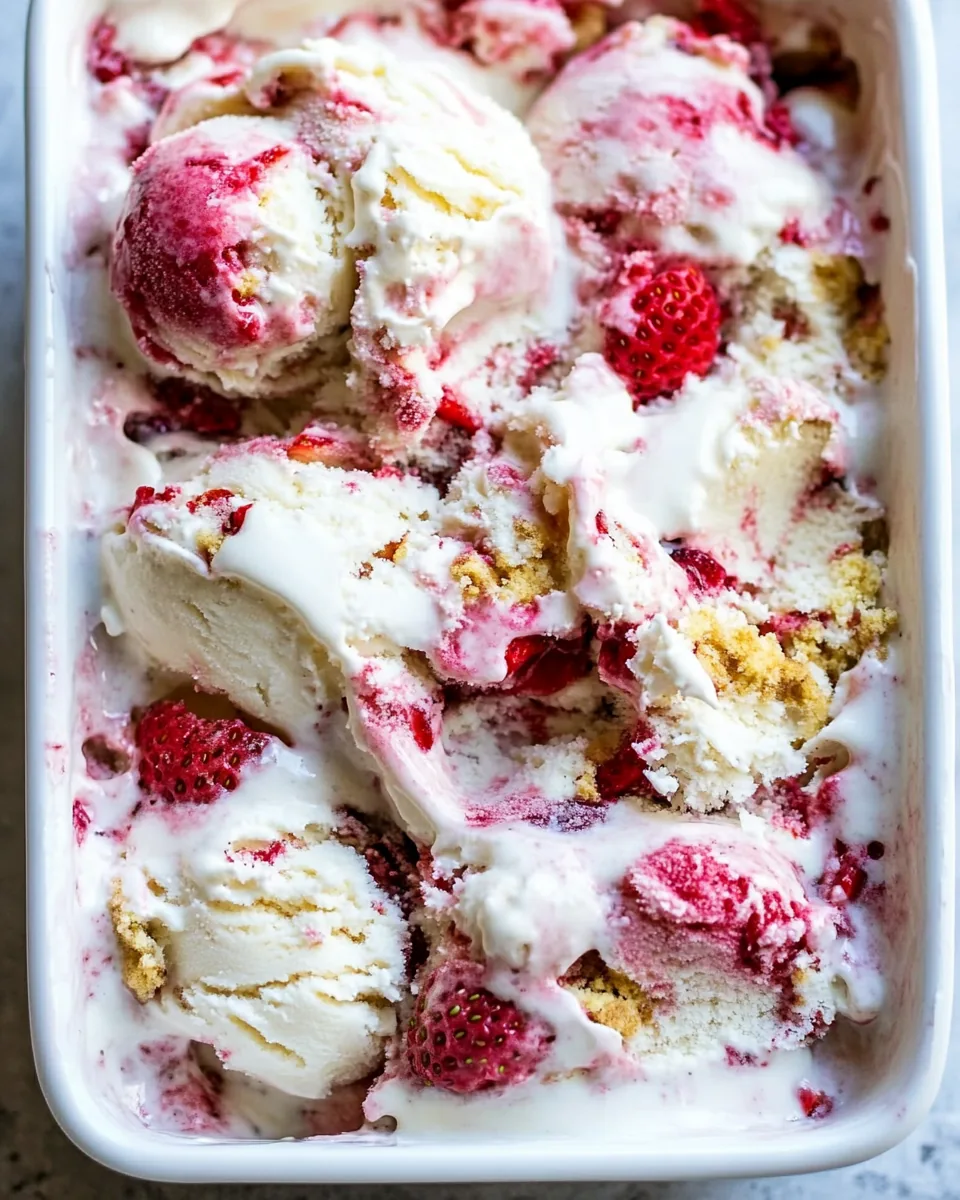
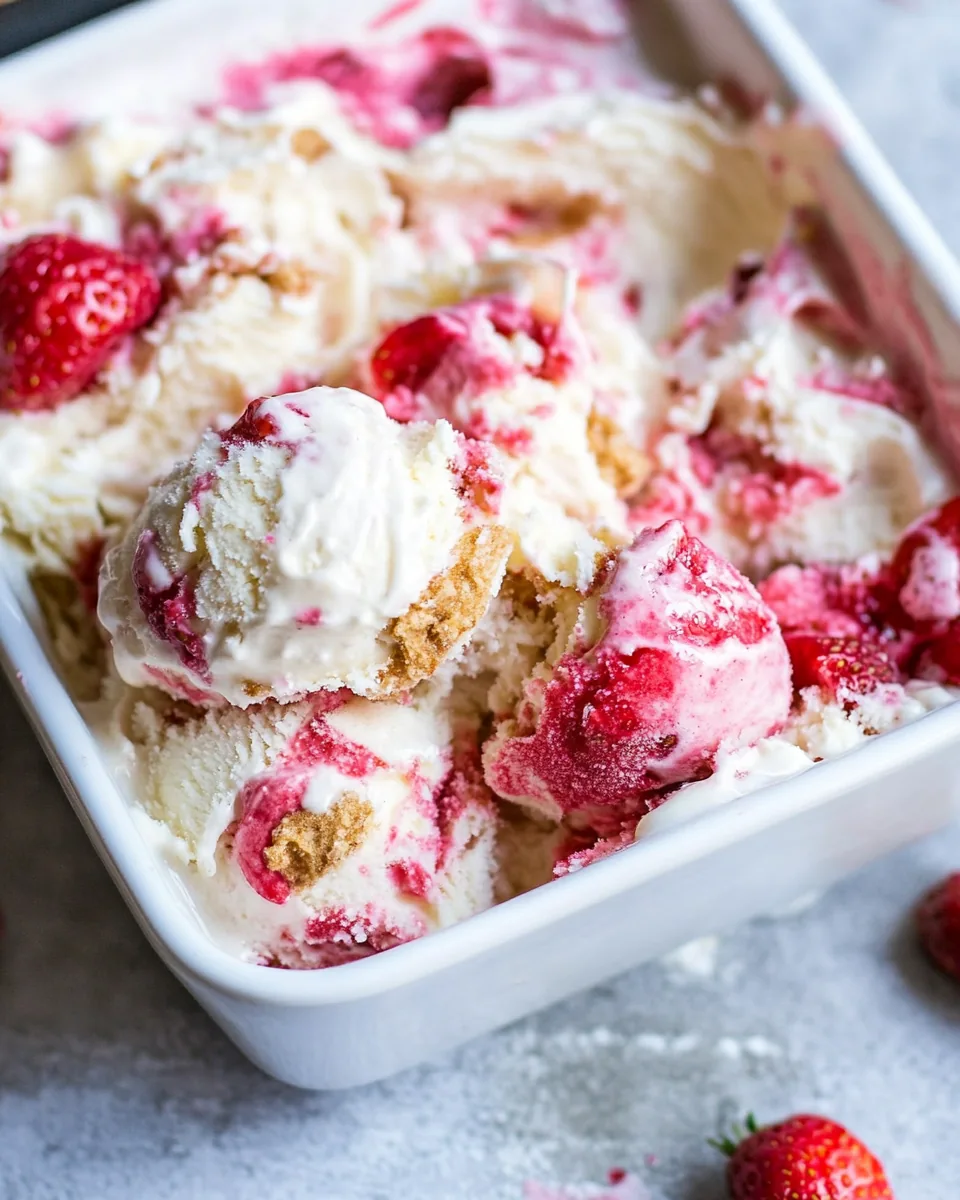
No Churn Strawberry Cheesecake Ice Cream
There’s something truly magical about the summer months, especially when it comes to indulging in a sweet treat like No Churn Strawberry Cheesecake Ice Cream. Growing up, my family spent every summer weekend at our cozy cottage by the lake. As the sun shone brightly and the air was filled with laughter, my mother would whip up this delightful dessert, bringing everyone together for a taste of pure bliss. The combination of creamy cheese and fresh strawberries encapsulated the essence of summer and made it the perfect ending to our sunny days.
Recipe Snapshot
15 mins
15 mins
0 mins
Medium
320 kcal
4 g
Keto, Gluten-Free, Low FODMAP
18 g
Saucepan, Large Pot, Mixing Bowl, Frying Pan, Cutting Board
Why This No Churn Strawberry Cheesecake Ice Cream Stands Out
A Simple Yet Delicious Treat
What I love most about the No Churn Strawberry Cheesecake Ice Cream is its simplicity. You don’t need an ice cream maker or intricate techniques to create this masterpiece. Just a few basic ingredients come together to form a creamy dessert that will leave your taste buds dancing.
Perfect for Hot Days
This ice cream is the ultimate refresher after a long, hot day. The luscious flavors of fresh strawberries and the rich creaminess of cheesecake make it a delightful indulgence that cools you down while satisfying your sweet cravings. I often find myself sneaking back for seconds!
Versatility at Its Best
What’s great about this recipe is its versatility. You can easily customize it by adding your favorite toppings or mix-ins. Want to add some chocolate chips or nuts? Go for it! The possibilities are endless.
Fun for Everyone
Making No Churn Strawberry Cheesecake Ice Cream is an activity the entire family can enjoy. I love having my kids help out in the kitchen, letting them mix the ingredients and fold in the whipped cream. It’s a fun way to spend time together while creating lasting memories.
What Goes Into No Churn Strawberry Cheesecake Ice Cream
When it comes to the ingredients for No Churn Strawberry Cheesecake Ice Cream, each one plays a vital role in creating the perfect balance of flavors and textures. From the fresh strawberries to the creamy cheese, these components work harmoniously together to achieve a delightful treat.
- Diced Strawberries – Fresh and juicy, the strawberries provide a vibrant flavor and a beautiful color to the ice cream.
- Sugar – Adds sweetness, enhancing the natural flavors of the strawberries and balancing the creaminess.
- Vanilla – This aromatic flavor rounds out the taste, giving it a warm, inviting essence.
- Heavy Cream – The base of the ice cream, creating that rich, creamy texture we all love.
- Sweetened Condensed Milk – This adds sweetness and creaminess, ensuring a smooth texture without the need for churning.
- Cream Cheese – The star of the cheesecake flavor, contributing richness and a slight tanginess.
- Graham Crackers – Coarsely crumbled, they add a delightful crunch and a nod to the classic cheesecake crust.
Instructions for No Churn Strawberry Cheesecake Ice Cream
Get ready to make some magic happen with your own No Churn Strawberry Cheesecake Ice Cream! This process is super simple, and you’ll be savoring your homemade delight in no time. Let’s dive into the steps:
In a small saucepan, combine diced strawberries, sugar, and vanilla. Turn on the heat and bring the mixture to a boil. Once it’s bubbling, reduce the heat and let it simmer for about five minutes. You want the sauce to thicken and the flavors to meld together beautifully. Once done, set the saucepan aside to cool completely. If you’re in a hurry, you can speed this up by chilling it in the refrigerator.
Next, take a large bowl and whip the heavy cream until soft peaks start to form. This is the stage where the cream is light and fluffy. Be careful not to over-whip it; we want it to hold shape but remain smooth.
Once the cream is whipped, transfer it to another bowl. Don’t worry if some cream remains in the first bowl; there’s no need to wash it just yet.
In the same bowl, add cream cheese and sweetened condensed milk. Beat these ingredients together until they are smooth and creamy. This will form your cheesecake base. The consistency should be thick but pourable.
Now, gently fold the whipped heavy cream into the cheesecake mixture. Use a spatula and fold carefully to retain the airiness of the cream. This step is crucial for achieving that light, fluffy texture.
Let’s add some crunch! Fold in the crumbled graham crackers gently, distributing them evenly throughout the mixture.
Transfer the combined mixture into a freezable container. Make sure to leave some space at the top since the ice cream will expand as it freezes. This step is important to avoid any spillage!
Now, drizzle your cooled strawberry mixture over the top of the ice cream base. Use a knife to swirl the strawberries into the ice cream gently. This will create beautiful layers of flavor.
If you’re feeling extra indulgent, sprinkle some additional graham cracker chunks on top before sealing the container.
Finally, place the container in the freezer for at least eight hours or until firm. The wait is the hardest part, but it will be worth it!
Things Worth Knowing
- Temperature Matters: Ensure your heavy cream is very cold when whipping. This helps achieve the best volume and texture.
- Sweetness Level: Adjust the sugar according to your taste. If your strawberries are very sweet, you can reduce the sugar amount.
- Chilling Time: Remember that the longer you let the ice cream freeze, the firmer it will become. Aim for at least eight hours for the best texture.
- Storage Tips: Store the ice cream in an airtight container to prevent ice crystals from forming. This will keep it smooth and creamy.
Variations to Try
If you’re looking to switch things up with your No Churn Strawberry Cheesecake Ice Cream, here are some fun variations to consider:
- Add Chocolate Flavor: For a chocolaty twist, fold in some cocoa powder to the cheesecake mixture or drizzle melted chocolate over the top before freezing.
- Mixed Berries: Use a combination of berries like blueberries or raspberries instead of just strawberries for a mixed berry cheesecake ice cream.
- Nuts for Crunch: Incorporate chopped nuts like pecans or almonds for an added texture and flavor.
- Fresh Mint: Add fresh mint leaves to the strawberry mixture for a refreshing twist. It pairs wonderfully with the creamy ice cream.
- Layering: Create layers of strawberry sauce and cheesecake mixture in the container for a stunning presentation.
- Healthier Option: Substitute some of the cream with Greek yogurt for a lighter version that still maintains creaminess.
- Exciting Toppings: Don’t forget about toppings! Crushed cookies, chocolate shavings, or whipped cream can add a finishing touch.
What Complements This No Churn Strawberry Cheesecake Ice Cream
When it comes to serving your No Churn Strawberry Cheesecake Ice Cream, the possibilities are endless! Here are some ideas to elevate your dessert experience:
- Fresh Fruit: Pair your ice cream with a side of fresh strawberry slices or a berry medley for a refreshing contrast.
- Complementary Desserts: Serve alongside a slice of cheesecake or fruit tart for a dessert extravaganza.
- Seasonal Occasions: Perfect for summer barbecues, picnics, or family gatherings where you want to impress your guests.
- Gourmet Toppings: Drizzle with chocolate sauce, caramel, or a sprinkle of crushed cookies for a fancy touch.
- With Coffee: Enjoy a scoop alongside your favorite coffee or dessert wine for a delightful end to a meal.
- Storage Tips: If you have leftovers, store them in an airtight container in the freezer to keep them fresh for your next craving.
FAQ
Conclusion
The No Churn Strawberry Cheesecake Ice Cream is a delightful treat that captures the essence of summer in every creamy bite. Its simplicity and deliciousness make it a must-try for anyone looking for an easy dessert to enjoy with family and friends. I encourage you to whip up a batch and experience the joy it brings. You won’t regret it!
No Churn Strawberry Cheesecake Ice Cream
Ingredients
Equipment
Method
- In a small saucepan, combine diced strawberries, sugar, and vanilla. Turn on the heat and bring the mixture to a boil. Once it’s bubbling, reduce the heat and let it simmer for about five minutes. You want the sauce to thicken and the flavors to meld together beautifully. Once done, set the saucepan aside to cool completely. If you're in a hurry, you can speed this up by chilling it in the refrigerator.
- Next, take a large bowl and whip the heavy cream until soft peaks start to form. This is the stage where the cream is light and fluffy. Be careful not to over-whip it; we want it to hold shape but remain smooth.
- Once the cream is whipped, transfer it to another bowl. Don’t worry if some cream remains in the first bowl; there's no need to wash it just yet.
- In the same bowl, add cream cheese and sweetened condensed milk. Beat these ingredients together until they are smooth and creamy. This will form your cheesecake base. The consistency should be thick but pourable.
- Now, gently fold the whipped heavy cream into the cheesecake mixture. Use a spatula and fold carefully to retain the airiness of the cream. This step is crucial for achieving that light, fluffy texture.
- Let’s add some crunch! Fold in the crumbled graham crackers gently, distributing them evenly throughout the mixture.
- Transfer the combined mixture into a freezable container. Make sure to leave some space at the top since the ice cream will expand as it freezes. This step is important to avoid any spillage!
- Now, drizzle your cooled strawberry mixture over the top of the ice cream base. Use a knife to swirl the strawberries into the ice cream gently. This will create beautiful layers of flavor.
- If you're feeling extra indulgent, sprinkle some additional graham cracker chunks on top before sealing the container.
- Finally, place the container in the freezer for at least eight hours or until firm. The wait is the hardest part, but it will be worth it!
Notes
- Tip 1: Store the ice cream in an airtight container to prevent ice crystals from forming.
- Tip 2: If you have leftovers, enjoy them within a week for the best flavor and texture.
- Tip 3: For a healthier option, consider reducing the amount of sugar.
- Tip 4: Always let the ice cream sit at room temperature for a few minutes before scooping for easier serving.
- Tip 5: Don’t hesitate to experiment with different fruits or toppings!