Hot Chocolate Bombs
There’s something truly magical about creating Hot Chocolate Bombs. I remember the first time I made these delightful treats. It was a chilly winter evening, and nothing felt quite like curling up with a cozy blanket and a cup of something warm. I decided to take my hot chocolate experience to the next level by making these fun little bombs. Watching them melt into a rich chocolatey drink was almost as satisfying as drinking it! The joy of seeing friends’ eyes light up when they pour hot milk over the bombs is just unbeatable. As the chocolate melts and releases the cocoa and marshmallows, I feel a warm wave of happiness wash over me. Whether you’re looking to impress guests or just treat yourself, Hot Chocolate Bombs are the way to go!
Recipe Snapshot
32 mins
30 mins
2 mins
Medium
150 kcal
1 g
Vegan, Gluten-Free, AIP
7 g
Food Processor, Silicone dome molds, Small spoon, Cookie sheet, Parchment paper
What You’ll Enjoy About This Hot Chocolate Bombs
Unique and Fun Experience
One of the best parts about making Hot Chocolate Bombs is how interactive they are! They’re not just a drink; they’re an experience. Pouring hot milk over them and watching them dissolve creates a sense of wonder that’s perfect for family gatherings or cozy nights in.
Customization Galore
What I love most is how customizable these bombs are. You can adjust the ingredients to fit your taste perfectly. Want a richer flavor? Add more cocoa powder. Prefer it sweeter? Just toss in a few extra marshmallows! You have the freedom to create your own signature hot chocolate bomb!
Great Gift Idea
These Hot Chocolate Bombs make for perfect gifts too! Just package a few in a lovely box, add a note, and you have a thoughtful present for friends or family. Everyone appreciates a homemade treat, especially when it’s as delightful as this!
Perfect for All Ages
Kids and adults alike adore Hot Chocolate Bombs. They’re a fantastic way to get the little ones involved in the kitchen. Plus, who wouldn’t want to watch their favorite things melting together in a cup?
Vegan-Friendly Option
For those who are dairy-free or vegan, these bombs are an excellent choice. Using dairy-free chocolate and milk alternatives means everyone can indulge without worry. It’s heartwarming to see everyone enjoying the same delicious treat!
What to Gather for Hot Chocolate Bombs
Gathering the right ingredients is essential in making delicious Hot Chocolate Bombs. Each component plays a vital role in creating that perfect melt-in-your-mouth experience. The star players are definitely the chocolate, which forms the outer shell, and the marshmallows, which provide that delightful surprise inside. Together with cacao powder and raw cane sugar, these ingredients combine to make a comforting drink that warms the heart and soul.
- 6 Ounces of Marshmallows: Make sure they are vegan, I used Dandies brand.
- 15 Ounces of Chocolate Chips: About a bag and a half depending on the size of your molds. I use dairy free like Enjoy Life or Simple Truth.
- 2 Tablespoons of Cacao Powder: This is the key ingredient for rich flavor.
- 4 Tablespoons of Raw Cane Sugar: Also called turbinado sugar, it adds a nice sweetness.
Directions for Hot Chocolate Bombs
Creating Hot Chocolate Bombs is easier than you might think, and the joy they bring makes it all worth it. Here’s how to make these delightful treats step by step.
- Start by placing the chocolate chips in a microwave-safe bowl. Heat them in 30-second intervals at half power, stirring in between until fully melted. It’s important to be cautious here; avoid getting any liquid into the chocolate, as it will seize and become grainy.
- Next, set your silicone molds on a cookie sheet for stability. Spoon a generous amount of melted chocolate into each mold cup. Using the back of a spoon or an icing spatula, spread the chocolate up the sides, ensuring you coat the edges well. Don’t be shy; the more chocolate, the better!
- Once all the molds are filled, place them in the refrigerator or freezer to set completely. This usually takes about two to three hours, but it could take longer in warm or humid conditions.
- While the chocolate sets, blend the cacao powder and raw cane sugar in a food processor to create a smooth hot cocoa mix. This will help the sugar dissolve easily when preparing your hot chocolate.
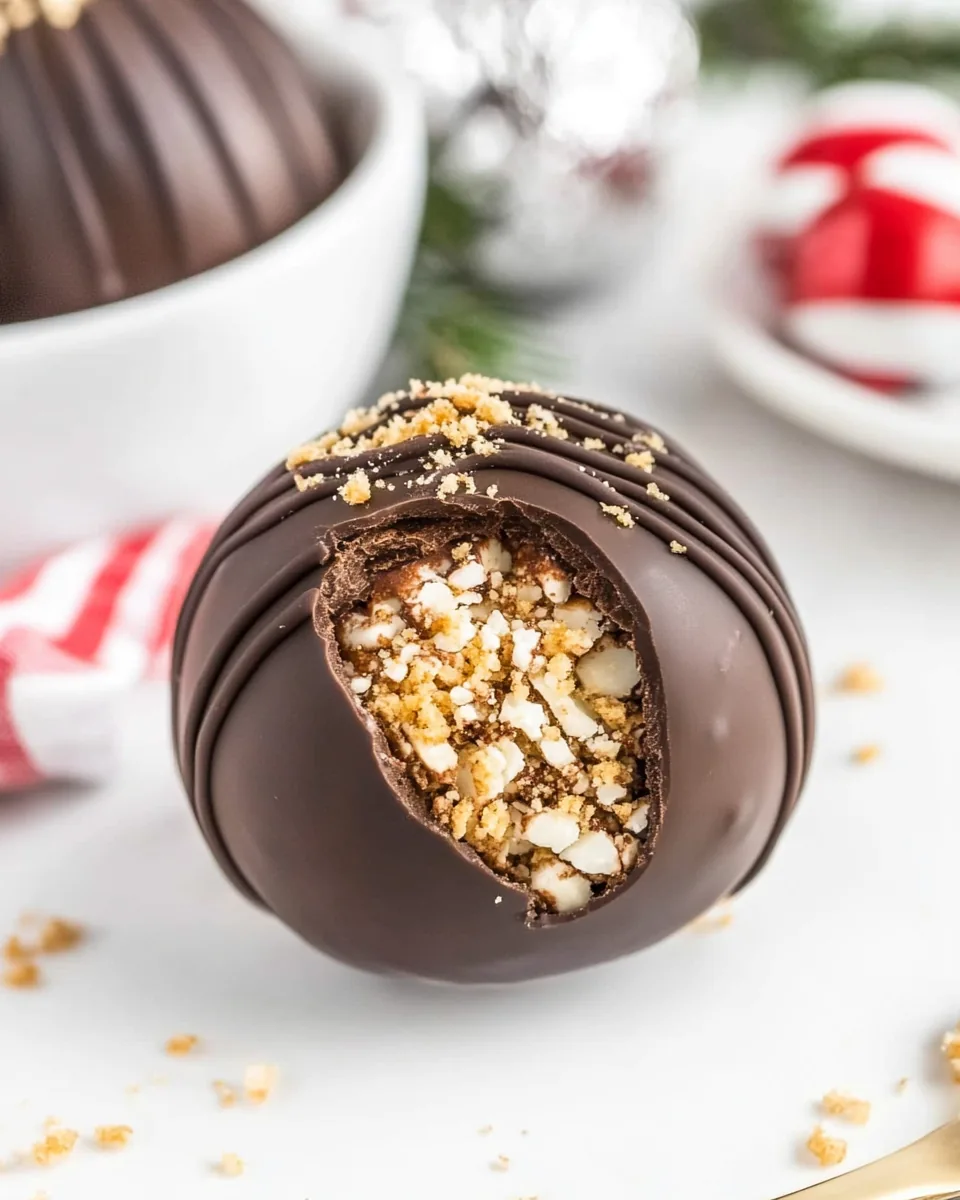
- Gently peel the chocolate pieces from the molds, ensuring they are intact. For half of the chocolate pieces, add a few spoonfuls of your homemade cocoa mix, followed by a generous amount of marshmallows. The more marshmallows, the more delightful your cup will be!
- Preheat your oven to about 300 degrees. Once warmed, remove the cookie sheet and place a piece of parchment paper on it. Take an empty chocolate dome and place it on the hot sheet for a few seconds. This will slightly melt the edges.
- Gently press this melted dome over the filled dome, sealing them together. Place them back in the fridge or freezer for a few minutes until they’re firm.
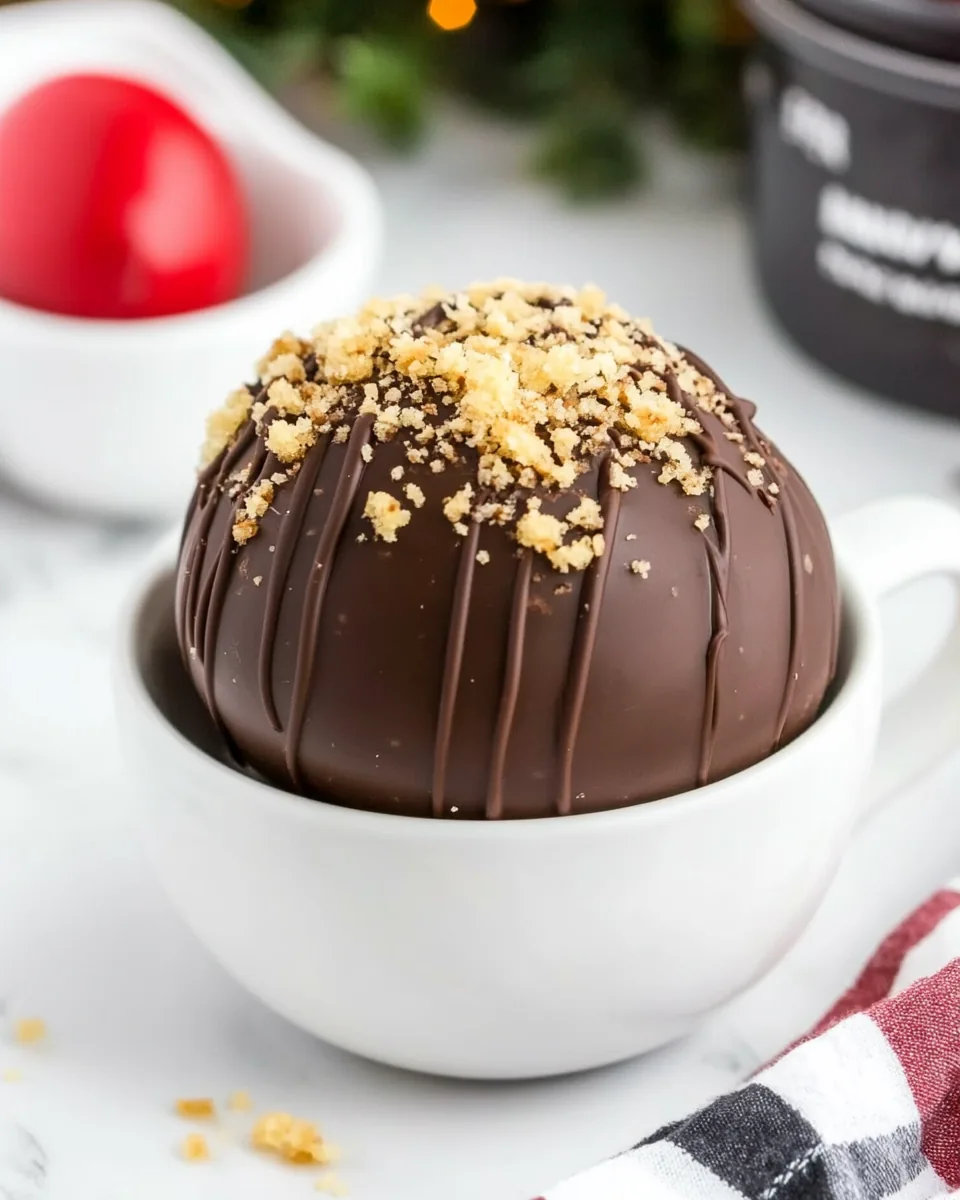
- To add a decorative touch, melt a few tablespoons of chocolate as before. Pour it into a zip-top bag, snip a tiny corner, and drizzle over the assembled Hot Chocolate Bombs. You can sprinkle extra sugar on top if desired.
- When it’s time to enjoy, place a hot chocolate bomb in a mug and pour a cup of hot milk alternative (like almond, coconut, or oat) over it. Stir until blended and enjoy a cozy moment!
Things Worth Knowing
- Proper Chocolate Melting: Always melt your chocolate slowly to prevent burning. Using half power in the microwave ensures a gentle melt.
- Sealing Secrets: If you find your chocolate isn’t sealing well, use a little extra melted chocolate at the edges to help it stick.
- Ambient Temperature: Be mindful of your kitchen’s temperature; warm environments can affect how quickly the chocolate sets.
- Storage Tip: Store your Hot Chocolate Bombs in a cool, dry place to maintain their shape and texture.
Customization Ideas

There are countless ways to customize your Hot Chocolate Bombs. Here are some fun ideas to try:
- Add Flavorings: Consider adding peppermint extract or even a touch of espresso to your cocoa mix for a unique twist.
- Decorative Toppings: Try using sprinkles or crushed cookies on top of the melted chocolate for a fun presentation.
- Different Fillings: Swap out marshmallows for crushed candy canes or caramel bits for a delightful surprise.
- Variety of Chocolates: Use a mix of dark, milk, and white chocolate for a colorful and flavorful experience.
- Serving Suggestions: Pair your Hot Chocolate Bombs with whipped coconut cream or a sprinkle of cinnamon for extra flair!
Serving Ideas for Hot Chocolate Bombs
When it comes to serving Hot Chocolate Bombs, the presentation and experience can elevate the moment. Here are some awesome ideas:
- Cozy Winter Evenings: These bombs are perfect for snuggling up by the fireplace with family. They bring warmth and joy, making cold nights feel special.
- Movie Nights: Enjoy watching your favorite films with a warm mug of hot chocolate. It’s a perfect treat that pairs wonderfully with popcorn!
- Holiday Gatherings: Bring these delightful treats to holiday parties or gatherings. They’re sure to impress guests of all ages and make the occasion feel even more festive.
- Weekend Brunches: Serve Hot Chocolate Bombs alongside pancakes or waffles for a fun brunch idea. It complements sweet dishes beautifully!
- Creative Workshops: Host a little party where everyone can make their own Hot Chocolate Bombs. It adds a hands-on element that everyone will love!
FAQ
Conclusion
Hot Chocolate Bombs are a delightful treat that brings joy and warmth to every occasion. They’re not just a drink; they’re an enjoyable experience that everyone loves! I encourage you to try making them for yourself, your family, or even as gifts. The smiles they bring will make it all worth it!

Hot Chocolate Bombs
Ingredients
Equipment
Method
- Start by placing the chocolate chips in a microwave-safe bowl. Heat them in 30-second intervals at half power, stirring in between until fully melted. It’s important to be cautious here; avoid getting any liquid into the chocolate, as it will seize and become grainy.
- Next, set your silicone molds on a cookie sheet for stability. Spoon a generous amount of melted chocolate into each mold cup. Using the back of a spoon or an icing spatula, spread the chocolate up the sides, ensuring you coat the edges well. Don’t be shy; the more chocolate, the better!
- Once all the molds are filled, place them in the refrigerator or freezer to set completely. This usually takes about two to three hours, but it could take longer in warm or humid conditions.
- While the chocolate sets, blend the cacao powder and raw cane sugar in a food processor to create a smooth hot cocoa mix. This will help the sugar dissolve easily when preparing your hot chocolate.
- Gently peel the chocolate pieces from the molds, ensuring they are intact. For half of the chocolate pieces, add a few spoonfuls of your homemade cocoa mix, followed by a generous amount of marshmallows. The more marshmallows, the more delightful your cup will be!
- Preheat your oven to about 300 degrees. Once warmed, remove the cookie sheet and place a piece of parchment paper on it. Take an empty chocolate dome and place it on the hot sheet for a few seconds. This will slightly melt the edges.
- Gently press this melted dome over the filled dome, sealing them together. Place them back in the fridge or freezer for a few minutes until they’re firm.
- To add a decorative touch, melt a few tablespoons of chocolate as before. Pour it into a zip-top bag, snip a tiny corner, and drizzle over the assembled Hot Chocolate Bombs. You can sprinkle extra sugar on top if desired.
- When it’s time to enjoy, place a hot chocolate bomb in a mug and pour a cup of hot milk alternative (like almond, coconut, or oat) over it. Stir until blended and enjoy a cozy moment!
Notes
- Tip 1: The total amount of chocolate you need will vary depending on the size of your mold.
- Tip 2: Nutrition is calculated based on the ingredients listed only, but does not include any alternative milk to pour-over and explode the hot chocolate bombs.
- Tip 3: If your mold is smaller than my 2.7 inch silicone molds, it will also affect the total nutrition contents.