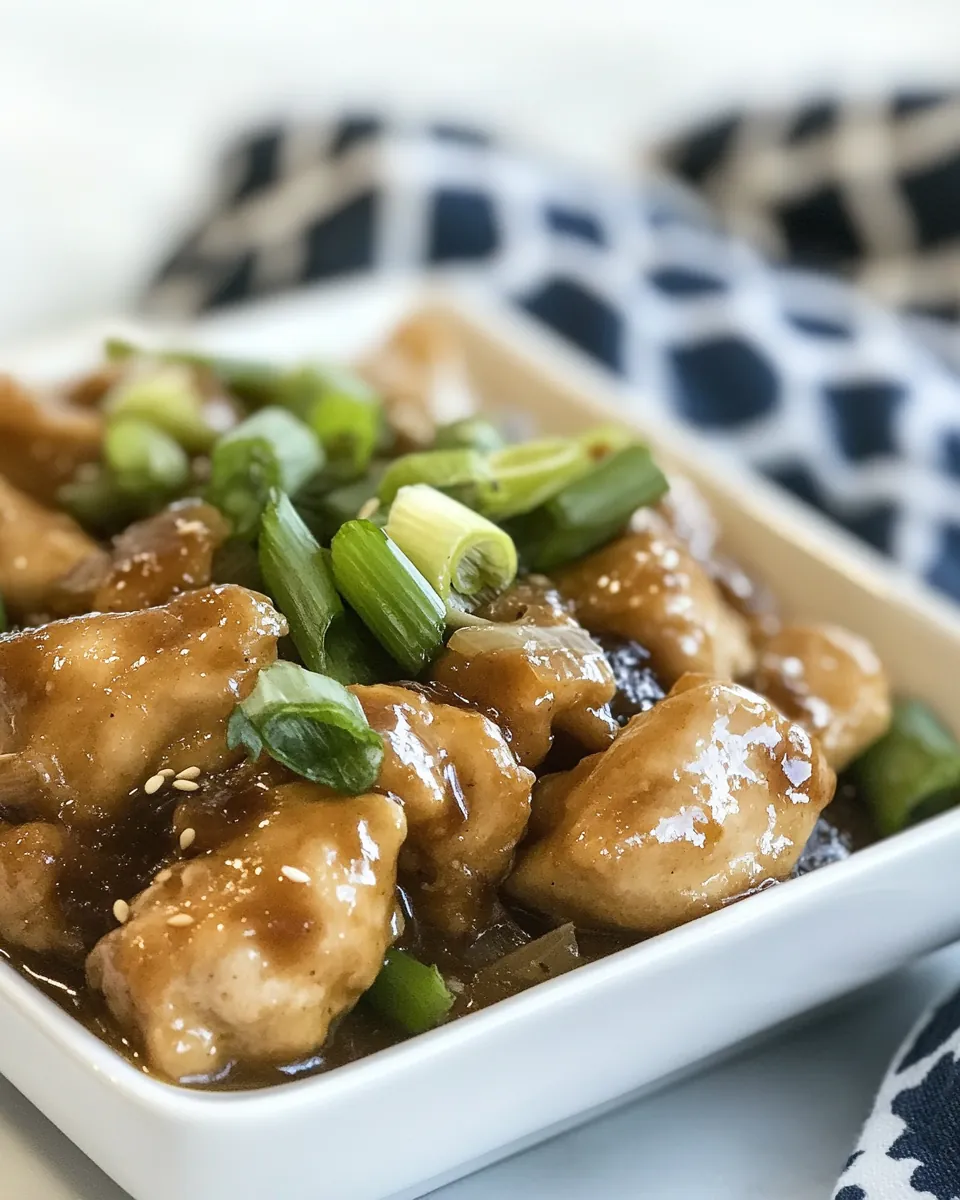
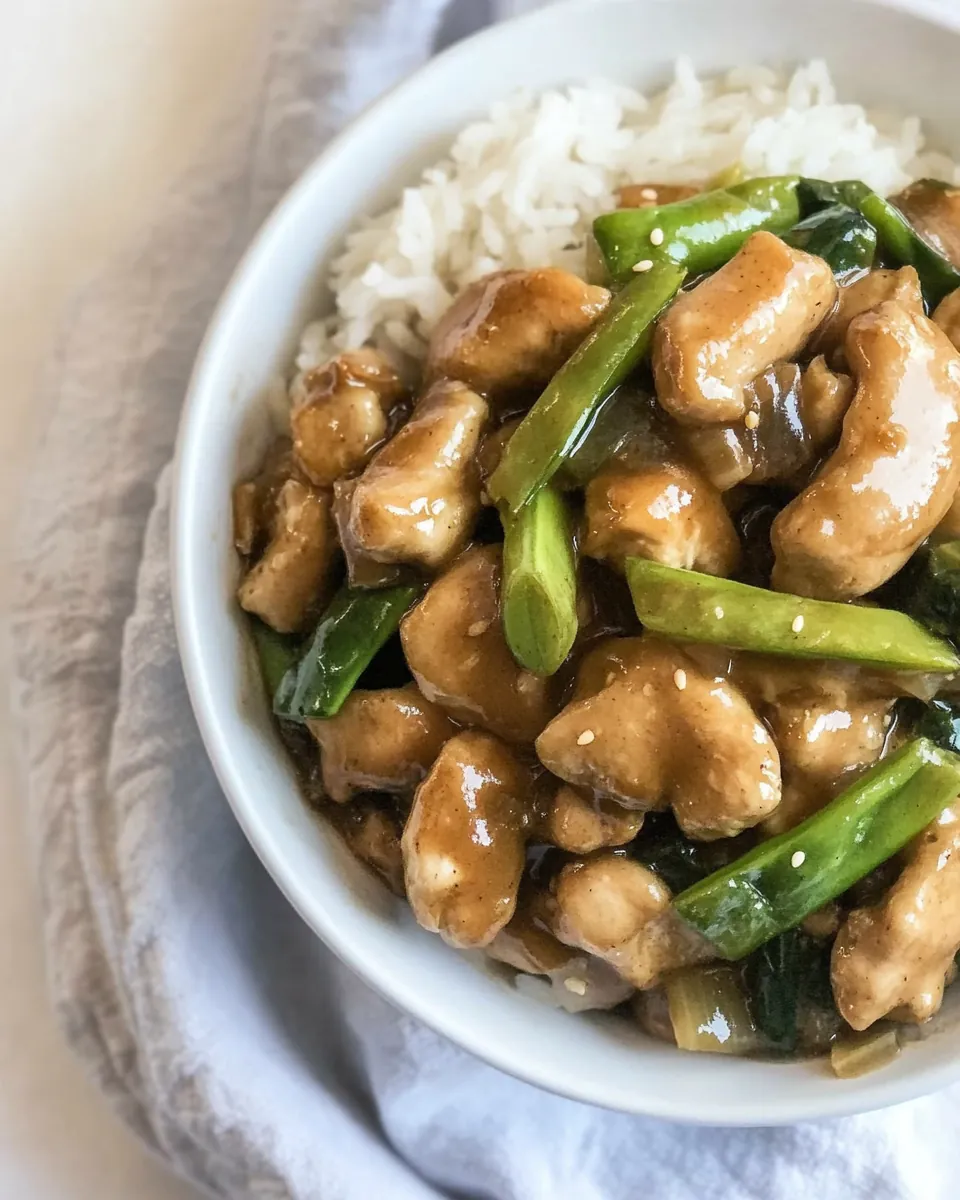
Mongolian Chicken
There’s something about a quick, tasty dish that brings everyone to the table, and for me, that dish is Mongolian Chicken. I remember the first time I tried it — the sweet and savory sauce clinging to the tender chicken stirred over steaming rice. It was a weeknight, and I was tired after a long day, but the aroma wafting through the kitchen brought all the family members together. The beauty of Mongolian Chicken is that it’s not just about the flavors; it’s about the memories created while cooking and enjoying it together. Whether it’s a casual family dinner or a gathering with friends, this recipe always shines.
Recipe Snapshot
30 mins
10 mins
20 mins
Medium
350 kcal
28 g
Paleo, Whole30, Gluten-Free
18 g
Wooden Spoon, Grater, Large Pot, Skillet, Chef’s Knife
Why This Mongolian Chicken Hits Different
What makes Mongolian Chicken so irresistible? Let me share the reasons why this dish is a favorite in my home.
Quick Preparation
One of my favorite aspects of Mongolian Chicken is how quickly it comes together. In just 30 minutes, you can whip up a colorful, delicious meal. It’s perfect for those busy weeknights when you want to serve something hearty without spending hours in the kitchen.
Flavor Explosion
This dish is a beautiful balance of flavors. The combination of savory chicken with garlic, ginger, and the unique taste of coconut aminos creates a captivating profile. A hint of sweetness from the sauce complements the tender veggies, making every bite a delight.
Family-Friendly
Kids and adults alike love Mongolian Chicken. The vibrant colors and tasty sauce are always a hit, and it’s a great way to introduce kids to different flavors without overwhelming them. It’s a dish I can confidently put on the table, knowing everyone will enjoy it.
Versatile Ingredients
The ingredients in Mongolian Chicken are not only flavorful but also versatile. You can easily swap out the veggies or adjust the seasonings according to your taste preferences. Whether you prefer more heat or a sweeter sauce, this dish can be customized to fit any palate.
Healthy Comfort Food
With lean chicken thighs and fresh vegetables, Mongolian Chicken is a wholesome meal option. It’s satisfying and nourishing, allowing you to enjoy comfort food without the guilt.
Perfect for Leftovers
If you’re lucky enough to have leftovers, Mongolian Chicken tastes even better the next day. The flavors deepen, making it ideal for a quick lunch or dinner the following day.
Ingredients to Make Mongolian Chicken
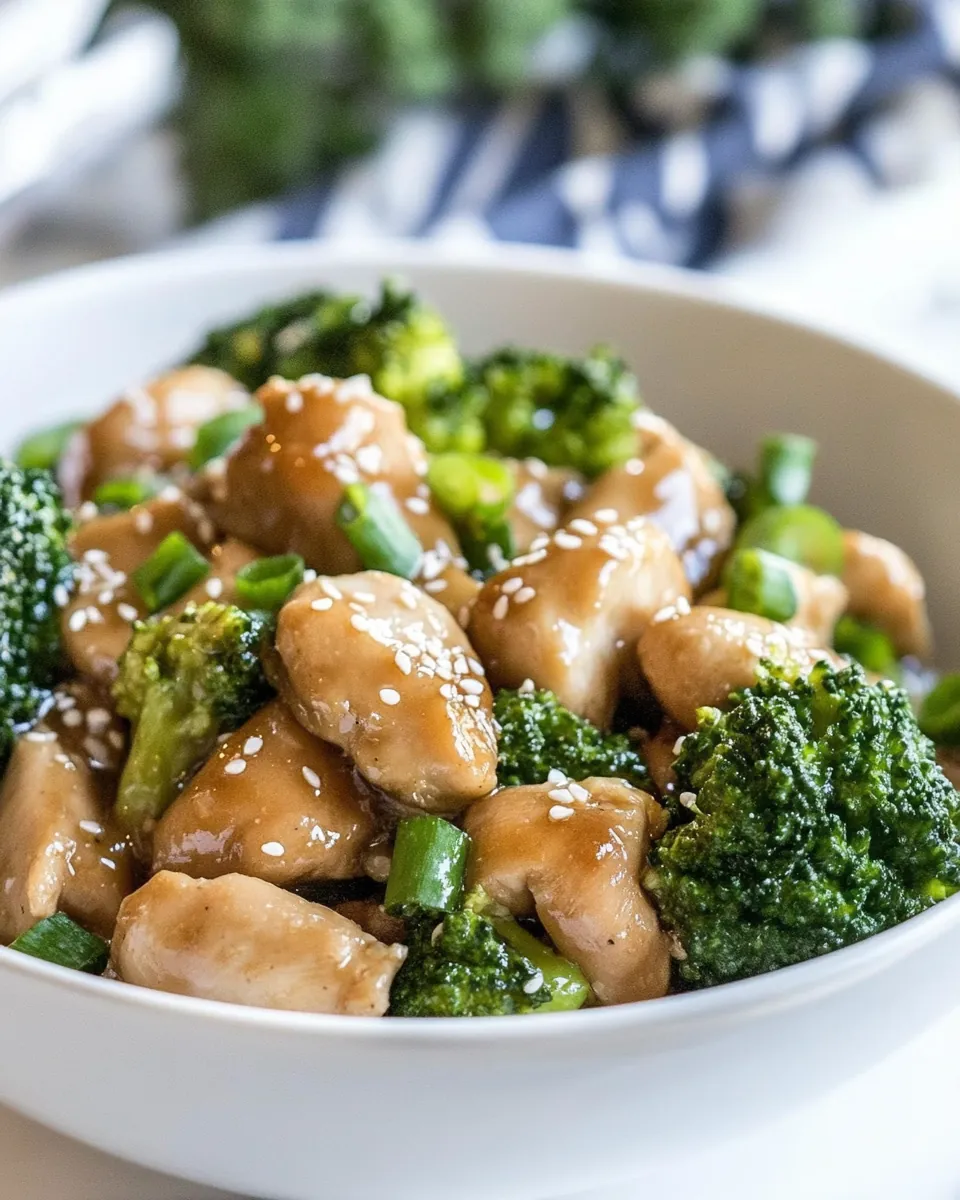
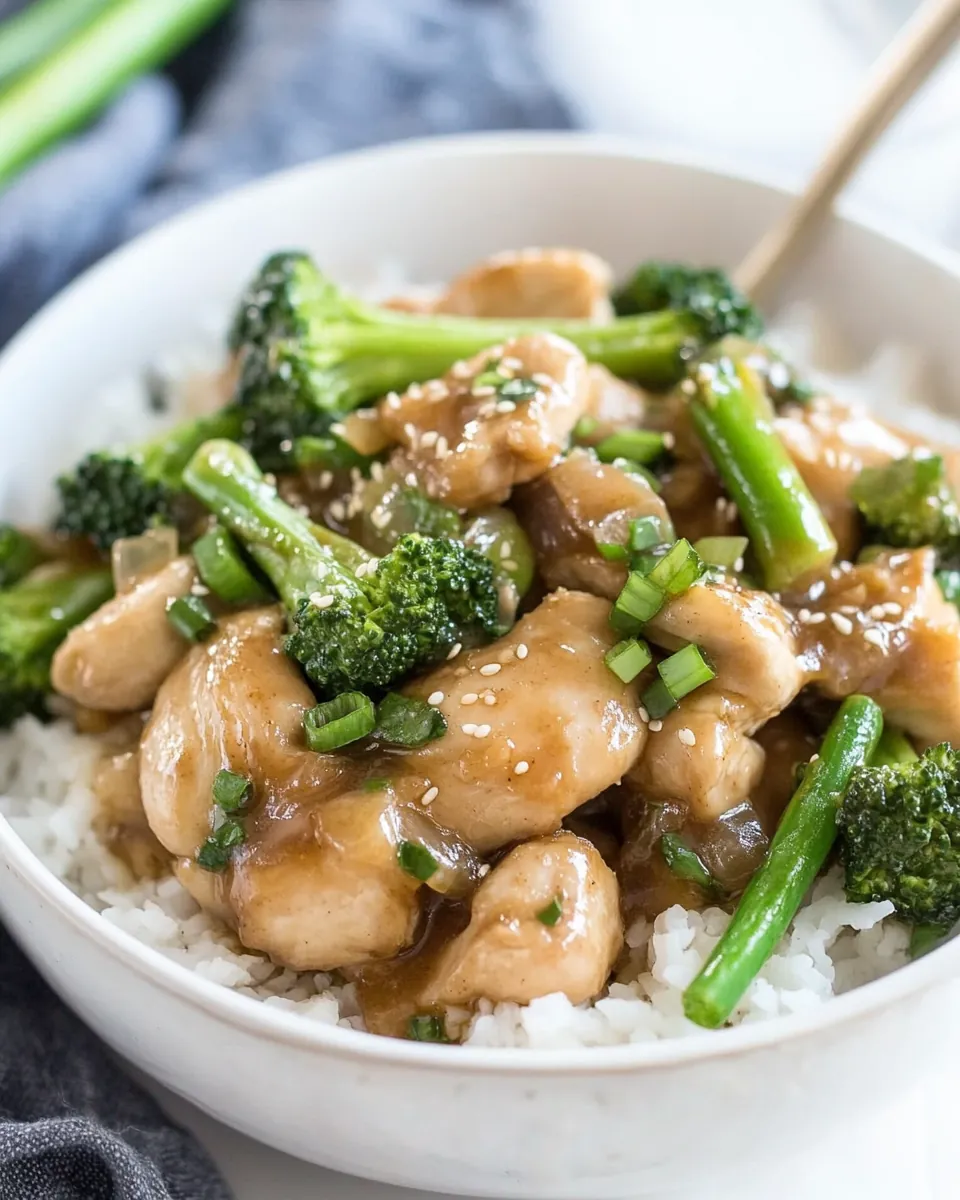
The heart of Mongolian Chicken lies in its fresh, quality ingredients. Each component plays a vital role, creating a harmonious blend of flavors and textures. From the succulent chicken to the crunchy broccoli, every bite is a burst of deliciousness.
- 1 lb boneless skinless chicken thighs, chopped – Tender and juicy, they form the base of our dish.
- 3 tbsp tapioca flour – Helps to create a crisp exterior on the chicken.
- 1/4 tsp sea salt – Enhances the flavors of the dish.
- 1/4 tsp black pepper – Adds a touch of heat.
- 3 tbsp avocado oil – Used for frying; it has a high smoke point and a light flavor.
- 1 large crown broccoli, chopped into florets – Provides a crunch and bright color.
- 3 cloves garlic, minced – Adds profound flavor and aroma.
- 1 tbsp fresh ginger, grated – Offers a zesty kick.
- 2 green onions, chopped – Adds freshness and a mild onion flavor.
- 1/3 cup coconut aminos – A savory sauce that’s a perfect alternative to soy sauce.
- 3 tbsp water – Used to adjust the consistency of the sauce.
- 2 tbsp cider vinegar – Adds a tangy brightness.
Step by Step Guide for Mongolian Chicken
Cooking Mongolian Chicken is a delightful experience that brings out your inner chef. The aromas fill the kitchen, and each step is rewarding. Let’s dive into the process of creating this delicious dish.
- Begin by chopping the chicken thighs into bite-sized pieces. It’s crucial to have uniform pieces for even cooking. Sprinkle them generously with tapioca flour. I find it works best to do this on the same cutting board to minimize mess. Use your hands to toss the chicken until it’s well-coated; this will help create a nice crisp when cooking.
- Next, heat the avocado oil in a large non-stick skillet over medium-high heat. You want the skillet hot enough that it sizzles when you add the chicken. Once the oil is shimmering, gently add the chicken pieces. Make sure they are spaced out to avoid steaming and allow them to brown properly.
- After about three minutes, resist the urge to stir. Let the chicken brown untouched. This is key for achieving that gorgeous golden color. Once browned, stir well and continue cooking until the chicken is nearly cooked through, which should take an additional two minutes.
- Next, add in the chopped broccoli, garlic, ginger, and green onions. Stir to combine everything well. The colors will brighten as the broccoli starts to soften. This is where the magic happens!
- Pour in the coconut aminos, water, and cider vinegar. Mix everything thoroughly to ensure the sauce coats all the ingredients. Cover the skillet and allow it to cook for about one to two minutes. This will steam the broccoli just enough to keep its vibrant color and crunchy texture.
- After a couple of minutes, remove the lid. Continue cooking at a full boil while stirring occasionally. You want the sauce to thicken and the chicken to finish cooking, which should take about three to five more minutes. Look for the chicken to be cooked through and the sauce to be glossy.
- Finally, once everything looks beautifully cooked and thickened, remove the skillet from the heat. Serve your delicious Mongolian Chicken with your choice of sides. I love pairing it with steamed rice or quinoa for a complete meal.
Things Worth Knowing
- Use High Heat: Cooking the chicken on medium-high heat allows it to brown beautifully without becoming dry.
- Fresh Ingredients: Always opt for fresh broccoli and ginger for the best flavor.
- Don’t Rush: Letting the chicken brown undisturbed is key to achieving that perfect crispy texture.
- Adjusting Thickness: If the sauce is too thick, you can add a splash of water to reach your desired consistency.
Helpful Hints
When making Mongolian Chicken, these tips will help you enhance the cooking experience and ensure a delightful dish.
- Storage: Store leftovers in an airtight container in the fridge for up to three days.
- Freezing: You can freeze Mongolian Chicken for up to a month. Just reheat in a skillet until warm.
- Pairing: This dish pairs wonderfully with steamed rice or quinoa for a complete meal.
- Adjust Spice: If you prefer a bit of heat, consider adding red pepper flakes or Sriracha to the sauce.
- Use Thighs: Feel free to use chicken breast if you prefer a leaner option, but thighs offer more flavor.
Side Dish Ideas for Mongolian Chicken
When it comes to enjoying Mongolian Chicken, the right side dishes can elevate the meal even further. Here are some fantastic options to serve alongside:
- Steamed Rice: A classic choice that soaks up the delicious sauce.
- Quinoa: A great alternative to rice, offering a nutty flavor and added protein.
- Asian Slaw: A refreshing, crunchy side that contrasts beautifully with the savory chicken.
- Stir-Fried Vegetables: Add some variety with a colorful mix of bell peppers, carrots, and snap peas.
- Garlic Noodles: Simple yet flavorful, these noodles pair well with the dish.
- Spring Rolls: For a fun appetizer, serve crispy spring rolls alongside your chicken.
FAQ
Conclusion
Mongolian Chicken is a delightful dish that brings warmth and flavor to any meal. Its quick preparation and unforgettable taste make it a go-to for busy weeknights or special gatherings. I encourage you to try this recipe and savor the deliciousness yourself. Cooking is a journey, and this recipe will surely become a cherished part of yours!
Mongolian Chicken
Ingredients
Equipment
Method
- Begin by chopping the chicken thighs into bite-sized pieces. It’s crucial to have uniform pieces for even cooking. Sprinkle them generously with tapioca flour. I find it works best to do this on the same cutting board to minimize mess. Use your hands to toss the chicken until it's well-coated; this will help create a nice crisp when cooking.
- Next, heat the avocado oil in a large non-stick skillet over medium-high heat. You want the skillet hot enough that it sizzles when you add the chicken. Once the oil is shimmering, gently add the chicken pieces. Make sure they are spaced out to avoid steaming and allow them to brown properly.
- After about three minutes, resist the urge to stir. Let the chicken brown untouched. This is key for achieving that gorgeous golden color. Once browned, stir well and continue cooking until the chicken is nearly cooked through, which should take an additional two minutes.
- Next, add in the chopped broccoli, garlic, ginger, and green onions. Stir to combine everything well. The colors will brighten as the broccoli starts to soften. This is where the magic happens!
- Pour in the coconut aminos, water, and cider vinegar. Mix everything thoroughly to ensure the sauce coats all the ingredients. Cover the skillet and allow it to cook for about one to two minutes. This will steam the broccoli just enough to keep its vibrant color and crunchy texture.
- After a couple of minutes, remove the lid. Continue cooking at a full boil while stirring occasionally. You want the sauce to thicken and the chicken to finish cooking, which should take about three to five more minutes. Look for the chicken to be cooked through and the sauce to be glossy.
- Finally, once everything looks beautifully cooked and thickened, remove the skillet from the heat. Serve your delicious Mongolian Chicken with your choice of sides. I love pairing it with steamed rice or quinoa for a complete meal.
Notes
- Tip 1: You can replace tapioca flour with cornstarch, all-purpose flour, or gluten-free all-purpose flour.