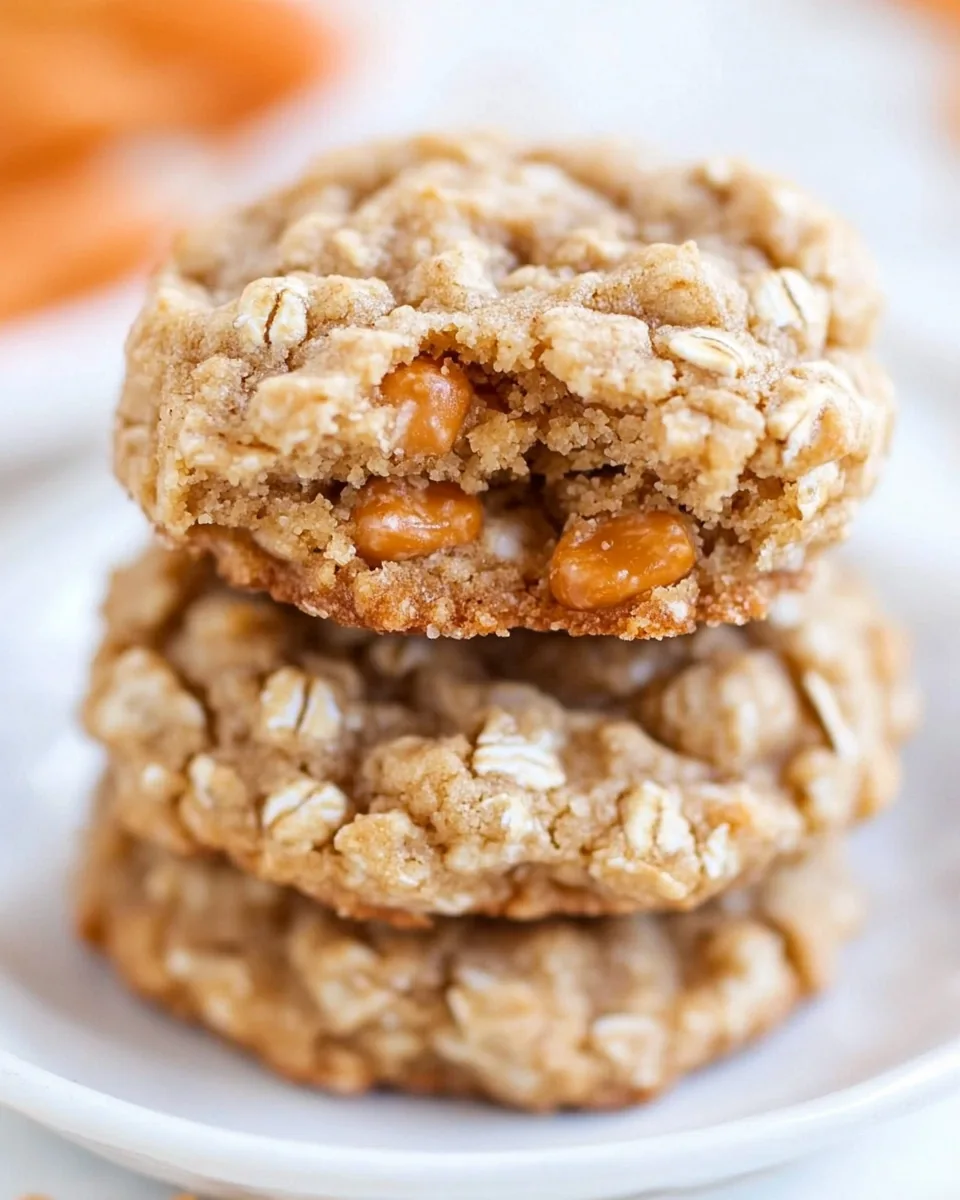
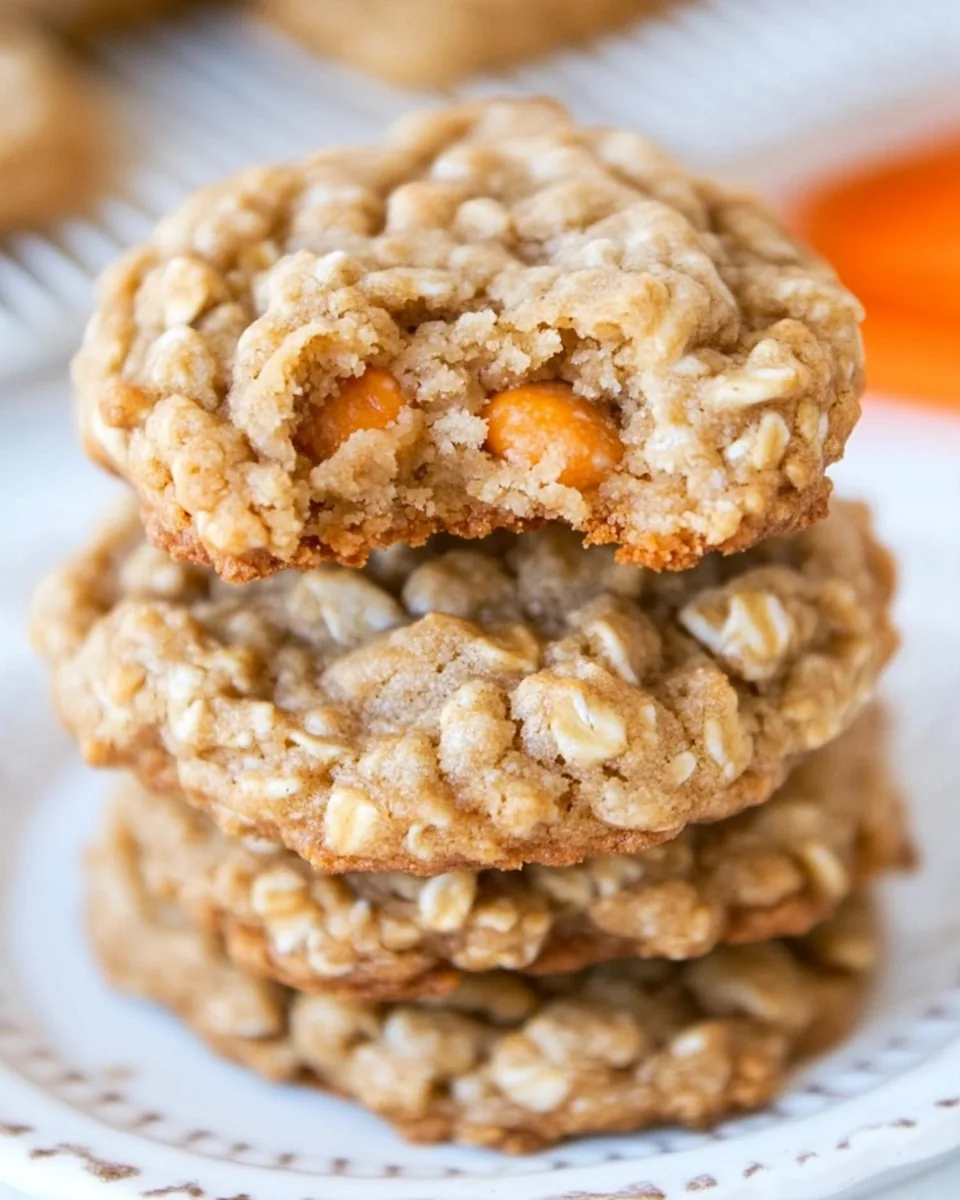
Soft and Chewy Oatmeal Scotchies Cookies
There’s something truly special about baking, especially when it comes to making Soft and Chewy Oatmeal Scotchies Cookies. I remember the first time I baked these delightful treats, the aroma filled my kitchen and brought everyone running. Each bite offers a perfect blend of textures; the chewiness of the oats combined with the rich sweetness of butterscotch chips makes them utterly irresistible. These cookies are not just a recipe; they’re a cozy memory, a comfort food that brings warmth to the heart. Whether it’s a rainy day or a sunny afternoon, these cookies make everything feel just a bit better. They remind me of family gatherings, where laughter and joy are shared over a plate of homemade goodness. Every time I pull a batch from the oven, I can’t help but smile, knowing that I’m about to share something special with my loved ones.
Recipe Snapshot
20 mins
11 mins
9 mins
Medium
150 kcal
2 g
Gluten-Free, Low FODMAP
7 g
Stand Mixer Fitted with a Paddle Attachment, Medium Cookie Scoop, Baking Sheets, Wire Rack
Why This Soft and Chewy Oatmeal Scotchies Cookies Shines
1. Nostalgic Comfort
Whenever I think of Soft and Chewy Oatmeal Scotchies Cookies, I’m reminded of my childhood. These cookies were a staple in my home, and each batch was an invitation to gather around the kitchen. The warm, inviting smell is like a hug, wrapping you in comfort. It’s a recipe that evokes memories of baking with family on chilly evenings, chatting and laughing while the cookies are in the oven.
2. The Perfect Balance
The combination of oats and butterscotch chips creates a harmonious flavor and texture. The oats lend a delightful chewiness, while the sweet, melt-in-your-mouth butterscotch adds a decadent richness. It’s a balance that makes these cookies not too sweet, allowing you to enjoy their flavors to the fullest.
3. Versatile Treats
These cookies are perfect for any occasion. Whether for a holiday, a bake sale, or just because, they fit right in. You can serve them at gatherings or enjoy them with your morning coffee. Their versatility makes them a must-have in any baking repertoire!
4. Simple Ingredients
The ingredients are simple and easy to find, making it accessible for anyone to try their hand at baking. With just a few staples like butter, sugar, and oats, you can whip up a delightful batch without a trip to the specialty store. This simplicity allows even beginner bakers to feel confident in their abilities.
5. Customizable Fun
One of the best things about baking is making it your own. You can easily modify this recipe by adding your favorite ingredients, such as nuts or dried fruit, to create a unique version of Soft and Chewy Oatmeal Scotchies Cookies. The possibilities are endless, and that creative freedom is part of the joy of baking.
6. Perfect for Gifting
These cookies make fantastic gifts too! Imagine presenting a box of homemade cookies to a friend or neighbor. It’s a sweet gesture that shows you care. The personal touch of homemade treats beats any store-bought option and brings joy to the recipient.
Soft and Chewy Oatmeal Scotchies Cookies Shopping List
When it comes to making the perfect Soft and Chewy Oatmeal Scotchies Cookies, the ingredients play a crucial role. Each one contributes to the overall flavor and texture, ensuring that each cookie is just right. The key players include old-fashioned oats for that chewy bite, butterscotch chips for sweetness, and butter for richness. Together, they create a delightful treat that you and your loved ones will cherish.
- 1 large egg: This binds all the ingredients together, giving the cookies a nice structure.
- ½ cup unsalted butter, 1 stick: Adds richness and flavor, making the cookies soft and chewy.
- ½ cup light brown sugar, packed: This sugar adds moisture and a deep caramel flavor that complements the butterscotch.
- ¼ cup granulated sugar: Balances sweetness and helps create a nice texture.
- 1 tablespoon vanilla extract: Enhances the overall flavor profile of the cookies.
- 1 ½ cups old-fashioned whole rolled oats, not instant or quick cook: Provides the chewy texture that is signature to oatmeal cookies.
- ¾ cup all-purpose flour: Gives structure and helps the cookies hold their shape.
- 2 teaspoons cinnamon: Adds warm, spicy notes that enhance the cookie’s flavor.
- ¾ teaspoon ground nutmeg: Offers a slightly sweet and nutty flavor complementing the other spices.
- ½ teaspoon baking soda: Helps the cookies rise and become fluffy.
- pinch salt, optional and to taste: Balances sweetness and enhances flavors.
- 1 heaping cup butterscotch chips: The star ingredient that adds sweetness and richness.
The Method for Soft and Chewy Oatmeal Scotchies Cookies
Making Soft and Chewy Oatmeal Scotchies Cookies is a delightful process that brings joy and deliciousness into your kitchen. Follow these steps carefully and you’ll be rewarded with cookies that are soft, chewy, and full of flavor. Let’s dive into the process!
- To start, gather your ingredients. In the bowl of a stand mixer fitted with the paddle attachment (or a large mixing bowl and hand mixer), add the egg, butter, light brown sugar, granulated sugar, and vanilla extract. Beat on medium-high speed for about 5 minutes until the mixture is light and fluffy. You want it to be creamy and well combined, showing a light yellow color.
- Next, stop the mixer and scrape down the sides of the bowl to ensure everything is well mixed. Now, add in the old-fashioned oats, all-purpose flour, cinnamon, ground nutmeg, baking soda, and a pinch of salt if you’re using it. Beat on low speed just until combined, being careful not to overmix. The dough should come together nicely, showing some texture from the oats.
- Now, it’s time to fold in the star ingredient! Add the butterscotch chips into the dough and beat for just a moment to incorporate. You want the chips evenly distributed throughout the dough, adding bursts of sweetness in every bite.
- Using a 2-inch medium cookie scoop (about 2 tablespoons), form dough mounds. I made around 20 mounds, but you can adjust the size as you like. Place the mounds on a large plate and flatten them slightly. Cover the plate with plastic wrap and refrigerate for at least 2 hours, and up to 5 days before baking. This chilling step is crucial, as it helps the cookies maintain their shape while baking.
- When you’re ready to bake, preheat your oven to 350°F (175°C). Line 2 baking sheets with Silpat Non-Stick Baking Mats, parchment paper, or spray with cooking spray. Make sure the baking sheets are prepared as this will help prevent sticking.
- Now, arrange the chilled dough mounds on the prepared baking sheets, spaced about 2 inches apart. I usually bake about 8 mounds per sheet to ensure even baking. It’s important not to crowd the cookies, as they will spread while baking.
- Bake in your preheated oven for 9 to 10 minutes. Look for the edges to be set and the tops to be barely set, even if they’re slightly underbaked in the center. Cookies may not appear fully done, but they will firm up as they cool. Be careful not to overbake, as this can result in dry cookies.
- Once baked, allow the cookies to cool on the baking sheets for about 5 minutes. This allows them to firm up slightly before transferring them to a wire rack to finish cooling. The cookies will continue to set as they cool, giving you perfectly soft and chewy treats.
Things Worth Knowing
- Chilling the Dough: Do not skip the chilling step! This helps the cookies maintain their shape and prevents them from spreading too much while baking.
- Don’t Overmix: When combining the dry ingredients, make sure to mix just until incorporated. Overmixing can lead to tough cookies.
- Watch the Bake Time: Keep an eye on the cookies as they bake. They should look slightly underbaked in the center when you take them out, as they will continue to cook on the baking sheet.
- Storage Tips: Store your cookies in an airtight container to keep them fresh. They can last up to a week at room temperature.
Substitutions and Tips

Baking is both a science and an art, and sometimes you might want to make a few adjustments. Here are some tips to help you achieve the best results with Soft and Chewy Oatmeal Scotchies Cookies.
- Storage: Store cookies airtight at room temperature for up to 1 week, or in the freezer for up to 3 months.
- Freezing: You can freeze unbaked cookie dough in an airtight container for up to 3 months. Just scoop the dough mounds, freeze them, and bake them fresh whenever you crave cookies!
- Pairing: These cookies are delicious with a glass of milk or a warm cup of coffee. They also make a great addition to any dessert platter!
- Variations: Feel free to mix in different types of chips, such as chocolate or peanut butter, for a fun twist on the classic recipe.
- Serving: These cookies are great for parties, snack time, or lunch boxes. They’re always a hit with both kids and adults!
Perfect Pairings for Soft and Chewy Oatmeal Scotchies Cookies
When it comes to serving Soft and Chewy Oatmeal Scotchies Cookies, there are plenty of ways to enjoy them. Here are some delightful pairings and occasions:
- With Milk: Enjoy these cookies fresh out of the oven with a cold glass of milk. The combination of flavors is simply unbeatable.
- As Dessert: Serve them as a sweet treat after dinner, perhaps with a scoop of ice cream on the side for an indulgent dessert.
- For Gatherings: These cookies are perfect for parties and gatherings. Their homey taste and inviting aroma will draw people to the dessert table.
- Lunch Box Treats: Pack them in lunch boxes for a sweet surprise that kids (and adults!) will love.
- Winter Holidays: These cookies are wonderful for holiday baking. They make great gifts and are perfect for sharing with friends and family.
- Seasonal Parties: Whether it’s a summer BBQ or a winter gathering, these cookies fit in perfectly with any menu. Their comforting taste warms the heart.
FAQ
Conclusion
The Soft and Chewy Oatmeal Scotchies Cookies truly stand out with their perfect blend of textures and flavors. They’re not just cookies; they are memories waiting to be created in your kitchen. I encourage you to try making them yourself—you won’t regret it! Every bite is a delightful experience that brings warmth and joy, perfect for sharing with friends and family.

Soft and Chewy Oatmeal Scotchies Cookies
Ingredients
Equipment
Method
- To start, gather your ingredients. In the bowl of a stand mixer fitted with the paddle attachment (or a large mixing bowl and hand mixer), add the egg, butter, light brown sugar, granulated sugar, and vanilla extract. Beat on medium-high speed for about 5 minutes until the mixture is light and fluffy. You want it to be creamy and well combined, showing a light yellow color.
- Next, stop the mixer and scrape down the sides of the bowl to ensure everything is well mixed. Now, add in the old-fashioned oats, all-purpose flour, cinnamon, ground nutmeg, baking soda, and a pinch of salt if you’re using it. Beat on low speed just until combined, being careful not to overmix. The dough should come together nicely, showing some texture from the oats.
- Now, it’s time to fold in the star ingredient! Add the butterscotch chips into the dough and beat for just a moment to incorporate. You want the chips evenly distributed throughout the dough, adding bursts of sweetness in every bite.
- Using a 2-inch medium cookie scoop (about 2 tablespoons), form dough mounds. I made around 20 mounds, but you can adjust the size as you like. Place the mounds on a large plate and flatten them slightly. Cover the plate with plastic wrap and refrigerate for at least 2 hours, and up to 5 days before baking. This chilling step is crucial, as it helps the cookies maintain their shape while baking.
- When you’re ready to bake, preheat your oven to 350°F (175°C). Line 2 baking sheets with Silpat Non-Stick Baking Mats, parchment paper, or spray with cooking spray. Make sure the baking sheets are prepared as this will help prevent sticking.
- Now, arrange the chilled dough mounds on the prepared baking sheets, spaced about 2 inches apart. I usually bake about 8 mounds per sheet to ensure even baking. It’s important not to crowd the cookies, as they will spread while baking.
- Bake in your preheated oven for 9 to 10 minutes. Look for the edges to be set and the tops to be barely set, even if they’re slightly underbaked in the center. Cookies may not appear fully done, but they will firm up as they cool. Be careful not to overbake, as this can result in dry cookies.
- Once baked, allow the cookies to cool on the baking sheets for about 5 minutes. This allows them to firm up slightly before transferring them to a wire rack to finish cooling. The cookies will continue to set as they cool, giving you perfectly soft and chewy treats.
Notes
- Storage: Store cookies airtight at room temperature for up to 1 week, or in the freezer for up to 3 months.
- Freezing: You can freeze unbaked cookie dough in an airtight container for up to 3 months. Just scoop the dough mounds, freeze them, and bake them fresh whenever you crave cookies!
- Pairing: These cookies are delicious with a glass of milk or a warm cup of coffee. They also make a great addition to any dessert platter!
- Variations: Feel free to mix in different types of chips, such as chocolate or peanut butter, for a fun twist on the classic recipe.
- Serving: These cookies are great for parties, snack time, or lunch boxes. They’re always a hit with both kids and adults!