Easter Deviled Eggs
Every spring, as the days grow warmer and the flowers begin to bloom, I find myself eagerly anticipating the arrival of Easter. One of my favorite traditions is preparing Easter Deviled Eggs. These delightful little treats are not only a tasty snack but also a wonderful way to get creative in the kitchen. With their bright colors and fun designs, they bring joy to any gathering, especially during holidays. This year, I decided to step it up a notch by transforming simple deviled eggs into adorable little chick faces. The excitement of crafting these cuties and sharing them with family and friends makes the effort worthwhile. Each bite is a creamy explosion of flavors that remind me of the warmth of the season.
Recipe Snapshot
40 mins
30 mins
10 mins
Medium
86 kcal
5 g
Keto, Paleo, Whole30
7 g
Large Pot, Mixing Bowl, Chef’s Knife, Peeler, Wooden Spoon
Why This Easter Deviled Eggs Is a Winner
They’re Visually Appealing
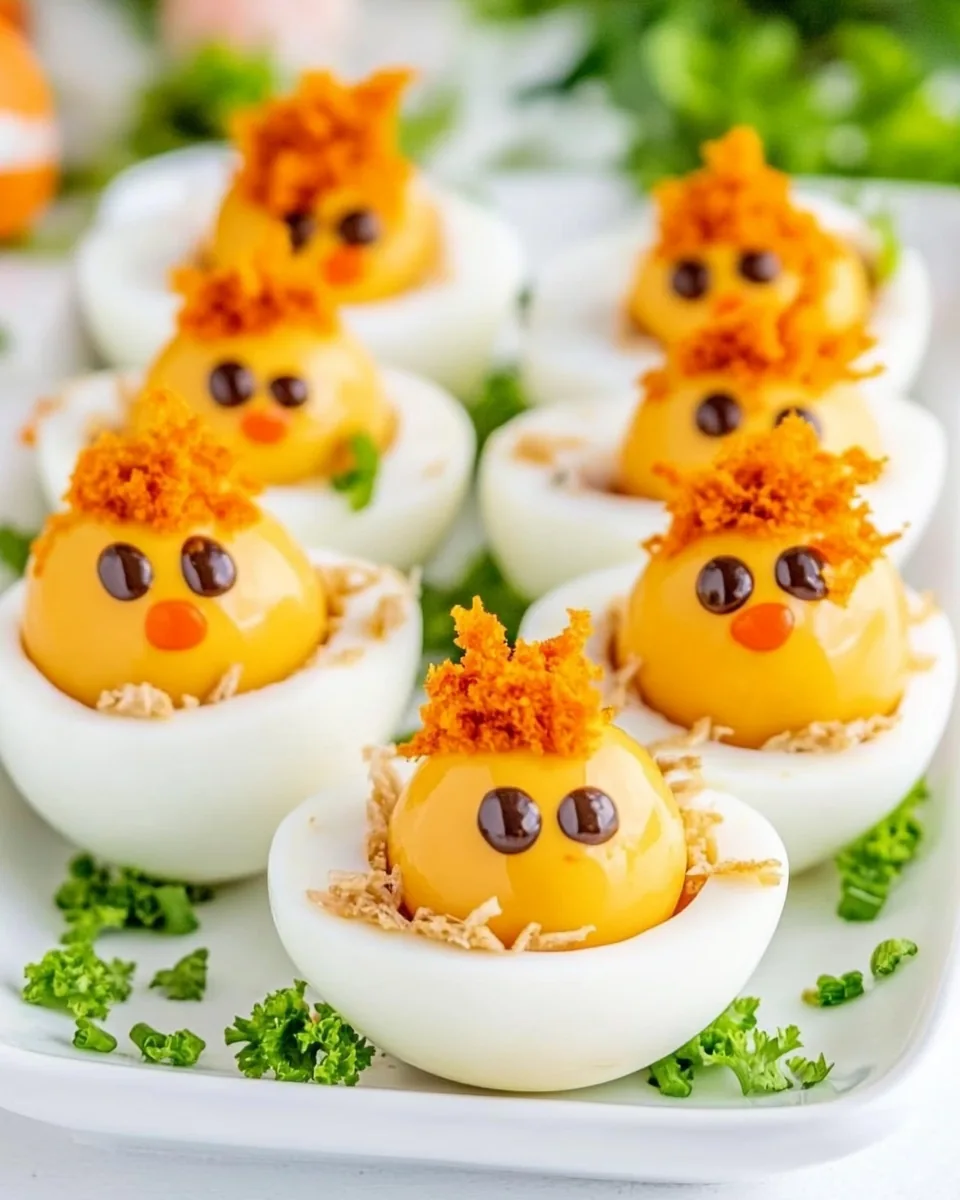
The first thing that stands out about Easter Deviled Eggs is their whimsical appearance. Who wouldn’t be charmed by a platter of tiny chick-themed eggs? They not only taste great but also serve as a centerpiece on the table, sparking conversations and smiles. When I bring these out during gatherings, the kids and adults alike can’t resist taking photos before even having a bite!
Simple Yet Versatile
While the traditional deviled egg filling is delicious, the beauty of Easter Deviled Eggs lies in their versatility. You can easily customize the filling to suit your taste. Whether you prefer a tangy twist with a touch of mustard or a richer flavor with increased mayonnaise, the choice is yours. I often experiment by adding different spices or herbs, making each batch unique, which keeps things exciting for my family.
Perfect for Any Occasion
These eggs are not just for Easter celebrations; they are perfect for picnics, potlucks, or any spring gathering. I love making them for casual get-togethers or even family brunches. They are a hit among all ages and can also serve as a light appetizer before a main meal. Plus, they can be made ahead of time, which saves me from last-minute stress!
Fun to Make with Family
One of my favorite aspects of preparing Easter Deviled Eggs is that it’s a fun activity I can share with my children. They love helping out, from peeling the eggs to decorating them with different toppings. It’s a fantastic way to bond as we share laughs and create lasting memories together in the kitchen. Teaching them how to make these little treats is not only rewarding but also instills a sense of pride when they see how much everyone enjoys them.
Deliciously Creamy
The foundation of any great deviled egg is the filling, and with Easter Deviled Eggs, the combination of flavors is simply divine. The creamy texture of the egg yolk mixed with Dijon mustard and light mayonnaise creates a luxurious mouthfeel that everyone loves. The addition of spices like smoked paprika brings a lovely depth of flavor, elevating the dish to something truly special.
It’s a Family Favorite
Finally, what makes Easter Deviled Eggs stand out is how they have become a cherished family tradition. Every year, I make sure to whip up a batch, and it’s always heartwarming to see everyone’s reactions when they take that first bite. The smiles and compliments are all the confirmation I need that these little deviled eggs are a staple in our holiday celebrations.
Everything You Need for Easter Deviled Eggs
Creating delicious Easter Deviled Eggs requires a careful selection of ingredients that complement each other beautifully. The combination of creamy egg yolks and rich mayonnaise forms a delightful filling that’s both smooth and flavorful. Each ingredient plays a vital role, and together they yield a treat that’s not only visually pleasing but also incredibly tasty.
- 12 hard-boiled eggs: The star of the dish, these eggs provide the creamy base for the filling. Make sure they are perfectly cooked for easy peeling and a smooth texture.
- 1/2 teaspoon Dijon mustard: This adds a subtle kick and depth, enhancing the overall flavor without overpowering the eggs.
- 1/3 cup light mayonnaise: Creaminess is key, and this helps create a luscious filling that is easy to pipe.
- 1/4 teaspoon garlic powder: A hint of garlic elevates the taste, providing a savory twist.
- 1 teaspoon smoked paprika: This not only adds flavor but also gives a beautiful color to the filling.
- 2 tablespoons chives, finely sliced: These add freshness and a mild onion flavor, balancing the richness of the filling.
- Salt and pepper: Essential for enhancing all the flavors in the filling.
- 1 carrot: Used for creating the chick’s beak and legs, adding a pop of color and crunch.
- 24 peppercorns: These serve as the eyes for the chicks, completing the adorable look of the eggs.
Putting Together Easter Deviled Eggs
Assembling Easter Deviled Eggs is a simple yet satisfying process that allows for creativity. Follow these steps to create perfect little chick faces that will wow your guests.
Start by peeling your hard-boiled eggs carefully so that the egg whites remain smooth and intact. Rinse them under cool water to remove any shell fragments. This step is crucial for presentation.
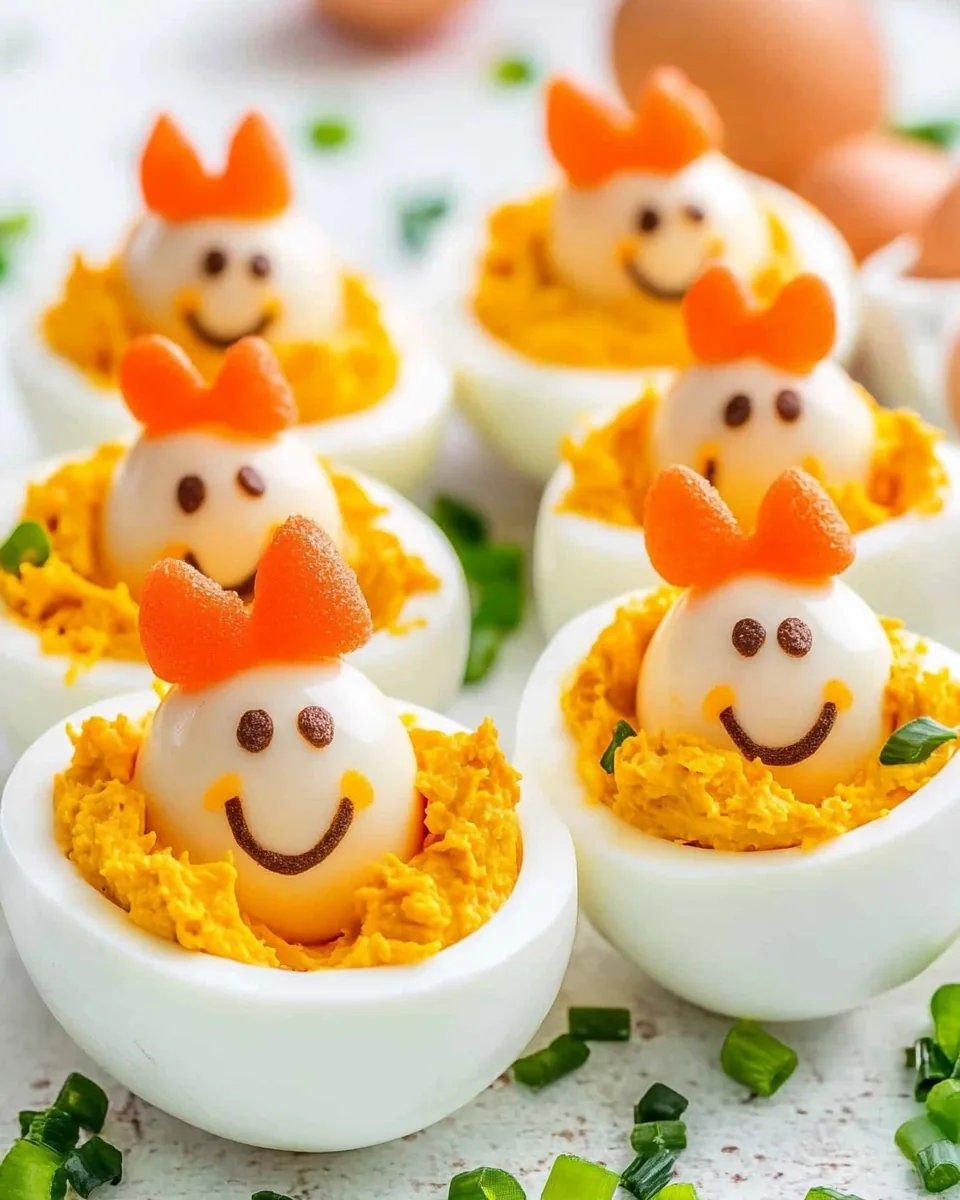
Next, cut a small sliver off the bottom of each egg to create a flat edge. This will help the eggs stand upright without toppling over. Then, slice 1/3 of the top off each egg to form a “hat” for the chick’s head. Set aside the tops for later.
Take a small spoon and gently scoop out the yolks into a mixing bowl. Be careful not to break the egg whites. Once you’ve removed all the yolks, add in the Dijon mustard, light mayonnaise, garlic powder, smoked paprika, chives, and a pinch of salt and pepper. Use a fork to mash everything together until it’s nice and smooth.
Once your filling is smooth, it’s time to fill. You can use a piping bag for this step or a plastic storage bag with one corner snipped off. Fill the bag with your egg yolk mixture, ensuring there are no air bubbles.
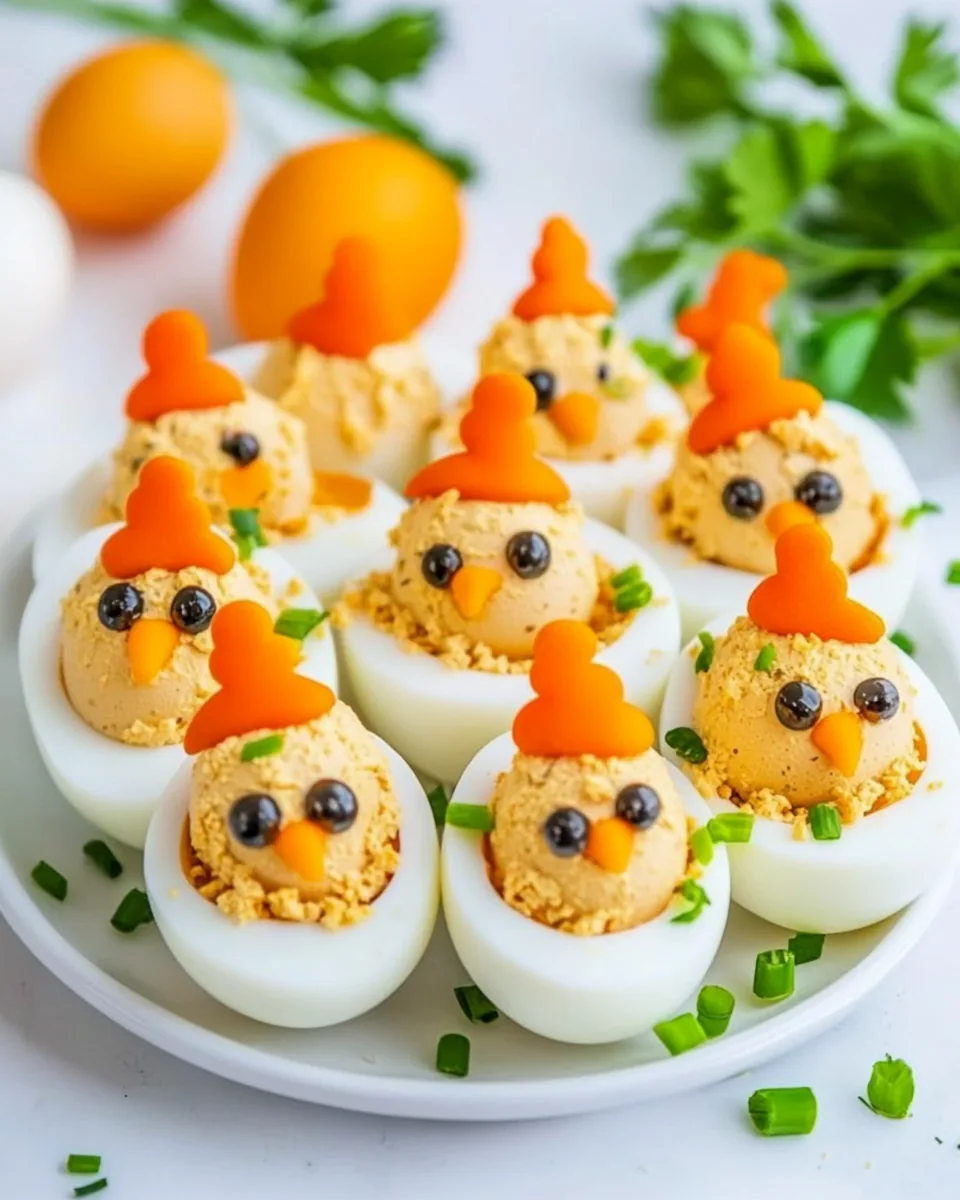
Arrange the egg bottoms on a serving plate, making sure they’re stable. Carefully pipe the yolk mixture into each hollow, adding enough to create a small mound to form the chick’s face.
Take the saved egg tops and place them back onto the filled eggs to resemble little hats for each chick. This adds to the charm of your creation!
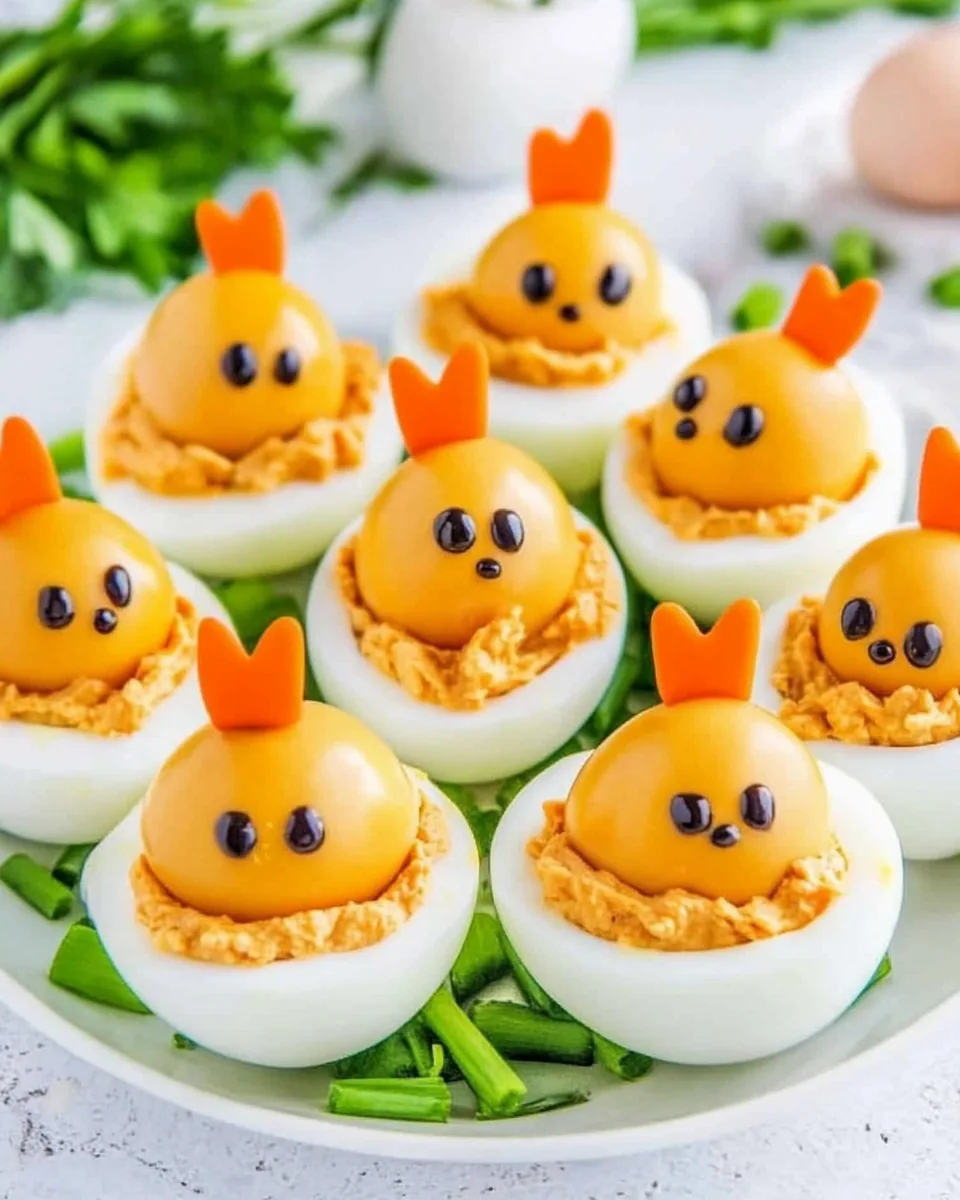
Now for some fun decoration! Use a sharp knife to cut tiny triangle shapes for beaks and L-shaped legs out of your carrot. Place the beaks under the piped yolk and create two small slits at the bottom of each egg to insert the legs.
Lastly, take two peppercorns and press them into the yolk to create the eyes for each chick. Make any adjustments as needed to ensure they look adorable.
Once all eggs are assembled, serve them immediately or refrigerate until ready to serve. They can be made a few hours in advance, making them perfect for gatherings.
Things Worth Knowing
- Perfectly Boiled Eggs: For the best results, ensure your eggs are perfectly boiled. Experiment with cooking times for your ideal texture.
- Flavor Fusion: Allow the filling to chill for a while before piping. This can enhance the flavors as they meld together.
- Creative Decorations: Get creative with your decorations! Use different vegetables or spices to give each egg a unique personality.
- Egg Shell Removal: If you struggle with peeling eggs, try cooling them in ice water after boiling. This can make the process easier.
Expert Tips about Easter Deviled Eggs
Making Easter Deviled Eggs can be a delightful experience, and with the right tips, you can elevate your dish even further. Here are some expert insights to ensure your eggs are a hit.
- Storage: After preparing your Easter Deviled Eggs, store any leftovers in an airtight container in the refrigerator. They can last up to 3 days, but they’re best enjoyed fresh.
- Freezing: It’s not recommended to freeze deviled eggs as the texture of the filling may change. It’s best to enjoy them fresh.
- Pairing: These eggs pair beautifully with a light salad or fruit platter. They’re great for spring picnics or Easter brunches.
- Presentation: Consider using a decorative platter for serving. A colorful display can enhance the visual appeal of your deviled eggs.
- Custom Fillings: Don’t be afraid to experiment with different ingredients in your filling. Try adding herbs, spices, or even avocado for a unique twist.
What to Pair With Easter Deviled Eggs
When serving Easter Deviled Eggs, consider complementary dishes that will enhance the overall dining experience. Here are some ideas:
- Fresh Green Salad: A crisp salad with a light vinaigrette pairs beautifully with the creaminess of the eggs.
- Seasonal Fruits: A platter of fresh fruits like strawberries, melons, and citrus adds a refreshing contrast to the rich eggs.
- Crusty Bread: Serve these eggs alongside slices of crusty bread or rolls. They can be enjoyed as a light lunch or snack.
- Deviled Egg Variations: You can offer different types of deviled eggs alongside your Easter ones, like spicy jalapeño or classic versions for variety.
- Chilled Beverages: Light beverages such as lemonade or iced tea will complement the flavors. Consider offering a selection for guests.
- Occasions: These eggs are perfect for Easter brunch or springtime gatherings. They can also be served at picnics and casual get-togethers.
- Storage Tips: If you have leftovers, store them in the fridge but try to consume them within a few days for the best quality.
FAQ
Conclusion
The beauty of Easter Deviled Eggs lies in their charming presentation and creamy flavor, making them a beloved dish for any spring gathering. I encourage you to try making these delightful treats for your next celebration. They are sure to bring smiles and joy to your table, creating wonderful memories with family and friends.
Easter Deviled Eggs
Ingredients
Equipment
Method
- Start by peeling your hard-boiled eggs carefully so that the egg whites remain smooth and intact. Rinse them under cool water to remove any shell fragments. This step is crucial for presentation.
- Next, cut a small sliver off the bottom of each egg to create a flat edge. This will help the eggs stand upright without toppling over. Then, slice 1/3 of the top off each egg to form a “hat” for the chick's head. Set aside the tops for later.
- Take a small spoon and gently scoop out the yolks into a mixing bowl. Be careful not to break the egg whites. Once you’ve removed all the yolks, add in the Dijon mustard, light mayonnaise, garlic powder, smoked paprika, chives, and a pinch of salt and pepper. Use a fork to mash everything together until it’s nice and smooth.
- Once your filling is smooth, it’s time to fill. You can use a piping bag for this step or a plastic storage bag with one corner snipped off. Fill the bag with your egg yolk mixture, ensuring there are no air bubbles.
- Arrange the egg bottoms on a serving plate, making sure they’re stable. Carefully pipe the yolk mixture into each hollow, adding enough to create a small mound to form the chick's face.
- Take the saved egg tops and place them back onto the filled eggs to resemble little hats for each chick. This adds to the charm of your creation!
- Now for some fun decoration! Use a sharp knife to cut tiny triangle shapes for beaks and L-shaped legs out of your carrot. Place the beaks under the piped yolk and create two small slits at the bottom of each egg to insert the legs.
- Lastly, take two peppercorns and press them into the yolk to create the eyes for each chick. Make any adjustments as needed to ensure they look adorable.
- Once all eggs are assembled, serve them immediately or refrigerate until ready to serve. They can be made a few hours in advance, making them perfect for gatherings.