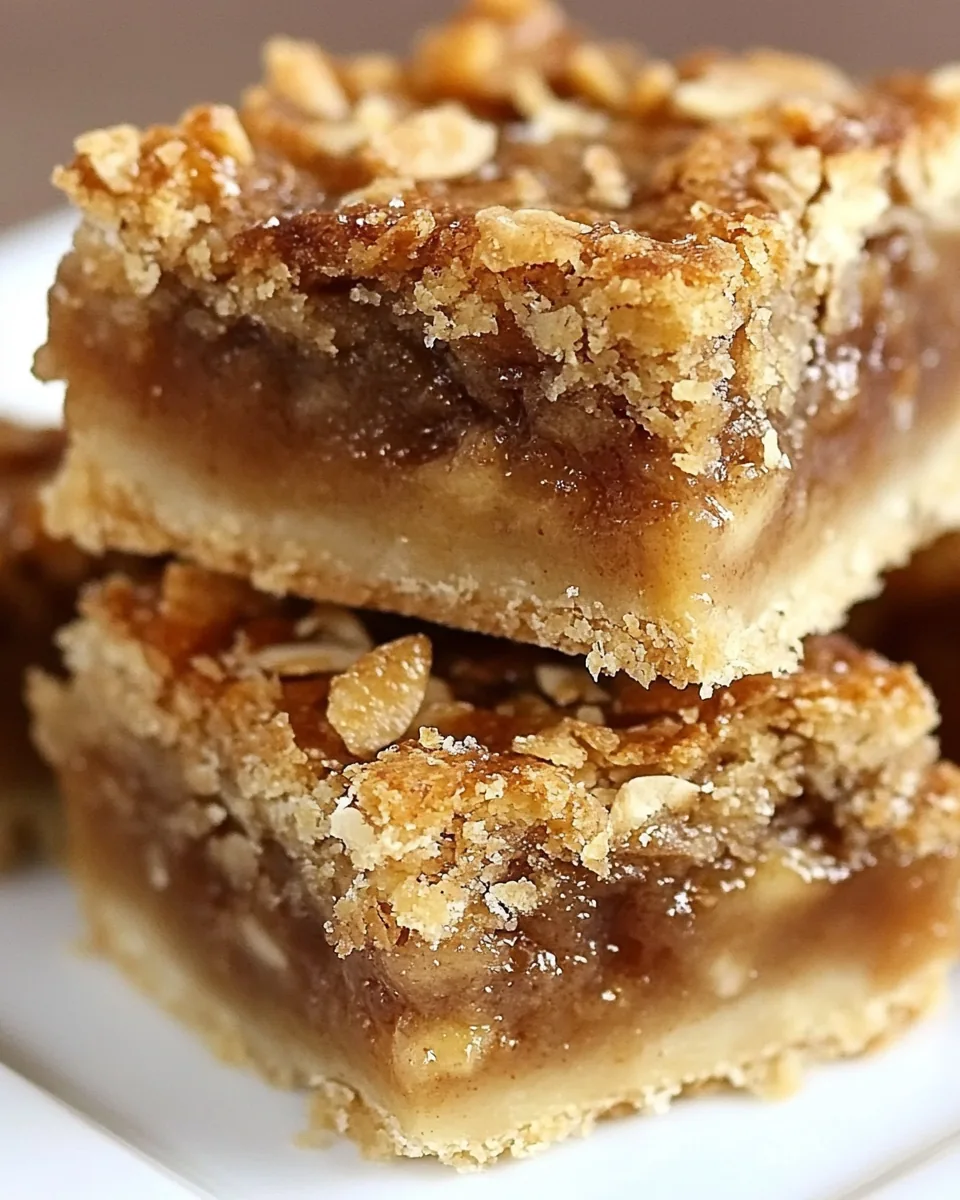
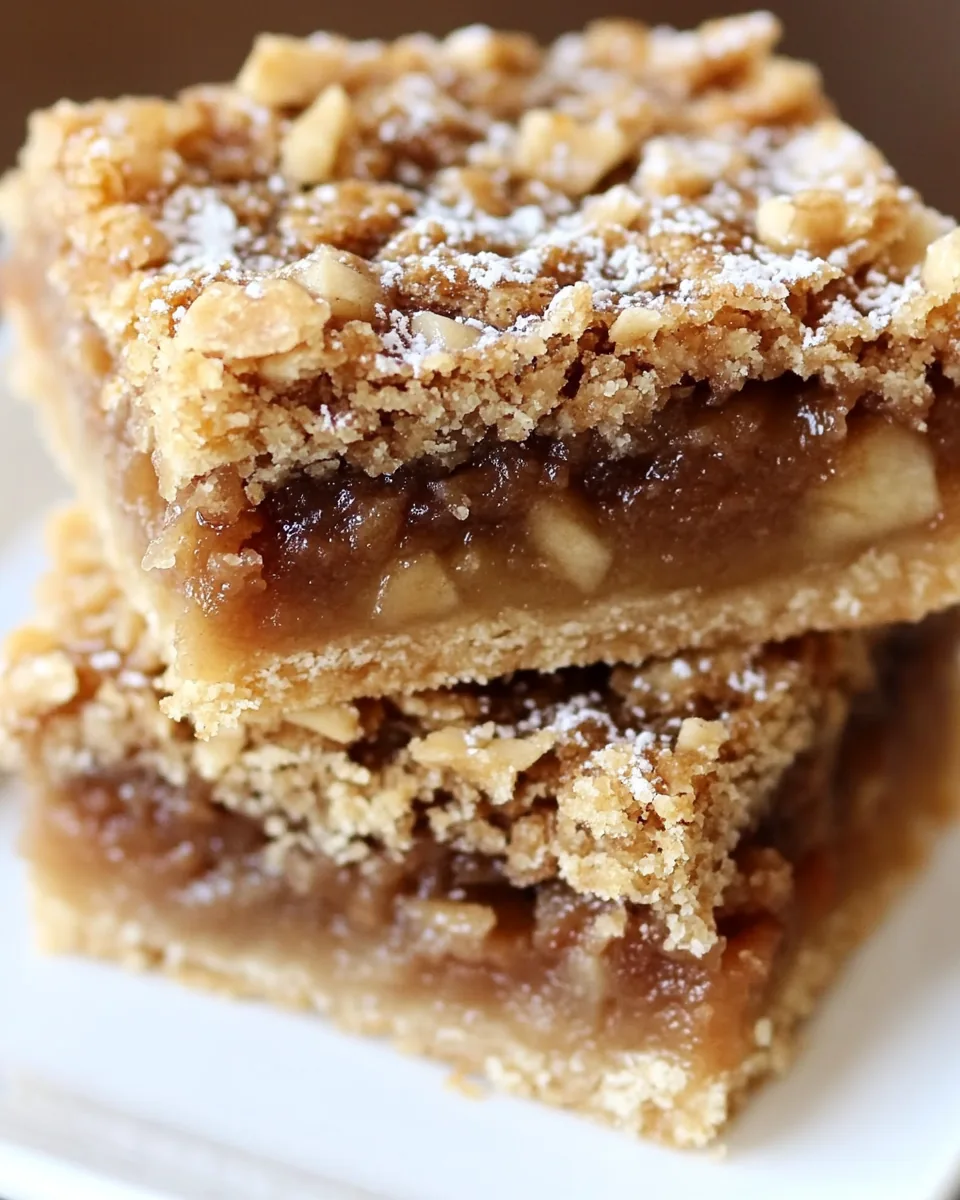
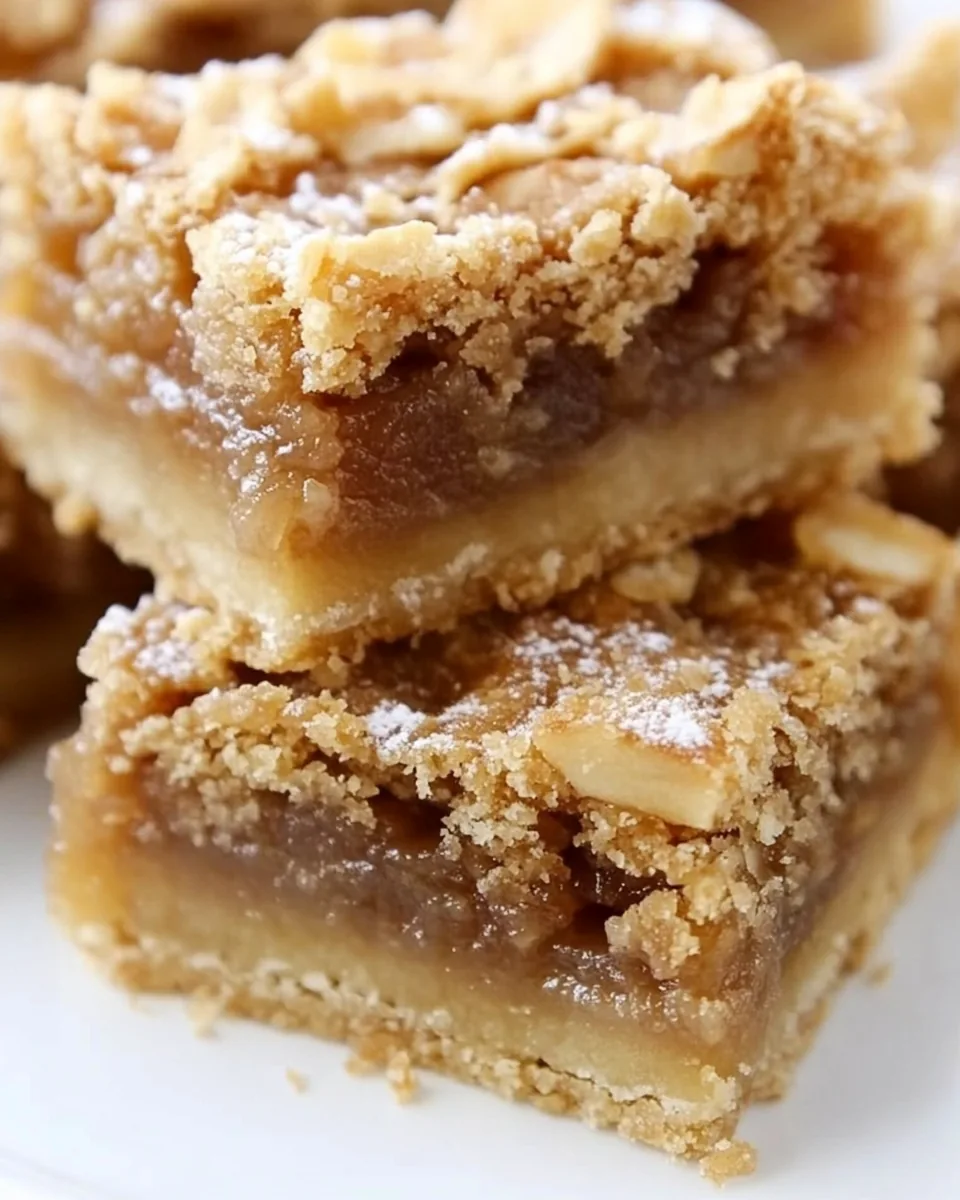
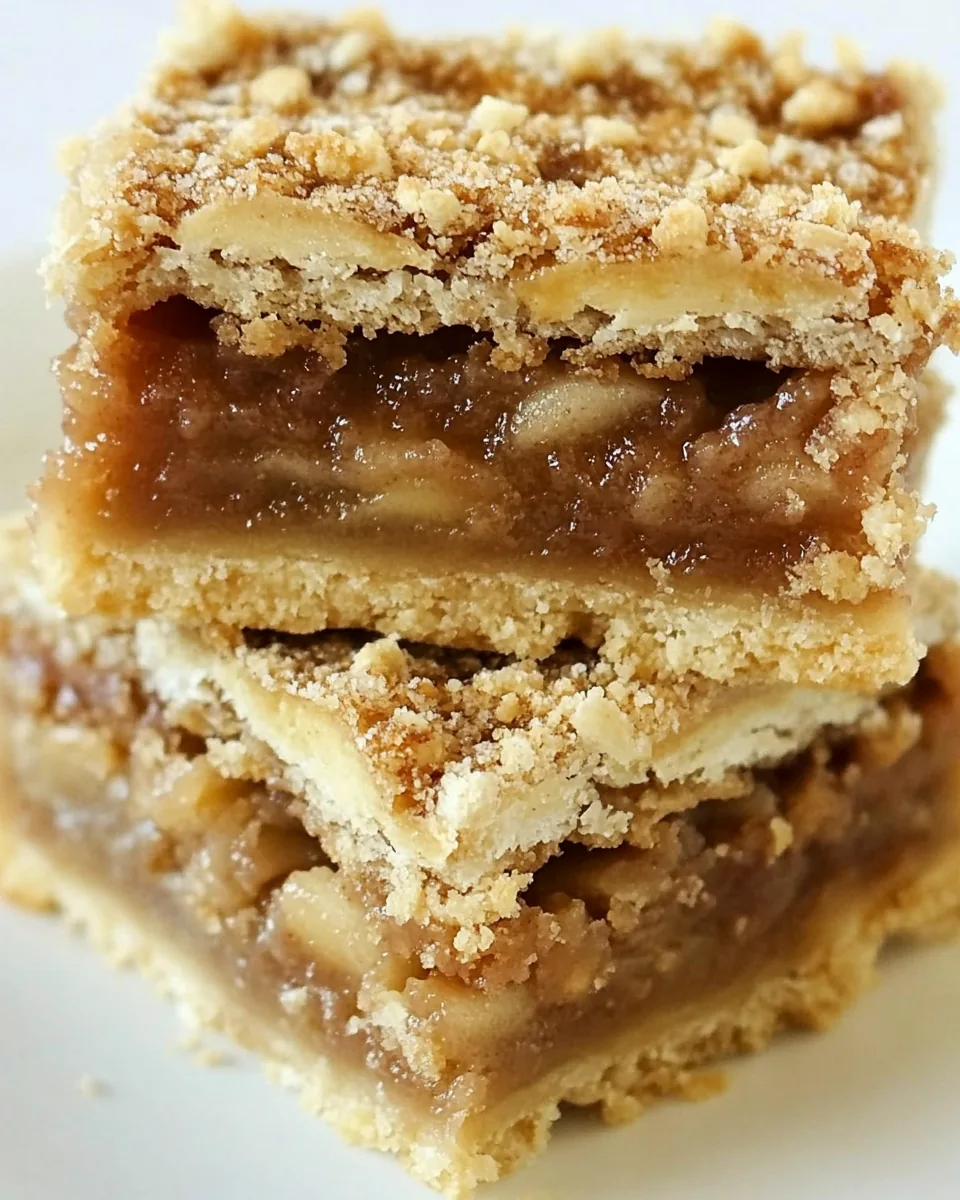
Apple Pie Bars
There’s something heartwarming about the cozy aroma of fresh Apple Pie Bars wafting through the house, isn’t there? I remember the first time I made these delightful treats. It was a chilly fall afternoon, and I found myself craving the comforting flavors of apples, cinnamon, and buttery crust. With a few ingredients and a little time, I transformed my kitchen into a mini bakery. As the bars baked, the sweet scent enveloped me, bringing back fond memories of family gatherings and holiday celebrations. These Apple Pie Bars are not just a dessert; they’re a gateway to nostalgia, a chance to share love and warmth with family and friends.
Recipe Snapshot
1 hr 50 mins
50 mins
60 mins
Medium
250 kcal
2 g
Gluten-Free, Low FODMAP
12 g
Skillet, Oven, Mixing Bowl, Baking Sheet, Chef’s Knife, Peeler, Frying Pan, Wooden Spoon
What’s Great About This Apple Pie Bars
Perfect for Sharing
One of the best reasons to love Apple Pie Bars is their shareability. These bars are the perfect treat to bring to gatherings, whether it’s a cozy family dinner or a festive holiday party. Everyone can grab a piece and indulge in the deliciousness without the fuss of serving slices from a pie. Plus, they’re easy to transport!
Endless Variations
Another fantastic aspect of this recipe is its versatility. You can easily adjust the spices or add in different fruits. Want a little more tang? Throw in some cranberries or a splash of lemon juice. The base can be a canvas for your creativity, allowing you to tailor the Apple Pie Bars to your taste.
Comforting Flavors
There’s something incredibly comforting about biting into a warm Apple Pie Bar and experiencing that gooey apple filling combined with a crumbly topping. The flavor of cinnamon and nutmeg adds warmth, making them perfect for fall and winter. They remind us of home and family, creating a sense of belonging with every bite.
Easy to Make
If you’re looking for a dessert that’s easy yet impressive, look no further. The Apple Pie Bars come together with minimal effort and produce stunning results. You don’t have to be a seasoned baker to whip these up; a few simple steps and some patience are all you need.
Great for Any Occasion
Whether it’s Thanksgiving or just a regular weekend, these bars are suitable for any occasion. They can be a delightful addition to your dessert table or a sweet treat after dinner. The joy of sharing them with loved ones makes every occasion special.
Perfect for Leftovers
And let’s not forget about leftovers! These Apple Pie Bars keep well, which means you can enjoy them over the next few days. They can also be frozen, so you can savor that homemade goodness whenever a craving strikes.
Essential Ingredients for Apple Pie Bars
When it comes to making Apple Pie Bars, the ingredients are simple yet effective. Each component plays a crucial role in creating that perfect blend of flavors and textures.
- Unsalted butter: A key ingredient that provides richness and flavor.
- Granulated sugar: Sweetens the crust and filling.
- All-purpose flour: The foundation of the crust, giving it structure.
- Ground cinnamon: Adds warmth and a traditional pie flavor.
- Granny Smith apples: Their tartness balances the sweetness beautifully.
- Quick cooking oats: Helps create that delicious crumb topping.
- Light brown sugar: Brings a hint of caramel flavor to the filling.
How to Make Apple Pie Bars
Making Apple Pie Bars is a straightforward process that fills your kitchen with an irresistible aroma. Follow these easy steps to create your own delicious batch.
- Preheat the oven to 375°F. Line a 12-by-17-inch rimmed baking sheet or jelly roll pan with parchment paper. This will ensure your bars don’t stick and makes for easy cleanup.
- Beat the butter with the granulated sugar using an electric mixer at medium speed until light and fluffy, which should take about 2 minutes. This step helps to incorporate air into the mixture, making your crust tender.
- At low speed, add in the all-purpose flour, ground cinnamon, ground nutmeg, and kosher salt until a soft dough forms. The dough should be pliable yet not sticky.
- Press the dough evenly over the bottom of the prepared pan, making sure to cover the sides about half an inch up. This will form your delicious crust.
- Bake the crust in the center of the oven for about 15 minutes, or until it turns golden and is set. Allow it to cool on a rack.
- In a large, deep skillet, melt the butter with the light brown sugar. If you don’t have a large skillet, divide the ingredients between two pans. The idea is to have enough surface area to cook the apples evenly.
- Add the peeled, cored, and thinly sliced Granny Smith apples to the skillet, cooking them over high heat while stirring occasionally, until softened; this should take about 10 minutes. As the apples soften, they will release their juices.
- Stir in ground cinnamon and nutmeg, cooking until the apples are caramelized and very tender. If the mixture seems dry, you can add up to ½ cup of water to the pan to prevent scorching. Let this cool.
- In a separate large bowl, mix together the quick cooking oats, all-purpose flour, light brown sugar, baking soda, and kosher salt. This will be your crumb topping.
- Using your fingers, squeeze the cold butter into the oat mixture, crumbling it together until it resembles coarse meal. This step creates a wonderful texture for your topping.
- Spread the cooled apple filling over the pre-baked crust and then scatter the crumb topping evenly on top, pressing it lightly into an even layer.
- Bake again in the center of the oven for 50 to 60 minutes, or until the topping is golden brown. Be sure to rotate the pan halfway through baking to ensure even cooking.
- After baking, let the bars cool completely on a rack before cutting them into 2-inch squares. This cooling time helps the filling set.
Things Worth Knowing
- Choosing Apples: Opt for tart apples like Granny Smith, as they hold their shape and provide a nice balance to the sweetness.
- Butter Temperature: Make sure your butter is at room temperature for easy creaming with sugar.
- Testing Doneness: Use a toothpick to check if the topping is golden brown and the filling is bubbling slightly.
- Chilling the Dough: If you find the dough too soft to handle, chill it for a bit before pressing it into the pan.
Helpful Hints
Here are some valuable tips to make your Apple Pie Bars even better:
- Storage: Store your leftover bars in an airtight container at room temperature for up to 4 days. They’ll stay delicious!
- Freezing: You can freeze these bars for up to a month. Just make sure to wrap them tightly to avoid freezer burn.
- Variations: Feel free to experiment with different spices or even add nuts for extra crunch.
- Serving Warm: These Apple Pie Bars are delightful when served warm, perhaps with a scoop of vanilla ice cream on top.
- Portion Control: Cut the bars into smaller pieces if you’re serving a crowd, making it easier for everyone to enjoy.
Perfect Matches for Apple Pie Bars
When it comes to serving Apple Pie Bars, the options are endless. Here are some ideas to enhance your dessert experience:
- A scoop of ice cream: Vanilla ice cream pairs beautifully with the warm flavors of the bars. The cold and creamy texture complements the sweet filling perfectly.
- Whipped cream: A dollop of freshly whipped cream adds a light, airy element to the rich bars.
- Seasonal fruits: Fresh fruit, like berries or citrus segments, can provide a refreshing contrast to the sweetness.
- Enjoy with coffee: Pairing these bars with a warm cup of coffee makes for a delightful afternoon treat.
- Picnic friendly: They’re great for picnics or outdoor gatherings, easily packed and served.
- Perfect for holidays: Especially during Thanksgiving, these Apple Pie Bars can take center stage as a delicious dessert option.
FAQ
Conclusion
In conclusion, Apple Pie Bars are a delightful treat that combines the classic flavors of apple pie into an easy-to-make dessert. They not only taste amazing but also bring back fond memories of family gatherings and cozy afternoons. I encourage you to try making these bars yourself and experience the joy they bring. Whether for a special occasion or simply to satisfy a sweet craving, these Apple Pie Bars are sure to impress everyone who tries them.
Apple Pie Bars
Ingredients
Equipment
Method
- Preheat the oven to 375°F. Line a 12-by-17-inch rimmed baking sheet or jelly roll pan with parchment paper.
- With an electric mixer, beat the butter with the sugar at medium speed until light and fluffy, about 2 minutes.
- At low speed, beat in the flour, spices, and salt until a soft dough forms.
- Press the dough over the bottom of the prepared pan and 1/2 inch up the side in an even layer.
- Bake in the center of the oven for about 15 minutes, or until the crust is golden and set. Let cool on a rack.
- In a very large, deep skillet, melt the butter with the brown sugar. If you don't have a large skillet, divide between 2 skillets.
- Add the apples to the skillet and cook over high heat, stirring occasionally, until softened, about 10 minutes.
- Stir in cinnamon and nutmeg. Cook until the apples are caramelized and very tender and the liquid is evaporated, about 10 minutes longer.
- Let cool.
- In a large bowl, mix the oats with the flour, brown sugar, cinnamon, baking soda, and salt.
- Using fingers (wash your hands and take off your rings first!), squeeze the butter into the oats and sugar and crumble together until the mixture resembles coarse meal.
- Spread the apple filling over the crust. Scatter the crumbs on top, pressing them lightly into an even layer.
- Bake in the center of the oven for 50 to 60 minutes, or until the topping is golden.
- Let cool completely on a rack before cutting into 2-inch bars.
Notes
- Tip 1: For this recipe, the 12x17-inch rimmed baking sheet (half sheet pan) is easiest to use. It fits perfectly in this pan.
- Tip 2: This recipe makes a large quantity. Make sure you have lots of people to feed.
- Tip 3: The bars can be stored in an airtight container at room temperature for 4 days or frozen for up to a month.