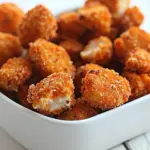
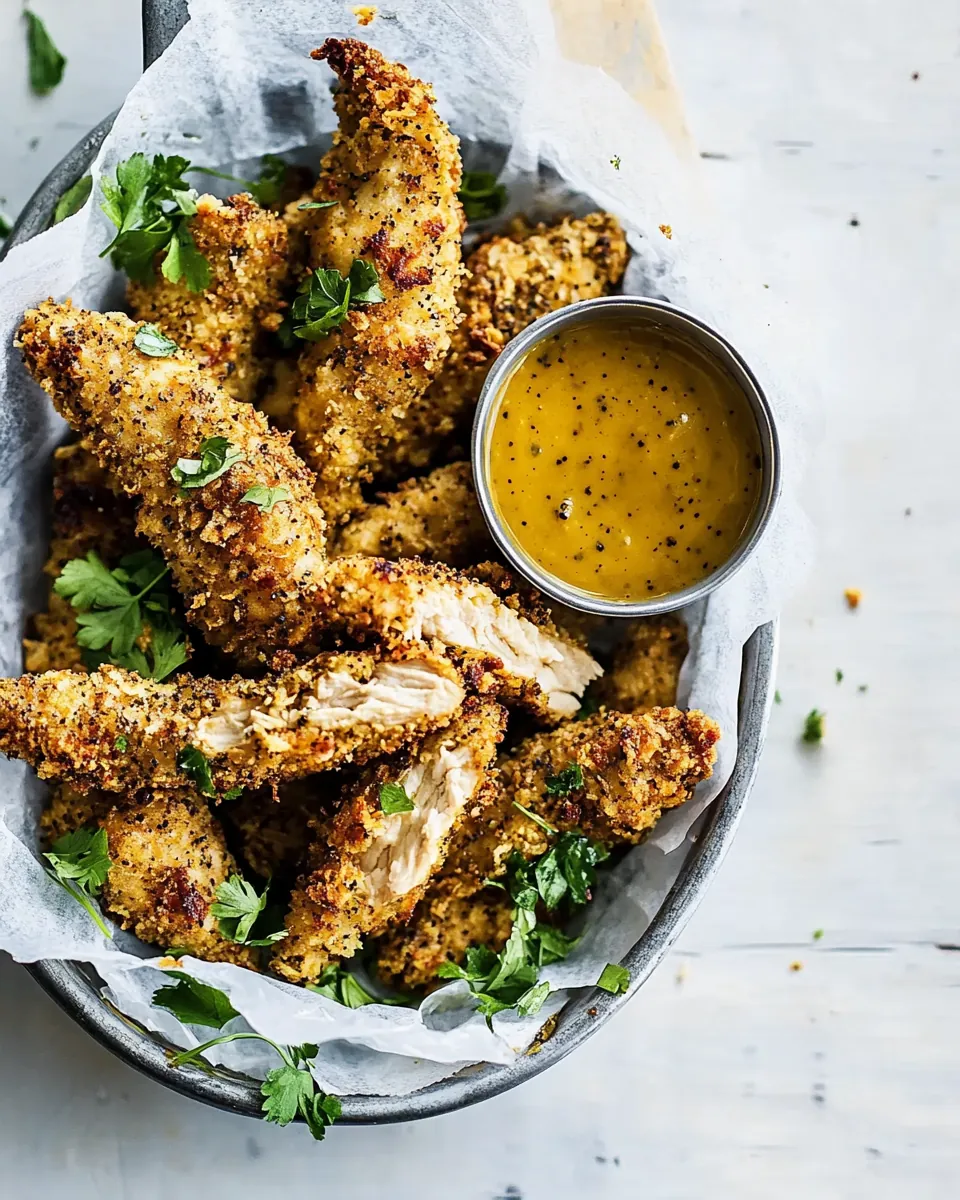
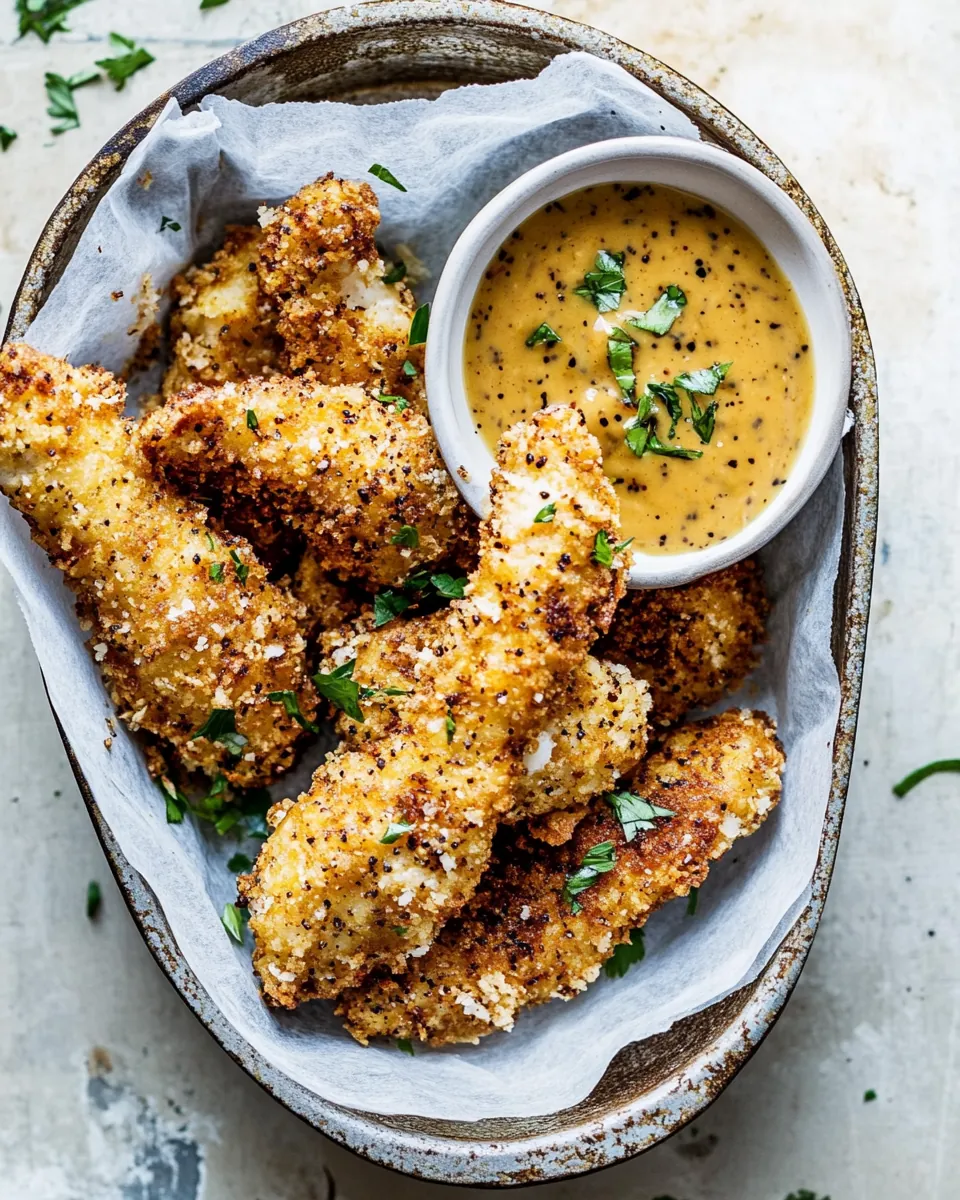
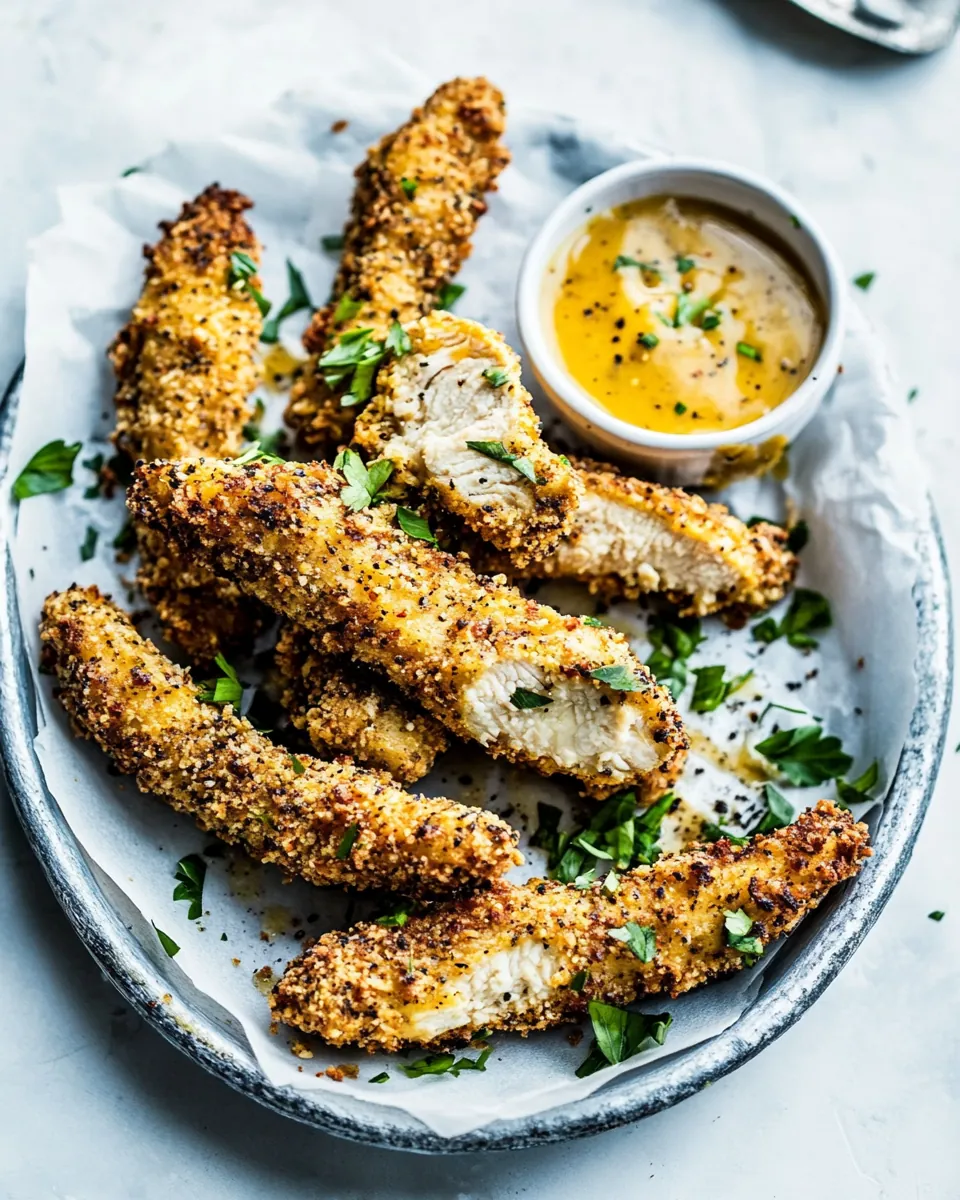
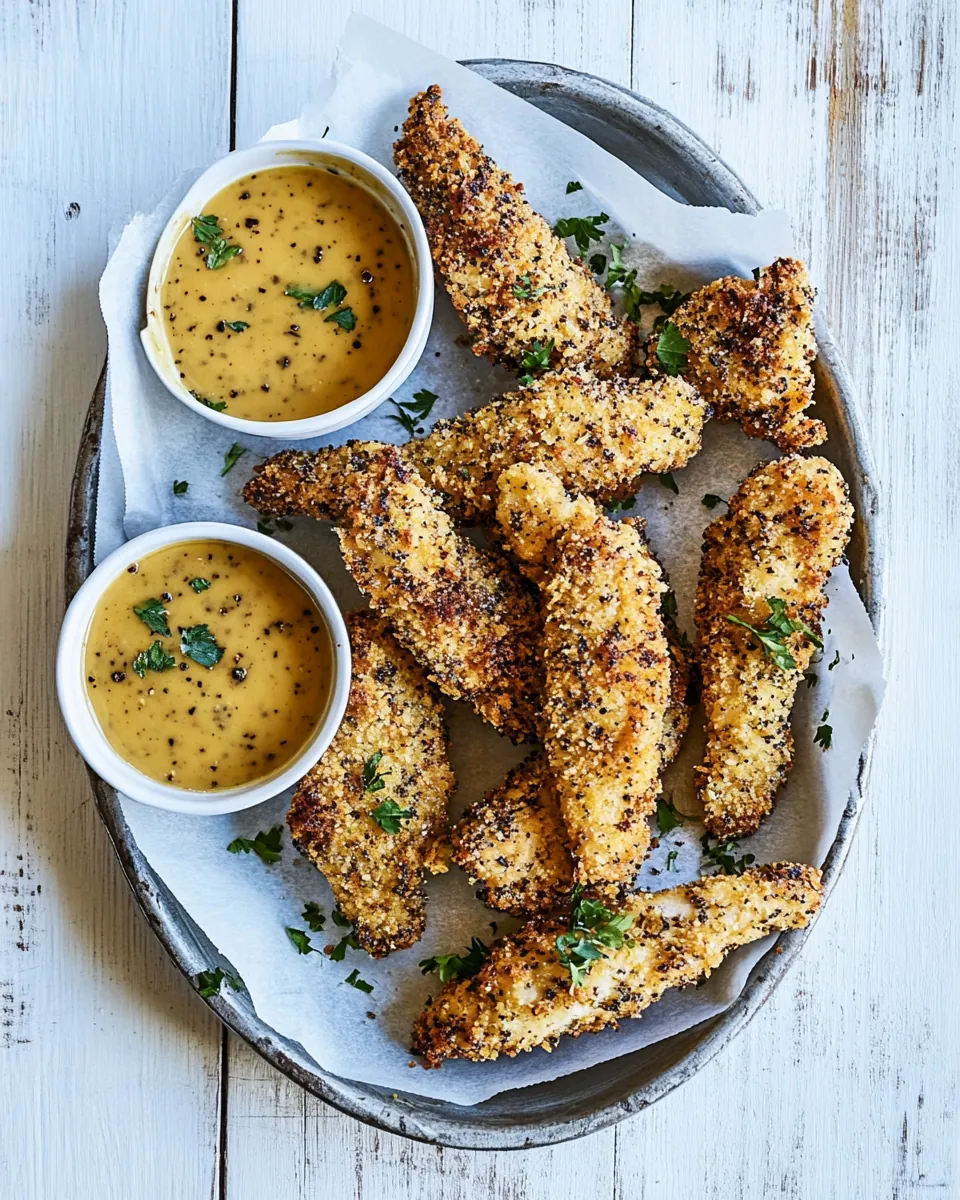
Baked Black Pepper Ranch Chicken Fingers
There’s something truly magical about the crunch of chicken fingers, especially when they’re draped in the tantalizing flavors of ranch and black pepper. When I first came across the recipe for Baked Black Pepper Ranch Chicken Fingers, I couldn’t help but remember my childhood, where chicken fingers were a staple at family gatherings and parties. They were always a hit, and I knew I had to recreate that experience with a twist. This dish combines tender chicken tenders with a crispy coating that’s bursting with flavor, perfect for dipping in honey mustard. As I made these, the aroma filled my kitchen, drawing everyone in. It’s a dish that evokes nostalgia, yet feels fresh and inviting.
Recipe Snapshot
40 mins
20 mins
20 mins
Medium
350 kcal
25 g
Standard
10 g
Wooden Spoon, Frying Pan, Whisk, Oven, Chef’s Knife, Baking Sheet
Why Try This Baked Black Pepper Ranch Chicken Fingers
Deliciously Healthy
Unlike traditional fried chicken fingers, these are baked, making them a healthier option without sacrificing flavor. You won’t believe how crispy they turn out!
Perfect for Any Occasion
Whether it’s a casual weeknight dinner or a fun gathering with friends, Baked Black Pepper Ranch Chicken Fingers are sure to be a hit. They’re incredibly versatile and can be enjoyed any time of the year.
Easy to Prepare
I love how simple this recipe is. With just a few ingredients, you can create a mouthwatering dish that feels gourmet. It’s perfect for beginner cooks as well!
Flavorful Dipping Sauce
The honey mustard sauce is the star of the show. Sweet and tangy, it perfectly complements the savory chicken fingers. You can easily make it in just a few minutes!
Kid-Friendly
Kids love chicken fingers, and this recipe is sure to please even the pickiest eaters. Plus, you can get them involved in the preparation, making it a fun family activity.
Meal Prep Friendly
These chicken fingers can be made ahead of time and frozen, making them a great option for meal prep. Just bake them straight from the freezer when you’re ready to enjoy!
What You’ll Need for Baked Black Pepper Ranch Chicken Fingers
For this recipe, you’ll want to gather ingredients that not only taste great but work harmoniously together. The key players in this dish are the chicken tenders, which are lean and versatile, and the corn flakes, which provide that irresistible crunch. The buttermilk helps tenderize the chicken while adding moisture, and the array of spices, including dried dill and cayenne pepper, elevate the flavor profile beautifully. Together, these ingredients create a dish that’s perfect for any meal!
- 2 pounds boneless chicken tenders: The star ingredient that offers lean protein and tenderness.
- 1 cup buttermilk: This adds moisture and helps tenderize the chicken.
- 2 cups finely crushed corn flakes: Provides a crunchy coating that makes each bite delightful.
- 2 tablespoons whole wheat or all-purpose flour: Helps the coating stick to the chicken.
- 1 tablespoon dried chives: Adds a mild onion flavor that enhances the overall taste.
- 1 tablespoon dried parsley: Contributes freshness and a pop of color.
- 2 teaspoons dried dill: A unique flavor that pairs well with the ranch theme.
- 1 teaspoon each garlic and onion powder: Essential for depth of flavor.
- 1 teaspoon cayenne pepper: Adds a hint of heat; adjust to your taste.
- 1 teaspoon kosher salt and black pepper: Seasoning is key to bringing out flavors.
- Extra virgin olive oil: For brushing the chicken before baking.
- Chopped fresh chives or parsley: For garnish, adding brightness.
- 1/4 cup dijon mustard: For the dipping sauce, providing a tangy kick.
- 1/4 cup honey: Sweetness that balances the mustard.
- 1/4 cup extra virgin olive oil: Another layer of richness in the sauce.
- Juice of 1/2 a lemon: Brightens the sauce and adds freshness.
- 1/4 teaspoon cayenne pepper: Additional spice for the sauce, if desired.
- Kosher salt and black pepper: For seasoning the sauce.
Instructions for Baked Black Pepper Ranch Chicken Fingers
Making Baked Black Pepper Ranch Chicken Fingers is straightforward, and I love how quickly it comes together. The key is to prep your ingredients beforehand, so everything is at your fingertips. Follow these steps to create a delicious chicken dish that everyone will adore.
- Add the chicken to a gallon-size zip-top bag and pour the buttermilk over the chicken. Toss well to coat the chicken evenly. This step is crucial for ensuring the chicken stays tender and flavorful.
- Preheat your oven to 425 degrees F. Line a baking sheet with parchment paper, which helps prevent sticking and makes for easy cleanup.
- In a medium-sized bowl, combine the finely crushed corn flakes, flour, parsley, chives, dill, garlic powder, onion powder, cayenne pepper, and a pinch of pepper. Stir well to combine all the ingredients, creating a flavorful coating for the chicken.
- Remove each piece of chicken from the buttermilk, allowing excess to drip off, and dredge each piece through the corn flake mixture, pressing gently to adhere. This ensures every piece is generously coated with the crunchy mixture.
- Place the coated chicken on the prepared baking sheet, making sure not to overcrowd the pan. If needed, use two baking sheets to ensure proper cooking. Lightly brush or drizzle the chicken with olive oil for added crispiness.
- Transfer the baking sheet to the oven and bake for 15 to 20 minutes, or until the chicken is cooked through and the coating is golden brown. You’ll know the chicken is done when it reaches an internal temperature of 165 degrees F.
- While the chicken is baking, it’s time to make the honey mustard sauce. In a glass jar or bowl, combine the dijon mustard, honey, olive oil, and lemon juice. Shake or whisk until smooth and creamy. Taste and add a pinch of cayenne pepper and salt if desired.
- Once the chicken is ready, remove it from the oven and let it cool slightly. Serve the chicken topped with flaky salt, fresh chives, and the honey mustard sauce for dipping. Enjoy every crunchy, flavorful bite!
Things Worth Knowing
- Oven Temperature: Make sure your oven is fully preheated to ensure even cooking. This helps the coating become perfectly crispy.
- Coating Technique: Pressing the crumbs onto the chicken is essential; it helps the coating stick well during baking.
- Freezing Option: You can freeze the breaded chicken fingers before baking. Just bake them directly from the freezer, adding a few extra minutes to the cooking time.
- Baking Sheet Care: Parchment paper not only prevents sticking but also helps in achieving a crispier texture.
- Adjusting Seasoning: Feel free to adapt the spices used. If you like it spicier, increase the cayenne pepper or add more seasoning to the coating.
Expert Tips about Baked Black Pepper Ranch Chicken Fingers
When it comes to perfecting your Baked Black Pepper Ranch Chicken Fingers, a few expert tips can make all the difference. Here are some insights to elevate your cooking game.
- Storage: Allow any leftovers to cool completely before storing them in an airtight container in the refrigerator. They can last up to three days, but they’re best enjoyed fresh.
- Freezing: If you want to make a large batch, freeze the cooked chicken fingers in a single layer on a baking sheet. Once frozen, transfer them to a freezer bag. They can be reheated straight from frozen!
- Pairing: These chicken fingers pair wonderfully with a fresh salad, steamed veggies, or your choice of dipping sauces. Try serving them with sweet potato fries for a delightful combination.
- Flavor Variations: Experiment with different spices or add shredded cheese to the coating for a cheesy twist. You can also try adding a touch of barbecue sauce to the buttermilk for a smoky flavor.
- Cooking Technique: For an even crispier texture, consider air frying them instead of baking. Adjust the cooking time to ensure they don’t overcook.
How to Enjoy Baked Black Pepper Ranch Chicken Fingers
When it comes to serving your Baked Black Pepper Ranch Chicken Fingers, the possibilities are endless. Here are some ideas to inspire your meal:
- Game Day Snacks: These chicken fingers are the perfect finger food for watching the game. Serve them with an array of dips for a fun snack platter!
- Family Dinners: Pair them with roasted veggies or a hearty salad for a wholesome family meal. The crunchiness of the chicken complements soft sides perfectly.
- Kids’ Parties: Kids will love these at birthday parties or playdates. Set up a DIY dipping station with various sauces for a fun twist!
- Quick Lunches: They make great leftovers. Pack them in a lunchbox along with fresh fruit and a small salad for a balanced meal.
- Seasonal Pairings: In the warmer months, serve with grilled corn on the cob or a refreshing coleslaw. In cooler months, consider sides like mashed potatoes or a comforting soup.
- Storage Tips: For any leftovers, store them properly to maintain their crunch. Avoid microwaving to reheat, as they can become soggy; instead, reheat in the oven.
FAQ
Conclusion
In conclusion, Baked Black Pepper Ranch Chicken Fingers deliver a perfect blend of crunch and flavor, making them an irresistible dish for any occasion. They’re simple enough for a weeknight meal yet special enough to impress guests. I encourage you to give this recipe a try; it’s a wonderful way to bring family and friends together around the table.
Baked Black Pepper Ranch Chicken Fingers
Ingredients
Equipment
Method
- Add the chicken to a gallon size zip top bag. Pour the buttermilk over the chicken. Toss well to coat.
- Preheat the oven to 425 degrees F. Line a baking sheet with parchment.
- Add the corn flake crumbs, flour, parsley, chives, dill, garlic powder, onion powder, cayenne pepper, and a pinch each of pepper to a medium sized bowl. Stir to combine.
- Remove each piece of chicken from the buttermilk, and dredge through the crumbs, pressing gently to adhere. Place on the prepared baking sheet. Repeat until all the chicken has been used. Make sure not to crowd your pan, if necessary use two baking sheets. Lightly brush/drizzle the chicken with olive oil.
- Transfer to the oven and bake for 15-20 minutes or until the chicken is cooked through.
- Meanwhile, make the honey mustard sauce. Combine all ingredients in a glass jar and shake or whisk until smooth and creamy.
- Serve the chicken topped with flaky salt, fresh chives and honey mustard for dipping. Enjoy!
Notes
- Tip 1: Allow any leftovers to cool completely before storing them in an airtight container in the refrigerator. They can last up to three days, but they’re best enjoyed fresh.
- Tip 2: If you want to make a large batch, freeze the cooked chicken fingers in a single layer on a baking sheet. Once frozen, transfer them to a freezer bag. They can be reheated straight from frozen!
- Tip 3: These chicken fingers pair wonderfully with a fresh salad, steamed veggies, or your choice of dipping sauces. Try serving them with sweet potato fries for a delightful combination.
- Tip 4: Experiment with different spices or add shredded cheese to the coating for a cheesy twist. You can also try adding a touch of barbecue sauce to the buttermilk for a smoky flavor.
- Tip 5: For an even crispier texture, consider air frying them instead of baking. Adjust the cooking time to ensure they don’t overcook.