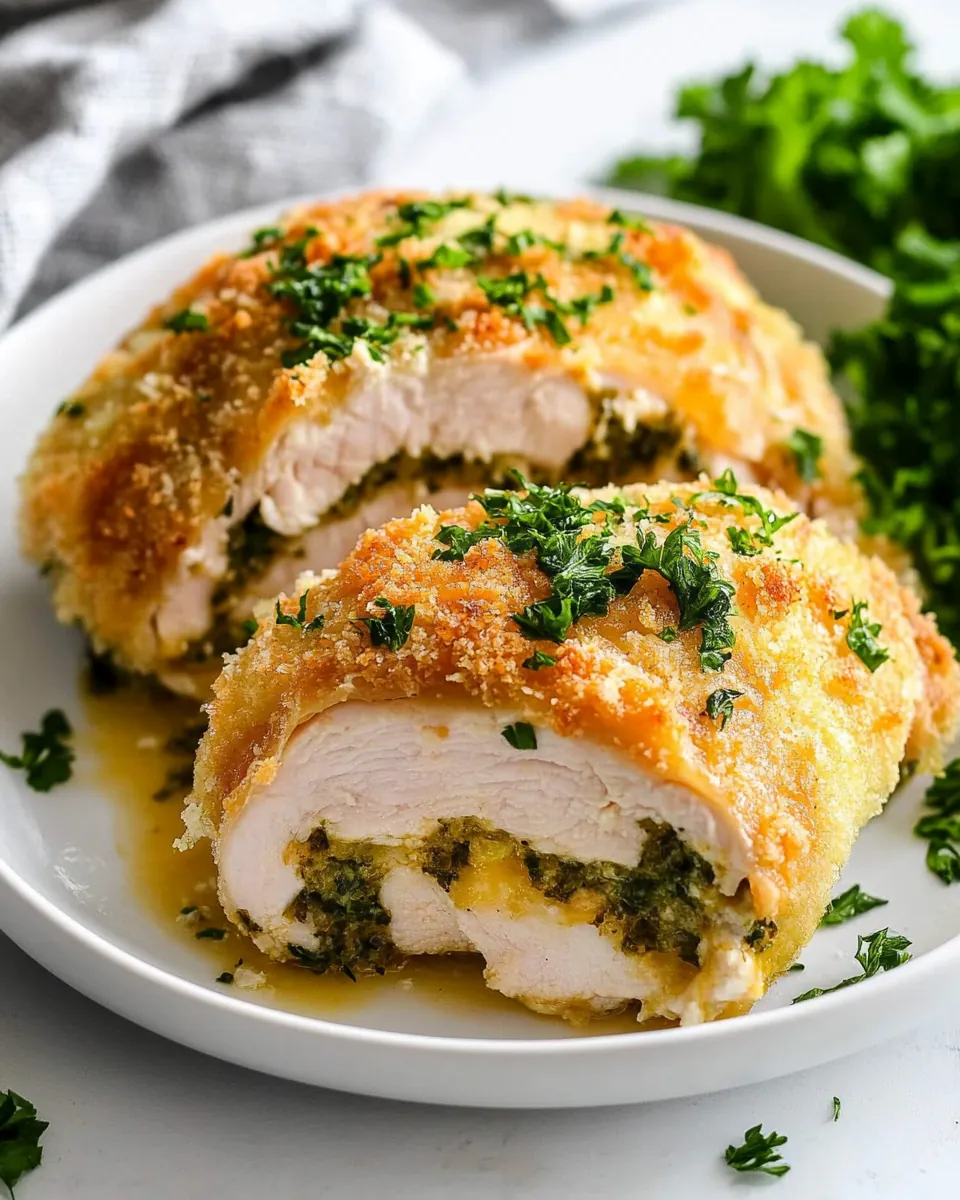
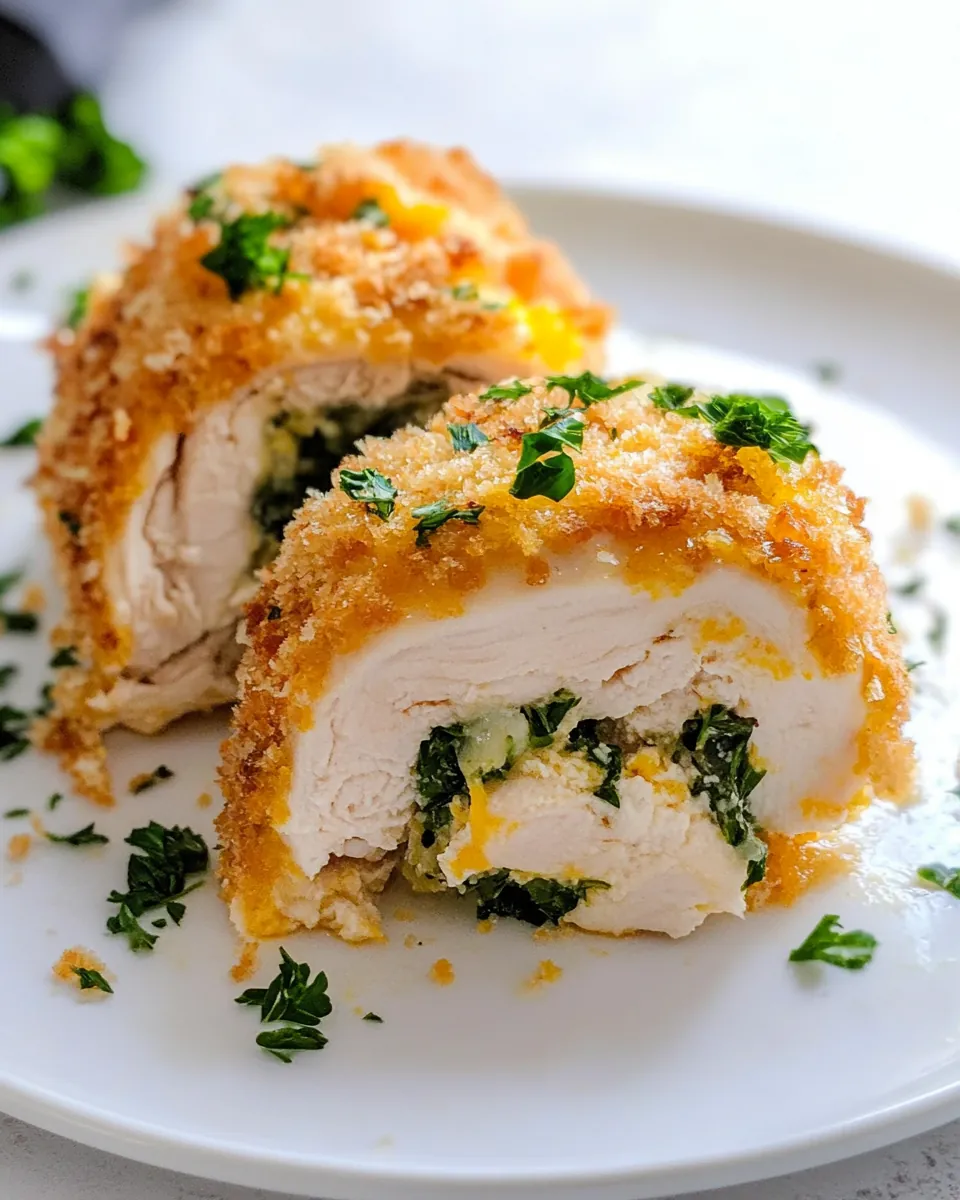
Baked Chicken Kiev
The first time I made Baked Chicken Kiev, I was a bit nervous. It seemed like a dish reserved for special occasions, something that required a certain level of finesse. But let me tell you, once I took that first bite of crispy chicken enveloping a warm, garlicky butter filling, I knew I had found a new favorite. There’s something so comforting about the combination of flavors and textures in this dish. It’s the perfect way to impress guests or simply treat yourself to a cozy dinner at home. Imagine the aroma of chicken baking in your oven, and the anticipation as you slice into your creation, revealing that luscious filling. Trust me, it’s a moment worth savoring!
Recipe Snapshot
1 hr 5 mins
30 mins
35 mins
Medium
400 kcal
30 g
Keto, Gluten-Free
25 g
Oven, Mixing Bowl, Baking Sheet, Frying Pan
The Appeal of This Baked Chicken Kiev
Flavor Explosion
The first thing that makes Baked Chicken Kiev special is the incredible flavor explosion waiting inside. The combination of butter, parsley, garlic, and green onions creates a savory filling that melts in your mouth. Each bite is a delightful mix of crispy and creamy, making it a dish that you’ll crave time and time again.
Easy to Master
You might think that Baked Chicken Kiev is a complicated dish, but I’m here to tell you it’s surprisingly easy to master. With just a bit of preparation, you can create this impressive meal without any fuss. The process is straightforward, and once you get the hang of it, you can whip it up for dinner in no time!
Perfect for Any Occasion
Whether you’re hosting a dinner party or just treating yourself on a weeknight, Baked Chicken Kiev is versatile enough for any occasion. It adds a touch of elegance to your table, making it perfect for special celebrations or even a cozy family meal. It’s a dish that shines no matter the setting.
Family-Friendly
If you have picky eaters at home, Baked Chicken Kiev is a fantastic option. Kids love the crispy texture and the delicious filling, while adults appreciate the classic flavors. You can serve it alongside a simple salad or some roasted vegetables for a wholesome meal that everyone will enjoy.
Customizable
This recipe is also highly customizable! Feel free to add your favorite herbs or spices to the filling. Want a little heat? Toss in some red pepper flakes! Prefer a different herb? Thyme or oregano can add a nice twist. The possibilities are endless!
Ingredient List for Baked Chicken Kiev
When it comes to Baked Chicken Kiev, the ingredients are simple but crucial. Each one plays a vital role in creating the rich, savory flavors that make this dish irresistible. The key players in this recipe include fresh herbs, tender chicken, and creamy butter. Together, they create a delightful medley that transforms a regular weeknight dinner into a gourmet experience.
- ¼ cup unsalted butter (½ stick, room temp) – This is the heart of your filling, bringing richness and a mouthwatering flavor.
- 3 tablespoons minced parsley (divided) – Freshness is key! This herb brightens the dish and adds a pop of color.
- 1 tablespoon minced green onion – Adds a mild onion flavor that complements the other ingredients beautifully.
- 1 tablespoon minced garlic (from 2 cloves) – Garlic gives a punch of flavor, infusing the butter with a savory aroma.
- 4 boneless, skinless chicken breasts (6-8 ounces each) – These are the stars of the dish, providing the perfect wrapping for the delicious filling.
- salt and pepper (to taste) – Essential seasonings that enhance all flavors.
- 1 cup Panko breadcrumbs – These create a crispy coating that makes the chicken irresistible.
- ½ teaspoon ground paprika – Adds a subtle smokiness and beautiful color to the breading.
- ¼ teaspoon ground cayenne pepper – For a hint of heat to balance out the richness.
- ⅓ cup buttermilk – Helps the breadcrumbs adhere and adds moisture.
Baked Chicken Kiev Instructions

Embarking on the journey of making Baked Chicken Kiev is a rewarding process. With these straightforward steps, you’ll soon have a dish that not only looks impressive but tastes divine. Just follow along, and let’s create a masterpiece!
- Begin by preparing the filling. In a small bowl, combine the butter with 1 tablespoon each of minced parsley, green onion, and garlic. Mix until well blended.
- Next, spoon the mixture onto a piece of plastic wrap and form it into a small log. Once you have your log, twist the ends to seal it tightly and freeze for 40 minutes. This helps the butter solidify.
- While your filling is chilling, take your chicken breasts and butterfly each one horizontally. Use a meat mallet to pound each half to a thickness of about ¼ inch. This step ensures even cooking and helps keep the chicken juicy.
- Season the chicken with salt and pepper. This is a crucial step as it enhances the overall flavor of the dish.
- After the butter has firmed up, cut the log into four equal pieces. Place one piece in the center of each chicken breast.
- Now comes the fun part! Tightly roll up each piece of chicken from the long side, tucking the ends under as you go. Secure them with toothpicks to keep everything in place.
- Chill the rolled chicken for an additional 30 minutes. This keeps the filling from leaking out during cooking.
- While the chicken chills, preheat your oven to 425°F. Spray a baking dish with cooking spray and set it aside.
- Prepare your breading station by combining the Panko breadcrumbs, paprika, cayenne, and remaining parsley in a shallow bowl. In another bowl, place the buttermilk.
- Dip each rolled chicken piece into the buttermilk, ensuring it’s fully coated, then roll it in the breadcrumb mixture until well covered.
- Place the breaded chicken in the prepared baking dish, seam side down. Bake uncovered for about 35 to 40 minutes, or until the internal temperature reaches 165°F.
- Once cooked, carefully remove the toothpicks and serve your Baked Chicken Kiev hot, enjoying the melted filling that oozes out with each slice.
Things Worth Knowing
- Pound Evenly: Ensuring the chicken is pounded to an even thickness helps it cook perfectly, preventing dry edges.
- Shortcuts: For a quicker meal, consider using thin-sliced chicken breasts to skip the pounding step.
- Seal Well: Make sure the filling is fully enclosed to avoid any leaking during cooking.
- Chill Time is Key: Don’t skip the chilling step! It helps the filling stay intact and makes for a crispier coating.
- Clean-Up Tips: Line your baking sheet with aluminum foil for easier clean-up if any butter leaks out.
Recipe Tips about Baked Chicken Kiev
Making Baked Chicken Kiev can be an enjoyable experience with the right tips at your disposal. Here are some insights to help you perfect this dish:
- Storage: Leftovers can be stored in an airtight container in the refrigerator for up to three days. To reheat, place them in the oven to maintain crispiness. Avoid the microwave as it can make the chicken soggy.
- Freezing: You can freeze the unbaked, rolled chicken for up to two months. Just ensure you wrap them well in plastic wrap and foil to prevent freezer burn. Let them thaw in the fridge before baking.
- Pairing: Serve Baked Chicken Kiev with sides like creamy mashed potatoes or a fresh green salad to complement the richness of the dish.
- Flavor Variations: Experiment with different herbs and spices in the filling, such as thyme or dill, to customize it to your taste.
- Cooking Method: If you want a healthier version, consider air-frying the chicken instead of baking for a crispy finish with less oil.
- Serving Temperature: Let the chicken rest for a few minutes after baking before slicing. This helps the filling settle and makes for a cleaner cut.
What to Pair With Baked Chicken Kiev
When serving Baked Chicken Kiev, the right accompaniments can elevate your meal. Here are some fantastic options:
- Mashed Potatoes: Creamy mashed potatoes absorb those delicious garlic butter flavors wonderfully.
- Green Salad: A crisp green salad with a tangy vinaigrette balances the richness of the chicken.
- Grilled Vegetables: Roasted or grilled seasonal vegetables provide a healthy contrast to the crispy chicken.
- Rice Pilaf: A fragrant rice pilaf can also be a delightful side, adding a lovely texture to your plate.
- Occasions: Baked Chicken Kiev is perfect for family dinners, special occasions, or even a cozy date night at home.
- Wine Pairing: Consider serving a light white wine, which can enhance the flavors without overpowering them.
FAQ
Conclusion
Baked Chicken Kiev is a dish that beautifully combines flavor and comfort, making it a must-try for any home cook. With its crispy exterior and luscious filling, it’s perfect for impressing guests or enjoying a cozy night in. I encourage you to give this recipe a go; you’ll be delighted by the results and the joy of creating something truly special in your kitchen.

Baked Chicken Kiev
Ingredients
Equipment
Method
- Begin by preparing the filling. In a small bowl, combine the butter with 1 tablespoon each of minced parsley, green onion, and garlic. Mix until well blended.
- Next, spoon the mixture onto a piece of plastic wrap and form it into a small log. Once you have your log, twist the ends to seal it tightly and freeze for 40 minutes. This helps the butter solidify.
- While your filling is chilling, take your chicken breasts and butterfly each one horizontally. Use a meat mallet to pound each half to a thickness of about ¼ inch. This step ensures even cooking and helps keep the chicken juicy.
- Season the chicken with salt and pepper. This is a crucial step as it enhances the overall flavor of the dish.
- After the butter has firmed up, cut the log into four equal pieces. Place one piece in the center of each chicken breast.
- Now comes the fun part! Tightly roll up each piece of chicken from the long side, tucking the ends under as you go. Secure them with toothpicks to keep everything in place.
- Chill the rolled chicken for an additional 30 minutes. This keeps the filling from leaking out during cooking.
- While the chicken chills, preheat your oven to 425°F. Spray a baking dish with cooking spray and set it aside.
- Prepare your breading station by combining the Panko breadcrumbs, paprika, cayenne, and remaining parsley in a shallow bowl. In another bowl, place the buttermilk.
- Dip each rolled chicken piece into the buttermilk, ensuring it's fully coated, then roll it in the breadcrumb mixture until well covered.
- Place the breaded chicken in the prepared baking dish, seam side down. Bake uncovered for about 35 to 40 minutes, or until the internal temperature reaches 165°F.
- Once cooked, carefully remove the toothpicks and serve your Baked Chicken Kiev hot, enjoying the melted filling that oozes out with each slice.
Notes
- Pounding Evenly: Ensuring the chicken is pounded to an even thickness helps it cook perfectly, preventing dry edges.
- Shortcuts: For a quicker meal, consider using thin-sliced chicken breasts to skip the pounding step.
- Seal Well: Make sure the filling is fully enclosed to avoid any leaking during cooking.
- Chill Time is Key: Don't skip the chilling step! It helps the filling stay intact and makes for a crispier coating.
- Clean-Up Tips: Line your baking sheet with aluminum foil for easier clean-up if any butter leaks out.