Baked Teriyaki Chicken Drumsticks
There’s something about the aroma of Baked Teriyaki Chicken Drumsticks wafting through the kitchen that instantly transports me back to my childhood. I remember weekend family gatherings where my mom would whip up her famous teriyaki chicken. Everyone would gather around the dining table, eager for that first bite. The juiciness of the chicken drumsticks paired with the sweet and savory glaze is an experience that’s hard to forget. It’s a dish that brings everyone together, a staple that can be enjoyed year-round. Whether you’re having a casual dinner or entertaining friends, these drumsticks are a surefire hit, and they hold a special place in my heart.
Recipe Snapshot
1 hr 5 mins
10 mins
55 mins
Medium
325 kcal
28 g
Whole30, Gluten-Free, Low FODMAP
18 g
9×13 Baking Pan
What Sets This Baked Teriyaki Chicken Drumsticks Apart
Flavor Explosion
The moment you take a bite of Baked Teriyaki Chicken Drumsticks, your taste buds will embark on a delightful journey. The perfect balance of sweetness from the brown sugar and a hint of heat from the Sriracha creates a complex flavor profile that makes this dish so irresistible.
Juicy and Tender
One of the best parts about using chicken drumsticks is their inherent juiciness. When baked properly, they remain moist and tender, making each bite satisfying. I love how the skin crisps up while the inside stays succulent, offering the perfect contrast.
Simple Ingredients
What’s beautiful about this recipe is its simplicity. You don’t need a long list of fancy ingredients; just staple items like soy sauce, garlic, and ginger come together to create a mouthwatering marinade. These everyday ingredients work in harmony to elevate the chicken to a whole new level.
Versatile and Customizable
This recipe is incredibly versatile. You can easily adjust the marinade to suit your taste. Want it spicier? Add more Sriracha. Prefer a tangier flavor? A splash of rice vinegar can do the trick. The possibilities are endless, making it a fun dish to experiment with.
Perfect for Meal Prep
Preparing Baked Teriyaki Chicken Drumsticks is a breeze, making it ideal for meal prep. You can marinate the chicken overnight and bake it just before serving. This means you can enjoy a delicious home-cooked meal even on the busiest of weeknights.
Family Favorite
Lastly, this dish is a guaranteed crowd-pleaser. There’s something about the sticky glaze that kids and adults alike can’t resist. It’s a great way to introduce a bit of Asian cuisine to your family, all while keeping it familiar and comforting.
Shopping List for Baked Teriyaki Chicken Drumsticks
When it comes to cooking, the ingredients you choose are fundamental to the success of your dish. For Baked Teriyaki Chicken Drumsticks, the combination of savory and sweet ingredients creates a mouthwatering marinade that infuses the chicken with flavor. Key players like soy sauce, ginger, and garlic not only enhance the taste but also add depth and richness. Let’s take a closer look at what you’ll need for this delectable dish.
- 8 bone-in, skin-on chicken drumsticks: These are the star of the dish. Their rich flavor and juicy texture make them perfect for absorbing the teriyaki marinade.
- ¼ cup low-sodium soy sauce: This is the base of our marinade, providing that essential umami flavor.
- ¼ cup water: Helps to dilute the soy sauce and balance flavors.
- 3 tablespoons brown sugar: Adds sweetness and helps caramelize the skin during cooking.
- 2 tablespoons rice vinegar: A splash of acidity to balance the sweetness and enhance the overall flavor.
- 1 tablespoon grated fresh ginger: Offers a warm, spicy note that perfectly complements the chicken.
- 3 cloves minced garlic: Essential for that aromatic flavor that we all love.
- 1 teaspoon sesame oil: Adds a nutty depth to the marinade.
- 1-3 teaspoons Sriracha: For those who like a bit of heat!
- 1 tablespoon cornstarch (mixed with 1 tablespoon water): This is used to thicken the sauce at the end.
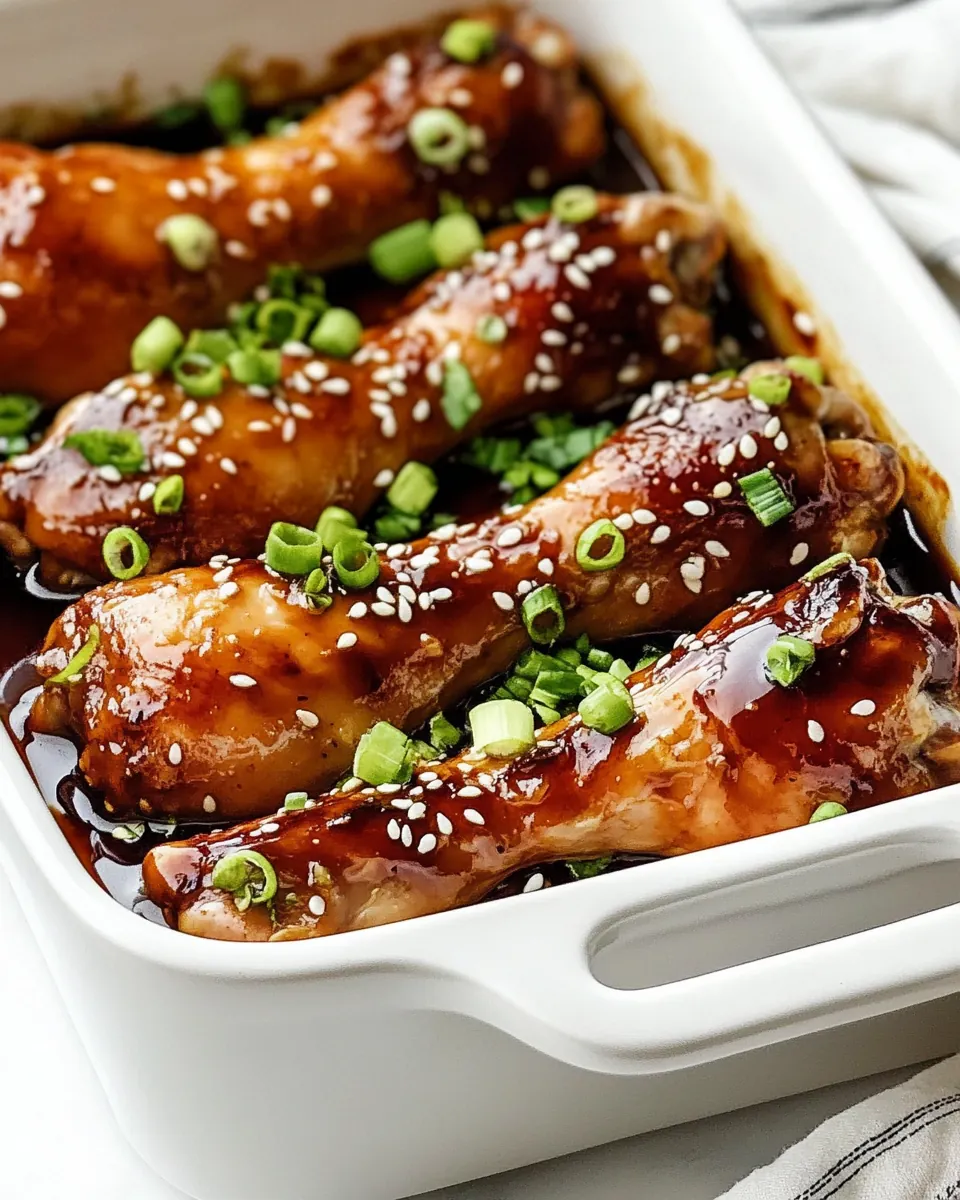
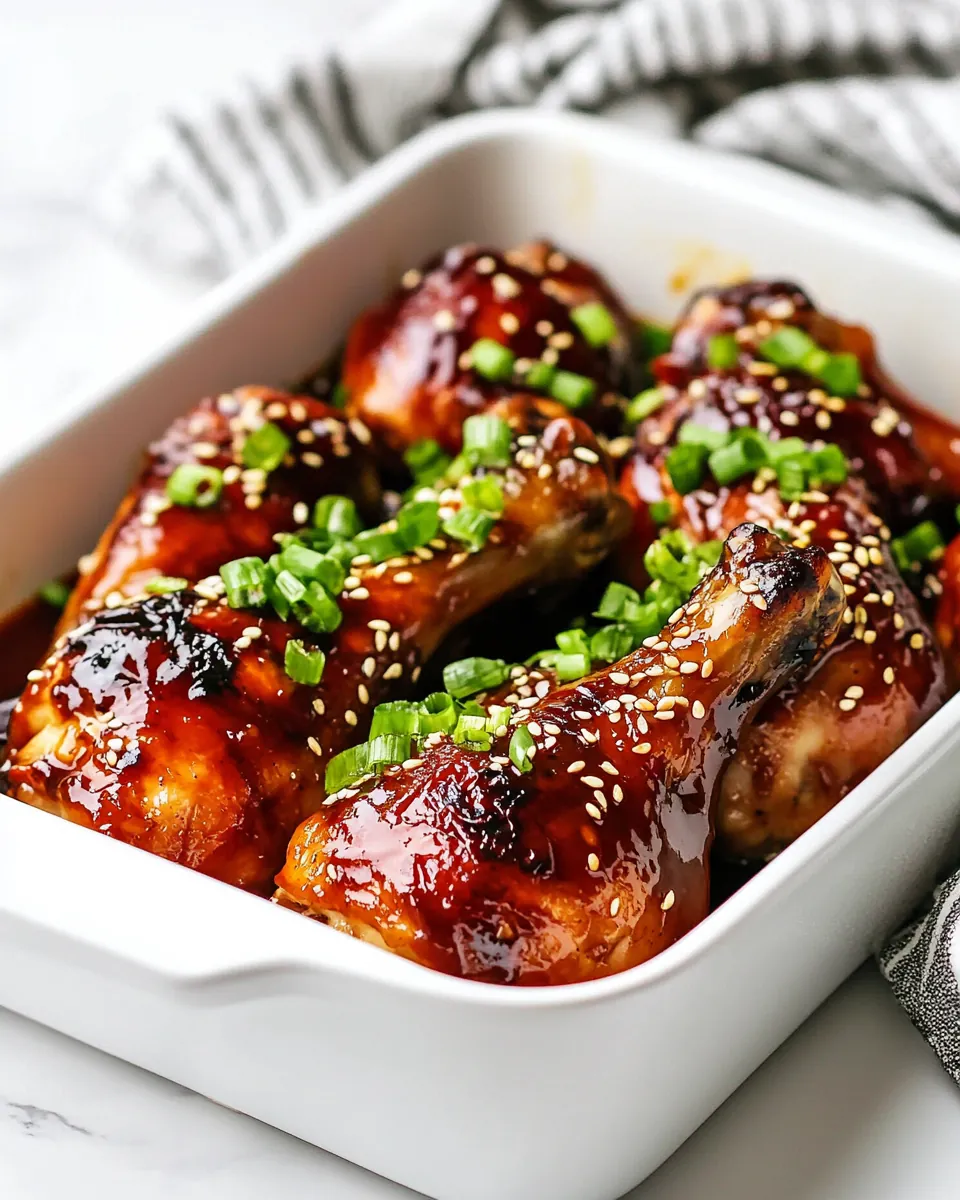
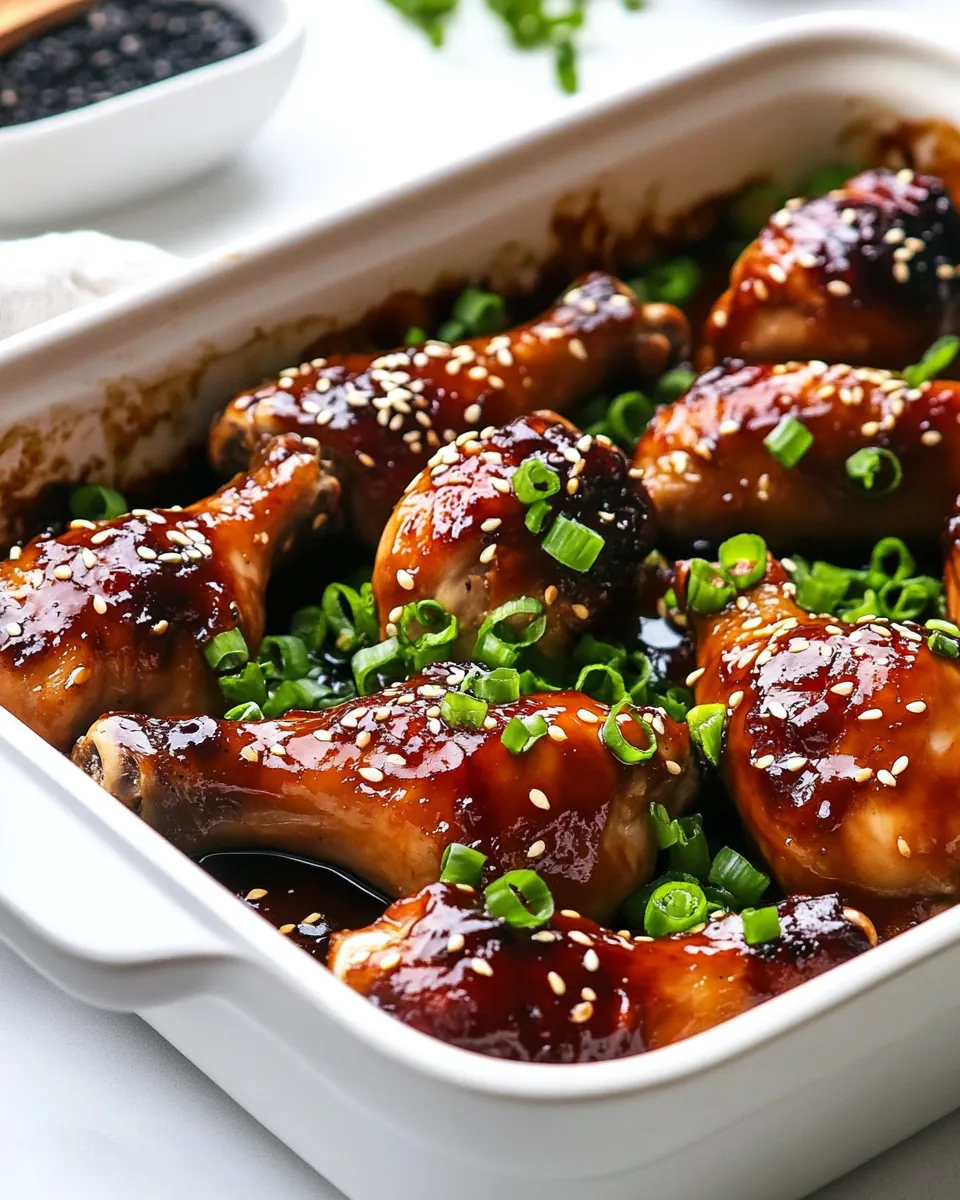
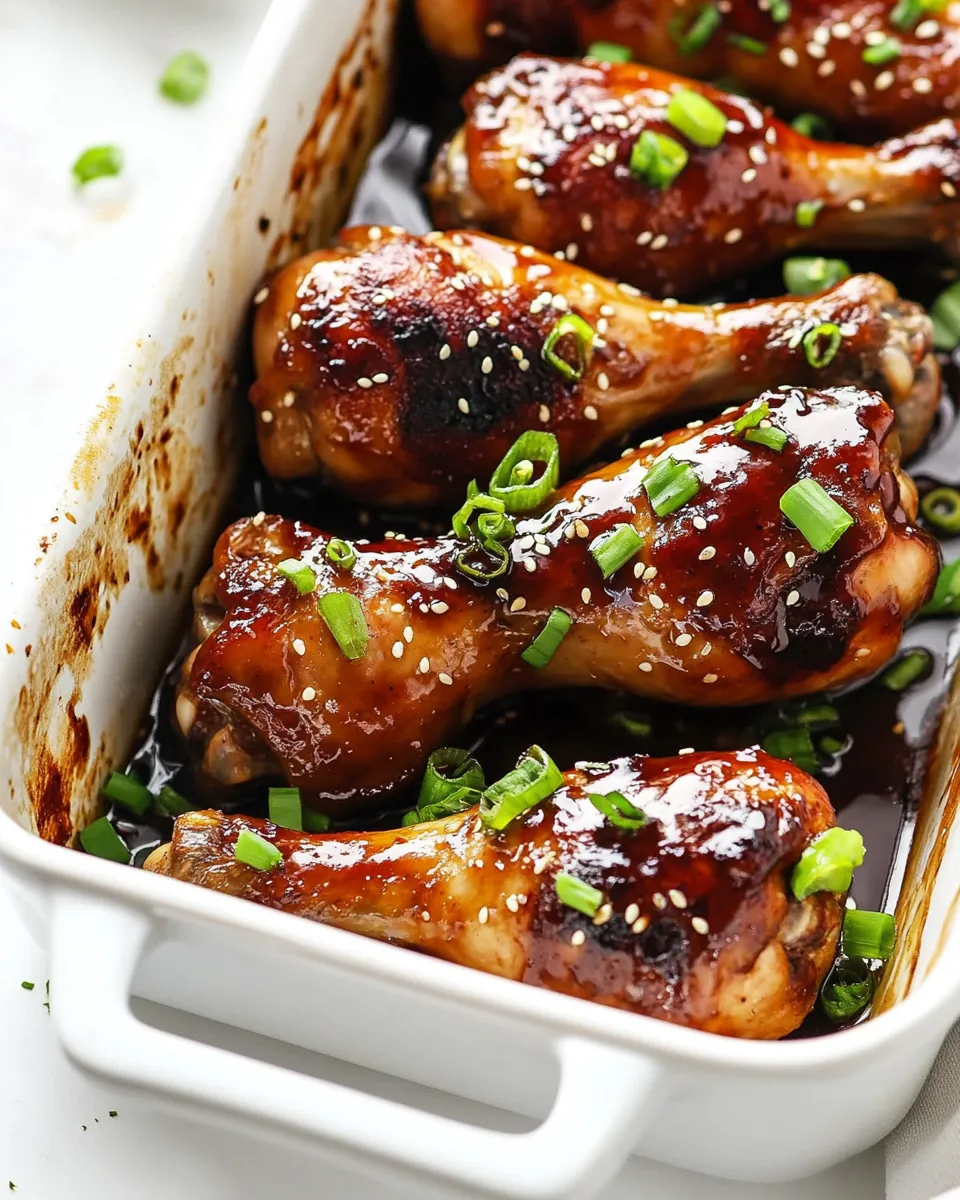
- Sliced green onions: For garnish, adding a fresh, crisp element.
- Sesame seeds: A final touch that adds texture and a nutty flavor.
Putting Together Baked Teriyaki Chicken Drumsticks
Cooking Baked Teriyaki Chicken Drumsticks is a straightforward process that allows the flavors to shine through. Follow these easy steps for a delicious meal that will impress your family and friends. Let’s dive into the cooking!
- Preheat your oven to 425°F (220°C). This high heat will help to crisp up the skin on the chicken drumsticks. Make sure you don’t skip this step; it’s crucial for achieving that golden brown color.
- Next, grab a 9×13-inch baking pan and spray it with nonstick cooking spray. This will prevent the drumsticks from sticking to the pan, making cleanup a breeze.
- Arrange the chicken drumsticks skin side down in the baking dish. You want to make sure they are spaced out, so they cook evenly. Visualize them lined up comfortably, with each piece having its own space.
- In a medium mixing bowl, whisk together the soy sauce, water, brown sugar, rice vinegar, ginger, garlic, sesame oil, and Sriracha. This marinade is where all the magic happens. Take a moment to appreciate the aroma as the ingredients combine.
- Pour the marinade over the arranged drumsticks. Use a brush or your hands to coat them thoroughly, ensuring every piece is enveloped in that delicious sauce.
- Place the baking pan in the preheated oven and bake for 40 to 45 minutes. Flip the chicken halfway through to ensure even cooking. Keep an eye on them; you want them to be golden and caramelized.
- Once cooked, remove the chicken from the oven and set it aside. Do not discard the sauce left in the pan – it’s liquid gold!
- Pour the leftover sauce into a saucepan and bring it to a simmer over medium heat. This step helps to intensify the flavors.
- Take your cornstarch and water mixture and stir it well before adding it to the sauce. This will thicken it up nicely. Return the sauce to the heat and let it simmer until it thickens to your desired consistency.
- Once thickened, brush the prepared sauce over the baked chicken. The sauce should cling to the skin, creating a glaze that’s both beautiful and appetizing.
- Finally, broil the chicken for 2 to 5 minutes. This last step is essential to achieve that lacquered finish. You’ll know it’s ready when it’s bubbly and beautifully browned. Garnish with sliced green onions and sesame seeds before serving.
Things Worth Knowing
- Resting the Chicken: Let the chicken rest for a few minutes after baking. This allows the juices to redistribute, ensuring every bite is tender and juicy.
- Marination Time: Marinating the chicken can significantly enhance its flavor. Aim for at least 30 minutes, but if you can let it sit overnight, you’ll love the results.
- Watch the Broil: Keep an eye on the chicken while broiling; it can go from perfectly caramelized to burnt in a matter of seconds.
- Double the Sauce: If you love extra sauce, consider doubling the marinade recipe. It’s great for drizzling over rice or vegetables.
Making Adjustments
Every cook has their unique style, and Baked Teriyaki Chicken Drumsticks is no exception. Here are some tips to help you customize this dish to your liking.
- Storage: Store any leftover chicken in an airtight container in the refrigerator for up to 3 days. Reheat in the oven to maintain the crispiness.
- Freezing: You can freeze the marinated chicken before cooking. Place it in a resealable bag and store it in the freezer for up to 3 months. Just thaw it in the fridge and bake as directed.
- Pairing: Serve with steamed rice or a fresh salad for a light meal. The glaze also works wonders on grilled vegetables.
- Spice Levels: Adjust the Sriracha to control the heat. You can even substitute it with other hot sauces based on your preference.
- Garnish: Try adding toasted sesame seeds or chopped cilantro for an extra touch of flavor and presentation.
Side Dish Ideas for Baked Teriyaki Chicken Drumsticks
When serving Baked Teriyaki Chicken Drumsticks, the right side dishes can elevate your meal to a whole new level. Here are some delightful options:
- Steamed Jasmine Rice: The light, fragrant rice is a classic pairing that soaks up the delicious teriyaki sauce beautifully.
- Broccoli Stir-Fry: A vibrant mix of vegetables with a touch of garlic and soy sauce complements the chicken while adding color and nutrients.
- Asian Slaw: A fresh, crunchy slaw with a sesame dressing provides a refreshing contrast to the rich flavors of the chicken.
- Grilled Asparagus: Lightly seasoned and grilled asparagus makes for a sophisticated side that’s easy to prepare.
- Edamame: A protein-packed snack that’s not only healthy but also fun to eat. Simply boil and sprinkle with sea salt.
- Miso Soup: This warm, comforting soup is a traditional accompaniment to many Japanese meals and adds depth to your dining experience.
- Fruit Salad: A light fruit salad can balance the savory flavors of the chicken, offering a sweet end to your meal.
FAQ
Conclusion
Baked Teriyaki Chicken Drumsticks are a true delight, bursting with flavor and perfect for any occasion. Whether you’re cooking for your family or hosting a gathering, this recipe is sure to impress. I encourage you to try it out; the combination of sweet and savory will have everyone coming back for seconds. Enjoy the process and the delicious results!
Baked Teriyaki Chicken Drumsticks
Ingredients
Equipment
Method
- Preheat your oven to 425°F (220°C). This high heat will help to crisp up the skin on the chicken drumsticks. Make sure you don’t skip this step; it’s crucial for achieving that golden brown color.
- Next, grab a 9x13-inch baking pan and spray it with nonstick cooking spray. This will prevent the drumsticks from sticking to the pan, making cleanup a breeze.
- Arrange the chicken drumsticks skin side down in the baking dish. You want to make sure they are spaced out, so they cook evenly. Visualize them lined up comfortably, with each piece having its own space.
- In a medium mixing bowl, whisk together the soy sauce, water, brown sugar, rice vinegar, ginger, garlic, sesame oil, and Sriracha. This marinade is where all the magic happens. Take a moment to appreciate the aroma as the ingredients combine.
- Pour the marinade over the arranged drumsticks. Use a brush or your hands to coat them thoroughly, ensuring every piece is enveloped in that delicious sauce.
- Place the baking pan in the preheated oven and bake for 40 to 45 minutes. Flip the chicken halfway through to ensure even cooking. Keep an eye on them; you want them to be golden and caramelized.
- Once cooked, remove the chicken from the oven and set it aside. Do not discard the sauce left in the pan - it’s liquid gold!
- Pour the leftover sauce into a saucepan and bring it to a simmer over medium heat. This step helps to intensify the flavors.
- Take your cornstarch and water mixture and stir it well before adding it to the sauce. This will thicken it up nicely. Return the sauce to the heat and let it simmer until it thickens to your desired consistency.
- Once thickened, brush the prepared sauce over the baked chicken. The sauce should cling to the skin, creating a glaze that’s both beautiful and appetizing.
- Finally, broil the chicken for 2 to 5 minutes. This last step is essential to achieve that lacquered finish. You’ll know it’s ready when it’s bubbly and beautifully browned. Garnish with sliced green onions and sesame seeds before serving.
Notes
- Tip 1: You can marinate the chicken drumsticks in the sauce anywhere from 30 minutes to 24 hours before baking them. Store the drumsticks in the sauce, in an airtight container or resealable bag, in the refrigerator until ready to bake.
- Tip 2: To keep the drumsticks juicy while baking, I baste them every 5-10 minutes with the sauce from the bottom of the pan. This also creates a more concentrated flavor.