Blackberry Cheesecake Bars
The first time I made Blackberry Cheesecake Bars, it was for a summer picnic with friends. I remember the sun shining bright, and as the bars chilled in the fridge, I could almost taste the creamy filling paired with the tangy freshness of blackberries. When it was finally time to serve, everyone gathered around the table, eager for a taste of this delicious dessert. Little did I know, these bars would steal the show, earning compliments and requests for the recipe. And that’s how I knew I had to share this delightful treat with you!
Recipe Snapshot
1 hr 15 mins
30 mins
45 mins
Medium
320 kcal
4g g
Gluten-Free, Low FODMAP
16g g
Oven, Mixing Bowl, Baking Sheet, Blender, Food Processor, Frying Pan, Wooden Spoon
The Appeal of This Blackberry Cheesecake Bars
1. A Perfect Balance of Flavors
The beauty of Blackberry Cheesecake Bars lies in their harmonious blend of flavors. The creamy richness of the cheesecake is beautifully contrasted by the tartness of fresh blackberries. This balance makes them not only delicious but also refreshing, especially during hot summer days.
2. Easy to Make and Serve
You won’t need to stress about complicated steps or fancy techniques when making these bars. The recipe is straightforward, making it perfect for novice bakers or those who want a quick dessert option. Plus, they’re easy to slice and serve, so they’re ideal for gatherings!
3. Visual Appeal
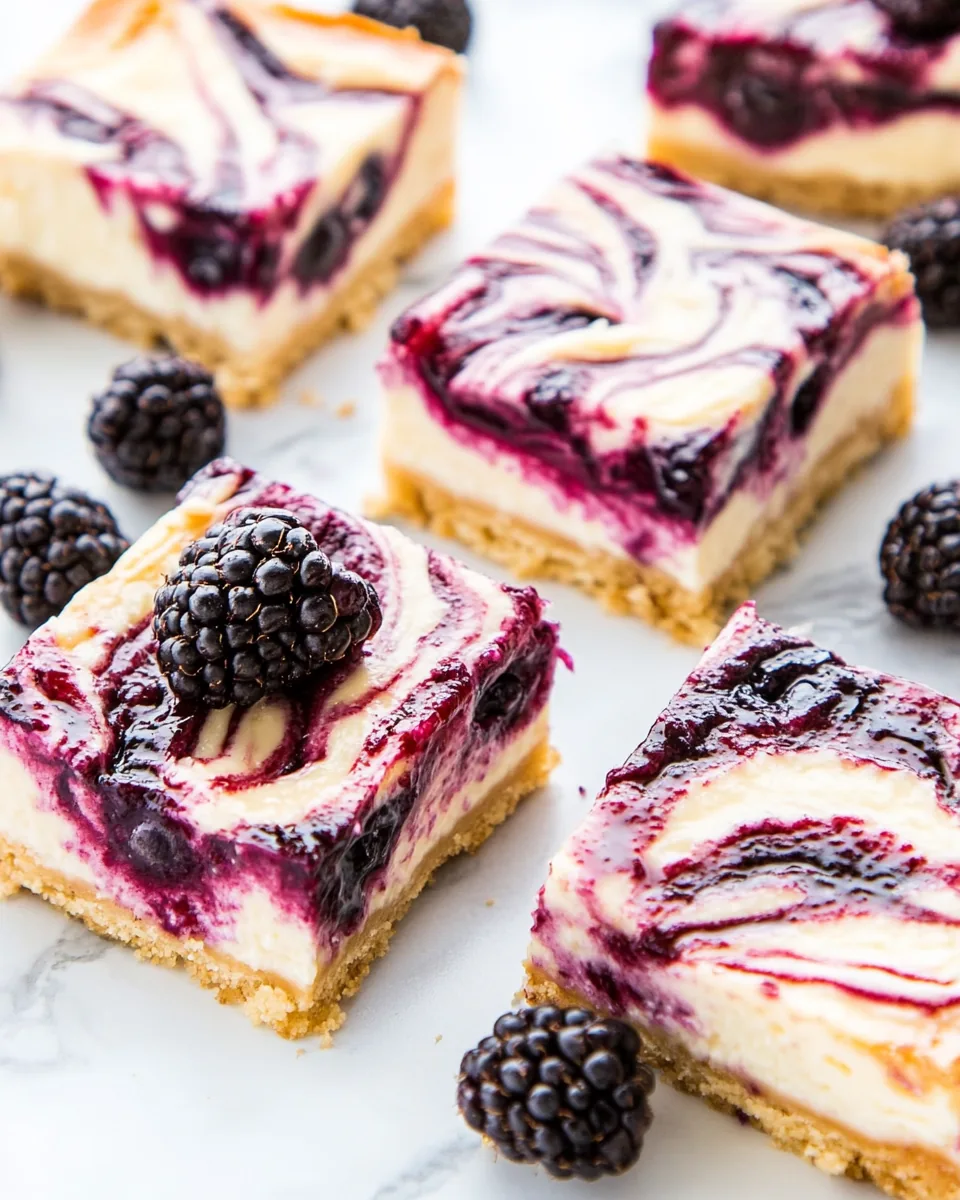
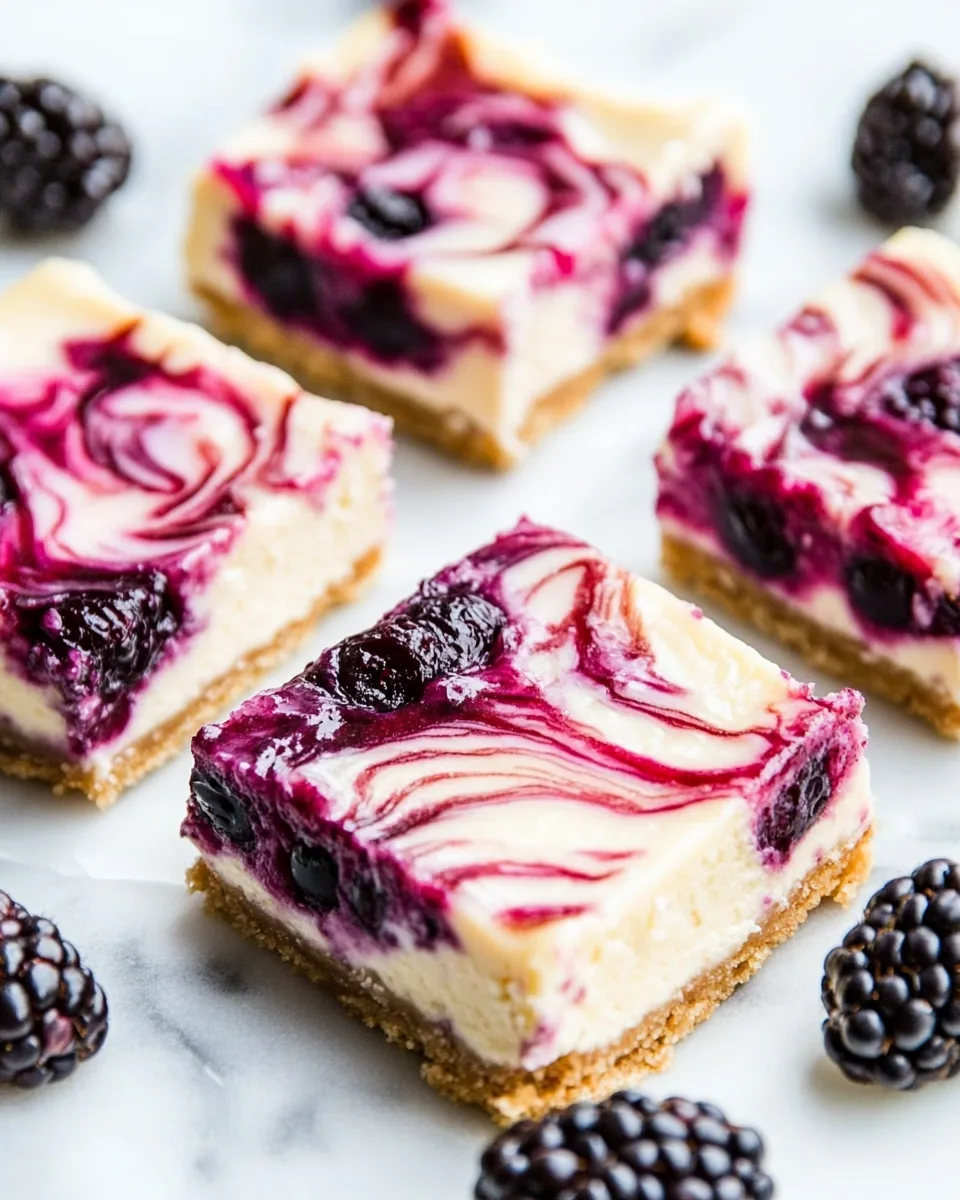
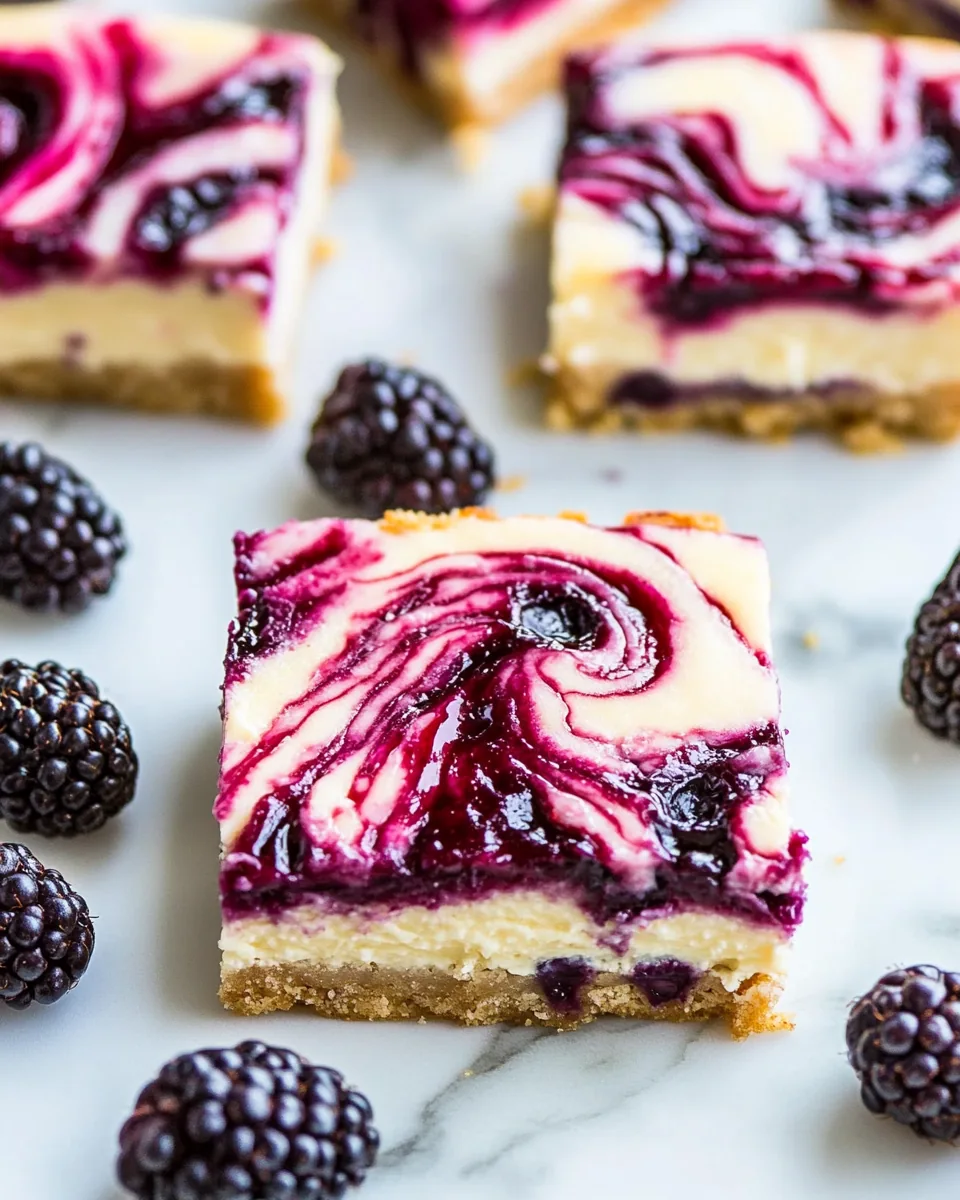
There’s something captivating about the vibrant purple swirls of blackberry puree atop the creamy cheesecake. When you cut into these bars, the contrasting layers create a stunning presentation that will impress your guests. They’re as beautiful as they are delicious!
4. Make-Ahead Convenience
One of the best parts about Blackberry Cheesecake Bars is that they can be made ahead of time. You can prepare them the day before your event, allowing the flavors to meld while saving you time on the day of your gathering. Just chill them in the fridge, and they’ll be ready to serve when you are!
5. Versatile for Any Occasion
Whether it’s a summer picnic, birthday party, or just a sweet treat for the family, these cheesecake bars fit the bill. They’re versatile enough to suit any occasion, making them a great addition to your dessert repertoire.
6. A Crowd-Pleaser
It’s always a win when you can create something that everyone enjoys. Blackberry Cheesecake Bars have this undeniable charm that draws people in. Trust me; you’ll love watching everyone return for seconds!
Shopping List for Blackberry Cheesecake Bars
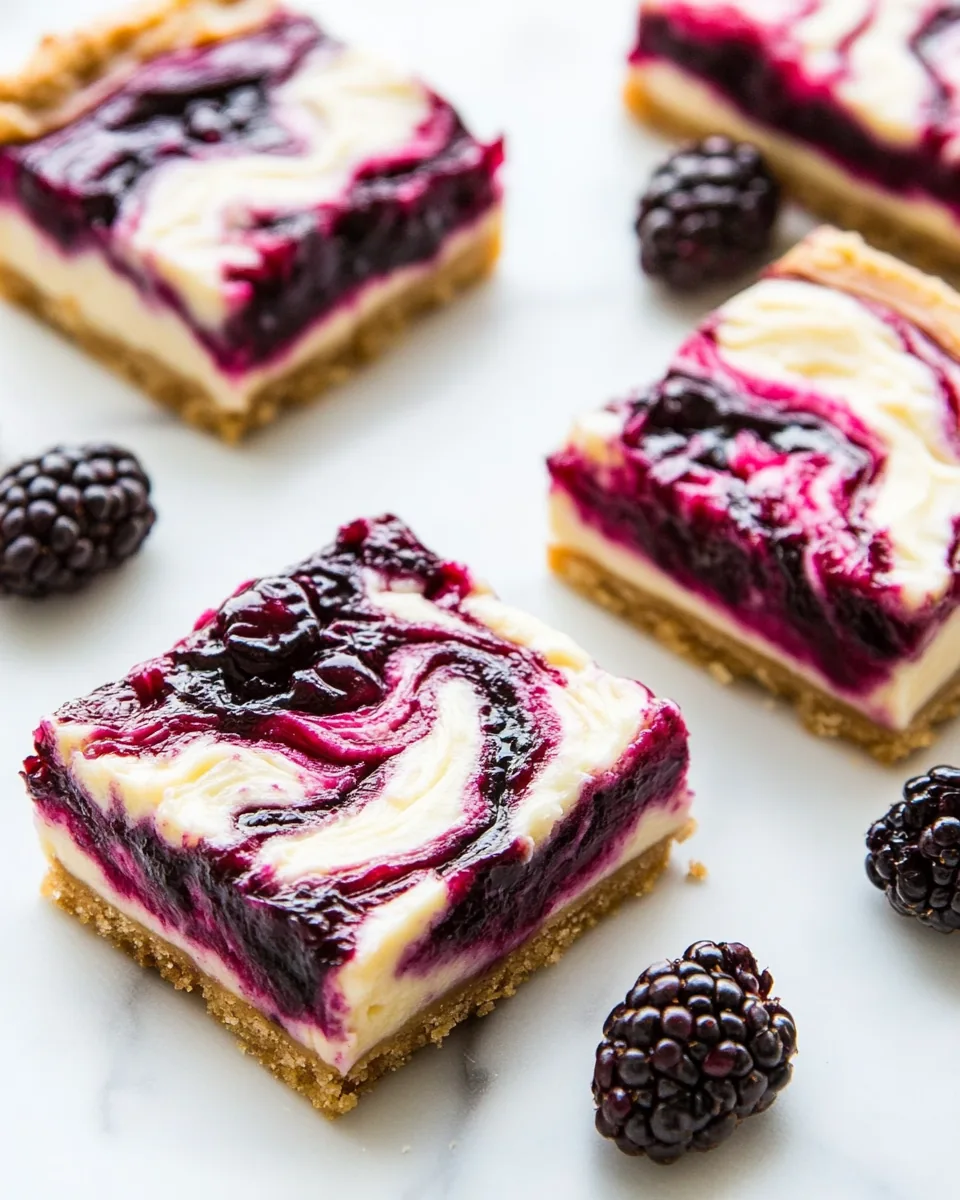
When it comes to making Blackberry Cheesecake Bars, the ingredients play a crucial role in achieving that perfect balance of flavors and textures. The combination of a buttery crust, rich cheesecake filling, and fresh blackberries creates a delightful harmony that is simply irresistible. Let’s take a look at what you’ll need to bring this delicious dessert to life!
- 2 and 1/4 cups graham crackers, pulsed into crumbs – This forms the base of your cheesecake bars, providing a firm and buttery crust that complements the creamy filling.
- 1/2 cup granulated sugar – Sweetens the crust and the filling, enhancing the overall flavor.
- 1/4 teaspoon salt – Balances sweetness and brings out the flavors.
- 1/2 cup (8 tablespoons) unsalted butter, melted – Binds the crust ingredients together and adds richness.
- (4) 8 ounce blocks of full-fat cream cheese, very soft – The star ingredient that creates the creamy texture of the cheesecake.
- 1 and 1/4 cups granulated sugar – Adds sweetness to the filling for the perfect cheesecake taste.
- 3 large eggs plus 2 egg yolks, at room temperature – Contributes to the structure and richness of the cheesecake.
- 2 teaspoons fresh lemon zest – Adds a burst of flavor that brightens up the cheesecake.
- 1/4 cup fresh lemon juice – Provides acidity that balances the sweetness of the cream cheese.
- 1 and 1/2 tablespoons all-purpose flour – Helps stabilize the cheesecake filling.
- 1 cup fresh blackberries – Adds a burst of flavor with their tart sweetness, perfect for swirling into the cheesecake.
- 1/4 cup granulated sugar – Used to sweeten the blackberry puree for the topping.
Cooking Instructions for Blackberry Cheesecake Bars
Making Blackberry Cheesecake Bars is a delightful process that fills your kitchen with incredible aromas. Follow these steps to create your own batch of creamy, dreamy bars that everyone will love!
- Preheat your oven to 350 degrees Fahrenheit. This step is crucial for ensuring that your cheesecake bars bake evenly and set properly.
- Line a 9×13-inch baking pan with aluminum foil, allowing two of the sides to overlap. This will help you lift the cheesecake bars out easily later on. Spray the foil and any exposed pan with non-stick baking spray to prevent sticking.
- In the body of a blender or food processor, combine graham crackers, granulated sugar, and salt. Pulse until the crackers have transformed into fine crumbs. This crumb mixture will create a buttery, flavorful crust.
- Add in the melted butter and stir well to combine. Press this mixture down evenly into the prepared pan to form your crust layer. Bake in the preheated oven for 10 minutes. This helps the crust set, creating a solid base for your cheesecake.
- While the crust is baking, in a large bowl using a handheld electric mixer (or in a stand mixer fitted with the paddle attachment), beat the cream cheese until completely smooth. Scrape down the sides of the bowl as needed; this should take about 3 minutes.
- Add in granulated sugar, eggs, and egg yolks, and beat until the mixture is smooth and creamy; this should take about 2 minutes. Make sure to incorporate all the ingredients well!
- Turn off the mixer and fold in lemon zest and lemon juice using a rubber spatula. Stir until combined, ensuring that the lemon flavors are evenly distributed throughout the mixture.
- Next, quickly fold in flour, stirring just until combined. Be careful not to overmix; this will lead to a denser cheesecake.
- Pour the cheesecake batter on top of the partially baked crust. Set aside to make your blackberry swirl.
- In a small food processor or blender, puree the blackberries until completely smooth. Press the mixture through a fine mesh strainer, discarding seeds and pulp. Stir in the granulated sugar for the topping.
- Spoon the blackberry mixture over the unbaked cheesecake layer in a few dollops. Use a skewer or a knife to gently swirl the blackberry mixture into the cheesecake batter, creating beautiful swirls.
- Bake in the oven for 35 to 40 minutes, or until the cheesecake layer is set at the edges and only slightly wiggly in the center. Keep an eye on it to prevent overbaking.
- Once baked, place the pan on a wire cooling rack and let it cool at room temperature until the pan is no longer hot. This step helps to avoid cracks in your cheesecake.
- After cooling, place the cheesecake bars in the fridge until completely chilled, about 2 hours. This chill time is essential for the best texture.
- When ready to serve, use the overlapped aluminum foil to lift the cheesecake out of the pan and onto a large cutting board. Cut into 16 bars and serve. Enjoy!
Things Worth Knowing
- Chilling Time is Key: Allowing the cheesecake bars to chill completely will result in a firmer texture, making them easier to cut and serve.
- Use Room Temperature Ingredients: Make sure your cream cheese and eggs are at room temperature before mixing. This ensures a smoother batter.
- Baking Dish Matters: Using a glass or ceramic baking dish can help maintain an even temperature, reducing the risk of cracks in your cheesecake.
- Don’t Overmix: When incorporating the eggs and other ingredients, mix just until combined. Overmixing can lead to a dense texture.
Ways to Customize
There are countless ways to bring your personal touch to these Blackberry Cheesecake Bars. Here are some fun ideas to consider:
- Fruit Swaps: Feel free to experiment with different fruits like raspberries or strawberries for a unique flavor twist.
- Nutty Crust: Add some crushed nuts like pecans or almonds to the graham cracker crust for added crunch and flavor.
- Chocolate Drizzle: Drizzling some melted chocolate on top before serving adds a decadent touch.
- Additional Flavoring: Consider adding a splash of almond extract or coconut extract to the cheesecake batter for an extra layer of flavor.
- Serving Suggestions: Serve with a dollop of whipped cream or a scoop of vanilla ice cream on the side for a special treat.
- Storage: Store any leftovers in an airtight container in the fridge for up to 3 days to maintain freshness.
- Freezing: You can freeze these bars for up to 2 months. Just ensure they are well-wrapped to prevent freezer burn.
What to Serve With Blackberry Cheesecake Bars
When it comes to serving Blackberry Cheesecake Bars, the options are endless. Here are some delightful pairings:
- Fresh Fruit: Serve with a side of seasonal fruits like strawberries or blueberries to enhance the fruity flavors.
- Sweet Tea: A refreshing glass of sweet tea or lemonade pairs perfectly for a summer gathering.
- Whipped Cream: A dollop of whipped cream on top adds a creamy touch that complements the bars.
- Ice Cream: Pairing these bars with vanilla or berry-flavored ice cream makes for a delightful dessert experience.
- Cheese Board: For a more sophisticated touch, serve with a cheese board featuring a selection of creamy cheeses that contrast the sweetness.
- Occasions: These bars are perfect for summer picnics, birthday parties, potlucks, or simply a sweet treat at home!
FAQ
Conclusion
The Blackberry Cheesecake Bars truly encapsulate the essence of summer with their vibrant colors and delicious flavors. They’re not just a dessert; they’re a crowd-pleaser that will elevate any gathering. I encourage you to try making these bars; you won’t be disappointed. They bring joy and sweetness to any occasion, making them a must-have recipe in your baking repertoire.
Blackberry Cheesecake Bars
Ingredients
Equipment
Method
- Preheat your oven to 350 degrees Fahrenheit. This step is crucial for ensuring that your cheesecake bars bake evenly and set properly.
- Line a 9×13-inch baking pan with aluminum foil, allowing two of the sides to overlap. This will help you lift the cheesecake bars out easily later on. Spray the foil and any exposed pan with non-stick baking spray to prevent sticking.
- In the body of a blender or food processor, combine graham crackers, granulated sugar, and salt. Pulse until the crackers have transformed into fine crumbs. This crumb mixture will create a buttery, flavorful crust.
- Add in the melted butter and stir well to combine. Press this mixture down evenly into the prepared pan to form your crust layer. Bake in the preheated oven for 10 minutes. This helps the crust set, creating a solid base for your cheesecake.
- While the crust is baking, in a large bowl using a handheld electric mixer (or in a stand mixer fitted with the paddle attachment), beat the cream cheese until completely smooth. Scrape down the sides of the bowl as needed; this should take about 3 minutes.
- Add in granulated sugar, eggs, and egg yolks, and beat until the mixture is smooth and creamy; this should take about 2 minutes. Make sure to incorporate all the ingredients well!
- Turn off the mixer and fold in lemon zest and lemon juice using a rubber spatula. Stir until combined, ensuring that the lemon flavors are evenly distributed throughout the mixture.
- Next, quickly fold in flour, stirring just until combined. Be careful not to overmix; this will lead to a denser cheesecake.
- Pour the cheesecake batter on top of the partially baked crust. Set aside to make your blackberry swirl.
- In a small food processor or blender, puree the blackberries until completely smooth. Press the mixture through a fine mesh strainer, discarding seeds and pulp. Stir in the granulated sugar for the topping.
- Spoon the blackberry mixture over the unbaked cheesecake layer in a few dollops. Use a skewer or a knife to gently swirl the blackberry mixture into the cheesecake batter, creating beautiful swirls.
- Bake in the oven for 35 to 40 minutes, or until the cheesecake layer is set at the edges and only slightly wiggly in the center. Keep an eye on it to prevent overbaking.
- Once baked, place the pan on a wire cooling rack and let it cool at room temperature until the pan is no longer hot. This step helps to avoid cracks in your cheesecake.
- After cooling, place the cheesecake bars in the fridge until completely chilled, about 2 hours. This chill time is essential for the best texture.
- When ready to serve, use the overlapped aluminum foil to lift the cheesecake out of the pan and onto a large cutting board. Cut into 16 bars and serve. Enjoy!
Notes
- Tip: For best results, recipe should be followed exactly as written.
- Tip: Blackberry puree may be made 1 day in advance and stored in the fridge until needed.
- Tip: Cheesecake bars will keep, stored in an airtight container in the fridge, for up to 3 days.