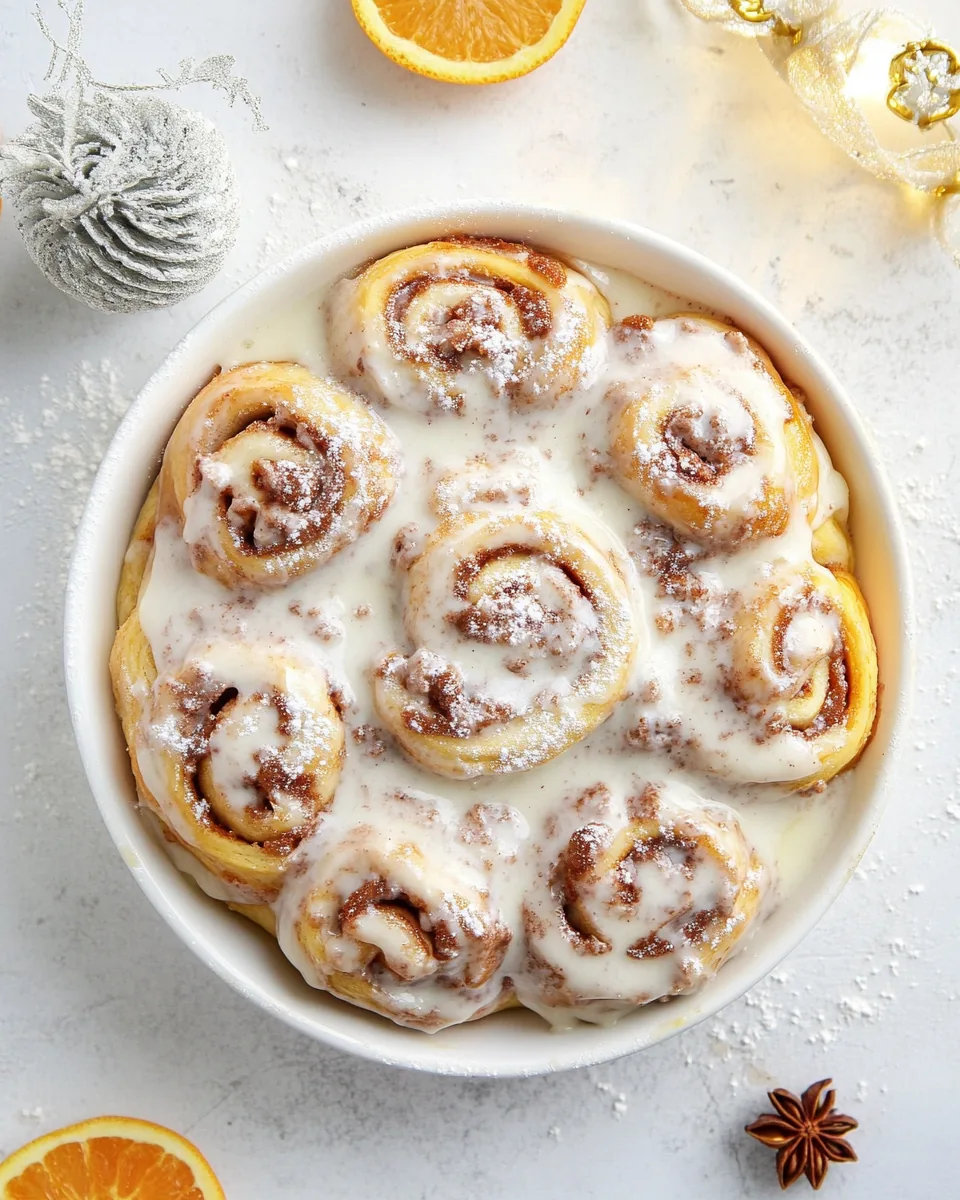
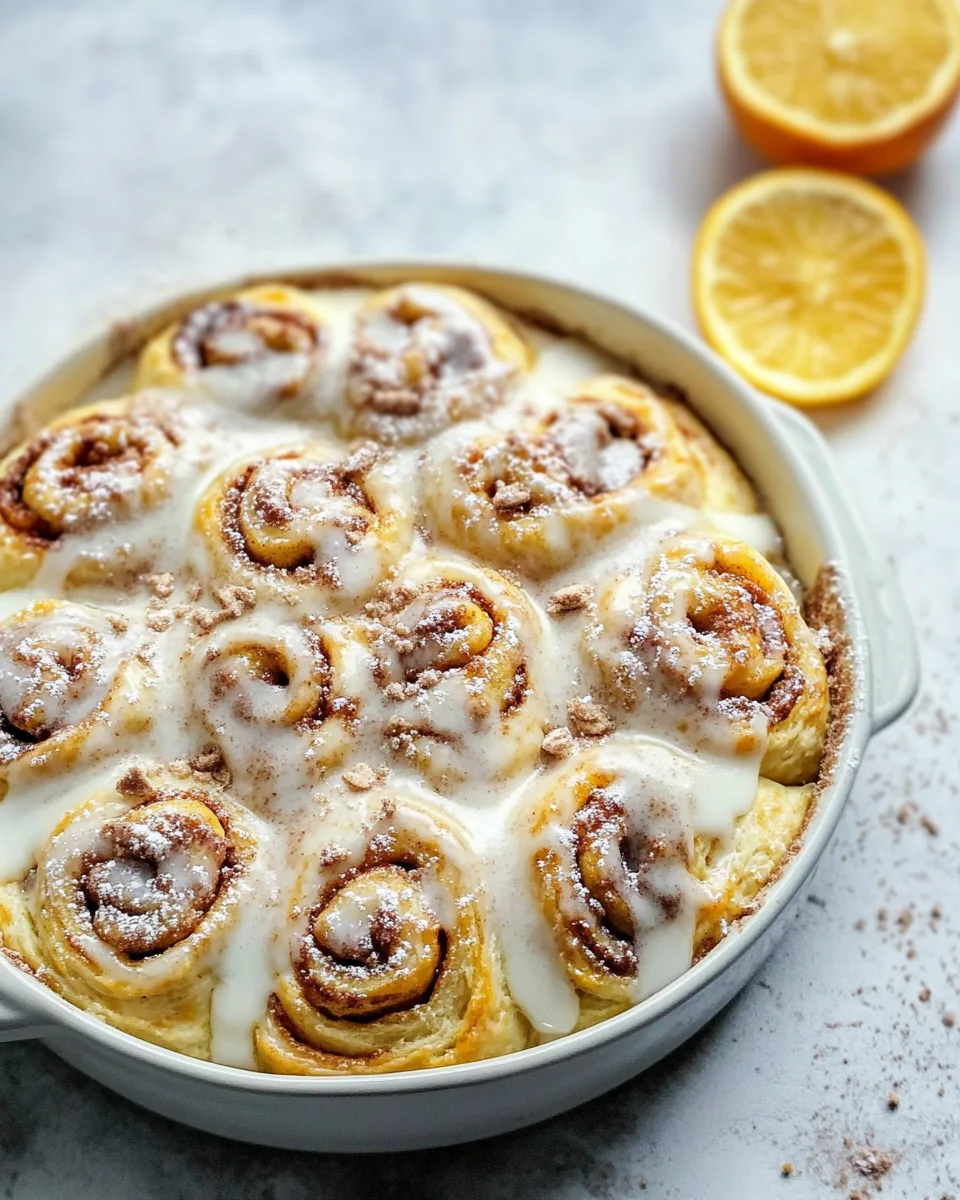
Cinnamon Orange Rolls
The moment I first pulled a warm batch of Cinnamon Orange Rolls from the oven, I knew I had stumbled upon something magical. The smell of sweet, spicy cinnamon mixed with the bright, zesty aroma of fresh oranges wafted through my kitchen, inviting everyone to join me in this moment of culinary bliss. I still remember the look on my family’s faces as they took that first bite; their eyes lit up with joy, and I couldn’t help but smile. This isn’t just any recipe—these are my go-to rolls for special occasions, lazy weekends, or any time I want to sprinkle a little sunshine into our day. There’s something about the combination of flavors that feels both indulgent and comforting, making every bite a little piece of happiness. Whether it’s for breakfast, brunch, or a delightful dessert, these rolls have a way of bringing everyone together, turning any ordinary day into a celebration.
Recipe Snapshot
60 mins
25 mins
35 mins
Medium
320 kcal
5 g
Gluten-Free, Low FODMAP
12 g
Oven, Grater, Mixing Bowl, Baking Sheet, Chef’s Knife, Frying Pan, Wooden Spoon, Whisk
What You’ll Enjoy About This Cinnamon Orange Rolls
1. Comforting Warmth
The first reason I adore these Cinnamon Orange Rolls is the warm comfort they bring. There’s nothing quite like biting into a freshly baked roll, the soft dough cradling a sweet filling, drizzled with a tangy glaze. They’re perfect for cozy mornings or when you want to treat yourself after a long day.
2. A Burst of Flavor
The vibrant orange zest paired with the warm spices creates an explosion of flavor that dances on your taste buds. Each roll offers a delightful sweetness, balanced perfectly by the citrusy notes. It’s a flavor combination that’s hard to resist!
3. Quick and Easy
What I love most about these rolls is that they come together surprisingly quickly. In just about an hour, you can have a freshly baked batch ready to enjoy. It’s the perfect solution when you’re craving something homemade without spending all day in the kitchen.
4. Versatile Occasions
These Cinnamon Orange Rolls aren’t just for breakfast! They’re fantastic for brunch gatherings, holidays, or even as a dessert to impress guests. Their beautiful presentation and delightful taste make them suitable for any occasion, adding a touch of elegance to your table.
5. Their Irresistible Aroma
As they bake, the smell of cinnamon and orange fills the air, creating an inviting atmosphere in your home. The aroma alone can lift your spirits and make anyone feel at ease. It’s a simple pleasure that enhances the overall experience of baking and sharing.
6. Memories in the Making
Baking these rolls often becomes a bonding experience with family or friends. Whether it’s rolling the dough together or enjoying them fresh out of the oven, these moments create lasting memories that you’ll cherish for years to come.
What You Need for Cinnamon Orange Rolls
To create these delightful Cinnamon Orange Rolls, we need a blend of simple ingredients that work beautifully together. The star players, like all-purpose flour and yeast, form the base, while cinnamon and orange zest take center stage with their warm and refreshing notes. Each ingredient plays its part in crafting rolls that are not just delicious but also evoke a sense of home.
- 2 3/4 cups all-purpose flour: The foundation of our rolls, providing structure and texture.
- 2 tablespoons sugar: Adds sweetness to the dough.
- 2 1/4 teaspoons active dry yeast: Helps the rolls rise and become fluffy.
- 1/3 cup milk: Adds moisture and richness to the dough.
- 1/4 cup unsalted butter: Provides flavor and tenderness.
- 1/4 cup water: Activates the yeast and helps blend the ingredients.
- 2 teaspoons vanilla extract: Enhances the overall flavor profile.
- 2 teaspoons freshly grated orange zest: Infuses the dough with vibrant citrus flavor.
- 1/4 teaspoon salt: Balances the sweetness.
- 1/4 teaspoon cinnamon: Adds warmth and depth to the filling.
- 2 large eggs: Binds the ingredients together and enriches the dough.
- 8 tablespoons unsalted butter, melted: Used for spreading on the dough and enhances flavor.
- 1/2 cup sugar: Sweetens the filling.
- 2 teaspoons freshly grated orange zest: Adds a zesty punch to the filling.
- 1 ½ teaspoons cinnamon: The star spice for the filling.
- 1/4 teaspoon freshly grated nutmeg: Adds a warm, aromatic note.
- 2 cups powdered sugar: For the sweet glaze.
- 1/4 cup freshly grated orange juice: Brightens up the glaze.
- 1 teaspoon freshly grated orange zest: Complements the glaze with extra flavor.
Putting Together Cinnamon Orange Rolls
Creating these Cinnamon Orange Rolls is a joy! The process is simple and forgiving, making it perfect for both novice and experienced bakers. Let’s dive into the steps that will lead you to a sweet, sticky treat that’s sure to impress. Follow along as each step unfolds to guide you through the creation of these delightful rolls!
Preheat your oven to 350 degrees F. This initial step is crucial as it prepares the environment for our rolls to bake perfectly. A well-preheated oven ensures even cooking and that golden-brown finish we all crave.
In the bowl of your electric mixer, combine 2 cups of the flour, sugar, and yeast. Stir these dry ingredients together gently, allowing the yeast to mix evenly with the flour and sugar. This blend will act as the foundation for your dough.
In a small saucepan, combine milk and unsalted butter, heating over low heat just until the butter melts. It should be warm but not boiling—this temperature helps activate the yeast. Once melted, remove from heat and let sit for 2 to 3 minutes.
Next, stir in water and vanilla extract into your milk and butter mixture. This will add moisture and flavor to your dough. Make sure to give it a good stir so everything is combined nicely.
With the dough hook attached to your mixer, pour the milk mixture into the flour mixture. Stir until all the ingredients come together, forming a sticky dough. Add in orange zest, salt, and cinnamon, along with the eggs one at a time. Beat well after each addition to ensure everything is well incorporated.
The dough will be quite sticky; this is what we want! Gradually add in the remaining 3/4 cup of flour, mixing for 2 to 3 minutes until the dough forms a cohesive ball. It should still be slightly tacky but not overly wet. Transfer it to a greased bowl and cover it. Let it sit for 10 minutes to allow the yeast to work its magic.
After 10 minutes, generously flour your work surface and roll the dough out into a rough 14 by 10 inch rectangle. The dough should feel soft and pliable. Use a rolling pin to achieve a nice even thickness.
Now for the filling! Spread the melted butter over the rolled-out dough. In a bowl, whisk together sugar, orange zest, cinnamon, and nutmeg. Sprinkle this mixture evenly over the buttered dough. This is where the magic happens—each bite will be filled with flavor!
Starting from one of the long sides, roll the dough tightly into a log. Make sure to keep it snug but not overly tight, as this will help the rolls rise. Once rolled, slice the log into 1-inch pieces. You should have lovely little rolls ready to go!
Place the sliced rolls into a greased baking dish. You can use a round dish, square dish, or even arrange them on a baking sheet in a fun shape. Just ensure they’re close but not overcrowded. Allow them to sit for 5 minutes to rest before baking.
Now it’s time for baking! Place the rolls in the preheated oven and bake for 35 to 40 minutes. Keep an eye on them; you’re looking for a beautiful golden brown on top. The smell will fill your kitchen—it’s divine!
Once baked, take the rolls out of the oven and let them cool for a few minutes. Meanwhile, you can whisk together the glaze ingredients until smooth. If it’s too thick, gradually add more orange juice; if too thin, whisk in more powdered sugar until you achieve the desired consistency.
Finally, drizzle the glaze over the warm rolls and serve them fresh. You’ll want to enjoy them while they’re still warm for the ultimate experience—a bite of cozy flavor!
Things Worth Knowing
- Yeast Activation: Make sure your milk is warm but not hot. If it’s too hot, it can kill the yeast, preventing your rolls from rising properly.
- Sticky Dough: Don’t be afraid of a sticky dough! It’s necessary for soft, fluffy rolls. Just use extra flour for dusting your work surface.
- Resting Time: Allowing the dough to rest for 10 minutes helps relax the gluten, making it easier to roll out without springing back.
- Glaze Consistency: Adjust the glaze thickness to your preference. A thicker glaze will coat the rolls nicely, while a thinner one will drizzle beautifully.
- Storage: Keep any leftover rolls in an airtight container. They can be stored at room temperature for up to two days.
Variations to Try

Baking is all about creativity! Here are some ideas to put a personal spin on your Cinnamon Orange Rolls. Feel free to experiment and discover your new favorite version.
- Add Nuts: Toss in some chopped pecans or walnuts into the filling for a delightful crunch.
- Chocolate Swirl: Incorporate chocolate chips into the filling for a decadent twist on the classic.
- Fruit Variations: Try using lemon zest instead of orange for a different citrus flavor, or mix in some berries for a fruity filling.
- Frosting instead of Glaze: Swap the glaze for a cream cheese frosting for a richer taste.
- Make Ahead: Prepare the rolls and place them in the fridge overnight. Allow them to come to room temperature before baking.
- Freezing: You can freeze unbaked rolls. Just thaw and let rise before baking. It’s perfect for quick treats!
What Complements This Cinnamon Orange Rolls
- Fresh Fruits: Serve with a side of mixed fresh fruits for a bright and refreshing contrast.
- Hot Coffee or Tea: Pair your rolls with a hot cup of coffee or tea to enhance the flavors.
- Special Occasions: These rolls are perfect for brunch gatherings or holiday breakfasts. They add a festive touch to any table.
- Storage Tips: If you have leftovers, store them in an airtight container at room temperature and enjoy them within a couple of days.
- Seasonal Touch: During fall, serve them with a side of spiced apple cider for a cozy fall-inspired meal.
- Make It a Meal: Add some scrambled eggs and crispy hash browns for a complete breakfast spread.
FAQ
Conclusion
The Cinnamon Orange Rolls unite the best of both worlds: a warm, fluffy pastry infused with sweet and citrusy goodness. They’re not just a treat; they’re a way to create memories with loved ones around the table. I encourage you to try making these rolls and watch as they become a favorite in your household—perfect for any occasion. Enjoy the process, savor the flavors, and most importantly, share the joy with others!

Cinnamon Orange Rolls
Ingredients
Equipment
Method
- Preheat your oven to 350 degrees F. This initial step is crucial as it prepares the environment for our rolls to bake perfectly. A well-preheated oven ensures even cooking and that golden-brown finish we all crave.
- In the bowl of your electric mixer, combine 2 cups of the flour, sugar, and yeast. Stir these dry ingredients together gently, allowing the yeast to mix evenly with the flour and sugar. This blend will act as the foundation for your dough.
- In a small saucepan, combine milk and unsalted butter, heating over low heat just until the butter melts. It should be warm but not boiling—this temperature helps activate the yeast. Once melted, remove from heat and let sit for 2 to 3 minutes.
- Next, stir in water and vanilla extract into your milk and butter mixture. This will add moisture and flavor to your dough. Make sure to give it a good stir so everything is combined nicely.
- With the dough hook attached to your mixer, pour the milk mixture into the flour mixture. Stir until all the ingredients come together, forming a sticky dough. Add in orange zest, salt, and cinnamon, along with the eggs one at a time. Beat well after each addition to ensure everything is well incorporated.
- The dough will be quite sticky; this is what we want! Gradually add in the remaining 3/4 cup of flour, mixing for 2 to 3 minutes until the dough forms a cohesive ball. It should still be slightly tacky but not overly wet. Transfer it to a greased bowl and cover it. Let it sit for 10 minutes to allow the yeast to work its magic.
- After 10 minutes, generously flour your work surface and roll the dough out into a rough 14 by 10 inch rectangle. The dough should feel soft and pliable. Use a rolling pin to achieve a nice even thickness.
- Now for the filling! Spread the melted butter over the rolled-out dough. In a bowl, whisk together sugar, orange zest, cinnamon, and nutmeg. Sprinkle this mixture evenly over the buttered dough. This is where the magic happens—each bite will be filled with flavor!
- Starting from one of the long sides, roll the dough tightly into a log. Make sure to keep it snug but not overly tight, as this will help the rolls rise. Once rolled, slice the log into 1-inch pieces. You should have lovely little rolls ready to go!
- Place the sliced rolls into a greased baking dish. You can use a round dish, square dish, or even arrange them on a baking sheet in a fun shape. Just ensure they’re close but not overcrowded. Allow them to sit for 5 minutes to rest before baking.
- Now it’s time for baking! Place the rolls in the preheated oven and bake for 35 to 40 minutes. Keep an eye on them; you're looking for a beautiful golden brown on top. The smell will fill your kitchen—it's divine!
- Once baked, take the rolls out of the oven and let them cool for a few minutes. Meanwhile, you can whisk together the glaze ingredients until smooth. If it’s too thick, gradually add more orange juice; if too thin, whisk in more powdered sugar until you achieve the desired consistency.
- Finally, drizzle the glaze over the warm rolls and serve them fresh. You’ll want to enjoy them while they’re still warm for the ultimate experience—a bite of cozy flavor!
Notes
- Tip 1: Yeast Activation: Make sure your milk is warm but not hot. If it’s too hot, it can kill the yeast, preventing your rolls from rising properly.
- Tip 2: Sticky Dough: Don’t be afraid of a sticky dough! It’s necessary for soft, fluffy rolls. Just use extra flour for dusting your work surface.
- Tip 3: Resting Time: Allowing the dough to rest for 10 minutes helps relax the gluten, making it easier to roll out without springing back.
- Tip 4: Glaze Consistency: Adjust the glaze thickness to your preference. A thicker glaze will coat the rolls nicely, while a thinner one will drizzle beautifully.
- Tip 5: Storage: If you have leftovers, store them in an airtight container. They can be stored at room temperature for up to two days.