Creamy Hummus
There’s something special about homemade dips, and Creamy Hummus is no exception. I remember the first time I made it; I was hosting a small gathering with friends and wanted to impress them with a tasty snack. It was a chilly evening, and we needed something warm and comforting. I decided to whip up a batch of Creamy Hummus from scratch, using fresh ingredients that filled my kitchen with rich aromas. As I blended the chickpeas and tahini, I could hardly wait to serve it with warm pita bread and crunchy vegetables. The laughter and joy of sharing that delicious dip around the table created such a memorable moment. Every bite was smooth and flavorful, and little did my friends know how simple it was to prepare!
Recipe Snapshot
60 mins
0 mins
0 mins
Medium
250 kcal
10 g
Keto, Paleo, Whole30
12 g
Saucepan, Large Pot, Chef’s Knife, Food Processor, Frying Pan, Wooden Spoon
What We Adore About This Creamy Hummus
Why should you fall in love with Creamy Hummus? Let me share some compelling reasons.
Healthy and Nutritious
First and foremost, Creamy Hummus is packed with nutrients. With key ingredients like chickpeas, tahini, and lemon juice, it provides a wealth of protein, fiber, and healthy fats. It’s an excellent option for a quick snack or as part of a balanced meal, making it a staple in my kitchen.
Versatile Delight
This dip isn’t just for pita bread! You can spread it on sandwiches, dollop it into salads, or use it as a veggie dip. The possibilities are endless, and each time you serve it, it feels like a new creation. I’m always amazed at how such a simple dish can adapt to different cuisines and preferences.
Quick and Easy
When time is of the essence, Creamy Hummus comes to the rescue. With just a handful of ingredients and a food processor, you can whip up this delicious dip in no time. It’s perfect for impromptu gatherings or busy weeknights when you want something satisfying without much fuss.
Customizable Flavors
The base recipe is fantastic, but the fun really begins when you start to experiment! Add roasted garlic for a deeper flavor, or toss in some spices like cumin or paprika for an extra kick. You can even blend in roasted red peppers or sun-dried tomatoes for a completely different taste. Each variation can become a new family favorite!
Perfect for Entertaining
Whenever I have friends over, Creamy Hummus is always on the table. It’s a crowd-pleaser that invites conversation as everyone gathers around to enjoy it together. Plus, it’s a great way to introduce guests to a healthier option while still indulging in something delicious.
What’s In This Creamy Hummus

The ingredients for Creamy Hummus are simple yet powerful. Each component works in harmony to create that creamy texture and rich flavor. The star of this dish is undoubtedly the chickpeas, which provide a hearty base. The addition of tahini brings a nutty depth, while lemon juice adds brightness and zest. Together, these ingredients create a delicious dip that’s as nutritious as it is satisfying.
- 1 ¼ cups dried chickpeas: These little legumes are packed with protein and fiber, forming the foundation of the hummus. Soaking them overnight enhances their texture and flavor.
- 1 teaspoon baking soda: This helps soften the chickpeas during cooking, resulting in a smoother hummus.
- 6 ½ cups water: Essential for soaking and cooking the chickpeas, ensuring they become perfectly tender.
- 1 jar (11 ounces) Soom brand tahini: A creamy paste made from ground sesame seeds, tahini adds richness and depth to the flavor profile.
- 1/4 cup freshly squeezed lemon juice: The acidity of the lemon juice brightens the flavor and balances the creaminess.
- 3-4 cloves garlic, crushed and chopped: Garlic adds a lovely aroma and flavor that elevates the dish.
- 1-1 ½ teaspoons kosher salt: Essential for seasoning; it enhances all the flavors in the hummus.
- 6 ½ tablespoons ice water: Adding cold water during processing gives the hummus a light and fluffy texture.
- Extra virgin olive oil, to serve: Drizzle on top for a finishing touch and added richness.
- Pepitas, to serve: These toasted pumpkin seeds give a delightful crunch and are a beautiful garnish.
Making This Creamy Hummus
Making Creamy Hummus is a rewarding experience that fills your kitchen with enticing aromas. Follow these steps for a perfect dip every time. Each step is designed to ensure you achieve the ideal texture and flavor.
- Start by soaking the chickpeas overnight in cold water. This step is crucial because it allows the chickpeas to double in size, making them tender and ready for cooking. If you forget to soak them, you can use the quick soak method by boiling them for two hours.
- After soaking, drain the chickpeas and place them in a saucepan. Add baking soda and cook over high heat for about three minutes, stirring constantly. This step helps to break down the skins, making the hummus smoother.
- Next, add the water to the saucepan and bring to a boil. Once boiling, reduce the heat to a simmer. Cook for twenty to forty minutes, skimming off foam or skins that rise to the top. Keep an eye on the chickpeas until they are very tender but not mushy.
- Once cooked, drain the chickpeas and let them cool slightly. Transfer them to a food processor and process for one to two minutes until a paste forms. This is where the magic happens; you want it to be as smooth as possible.
- With the processor running, add the tahini, lemon juice, garlic, and one teaspoon of salt. Blend until everything is well combined and creamy.
- Slowly add in the ice water, a tablespoon at a time, and continue processing for a full five minutes. This might seem long, but it’s essential for achieving that dreamy texture!
- Once it’s blended to your liking, taste the hummus and add more salt if desired. Remember, flavors can deepen over time, so don’t be shy!
- Scrape the hummus into a bowl and cover it. Let it rest for thirty minutes; this waiting period allows the flavors to meld beautifully.
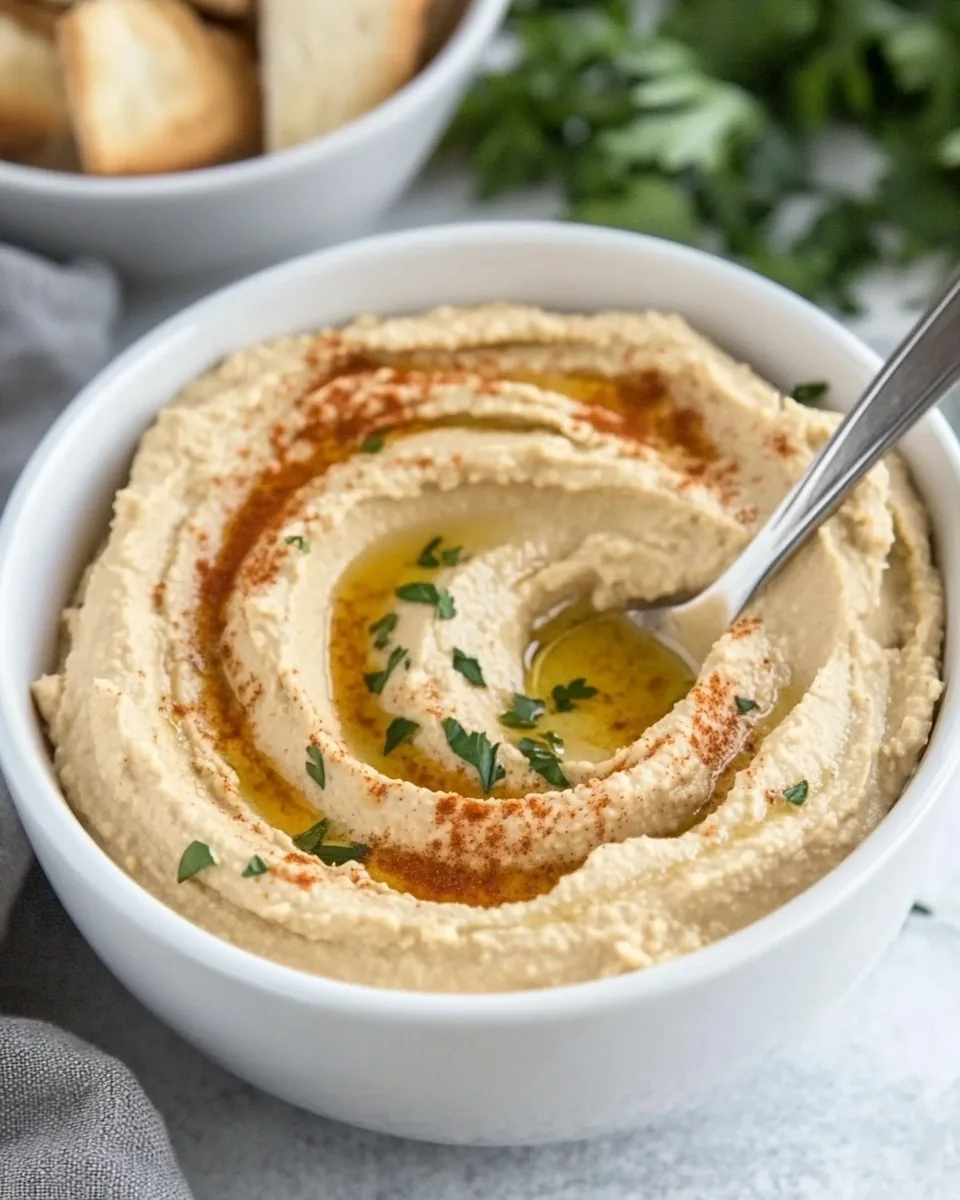
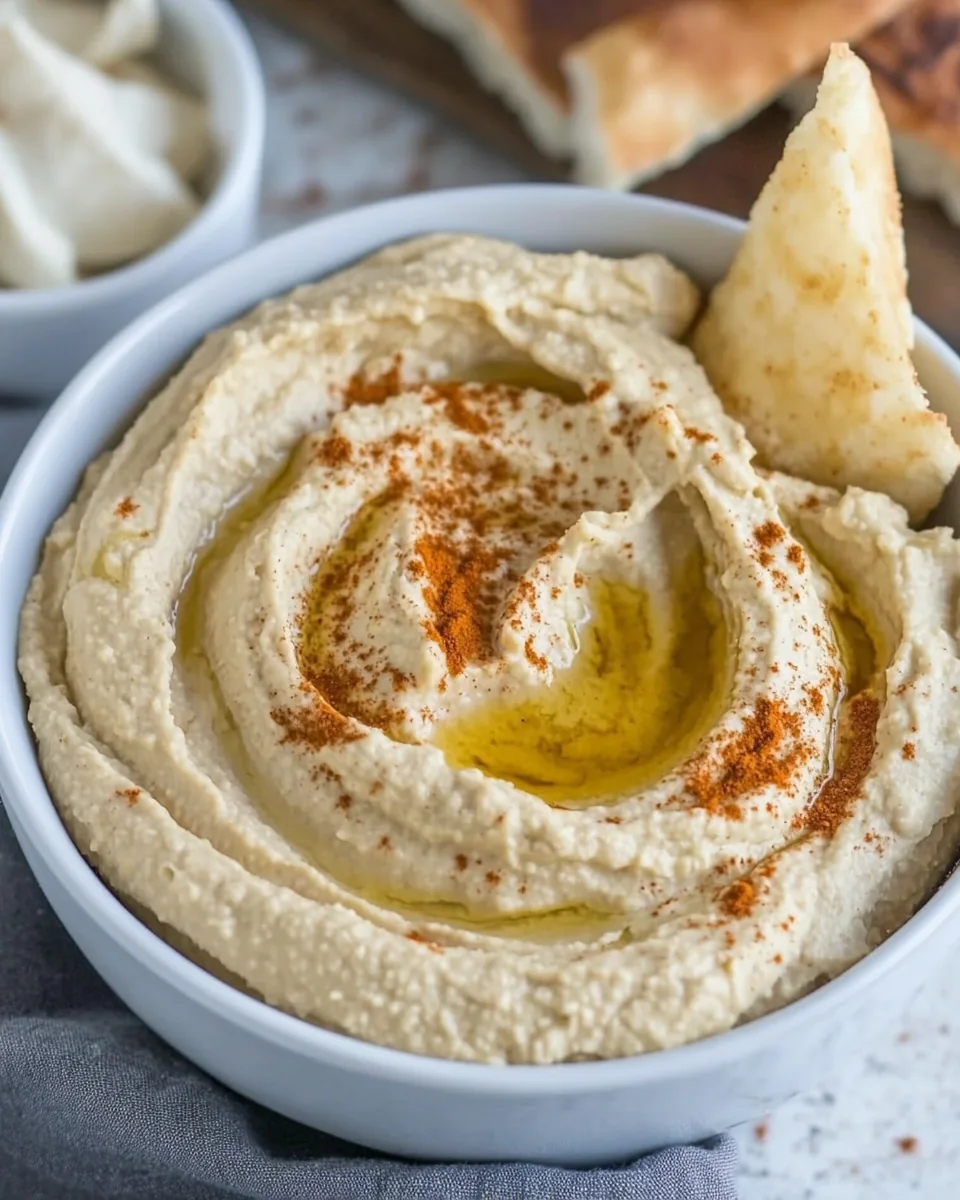
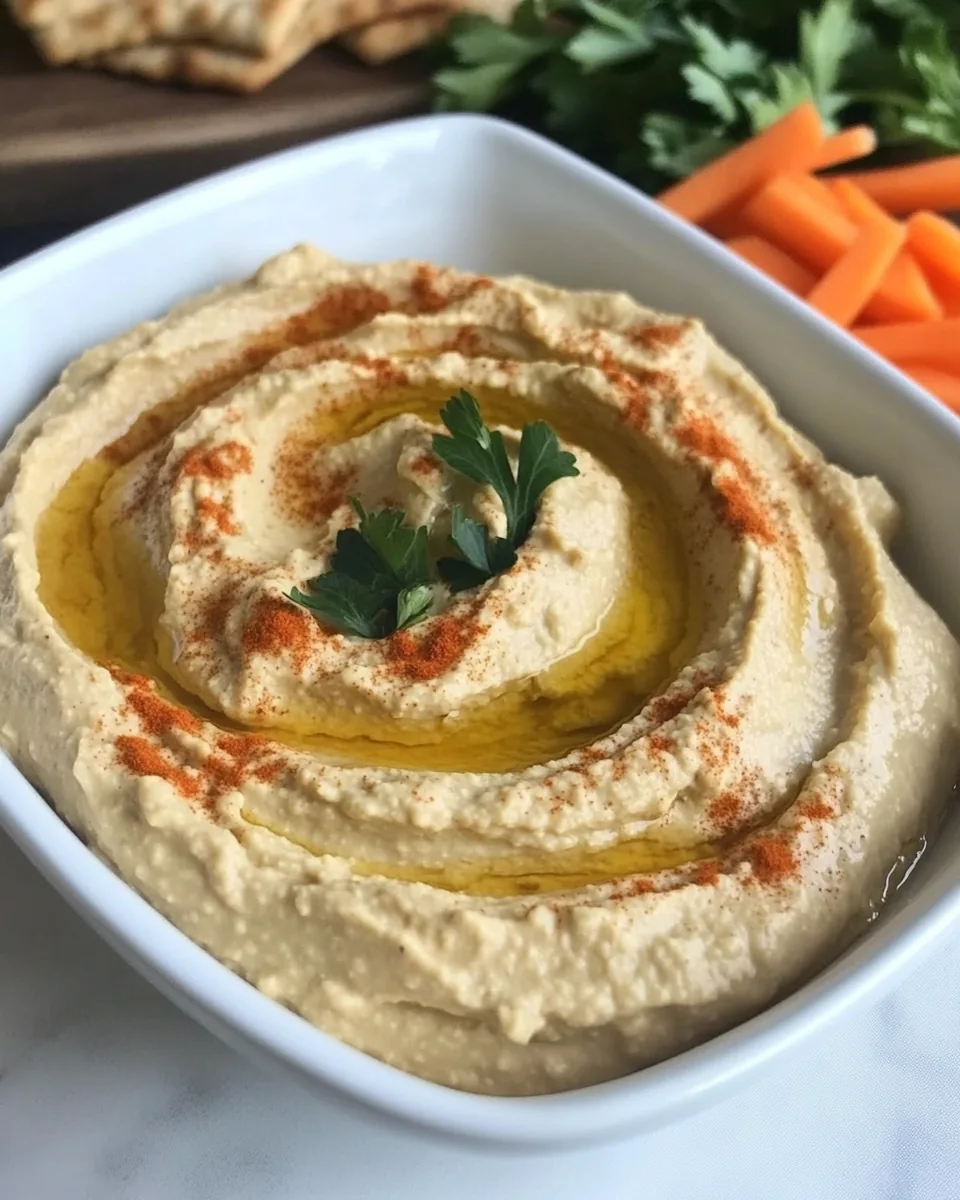
- When you’re ready to serve, drizzle with extra virgin olive oil for a luxurious finish. I like to sprinkle some pepitas on top for added crunch and a pop of color.
Things Worth Knowing
Things Worth Knowing
- Hummus Texture: If your hummus is too thick, add more ice water to achieve the desired creaminess. A smooth consistency is key!
- Flavor Enhancements: Experiment with various spices or herbs like cumin or parsley to personalize your hummus. The options are endless!
- Serving Suggestions: Serve with an assortment of veggies, pita chips, or even use it as a spread on sandwiches for a fresh twist.
- Storage Tips: Store leftover hummus in an airtight container in the refrigerator. It usually lasts about a week.
- Chickpea Prep: For the best flavor, use dried chickpeas instead of canned. They offer a fresher taste and better texture.
Recipe Notes about Creamy Hummus
To make the most of your Creamy Hummus, here are some helpful notes:
- Storage: Keep hummus in an airtight container and refrigerate. It stays fresh for about a week.
- Freezing: You can freeze hummus for up to three months. Just make sure to leave space for expansion in the container.
- Pairing: This hummus pairs wonderfully with fresh veggies, warm pita, or even as a spread on sandwiches.
- Consistency: If your hummus is too thick after storing, simply stir in a bit of water or olive oil to loosen it up.
- Flavoring: Feel free to blend in roasted red peppers, olives, or spices for a twist on the classic recipe.
How to Serve Creamy Hummus
Serving Creamy Hummus is where you can get creative! Here are some ideas to make it a hit:
- Snack Platter: Arrange a vibrant platter with hummus, sliced cucumbers, carrots, and bell peppers. This makes for a visually stunning and healthy appetizer.
- Party Dip: Serve Creamy Hummus at gatherings with pita chips and a variety of dips to keep everyone coming back for more.
- Sandwich Spread: Use this hummus as a spread in wraps or sandwiches, adding layer upon layer of flavor.
- Brunch Delight: Pair it with brunch items like eggs or avocado toast for a unique twist.
- Picnic Essential: Pack it up for outdoor lunches along with fresh bread for a delightful, healthy meal in the sun.
- Garnishing: Get creative with toppings! Sprinkle paprika, chopped parsley, or toasted nuts on top to elevate your presentation.
FAQ
Conclusion
In conclusion, Creamy Hummus is a truly special dish that brings people together over delicious, shared moments. Its versatility and flavor make it a favorite in homes around the world. I encourage you to try making it yourself; you’ll be surprised at how easy it is and how rewarding it feels to create something so delightful!
Creamy Hummus
Ingredients
Equipment
Method
- Soak the chickpeas overnight in cold water until they double in size.
- Drain the chickpeas and place them in a saucepan with the baking soda. Cook over high heat for about three minutes, stirring constantly. Add water and bring to a boil.
- Reduce heat to a simmer and cook for twenty to forty minutes, skimming off any foam or skins from the top, or until chickpeas are very tender but not mushy.
- Drain and place chickpeas in a food processor. Process for a minute or two until a paste forms.
- Then, with the processor running, add the tahini, lemon juice, garlic, and one teaspoon of salt.
- Slowly add in the ice water and process for a full five minutes until the hummus is smooth and creamy.
- Taste and add another half teaspoon of salt if desired.
- Scrape into a bowl, cover, and let rest for thirty minutes. To serve, drizzle with olive oil if desired. I sprinkled with pepitas for some color and crunch.
Notes
- Tip 1: Store hummus in an airtight container and refrigerate. It stays fresh for about a week.
- Tip 2: You can freeze hummus for up to three months. Just make sure to leave space for expansion in the container.
- Tip 3: This hummus pairs wonderfully with fresh veggies, warm pita, or even as a spread on sandwiches.
- Tip 4: If your hummus is too thick after storing, simply stir in a bit of water or olive oil to loosen it up.
- Tip 5: Feel free to blend in roasted red peppers, olives, or spices for a twist on the classic recipe.