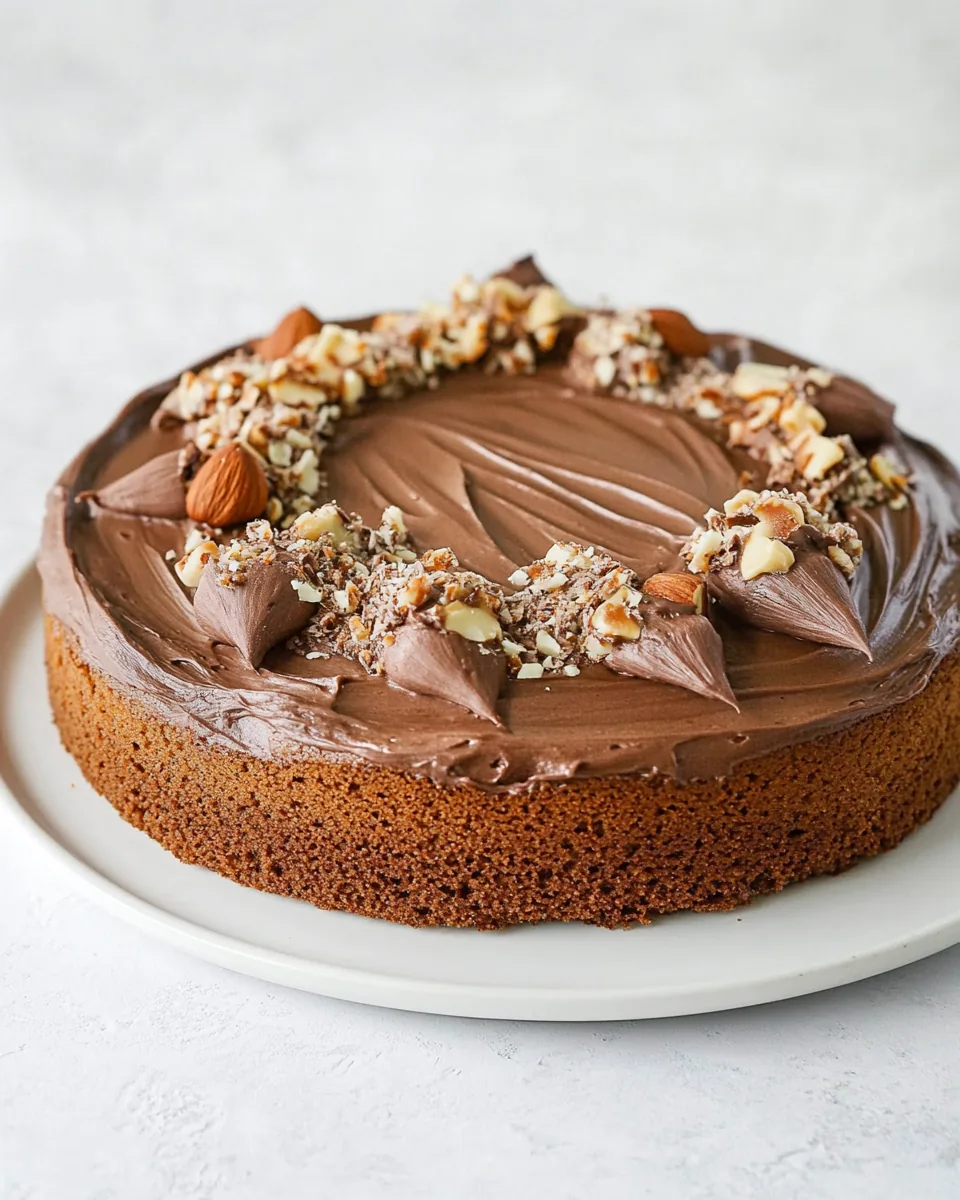
Flourless Hazelnut Cake
It was a rainy afternoon when I first attempted the Flourless Hazelnut Cake. I was looking for a dessert that could satisfy my sweet tooth without the hefty burden of flour. The thought of indulging in a rich, chocolatey treat that was also gluten-free intrigued me. As I gathered my ingredients, a sense of excitement filled the air. The earthy aroma of hazelnut flour blended with the sweetness of chocolate and Nutella promised a delightful experience. This cake is not just a dessert; it’s a testament to the magic of simple ingredients coming together to create something extraordinary.
As I whisked the egg whites, I felt like a magician, transforming the humble ingredients into something light and airy. The anticipation grew as the batter came together, rich and glossy, unlike anything I had ever made before. With each layer of flavor, I could almost taste the love and care that went into making this cake. I knew that the Flourless Hazelnut Cake would be perfect for sharing with friends and family, a sweet moment to bring us together amidst the chaos.
Recipe Snapshot
1 hr 40 mins
60 mins
40 mins
Hard
350 kcal
6 g
Gluten-Free, Low FODMAP
25 g
Oven, Large Pot, Mixing Bowl, Baking Sheet, Chef’s Knife, Blender, Frying Pan, Food Processor, Wooden Spoon, Whisk
What You’ll Enjoy About This Flourless Hazelnut Cake
Why This Recipe Stands Out
There are so many reasons to fall in love with this Flourless Hazelnut Cake. Allow me to share just a few!
1. Gluten-Free Goodness
Being a gluten-free dessert, this cake is perfect for those who are sensitive to gluten or simply looking to reduce their intake. The hazelnut flour lends a unique flavor that elevates the cake beyond traditional options.
2. Rich and Indulgent
The combination of semisweet and milk chocolate creates a deep, luscious flavor that ensures every bite is a moment to savor. It’s like a chocolate lover’s dream come true!
3. Easy to Make
With straightforward steps, this recipe is accessible even for novice bakers. You don’t need to be an expert to create an impressive dessert that will wow everyone.
4. Perfect for Any Occasion
Whether it’s a birthday, holiday, or just a weekend treat, the Flourless Hazelnut Cake fits in beautifully. Its elegant presentation makes it a showstopper on any dessert table.
5. Versatile Toppings
Top it with whipped cream, fresh fruits, or even a sprinkle of powdered sugar to customize your experience. Each variation offers a new way to enjoy this delightful cake.
6. Make Ahead Option
This cake can be prepared ahead of time, stored in the refrigerator, and served later, making it a practical choice for busy schedules while still delivering on taste and quality.
Ingredients for Flourless Hazelnut Cake
The ingredients for the Flourless Hazelnut Cake are carefully chosen to create a harmonious blend of flavors and textures. The hazelnut flour serves as the backbone of the cake, providing a nutty flavor that pairs beautifully with the rich chocolate ganache. Each ingredient plays a crucial role in achieving the perfect balance that makes this cake irresistible.
- 3 cups (300g) hazelnut flour: This flour adds a rich, nutty flavor and moist texture to the cake, making it a delightful gluten-free option.
- 2 tablespoons (16g) cornstarch: This helps to stabilize the cake and ensures a light texture, complementing the heaviness of the chocolate.
- ½ teaspoon fine sea salt: A pinch of salt enhances the flavors and balances the sweetness in the cake.
- 1 ⅓ cups (266g) granulated sugar, divided: Sugar is key to sweetening the cake, while some is added to the egg whites for volume and texture.
- 1 teaspoon instant espresso powder: This adds depth of flavor and enhances the chocolate taste, making it even richer.
- 6 large eggs, separated, at room temperature: Eggs provide structure and moisture; separating them helps create a light, airy batter.
- 10 tablespoons (141g) European-style salted butter: Rich and creamy, this butter brings moisture and a luxurious mouthfeel to the cake.
- 2 teaspoons vanilla extract: Vanilla adds warmth and complements the nutty and chocolate flavors perfectly.
- 2 oz (56g) 55-60% semisweet chocolate, finely chopped: Provides a rich chocolate flavor and texture in the cake.
- 2 oz (56g) 30-35% milk chocolate, finely chopped: Adds creaminess and sweetness to balance the darker chocolate.
- ⅓ cup (100g) Nutella: This iconic spread brings a creamy texture and additional hazelnut flavor to the ganache.
- 1 cup (240g) heavy whipping cream: Used for making the ganache, it provides the creamy base that envelops the cake.
- 1 tablespoon (22g) glucose or light corn syrup: This helps to create a glossy finish for the ganache.
- candied hazelnuts, optional, for decoration: Adds a crunchy texture and is perfect for garnishing the cake.
How to Make Flourless Hazelnut Cake
Making the Flourless Hazelnut Cake is a rewarding process that brings joy to every step. You’ll be amazed at how simple it is to create this indulgent dessert. Let’s dive into the process together!
- Preheat your oven to 350 degrees F. Prepare a 9-inch round cake pan by buttering and lining the bottom with parchment paper, ensuring that the parchment is lightly buttered as well. This will help the cake release easily after baking.
- In a mixing bowl, sift the hazelnut flour. If there are large bits left over, pulse them in a food processor to create a finer texture, then sift again. You should end up with a total of 300g. Next, whisk in the cornstarch, espresso powder, and salt until well combined, then set aside.
- Using a stand mixer fitted with the whisk attachment, whip the egg yolks with 1 cup of granulated sugar on medium-high speed for 5 to 6 minutes until the mixture becomes thick and pale yellow.
- In a microwave-safe container, melt the butter. Microwave it at 50% power for 10 seconds, stirring in between until it’s completely melted but not separated. It should be a light yellow and pourable. Let it cool slightly.
- With the mixer running on low speed, gradually pour the melted butter into the egg yolk mixture in three to four additions, allowing it to incorporate fully before adding more. Add the vanilla extract and mix until combined.
- If you’re using a single bowl for your stand mixer, transfer the mixture to a large bowl and clean the mixer bowl thoroughly. If you have two bowls, swap them out and wash the whisk attachment. This step is crucial to achieving fluffy egg whites.
- In a clean mixing bowl, whip the egg whites on medium speed until frothy. Gradually add in the remaining 1/3 cup sugar in three or four additions while mixing, then increase the speed to medium-high until medium peaks form—this could take 5 to 10 minutes.
- Gently fold a little less than half of the whipped egg whites into the egg yolk mixture. This lightens the mixture. Once incorporated, fold in half of the sifted hazelnut flour until it is almost blended, followed by the remaining egg whites and the remaining hazelnut flour. Be careful not to overmix, which would deflate the batter.
- Pour the batter into the prepared cake pan. If your pan has a removable bottom, place it on a baking sheet to catch any drips.
- Bake for about 40 minutes. The cake should have set edges, be light golden brown on top, and a toothpick inserted in the center should come out clean.
- Once baked, remove the cake from the oven and let it cool on a wire rack. Run a knife around the edge to loosen it before gently removing the sides of the pan, or invert it to release. Allow it to cool completely. You can make the cake ahead of time and refrigerate it overnight or freeze it for up to a month.
- For the ganache, place the chopped chocolate and Nutella in a heat-proof bowl. In a small saucepan, warm the cream and glucose over low heat until it just begins to steam—do not let it boil.
- Immediately pour the hot cream over the chopped chocolate. Let it sit for 30 seconds before whisking until the chocolate is fully melted and the mixture is smooth. If preferred, an immersion blender works wonders for achieving a silky texture.
- Transfer the ganache to a large mixing bowl. Cover the surface with plastic wrap and refrigerate for 4 to 6 hours or overnight until it cools completely.
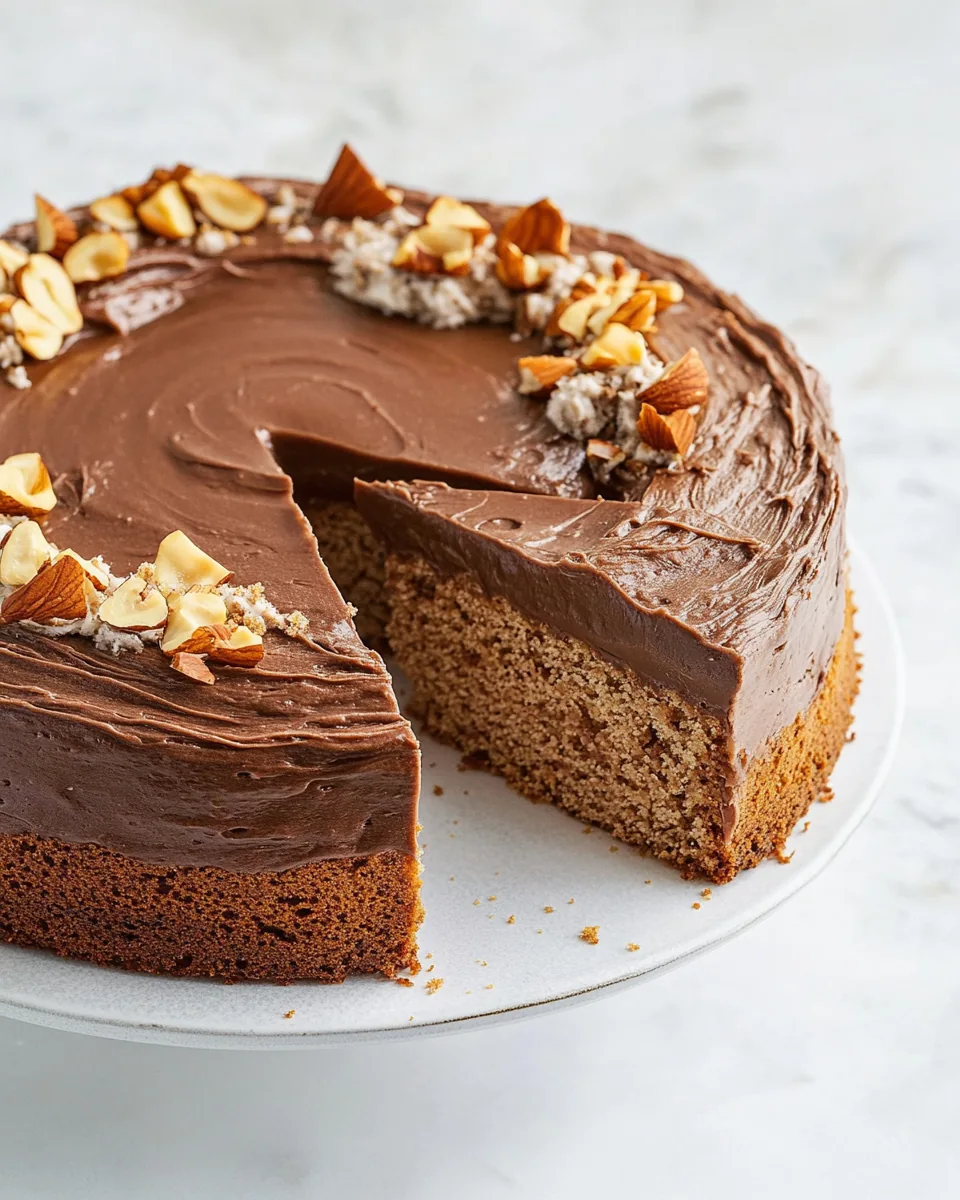
- When the ganache is fully chilled, whip it with an electric mixer for a few minutes until it lightens in color and increases in volume. Be cautious not to overwhip, or it may become too thick. Spread or pipe the ganache onto the cooled cake, and if desired, top with candied hazelnuts for decoration.
- Slice and serve immediately, or refrigerate until ready to enjoy. To store leftovers, cover the cut surfaces with plastic wrap or store in an airtight container. The cake keeps well in the refrigerator for up to five days, but I recommend adding the candied hazelnuts just before serving to maintain their crunch.
Things Worth Knowing
- Air Incorporation: When whipping egg whites, they’re best at room temperature as they trap more air, leading to a fluffier texture.
- Butter Temperature: Ensure the butter is not too hot when adding it to the egg yolk mixture, as it can cook the eggs.
- Cooling Time: Allow the cake to cool completely before adding the ganache to avoid melting it.
- Storage: Store the cake wrapped tightly in the refrigerator to keep it fresh, and consume it within five days.
Recipe Variations about Flourless Hazelnut Cake
There are countless ways to enjoy the Flourless Hazelnut Cake, making it a versatile dessert for any occasion. Here are some ideas to inspire your baking adventures!
- Flavored Ganache: Experiment with flavored ganaches by infusing the cream with spices or citrus zest before combining with chocolate.
- Nut Alternatives: Swap some of the hazelnut flour with almond flour for a unique flavor twist or to cater to nut allergies.
- Fruit Additions: Add fresh berries or a fruit compote on top for a refreshing contrast to the rich cake.
- Layering: Consider making a layered cake by baking two cakes and stacking them with ganache between the layers.
- Gluten-Free Flour Blend: If hazelnuts aren’t your favorite, try a gluten-free flour blend for a different taste.
- Less Sweet Option: Reduce the sugar slightly for a less sweet cake that pairs well with strong coffee or tea.
- Decadent Toppings: Drizzle caramel or serve with a scoop of vanilla ice cream for a decadent dessert experience.
Pairing Suggestions for Flourless Hazelnut Cake
The Flourless Hazelnut Cake offers a delightful balance of rich flavors, making it a perfect centerpiece for various occasions. Here are some pairing ideas to elevate your dessert experience:
- Fresh Berries: Serve with a side of mixed fresh berries to provide a tart contrast to the rich chocolate flavors.
- Whipped Cream: A dollop of lightly sweetened whipped cream complements the cake beautifully.
- Coffee: Pair with a strong cup of coffee or espresso to enhance the chocolate notes.
- Seasonal Desserts: This cake can be an exquisite addition to holiday gatherings, especially around winter when rich flavors are celebrated.
- Cheese Plate: Serve alongside a cheese platter for an interesting savory-sweet contrast.
- Chocolate Sauce: Drizzle with chocolate sauce for an extra layer of indulgence.
- Ice Cream: Adding a scoop of vanilla or hazelnut ice cream takes the whole dessert experience to another level.
FAQ
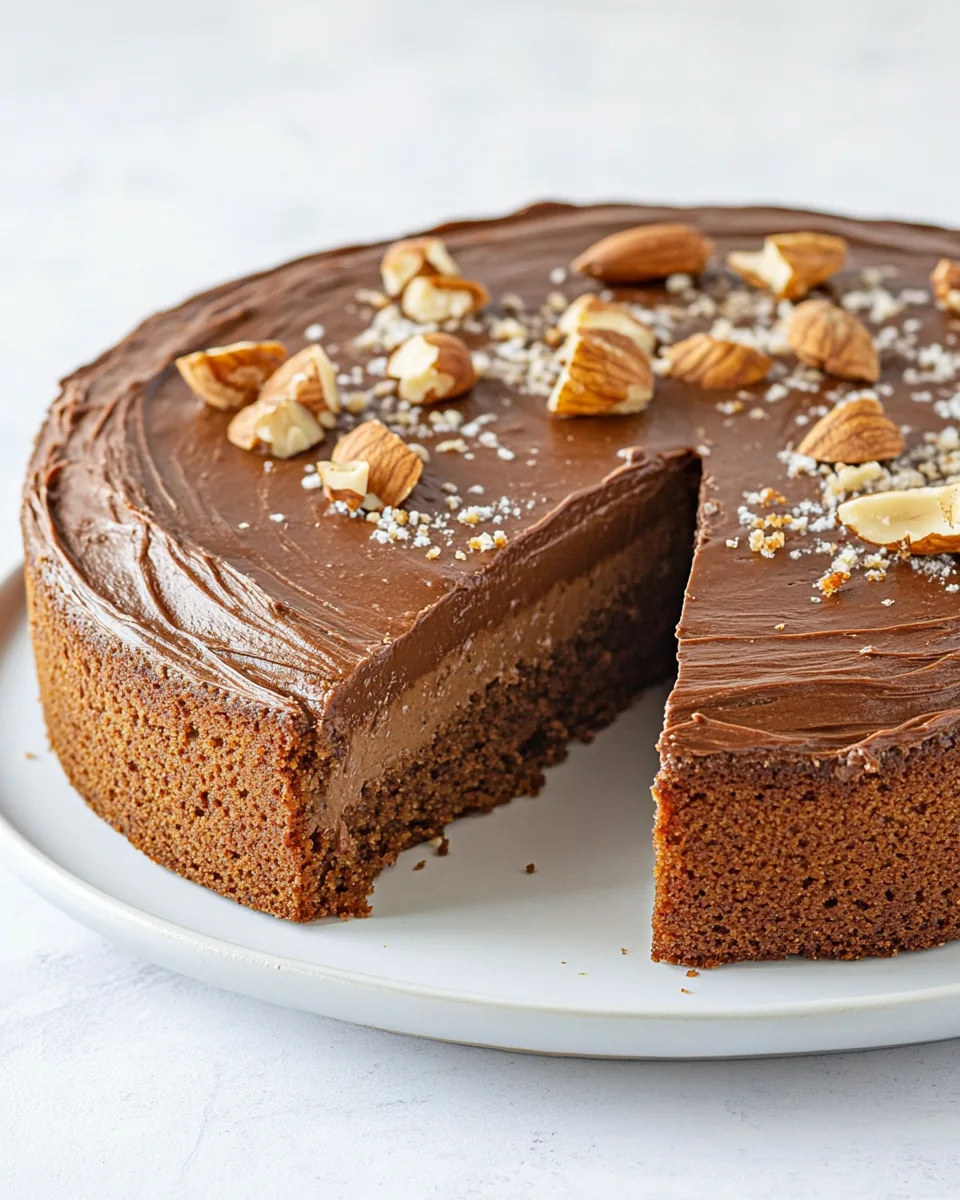
Conclusion
The Flourless Hazelnut Cake is a true gem in the world of desserts. With its rich flavors and elegant texture, it’s sure to impress anyone who tries it. I encourage you to take a moment to recreate this delightful dish in your kitchen. You’ll not only enjoy the process but also create sweet memories with those you share it with.
Flourless Hazelnut Cake
Ingredients
Equipment
Method
- Preheat your oven to 350 degrees F. Prepare a 9-inch round cake pan by buttering and lining the bottom with parchment paper, ensuring that the parchment is lightly buttered as well. This will help the cake release easily after baking.
- In a mixing bowl, sift the hazelnut flour. If there are large bits left over, pulse them in a food processor to create a finer texture, then sift again. You should end up with a total of 300g. Next, whisk in the cornstarch, espresso powder, and salt until well combined, then set aside.
- Using a stand mixer fitted with the whisk attachment, whip the egg yolks with 1 cup of granulated sugar on medium-high speed for 5 to 6 minutes until the mixture becomes thick and pale yellow.
- In a microwave-safe container, melt the butter. Microwave it at 50% power for 10 seconds, stirring in between until it’s completely melted but not separated. It should be a light yellow and pourable. Let it cool slightly.
- With the mixer running on low speed, gradually pour the melted butter into the egg yolk mixture in three to four additions, allowing it to incorporate fully before adding more. Add the vanilla extract and mix until combined.
- If you're using a single bowl for your stand mixer, transfer the mixture to a large bowl and clean the mixer bowl thoroughly. If you have two bowls, swap them out and wash the whisk attachment. This step is crucial to achieving fluffy egg whites.
- In a clean mixing bowl, whip the egg whites on medium speed until frothy. Gradually add in the remaining 1/3 cup sugar in three or four additions while mixing, then increase the speed to medium-high until medium peaks form—this could take 5 to 10 minutes.
- Gently fold a little less than half of the whipped egg whites into the egg yolk mixture. This lightens the mixture. Once incorporated, fold in half of the sifted hazelnut flour until it is almost blended, followed by the remaining egg whites and the remaining hazelnut flour. Be careful not to overmix, which would deflate the batter.
- Pour the batter into the prepared cake pan. If your pan has a removable bottom, place it on a baking sheet to catch any drips.
- Bake for about 40 minutes. The cake should have set edges, be light golden brown on top, and a toothpick inserted in the center should come out clean.
- Once baked, remove the cake from the oven and let it cool on a wire rack. Run a knife around the edge to loosen it before gently removing the sides of the pan, or invert it to release. Allow it to cool completely. You can make the cake ahead of time and refrigerate it overnight or freeze it for up to a month.
- For the ganache, place the chopped chocolate and Nutella in a heat-proof bowl. In a small saucepan, warm the cream and glucose over low heat until it just begins to steam—do not let it boil.
- Immediately pour the hot cream over the chopped chocolate. Let it sit for 30 seconds before whisking until the chocolate is fully melted and the mixture is smooth. If preferred, an immersion blender works wonders for achieving a silky texture.
- Transfer the ganache to a large mixing bowl. Cover the surface with plastic wrap and refrigerate for 4 to 6 hours or overnight until it cools completely.
- When the ganache is fully chilled, whip it with an electric mixer for a few minutes until it lightens in color and increases in volume. Be cautious not to overwhip, or it may become too thick. Spread or pipe the ganache onto the cooled cake, and if desired, top with candied hazelnuts for decoration.
- Slice and serve immediately, or refrigerate until ready to enjoy. To store leftovers, cover the cut surfaces with plastic wrap or store in an airtight container. The cake keeps well in the refrigerator for up to five days, but I recommend adding the candied hazelnuts just before serving to maintain their crunch.
Notes
- Tip 1: You can replace some of the hazelnut flour with almond flour, ensuring the total nut flour equals 300g.