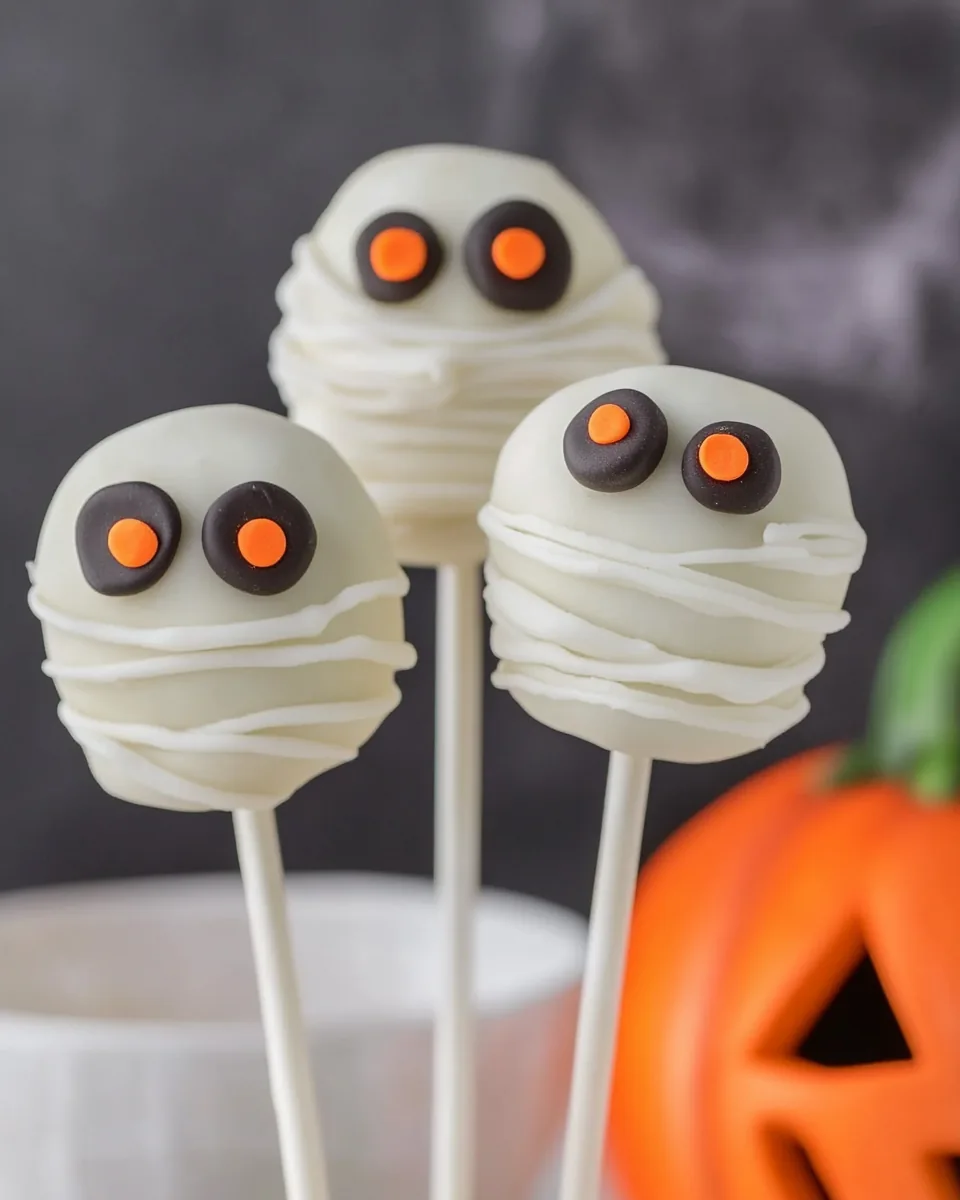
Halloween Cake Pops
Every year, as fall approaches, I find myself excitedly preparing for Halloween, and this year is no different. The star of my dessert table will undoubtedly be these adorable Halloween Cake Pops. I love how they bring a little whimsy to any gathering, making them perfect for parties, school events, or just a fun family treat. The best part? They’re ridiculously easy to make! You can customize them in any way you want, whether it be the colors or the toppings, making them a blank canvas for creativity. Plus, they’re so delightful to eat, with the combination of fluffy cake and smooth chocolate coating melting in your mouth. I can already picture the kids’ faces lighting up when they see these spooky treats.
Recipe Snapshot
30 mins
30 mins
0 mins
Medium
130 kcal
2 g
Keto, Paleo, Whole30
5 g
Mixing Bowl, Baking Sheet, Wooden Spoon
Why Try This Halloween Cake Pops
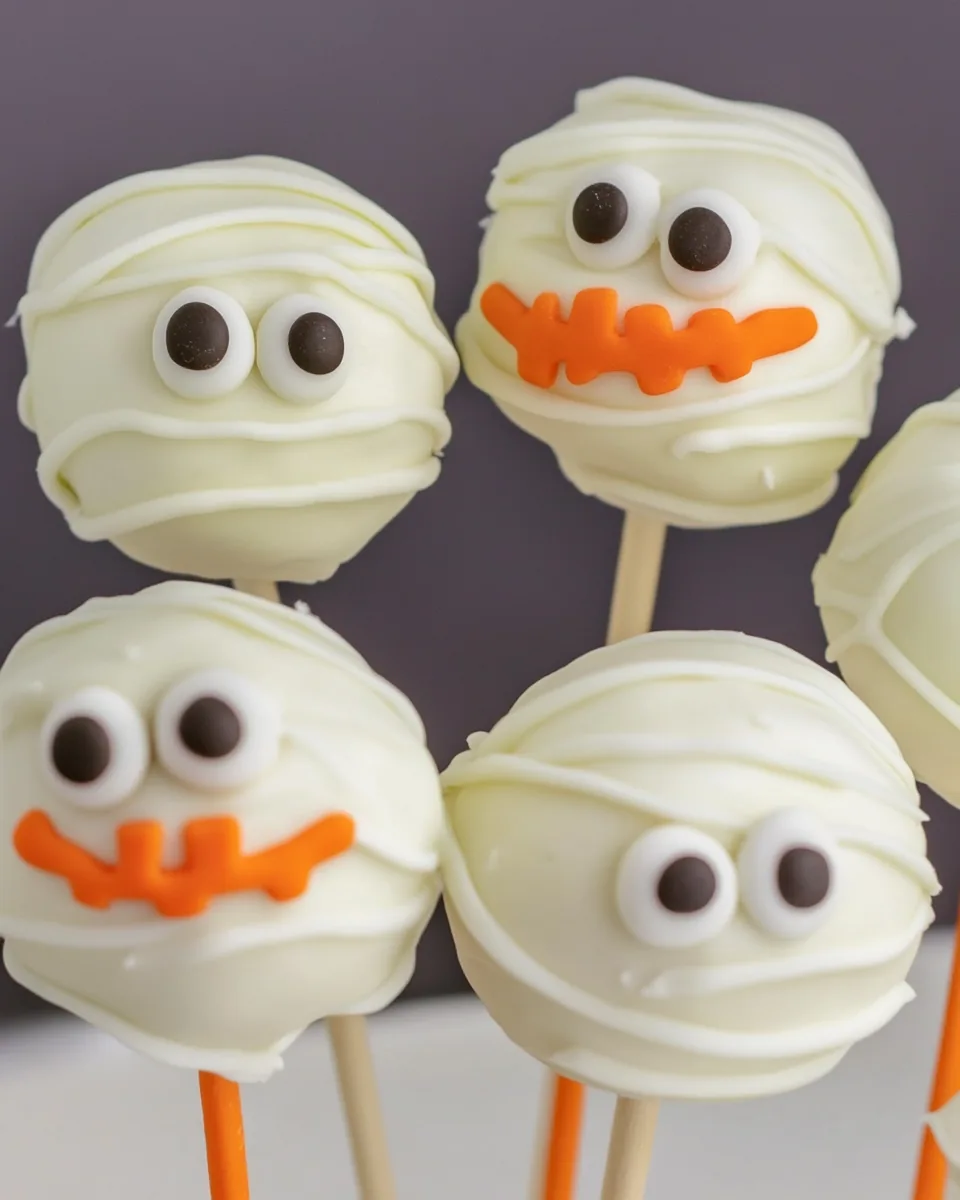
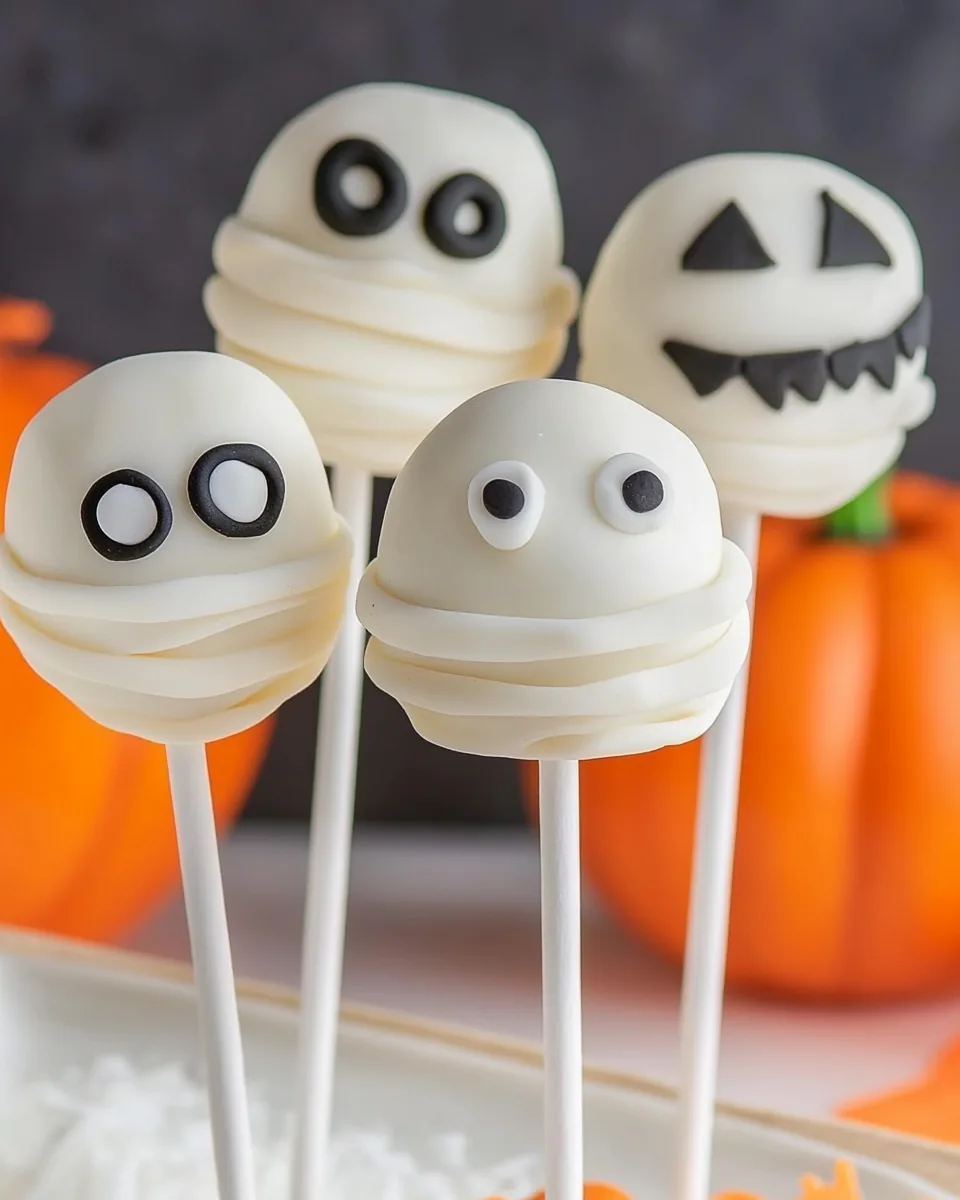
1. They’re So Much Fun to Decorate
One of my favorite things about making Halloween Cake Pops is the decorating process. You can let your imagination fly! Whether you want to cover them with vibrant sprinkles, crushed Oreos, or use food coloring to create spooky designs, the options are endless. It’s a great way to get the kids involved, too. Everyone can have their own style!
2. Perfect for Any Occasion
While these cake pops scream Halloween, they can be enjoyed at any celebration. Birthdays, fall festivals, or even cozy movie nights can be made more festive with a tray of these treats. They’re not just limited to October; you can adapt the colors and themes to suit any holiday!
3. Easy to Make
You might think that Halloween Cake Pops are complicated, but they’re surprisingly straightforward. With just a few ingredients, you can whip these up in no time. All you need is a baked cake, frosting, and chocolate for coating. It’s a simple process of crumbling, mixing, rolling, and dipping!
4. A Hit with All Ages
These cake pops are loved by kids and adults alike! They’re bite-sized, so they’re perfect for little hands, and the flavors appeal to everyone’s sweet tooth. Whether you’re a chocolate lover or a frosting fanatic, each bite of these cake pops brings joy and nostalgia.
5. Great for Baking Beginners
If you’re new to baking, Halloween Cake Pops are an excellent recipe to start with. There’s no intricate technique involved; it’s all about mixing and having fun. Even if you make a mistake, it’s hard to mess them up, and they still taste delicious!
6. Store Well for Later Enjoyment
Another bonus is that these cake pops can be stored easily. Made ahead of time, they can be kept in the refrigerator for up to a week. This makes them ideal for preparing in advance for busy events or family gatherings. Just take them out when you’re ready to serve!
What to Buy for Halloween Cake Pops
When it comes to making Halloween Cake Pops, the ingredients are simple yet crucial for that delightful flavor and texture. The combination of a light and fluffy cake, rich frosting, and smooth chocolate creates a delicious treat that everyone loves. Let’s break down the main ingredients that work together beautifully.
- Angel Food Cake: This cake serves as the perfect base—light, airy, and fluffy. It crumbles easily and blends wonderfully with frosting.
- Vanilla Frosting: The frosting acts as a binding agent, helping to mold the cake into perfect balls while adding sweetness.
- White Chocolate Chips: Used for coating, they add a rich, creamy layer that contrasts beautifully with the fluffy cake inside.
- Food Coloring: Ideal for creating festive colors, it allows you to customize your cake pops to match any occasion.
- Sprinkles and Other Toppings: These add a decorative touch, making your cake pops visually appealing and fun!
- Cake Pop Sticks: Essential for serving, they allow for easy handling and presentation.
How to Assemble Halloween Cake Pops
Now that you have your ingredients ready, it’s time to dive into making those stunning Halloween Cake Pops. Don’t worry; it’s a fun process and very forgiving!
Start by crumbling the baked Angel Food Cake into a medium bowl. Use your hands to break it into very small pieces. The texture should be fine, resembling breadcrumbs—it helps the cake pops hold their shape.
Add in the vanilla frosting and vanilla extract to the crumbled cake. Mix thoroughly with your hands or a spoon until everything is well combined. It should feel moist but not sticky, forming a dough-like texture.
Now, separate the mixture into three bowls for coloring. If you plan on using different colors, this is your chance to be creative! Add approximately 25 drops of food coloring to each bowl and mix until you achieve the desired hues. Don’t shy away from adding more color if needed!
Once colored, cover the bowls and place them in the freezer for at least 10 to 15 minutes. This will make the mixture a bit firmer and easier to roll.
After chilling, take the mixture out and start rolling it into 1.5-inch balls. Ensure they are tight and compact; this will help them maintain their shape when dipped.
Place the rolled balls on a parchment-lined tray and return them to the freezer for another 15 to 20 minutes. This extra chill will help them hold together better when you coat them with chocolate.
As your cake pops chill, melt one-third cup of white chocolate chips in the microwave. Heat in 15 to 20-second increments, stirring well between each session until smooth. Be careful not to overheat!
Take the chilled cake balls from the freezer. Dip the tip of a cake pop stick into the melted chocolate and then insert it halfway into a cake ball to help it stay in place.
Repeat this with the remaining cake balls, then place them back in the freezer for another 15 to 20 minutes.
When you’re ready to coat the pops, reheat the remaining melted chocolate, ensuring it’s smooth and not too hot. Dunk each cake pop straight down into the melted chocolate, then slowly lift it out, allowing excess chocolate to drip off.
Allow the coated cake pops to stand upright in a box, styrofoam, or a cup for drying. This prevents them from sticking to surfaces.
While the coating is still wet, sprinkle on your choice of toppings, like sprinkles or crushed Oreos. Let them set for about 10 to 15 seconds before transferring them to a decorative display.
Store the finished Halloween Cake Pops in the refrigerator for up to a week. Enjoy sharing them with friends and family!
Things Worth Knowing
- Be Patient with Melting Chocolate: It’s vital to melt the chocolate gently. Stir frequently to avoid scorching, as burnt chocolate can ruin your pops.
- Chill the Mixture: Always chill your cake ball mixture before rolling and coating. This ensures they keep their shape during the coating process.
- Experiment with Flavors: Feel free to experiment with different flavored frostings or cake mixes to create unique taste combinations.
- Decorate with Precision: Use a piping bag for detailed decorations if you want to make your pops look extra festive.
Change It Up
Got a little extra time on your hands? Here are some fun ways to customize your Halloween Cake Pops and make them even more special!
- Add Different Flavors: You can enhance the flavor by using chocolate or lemon cake instead of Angel Food Cake.
- Try Different Coatings: Instead of white chocolate, try using dark or milk chocolate for a richer taste.
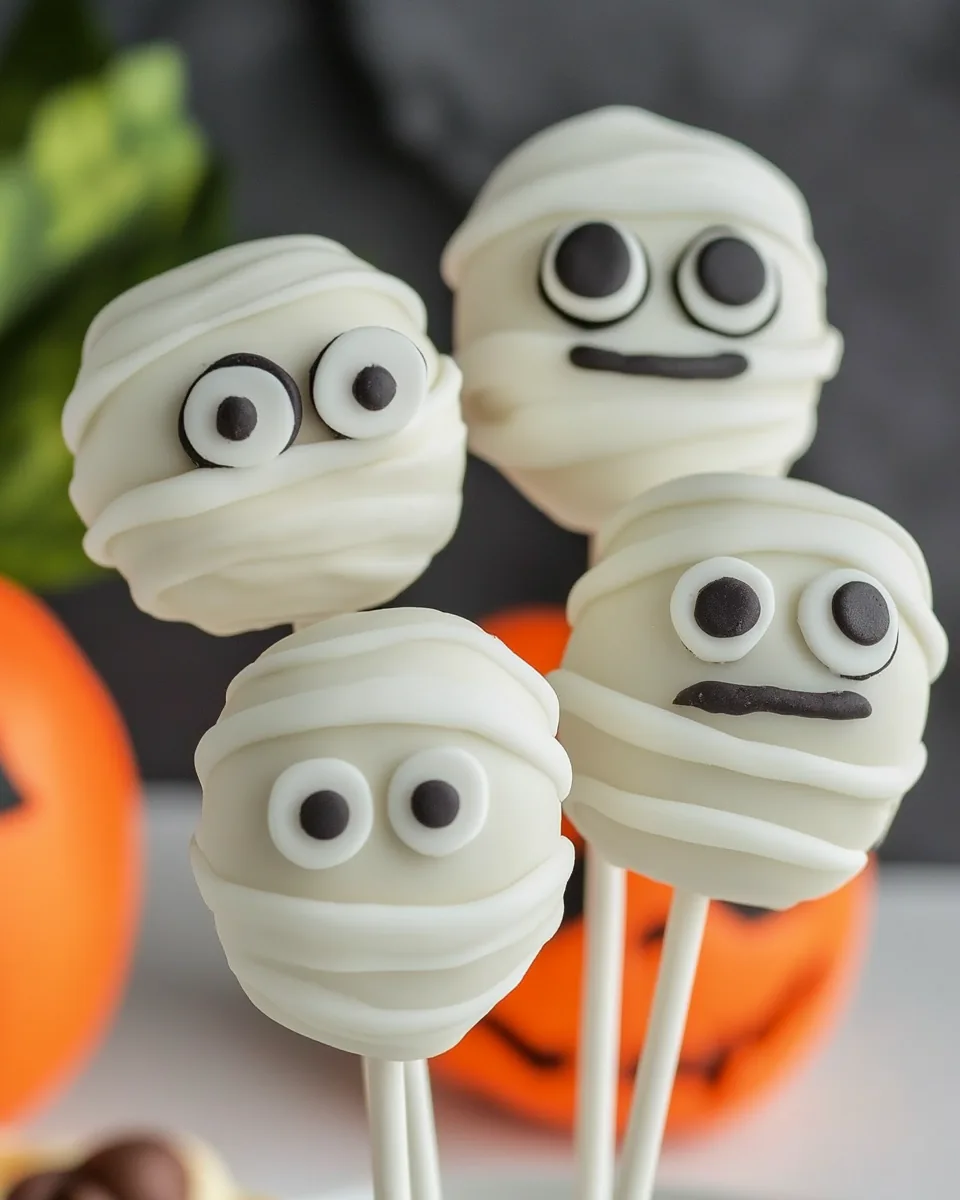
- Go Crazy with Toppings: Use edible glitter, mini chocolate chips, or themed decorations like candy eyes for a spooky touch!
- Seasonal Variations: Adjust the colors and toppings to fit other holidays—think red and green for Christmas or pastel colors for Easter!
- Make Cake Pop Truffles: If you don’t have cake pop sticks, you can skip them and make truffles instead. Just roll them in chocolate and sprinkle!
- Use Different Shapes: Instead of round balls, try forming the mixture into ghosts or pumpkins to make them even more festive.
Serve This Halloween Cake Pops With
When it comes to serving your Halloween Cake Pops, you have a multitude of options to elevate the experience:
- Halloween Treat Table: Display them on a decorated table alongside other spooky treats like cookies or cupcakes for a festive look.
- Kids’ Parties: Perfect for entertaining kids, these cake pops can be a fun dessert to keep the little ones excited.
- Fall Celebrations: Pair them with apple cider or pumpkin spice drinks for a seasonal touch.
- Movie Nights: Serve them alongside popcorn for a fun movie experience, especially during Halloween-themed movie marathons.
- Gift Giving: Wrap them up nicely and give them as homemade gifts to friends, family, or classmates.
- Decorate for the Occasion: Use themed plates or cups when serving to enhance the festive atmosphere.
FAQ
Conclusion
In conclusion, these Halloween Cake Pops are not only fun to make but also a delightful treat that everyone will love. Their adaptability and ease make them a wonderful addition to any Halloween celebration. I encourage you to gather your ingredients, invite some friends or family, and dive into the joyful process of creating these festive desserts. You won’t regret it!
Halloween Cake Pops
Ingredients
Equipment
Method
- Start by crumbling the baked Angel Food Cake into a medium bowl. Use your hands to break it into very small pieces. The texture should be fine, resembling breadcrumbs—it helps the cake pops hold their shape.
- Add in the vanilla frosting and vanilla extract to the crumbled cake. Mix thoroughly with your hands or a spoon until everything is well combined. It should feel moist but not sticky, forming a dough-like texture.
- Now, separate the mixture into three bowls for coloring. If you plan on using different colors, this is your chance to be creative! Add approximately 25 drops of food coloring to each bowl and mix until you achieve the desired hues. Don’t shy away from adding more color if needed!
- Once colored, cover the bowls and place them in the freezer for at least 10 to 15 minutes. This will make the mixture a bit firmer and easier to roll.
- After chilling, take the mixture out and start rolling it into 1.5-inch balls. Ensure they are tight and compact; this will help them maintain their shape when dipped.
- Place the rolled balls on a parchment-lined tray and return them to the freezer for another 15 to 20 minutes. This extra chill will help them hold together better when you coat them with chocolate.
- As your cake pops chill, melt one-third cup of white chocolate chips in the microwave. Heat in 15 to 20-second increments, stirring well between each session until smooth. Be careful not to overheat!
- Take the chilled cake balls from the freezer. Dip the tip of a cake pop stick into the melted chocolate and then insert it halfway into a cake ball to help it stay in place.
- Repeat this with the remaining cake balls, then place them back in the freezer for another 15 to 20 minutes.
- When you're ready to coat the pops, reheat the remaining melted chocolate, ensuring it's smooth and not too hot. Dunk each cake pop straight down into the melted chocolate, then slowly lift it out, allowing excess chocolate to drip off.
- Allow the coated cake pops to stand upright in a box, styrofoam, or a cup for drying. This prevents them from sticking to surfaces.
- While the coating is still wet, sprinkle on your choice of toppings, like sprinkles or crushed Oreos. Let them set for about 10 to 15 seconds before transferring them to a decorative display.
- Store the finished Halloween Cake Pops in the refrigerator for up to a week. Enjoy sharing them with friends and family!
Notes
- Be Patient with Melting Chocolate: It’s vital to melt the chocolate gently. Stir frequently to avoid scorching, as burnt chocolate can ruin your pops.
- Chill the Mixture: Always chill your cake ball mixture before rolling and coating. This ensures they keep their shape during the coating process.
- Experiment with Flavors: Feel free to experiment with different flavored frostings or cake mixes to create unique taste combinations.
- Decorate with Precision: Use a piping bag for detailed decorations if you want to make your pops look extra festive.