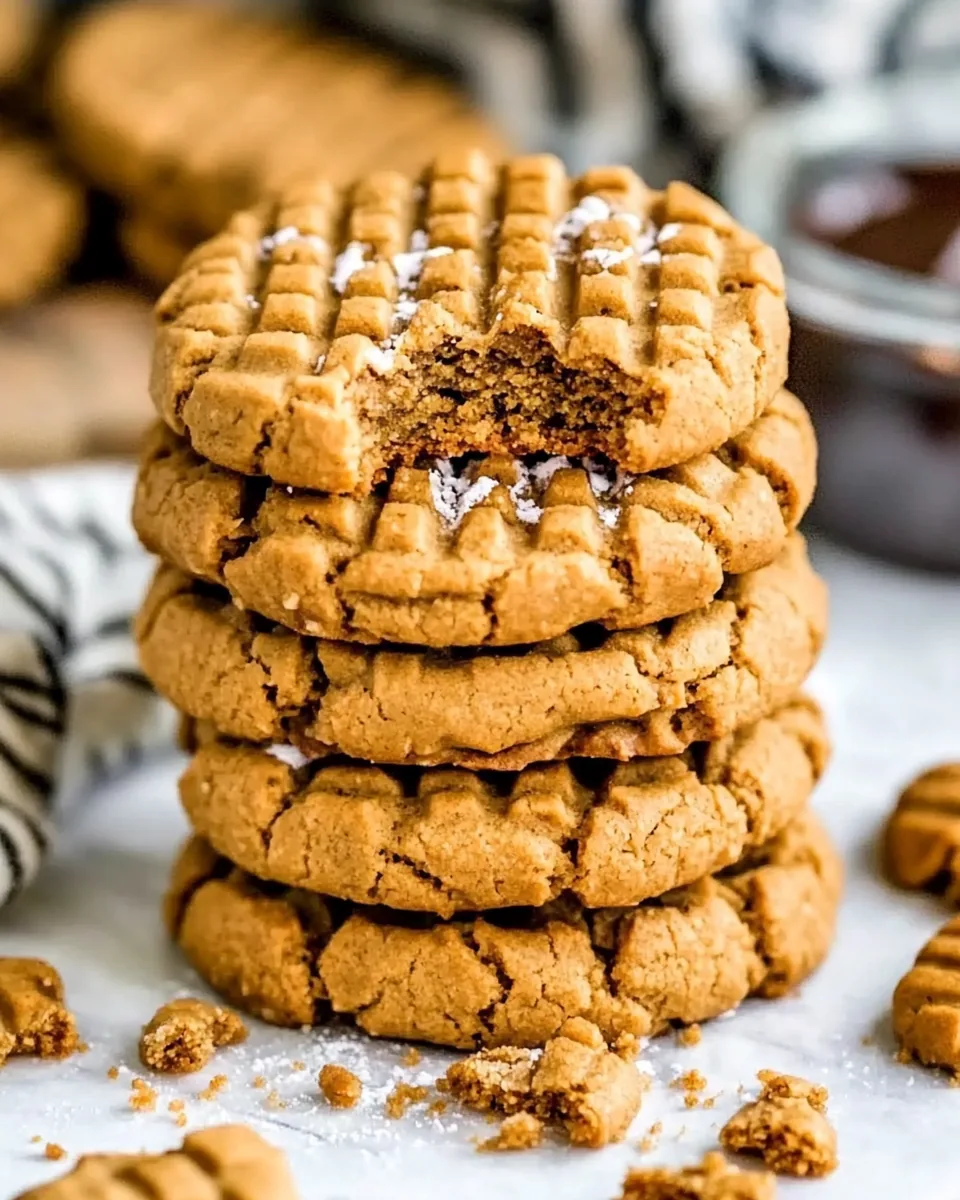
Homemade Nutter Butter Cookies
There’s something incredibly nostalgic about making Homemade Nutter Butter Cookies. Growing up, I would watch my grandmother whip up these delightful treats, and the smell of peanut butter wafting through the kitchen was enough to bring a smile to anyone’s face. As a child, I loved helping her roll the cookie dough into little balls and then flattening them with a fork, making those signature criss-cross patterns that are just so iconic! And, of course, the best part was always the filling—a creamy peanut butter mix that, as far as I was concerned, could be eaten straight from the bowl. Now, as an adult, I find joy in recreating this cherished family recipe in my own kitchen. It’s not just about the cookies; it’s about the memories and the sweetness of time spent with loved ones.
Recipe Snapshot
35 mins
20 mins
15 mins
Medium
150 kcal
4 g
Gluten-Free, Low FODMAP
8 g
Mixing Bowl, Baking Sheet, Food Processor, Oven
What Sets This Homemade Nutter Butter Cookies Apart
A Joyful Tradition
There’s something special about Homemade Nutter Butter Cookies that makes them a favorite in our household. They carry the tradition of sharing sweet treats with family and friends. Every batch reminds me of gatherings where we’d all sit around the table, enjoying cookies and sharing laughter.
Easy to Make
One of the reasons I adore this recipe is how simple it is. You don’t need to be a pro baker to pull these off. With just a handful of ingredients and a dash of love, anyone can create these nutty delights. It’s perfect for a fun baking day with kids or just as a calming weekend project.
Customizable Goodness
Another standout feature is how customizable these cookies are. You can easily adjust the filling to your taste. Whether you prefer a richer peanut butter cream or a sweeter touch with a hint of maple syrup, the options are endless. It’s your chance to get creative!
Perfect for Any Occasion
These cookies aren’t just for special occasions; they make the perfect snack for any day of the week. I often pack them for school lunches, serve them at parties, or enjoy them with a cup of coffee in the afternoon. They fit right in, no matter the setting.
Memorable Flavors
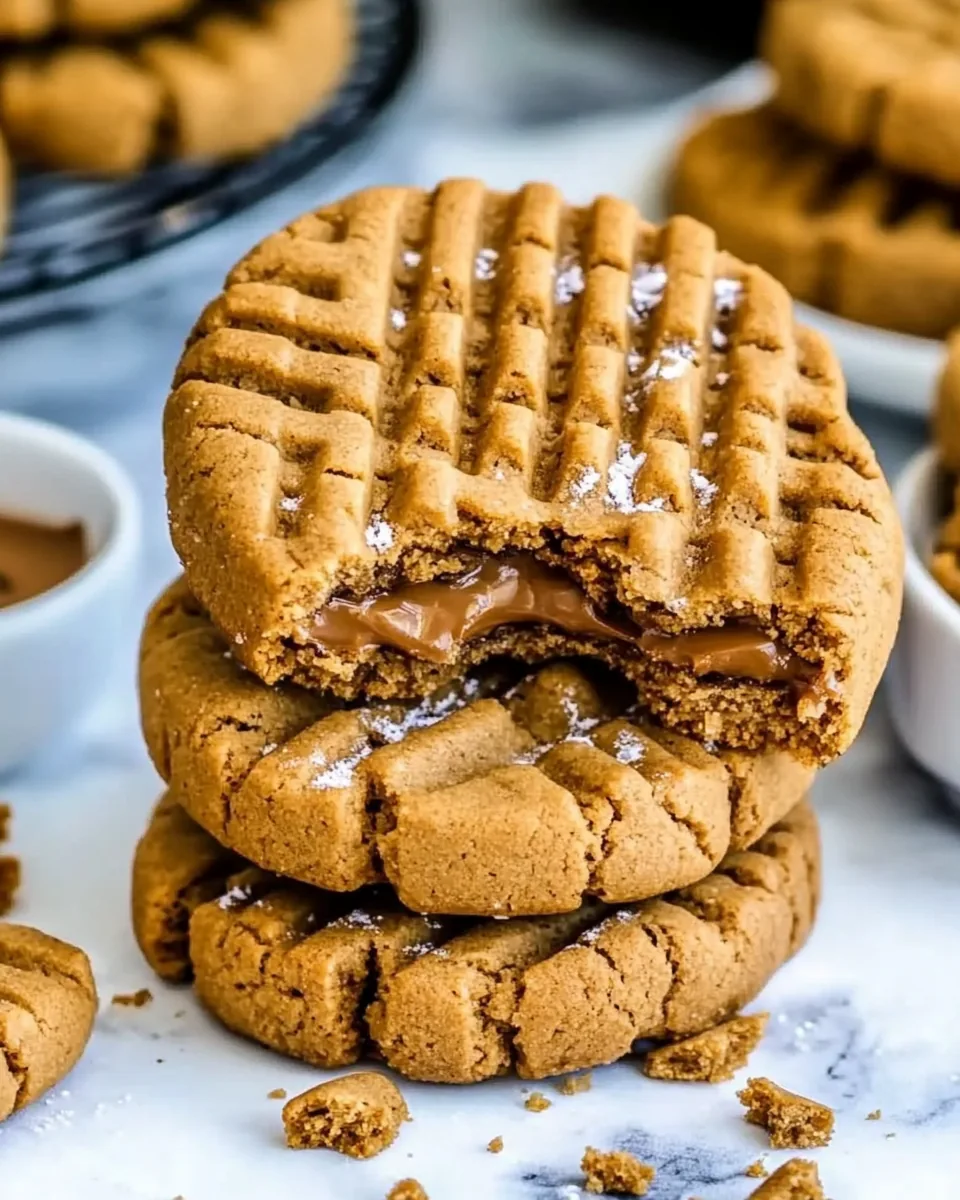
When you bite into a Homemade Nutter Butter Cookie, the combination of peanut butter and the sweet filling creates a flavor that’s unforgettable. The contrast of textures, from the slightly crispy edges to the soft center, is pure bliss. It’s a flavor that lingers, making you crave more.
Shared with Love
Finally, sharing these cookies with others is what truly makes them special. There’s nothing quite like gifting a batch of homemade cookies to friends or family, watching their faces light up as they take that first bite. It’s about connection and creating sweet memories.
What You Need for Homemade Nutter Butter Cookies
To create the perfect Homemade Nutter Butter Cookies, you’ll need a blend of simple yet delightful ingredients that harmonize beautifully. The key players here are the creamy peanut butter, which gives these cookies their rich flavor, and the granulated sugar, which adds sweetness and helps achieve that lovely texture. Together, they create a cookie that’s both comforting and indulgent.
- 1 cup creamy peanut butter: The star of the show, providing that rich, nutty flavor.
- 1 cup granulated sugar: Sweetens the dough and helps achieve a delightful texture.
- 1 egg: Acts as a binder to hold the ingredients together.
- ½ teaspoon vanilla extract: Adds a warm, aromatic flavor.
- 1 tablespoon all-purpose flour: A small amount helps with the texture of the cookies.
- ¾ cup creamy peanut butter: Used for the filling, enhancing that peanut flavor.
- ⅓ cup powdered sugar: For sweetness in the filling.
- 2 tablespoons maple syrup: Adds a unique sweetness to the filling.
- ½ teaspoon vanilla extract: A touch more for the filling.
- 3 ounces Ghirardelli chocolate melting wafers: Ideal for dipping the cookies.
- Flaky sea salt (optional): Adds a delightful crunch and enhances the sweetness.
Recipe Steps for Homemade Nutter Butter Cookies
Making Homemade Nutter Butter Cookies is a delightful experience that fills the kitchen with warmth and sweetness. Follow these steps for a delicious outcome that will have everyone coming back for more. Let’s dive in!
Preheat your oven to 350°F and prepare a large baking sheet by lining it with a silicone baking mat or parchment paper. This is important as it prevents the cookies from sticking and ensures even baking.
In a large mixing bowl, combine 1 cup of creamy peanut butter and 1 cup of granulated sugar. Using a hand mixer or a whisk, beat the two together until creamy and well combined. You should look for a smooth, pale mixture that’s slightly fluffy.
Add in 1 egg and ½ teaspoon of vanilla extract. Beat until thoroughly combined, ensuring the egg is fully incorporated. The mixture should become a cohesive dough.
Now, it’s time to roll the dough. Take small portions, about ½ teaspoon to 1 teaspoon each, and roll them into balls. You should aim for uniform sizes so that they bake evenly.
Place two balls next to each other on the prepared baking sheet. Using the bottom of a cup or measuring cup, flatten the cookies to a thickness of about ⅛ to ¼ inch. This is where the iconic shape starts to form!
Dip a fork’s tines into 1 tablespoon of all-purpose flour to prevent sticking, and press it into the cookie to create criss-cross markings. This gives the cookies their signature look!
Now, bake the cookies in your preheated oven for 9 to 11 minutes. Keep an eye on them; they should be lightly golden at the edges but still soft in the center.
Once baked, remove the cookies from the oven and allow them to rest on the baking sheet for 5 minutes. This resting phase helps them firm up a bit before transferring them to a cooling rack.
To speed up the cooling process, you can carefully transfer the cookies to the freezer for about 10 minutes. This step ensures they’re perfectly set and ready for filling.
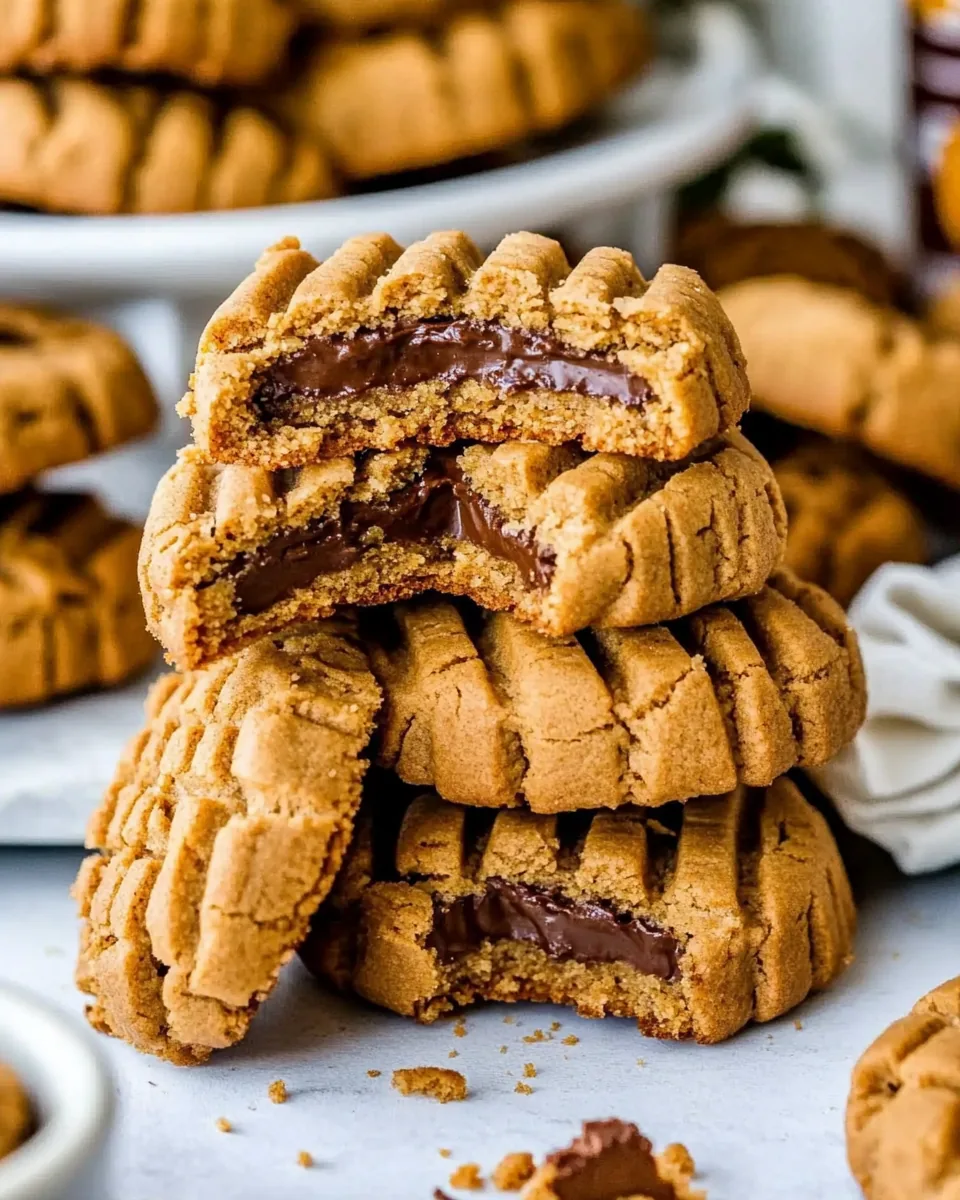
While the cookies are cooling, prepare the filling. In a separate bowl, beat together ¾ cup of creamy peanut butter, ⅓ cup of powdered sugar, 2 tablespoons of maple syrup, and another ½ teaspoon of vanilla extract. Adjust the consistency by adding more syrup or powdered sugar as needed.
Spread about 1 teaspoon of the filling onto the bottom of one cookie. Top it with another cookie to form a sandwich. Repeat this process until all cookies are filled and sandwiched together.
Transfer the filled cookies back to the lined baking sheet and place them in the freezer for another 10 minutes to help set the filling.
While the cookies chill, melt the 3 ounces of chocolate melting wafers according to the package directions. The chocolate should be completely melted and smooth.
Dip each cookie sandwich into the melted chocolate, ensuring they’re well coated. Place them back on the lined baking sheet and sprinkle with flaky sea salt if desired. This will add an extra layer of flavor!
Finally, let the chocolate set completely before serving your delicious Homemade Nutter Butter Cookies. Enjoy them fresh or store for later!
Things Worth Knowing
- Cooling Time: Letting cookies rest on the baking sheet is crucial for setting their structure.
- Dough Consistency: If your dough feels too sticky, chilling it in the refrigerator for a bit can help.
- Melting Chocolate: Use a double boiler or microwave in short bursts to avoid burning the chocolate.
- Filling Texture: Adjust the filling’s thickness by adding more syrup for a creamier texture or more powdered sugar for a thicker consistency.
Change It Up
There’s always room for creativity in the kitchen! Here are some tips to customize your Homemade Nutter Butter Cookies:
- Experiment with Fillings: You can try different fillings like Nutella or cream cheese frosting for a unique twist.
- Add Chocolate Chips: Mix in some chocolate chips into the cookie dough for added sweetness and texture.
- Make It a Sandwich: Instead of filling them with just peanut butter, sandwich them with chocolate ganache for a richer flavor.
- Decorate: Use colored chocolate melts to decorate the tops of the cookies for special occasions.
- Storage: Store cookies in an airtight container at room temperature for up to 4 days.
- Freezing: You can freeze the cookies in a single layer before transferring them to a freezer bag for up to 3 months.
- Pairing: Enjoy these cookies with a glass of cold milk or a cup of coffee for the ultimate snack experience.
Serving This Homemade Nutter Butter Cookies
When it comes to serving Homemade Nutter Butter Cookies, the possibilities are endless! Here are some delightful ideas:
- Perfect for Lunchboxes: Pack a couple of cookies in school lunches for a sweet surprise.
- After-School Snack: Serve them alongside a glass of milk after a long day at school.
- Party Treats: These cookies make an excellent addition to any party platter; they’re sure to be a hit.
- Special Occasions: Make them for birthdays or holidays; they are great gifts when wrapped up nicely.
- Seasonal Pairings: Serve them as a sweet treat during colder months, or enjoy them on warm summer days.
FAQ
Conclusion
What truly makes Homemade Nutter Butter Cookies special is the perfect combination of creamy peanut butter and sweet filling, creating a nostalgic treat that’s hard to resist. Whether for a family gathering, a special occasion, or just a cozy night in, these cookies are sure to bring joy. I encourage you to try making them tonight; you won’t be disappointed!

Homemade Nutter Butter Cookies
Ingredients
Equipment
Method
- Preheat oven to 350°F and line a large baking sheet with a silicone baking mat or parchment paper.
- In a large mixing bowl, beat creamy peanut butter and granulated sugar together until creamy. Add egg and vanilla extract and beat until thoroughly combined.
- Roll dough into small balls, using about ½ teaspoon to 1 teaspoon of cookie dough per ball.
- Place two balls next to each other on the prepared baking sheet and then using the bottom of a cup or measuring cup, flatten the cookies to ⅛ to ¼ inch thickness.
- Dip the tines of the fork into all-purpose flour and press into the cookie to create the criss-cross markings.
- Bake cookies for 9 to 11 minutes. Remove from oven, let rest on baking sheet for 5 minutes and then carefully transfer to a cooling rack to cool completely.
- While the cookies are cooling, prepare the filling by beating creamy peanut butter, powdered sugar, maple syrup and vanilla extract together.
- Spread the filling, about a teaspoon or so per cookie, onto the bottom of one cookie and use the other cookie to make it into a sandwich.
- Transfer the cookies to a parchment lined baking sheet and place in the freezer for 10 minutes.
- Melt the Ghirardelli chocolate melting wafers according to the package directions until chocolate is completely melted and smooth.
- Dip the cookies in the chocolate and place back on the parchment lined baking sheet. Sprinkle with flaky sea salt if desired.
- Let chocolate set up completely before serving.
Notes
- Storage: Cookies can be stored at room temperature in an airtight container for up to 4 days.
- Freezing: Lay the cookies out in a single layer on a parchment lined baking sheet and flash freeze for about 30 minutes. Once they’re frozen, place them in an airtight, freezer safe ziplock bag and keep them in the freezer for up to 3 months. To thaw, let defrost at room temperature for 3 to 4 hours before serving.