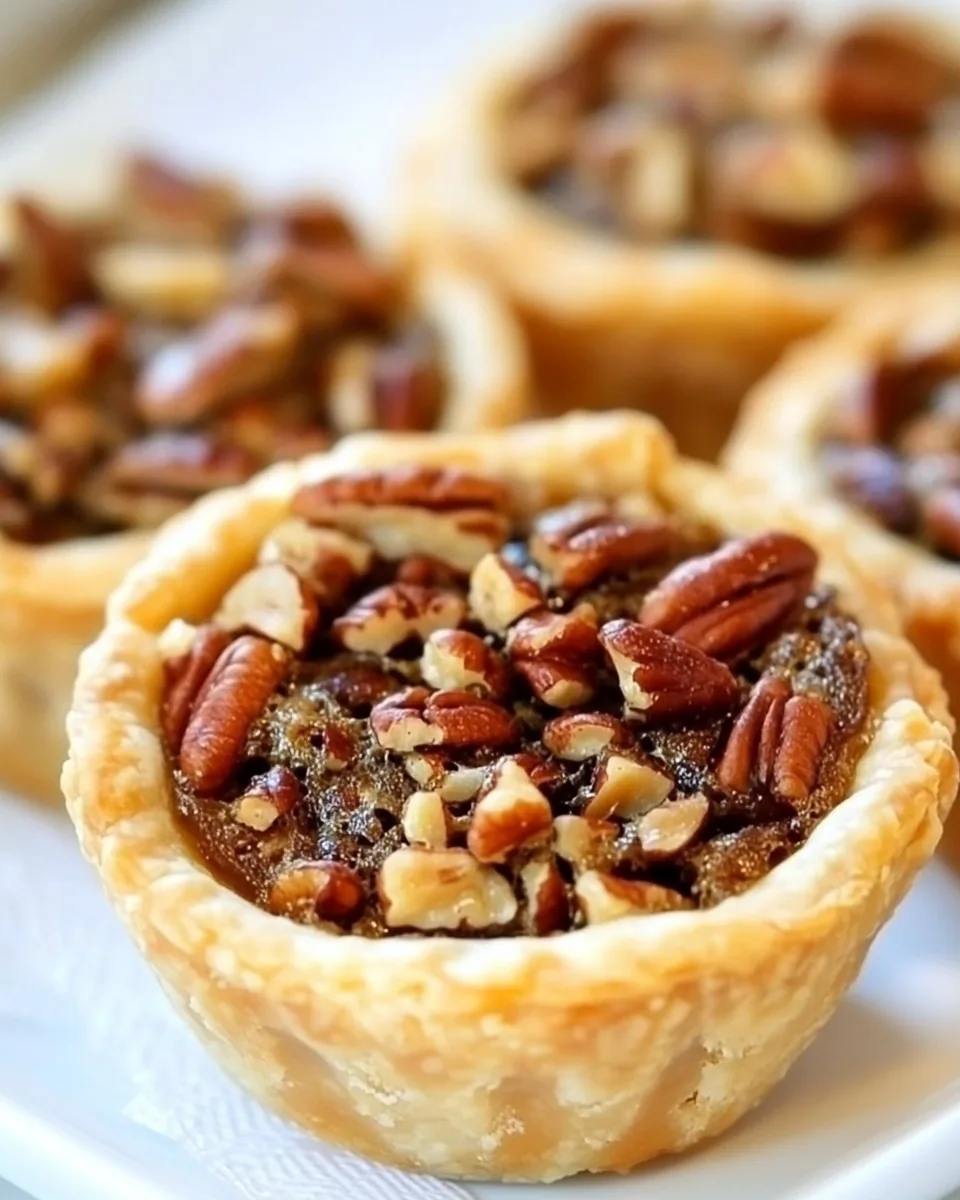
Mini Pecan Pies
There’s nothing quite like a warm, sweet treat to brighten your day, and that’s exactly what Mini Pecan Pies do for me! I remember the first time I made these tiny delights; it was a chilly fall afternoon, and I was craving something sweet that reminded me of home. The smell of buttery crust baking in the oven mixed with the rich aroma of pecans was simply irresistible. I can still see my family gathered around the kitchen table, eagerly waiting for the first batch to cool down. These little pies are not just delicious; they’re a labor of love, filled with memories and joy. Every bite of the Mini Pecan Pies is a reminder of that cozy feeling, and I can’t wait to share this recipe with you so you can create your own sweet moments!
Recipe Snapshot
40 mins
10 mins
30 mins
Medium
280 kcal
4 g
Gluten-Free, Low FODMAP
16 g
Oven, Mixing Bowl, Baking Sheet, Chef’s Knife, Frying Pan, Wooden Spoon
Why This Mini Pecan Pies Shines
Homemade Delight
The first reason I absolutely adore Mini Pecan Pies is their homemade charm. There’s something special about creating a dessert from scratch. You can feel the love in each layer, from the buttery crust to the sweet pecan filling. It’s a great way to connect with family traditions and create new ones.
Perfect for Any Occasion
These little pies are incredibly versatile. Whether it’s a holiday gathering, a casual family dinner, or even a simple afternoon snack with coffee, Mini Pecan Pies fit right in. Their dainty size makes them ideal for sharing, and they’re always a hit with guests!
Rich and Flavorful
The flavor profile of these pies is just heavenly. The combination of sweet corn syrup, brown sugar, and the rich earthiness of pecans creates an irresistible filling. Each bite bursts with flavor, making it hard to stop at just one pie!
Easy to Make
Even if you’re not a baking expert, these Mini Pecan Pies are surprisingly easy to make. The steps are straightforward, and with a little patience, you’ll be rewarded with delicious pies that look and taste fabulous. It’s perfect for baking novices or anyone who wants a quick dessert fix!
Make Ahead Convenience
One of my favorite features of Mini Pecan Pies is that they can be made in advance. You can whip up a batch and store them for later, making it a breeze to have a sweet treat ready when unexpected guests arrive or when a craving strikes.
Customizable Filling
While the classic pecan filling is delightful, there’s room for creativity! You can add chocolate chips, substitute different nuts, or even incorporate spices to suit your taste. This versatility allows you to put your own spin on these pies, which is always fun!
Recipe Ingredients for Mini Pecan Pies
When it comes to making Mini Pecan Pies, the quality of your ingredients truly matters. Each component plays a vital role in creating the perfect balance of flavors and textures. The creamy filling combined with the flaky crust is what makes these pies irresistible. Here’s what you’ll need to get started:
- ½ cup unsalted butter – The base of our crust, adding richness and flavor.
- 3 ounces cream cheese – Helps create a tender, flaky crust.
- 1⅛ cup all-purpose flour – This is the backbone of the crust, giving it structure.
- ¼ teaspoon salt – Enhances the sweetness and balances flavors.
- ½ cup brown sugar – Adds deep sweetness and a hint of molasses flavor.
- ¼ cup light or dark corn syrup – Provides that signature sweetness and gooey texture.
- 1 egg – Binds the filling together.
- 1 tablespoon butter, melted – A boost of flavor in the filling.
- ¼ teaspoon salt – For seasoning the filling.
- ½ teaspoon vanilla extract – Adds warmth and depth to the flavor.
- ¾ cup chopped pecans – The star ingredient, lending a crunchy texture.
- ½ cup semi-sweet chocolate chips (optional) – A delightful twist if you want to add chocolate!
- 12 pecan halves – For a beautiful garnish on top of each pie.
Step by Step Guide for Mini Pecan Pies
Baking Mini Pecan Pies is a delightful experience, and I can’t wait to walk you through it step by step. From mixing the crust to creating that heavenly filling, here’s how you can make these scrumptious pies yourself!
- First, in a large mixing bowl, cream together ½ cup unsalted butter and 3 ounces cream cheese until light and fluffy. This mixture forms the base of your crust, so take your time to get it just right. Look for a light, airy texture that makes it easy to incorporate the remaining ingredients.
- Next, stir in 1⅛ cup all-purpose flour and ¼ teaspoon salt just until the dough forms. Be careful not to overmix; you want to keep that tenderness in the crust!
- Now, wrap the formed dough in plastic wrap, shaping it into a log. Place it in the refrigerator for at least 1 hour. This chilling time is essential for firming up the crust, making it easier to handle later.
- While the dough chills, let’s prepare the filling. In another large mixing bowl, combine ½ cup brown sugar, ¼ cup light or dark corn syrup, 1 egg, and 1 tablespoon melted butter. Beat this mixture until it’s well combined, creamy, and smooth.
- Add ¼ teaspoon salt, ½ teaspoon vanilla extract, ¾ cup chopped pecans, and ½ cup semi-sweet chocolate chips (if you’re using them) to the filling. Stir gently until everything is evenly distributed.
- Now it’s time to preheat your oven to 350°F (175°C). This ensures that your pies bake evenly and thoroughly.
- Grease a muffin tin with cooking spray to prevent sticking. This step is crucial, as the last thing you want is to lose your lovely pies!
- Remove the chilled crust from the refrigerator. Cut the log in half, and then each half into halves again so you have four sections. Slice each section into three equal parts, giving you a total of 12 individual crusts.
- Press each crust into the muffin tin, working it up the sides to form a small cup for your filling. Take your time to ensure an even thickness throughout.
- Carefully divide the pecan filling mixture evenly among the twelve crusts, topping each with a pecan half for a beautiful presentation.
- Bake the pies in your preheated oven for about 30 minutes or until the crusts are golden brown and the filling is set. Keep an eye on them to avoid over-baking!
- Once baked, let them cool in the muffin tin for at least ten minutes. To remove, gently slide a knife down the outside of each pie and lift them out carefully. Enjoy the delicious rewards of your hard work!
Things Worth Knowing
- Don’t forget to chill the dough! This helps the crust hold its shape while baking.
- For an extra crunch, toast the pecans before adding them to the filling.
- Make sure not to overbake the pies; they should just be golden brown.
- Let the pies cool completely before storing them to avoid sogginess.
Recipe Tips about Mini Pecan Pies
Here are some tips to ensure your Mini Pecan Pies turn out perfectly every time. Baking can be finicky, but these pointers will help you navigate any challenges and enhance your experience.
- Storage: Keep your pies in an airtight container at room temperature for up to 3 days, or refrigerate for up to 1 week. This helps retain their freshness and flavor.
- Freezing: You can freeze the baked pies for up to 3 months. Allow them to cool completely, wrap them in plastic and then foil, and place them in an airtight container. Thaw at room temperature or in the refrigerator when ready to enjoy.
- Variations: Feel free to experiment with your filling! Add a pinch of cinnamon for warmth, or use different nuts to create a unique flavor profile.
- Serving: These pies are delightful on their own, but you can also serve them with a scoop of vanilla ice cream or whipped cream for an extra treat.
- Pairing: Pair Mini Pecan Pies with a hot cup of coffee or tea to balance the sweetness and enhance the overall experience.
Side Dish Ideas for Mini Pecan Pies
When considering how to serve your Mini Pecan Pies, think about creating a delightful dessert table that complements these sweet bites.
- Whipped Cream: A dollop of freshly whipped cream adds a creamy texture and balances the sweetness of the pies.
- Vanilla Ice Cream: Serve your pies warm with a scoop of vanilla ice cream on the side for a comforting treat.
- Fruit Salad: A light fruit salad with seasonal fruits can provide a refreshing contrast to the richness of the pies.
- Cheese Platter: To elevate your dessert experience, consider a small cheese platter featuring mild cheeses that pair well with sweet pies.
- Seasonal Decor: If serving during holidays like Thanksgiving, consider adding seasonal decor like small pumpkins or autumn leaves to enhance the visual appeal.
- Tea or Coffee: Pair your pies with a hot cup of tea or coffee. The warmth of the beverage complements the pies beautifully.
FAQ
Conclusion
Mini Pecan Pies are truly a delightful treat that can brighten any occasion. With their perfect balance of crunchy pecans and sweet filling, they’ll surely impress your family and friends. I encourage you to give this recipe a try and enjoy the process of baking these little gems. You’ll not only satisfy your sweet tooth but also create wonderful memories in the kitchen!
Mini Pecan Pies
Ingredients
Equipment
Method
- First, in a large mixing bowl, cream together ½ cup unsalted butter and 3 ounces cream cheese until light and fluffy. This mixture forms the base of your crust, so take your time to get it just right. Look for a light, airy texture that makes it easy to incorporate the remaining ingredients.
- Next, stir in 1⅛ cup all-purpose flour and ¼ teaspoon salt just until the dough forms. Be careful not to overmix; you want to keep that tenderness in the crust!
- Now, wrap the formed dough in plastic wrap, shaping it into a log. Place it in the refrigerator for at least 1 hour. This chilling time is essential for firming up the crust, making it easier to handle later.
- While the dough chills, let’s prepare the filling. In another large mixing bowl, combine ½ cup brown sugar, ¼ cup light or dark corn syrup, 1 egg, and 1 tablespoon melted butter. Beat this mixture until it's well combined, creamy, and smooth.
- Add ¼ teaspoon salt, ½ teaspoon vanilla extract, ¾ cup chopped pecans, and ½ cup semi-sweet chocolate chips (if you’re using them) to the filling. Stir gently until everything is evenly distributed.
- Now it’s time to preheat your oven to 350°F (175°C). This ensures that your pies bake evenly and thoroughly.
- Grease a muffin tin with cooking spray to prevent sticking. This step is crucial, as the last thing you want is to lose your lovely pies!
- Remove the chilled crust from the refrigerator. Cut the log in half, and then each half into halves again so you have four sections. Slice each section into three equal parts, giving you a total of 12 individual crusts.
- Press each crust into the muffin tin, working it up the sides to form a small cup for your filling. Take your time to ensure an even thickness throughout.
- Carefully divide the pecan filling mixture evenly among the twelve crusts, topping each with a pecan half for a beautiful presentation.
- Bake the pies in your preheated oven for about 30 minutes or until the crusts are golden brown and the filling is set. Keep an eye on them to avoid over-baking!
- Once baked, let them cool in the muffin tin for at least ten minutes. To remove, gently slide a knife down the outside of each pie and lift them out carefully. Enjoy the delicious rewards of your hard work!
Notes
- Make In Advance: These pies can be made a day or two in advance and stored at room temperature. The pie crust can be made 2 days in advance and stored in the refrigerator.
- Freezing Baked Pies: Cool completely, wrap in plastic, then foil and place in an airtight container. Freeze for up to 3 months. Thaw at room temperature or in the refrigerator.
- Storing: Store pies in an airtight container at room temperature for up to 3 days or refrigerate for up to 1 week.