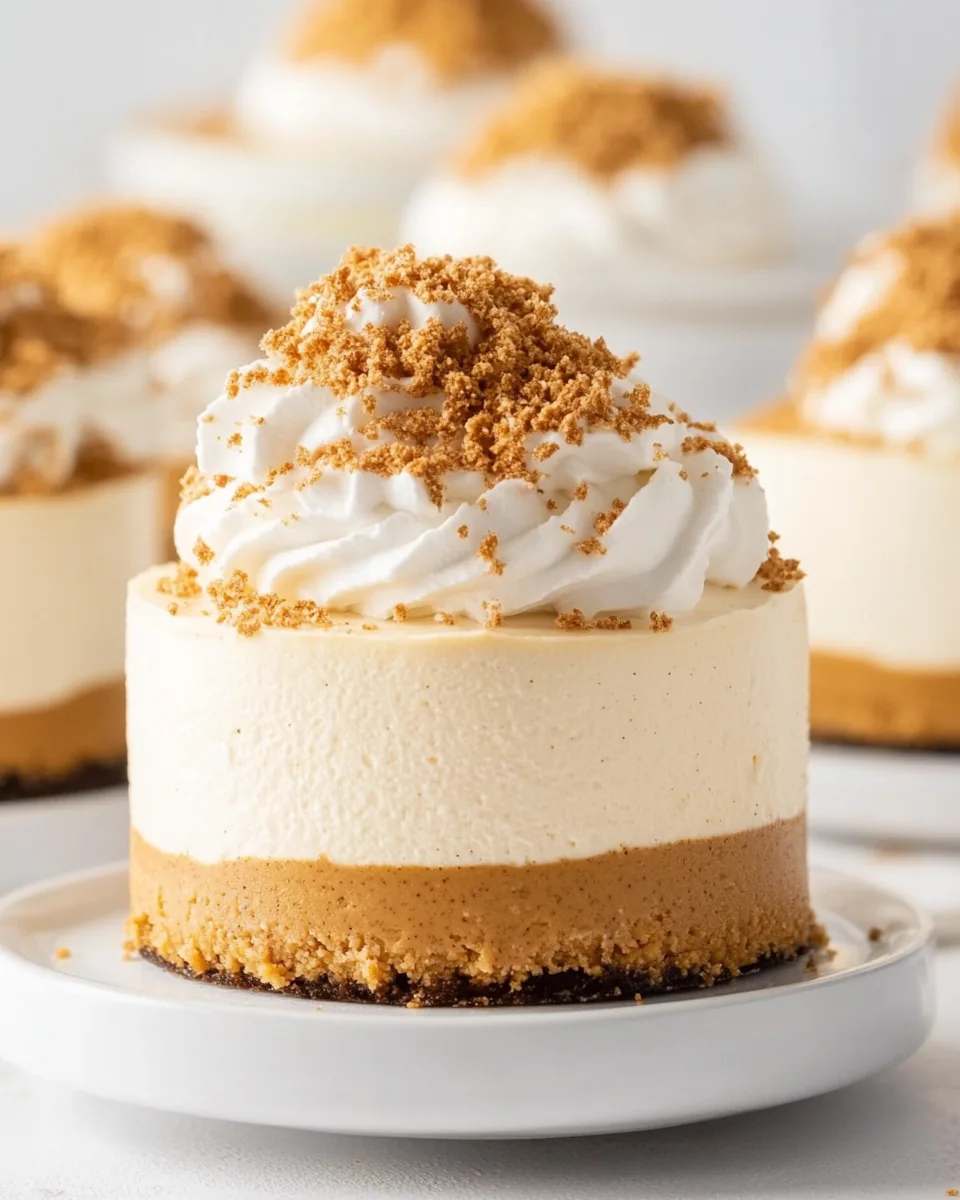
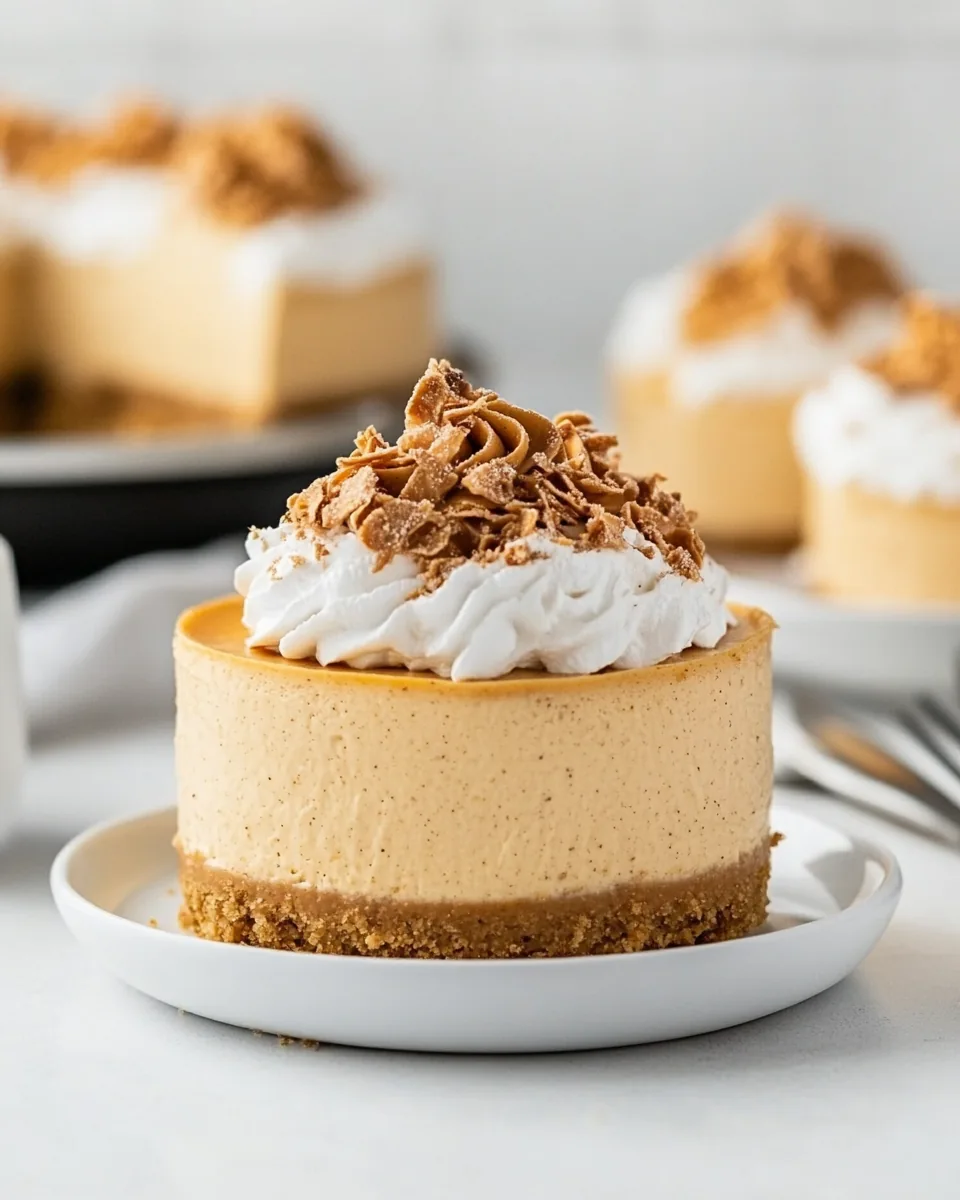
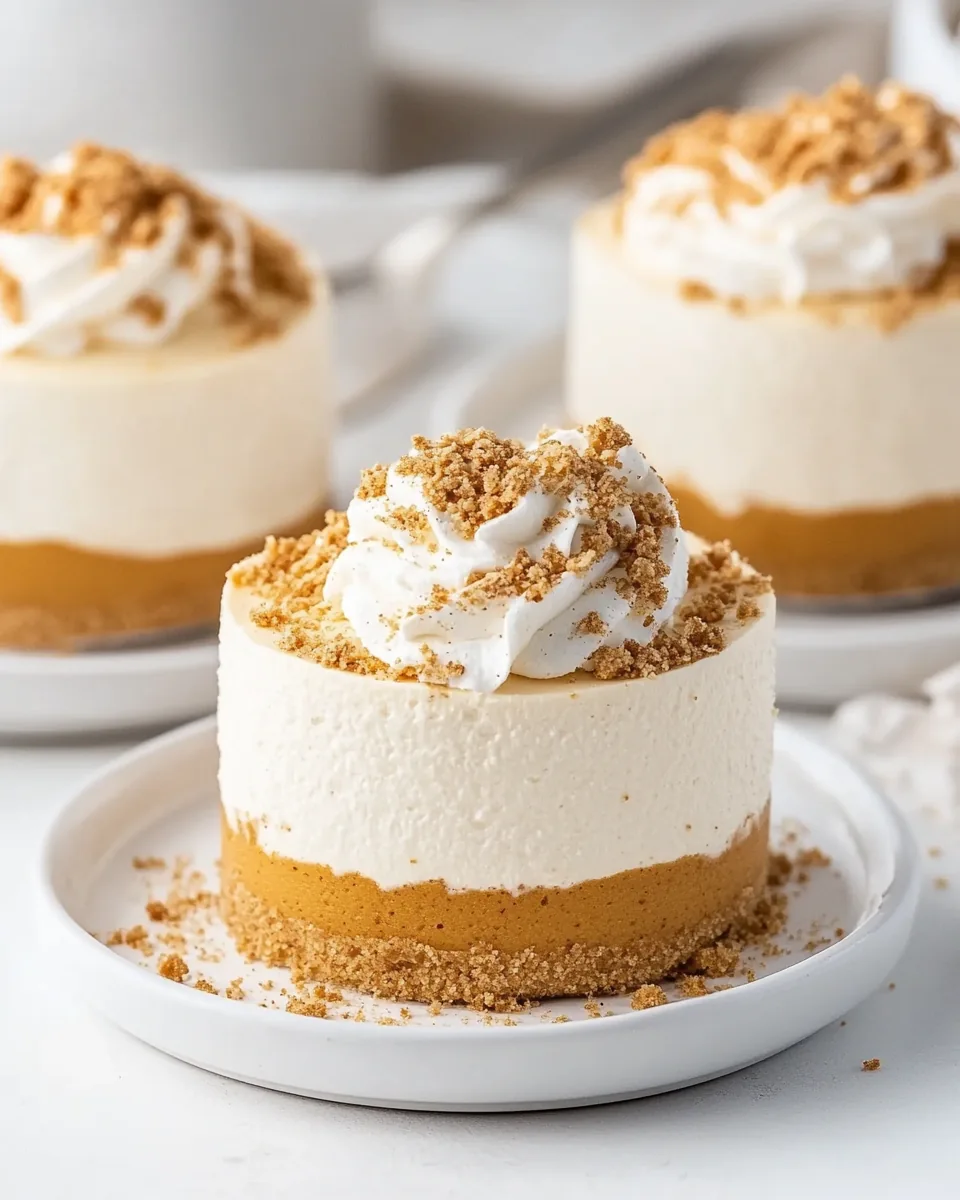
No Bake Pumpkin Cheesecake
There’s something magical about dessert that requires no baking, especially when it comes to a No Bake Pumpkin Cheesecake. I still remember the first time I made this for a family gathering. The leaves were turning a vibrant orange, and the air had that crispness that heralds the arrival of fall. I wanted to create something that captured that seasonal warmth, and this dessert did just that. With its creamy texture and the comforting flavor of pumpkin, it was an instant hit. Every bite brought smiles and compliments, and I knew I had found a perfect recipe for autumn gatherings. Now, I always keep the ingredients on hand because you never know when the craving for this delightful treat might strike!
Recipe Snapshot
15 mins
15 mins
0 mins
Easy
320 kcal
4 g
Vegan, Gluten-Free, AIP
15 g
KitchenAid 9-Speed Digital Hand Mixer
What Sets This No Bake Pumpkin Cheesecake Apart
Easy to Make
One of the best things about this No Bake Pumpkin Cheesecake is its simplicity. It requires minimal effort and just a few steps. For those who might feel intimidated by baking, this recipe is perfect. You can whip it up in no time, and the results are impressive!
Perfect for Any Occasion
Whether it’s Thanksgiving or just a cozy fall evening, this cheesecake fits right in. It’s a great way to celebrate the season or enjoy a sweet treat while watching your favorite movie. You can serve it at gatherings, potlucks, or as a delightful surprise for guests. It’s versatile enough to shine on any table.
Rich and Creamy
As you take a forkful of this dessert, you’ll experience the creamy richness of the filling that combines perfectly with the spiced flavors of pumpkin and cookie crust. The blend of textures is just heavenly. It’s a delightful contrast to the crisp crust that crumbles just right.
Make-Ahead Convenience
This cheesecake is a dream for those who like to plan ahead. Since it requires chilling time, it can be made the day before your event, making your life easier. Just pop it in the fridge, and it’s ready to serve when you are!
Customizable Toppings
You can personalize your No Bake Pumpkin Cheesecake however you like! While it’s delicious on its own, feel free to get creative with toppings. Whipped cream, caramel sauce, and even crushed cookies can enhance its flavor and presentation.
Kid-Friendly Fun
This recipe is also a fun way to get the kids involved in the kitchen. They can help crush the cookies, mix the filling, and decorate the cheesecake with their favorite toppings. It’s a great opportunity to bond and create lasting memories.
What You Need for No Bake Pumpkin Cheesecake

When it comes to the ingredients for this No Bake Pumpkin Cheesecake, each one contributes to the overall flavor and texture. The combination of creamy and spiced elements makes this dessert truly special. Here’s what you’ll need to bring this fall favorite to life:
- 16 Biscoff cookies – crushed into crumbs, plus extra for topping
- 3 tablespoons unsalted butter – melted
- 8 ounces cream cheese – softened
- ½ cup powdered sugar
- ¾ cup canned pumpkin puree
- 1 teaspoon pure vanilla extract
- 2 ½ teaspoons pumpkin pie spice
- 8 ounces frozen whipped topping – thawed (TruWhip or Cool Whip)
- Whipped topping – for garnish
- Homemade salted caramel sauce – for garnish
Cooking Instructions for No Bake Pumpkin Cheesecake
Making this No Bake Pumpkin Cheesecake is a delightful experience. The first step is all about creating that perfect crust, followed by mixing the delicious filling. Let’s dive into the step-by-step process!
In a medium bowl, stir together the crushed Biscoff cookies and melted butter. The crumbs should be evenly coated with the butter, giving you a moist mixture. You’re aiming for a texture that holds together when pressed.
Evenly divide the crumb mixture between eight individual serving dishes, about 2 ½ tablespoons per dish. Press the crumbs into the bottoms of the dishes to create a solid crust layer. Ensure it’s packed well to support the filling.
In a large bowl, use a KitchenAid mixer on medium-high speed to beat the softened cream cheese and powdered sugar until smooth and creamy. You want a light and fluffy texture here. If it’s too lumpy, keep mixing until you achieve that desired creaminess.
Add in the pumpkin puree, vanilla, and pumpkin pie spice to the cream cheese mixture. Mix until everything is fully incorporated, creating a beautifully spiced filling that epitomizes fall.
Using a rubber spatula, gently fold in the thawed whipped topping until well blended. Be careful to maintain the lightness of the mixture. You should no longer see streaks of whipped topping; it should be uniformly orange.
Evenly pipe or spoon the filling into the individual serving dishes, aiming for about ⅓ cup of filling per dish. Be generous; you want these servings to be satisfying!
Cover the dishes with plastic wrap and refrigerate for at least three hours before serving. This chilling time is crucial as it allows the cheesecake to set properly.
If desired, just before serving, garnish with additional whipped topping, salted caramel sauce, and crushed Biscoff cookies. This adds a lovely touch and makes the dessert even more tempting.
Things Worth Knowing
- Chilling Time: Allowing the cheesecake to chill is essential for the right texture. It helps it firm up and makes it easier to serve.
- Ingredient Quality: Using high-quality cream cheese and pumpkin puree will elevate your cheesecake’s taste.
- Cookie Choice: While Biscoff cookies are amazing, feel free to experiment with other cookie bases for the crust.
- Serving Size: Customize your serving sizes depending on your gathering. Smaller portions are great for large groups.
Helpful Notes about No Bake Pumpkin Cheesecake
To ensure you get the most out of your No Bake Pumpkin Cheesecake, here are some helpful notes to keep in mind:
- Storage: Store any leftovers in an airtight container in the refrigerator. It should last up to three days if properly covered.
- Freezing: You can freeze individual servings of cheesecake. Just make sure to wrap them well to avoid freezer burn. Thaw before serving.
- Pairing: This cheesecake pairs wonderfully with a cup of coffee or a spiced chai. It’s the perfect end to a fall meal.
- Variations: Try adding different spices to the filling for a unique twist or create a layered version with chocolate or other flavors.
What Goes Well With This No Bake Pumpkin Cheesecake
- Coffee – The rich flavors of the cheesecake pair beautifully with a hot cup of coffee.
- Tea – A spiced chai or Earl Grey complements the pumpkin flavor perfectly.
- Ice Cream – Serve it alongside a scoop of vanilla ice cream for added creaminess.
- Seasonal Fruits – Freshly sliced apples or pears can add a refreshing contrast.
- Nut Toppings – Chopped pecans or walnuts sprinkled on top enhance the flavor and texture.
FAQ
Conclusion
The No Bake Pumpkin Cheesecake is truly special because it combines the warmth of autumn flavors with the ease of preparation. It’s a dessert that brings people together, perfect for sharing with friends and family during the fall season. I encourage you to try making it yourself and enjoy the delightful taste and texture. You’ll be glad you did!
No Bake Pumpkin Cheesecake
Ingredients
Equipment
Method
- In a medium bowl, stir together the Biscoff cookies and melted butter. Evenly divide the crumbs between 8 individual serving dishes (about 2 ½ tablespoons per dish) and press into the bottoms of the dishes to form a crust layer.
- In a large bowl, with an electric mixer, beat the cream cheese and powdered sugar on medium-high speed until smooth and creamy. Add in pumpkin puree, vanilla, and pumpkin pie spice and mix until fully incorporated.
- Using a rubber spatula, fold in the whipped topping until well blended and no streaks remain.
- Evenly pipe or spoon the filling into individual serving dishes, about ⅓ cup of filling per dish. Cover with plastic wrap and refrigerate for at least 3 hours before serving.
- If desired, garnish with additional whipped topping, salted caramel sauce and Biscoff cookie crumbs before serving.
Notes
- Storage: Store any leftovers in an airtight container in the refrigerator. It should last up to three days if properly covered.
- Freezing: You can freeze individual servings of cheesecake. Just make sure to wrap them well to avoid freezer burn. Thaw before serving.
- Pairing: This cheesecake pairs wonderfully with a cup of coffee or a spiced chai. It's the perfect end to a fall meal.
- Variations: Try adding different spices to the filling for a unique twist or create a layered version with chocolate or other flavors.