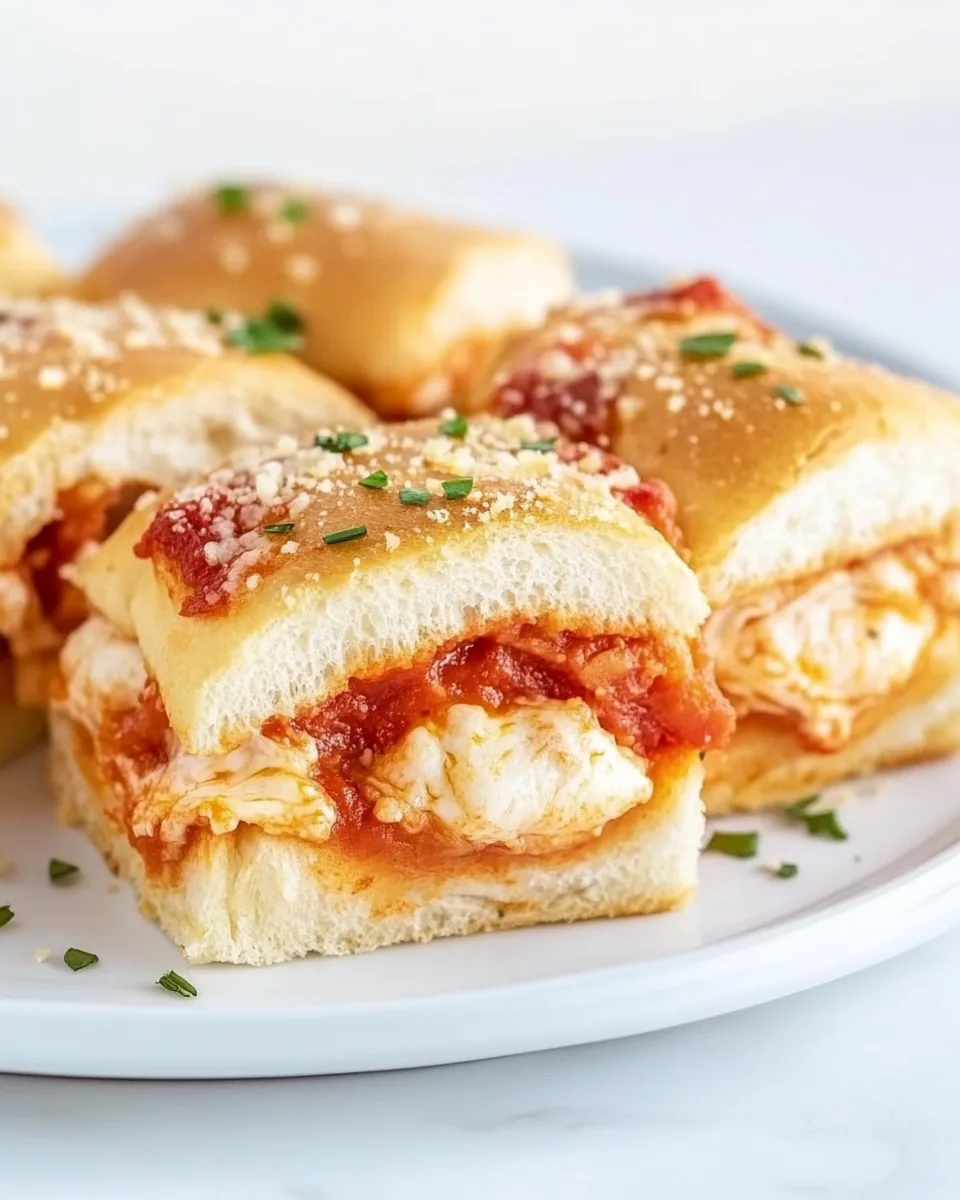
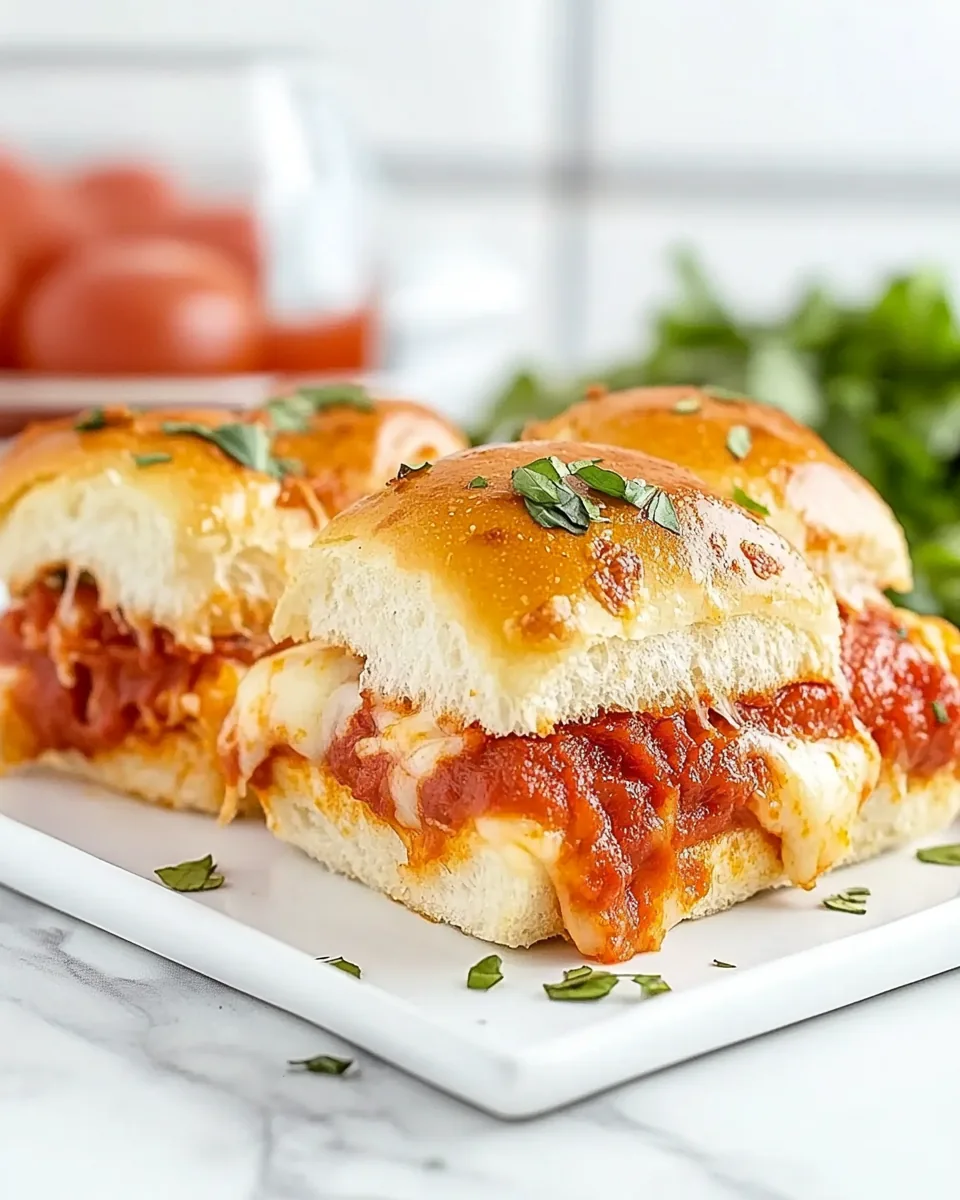
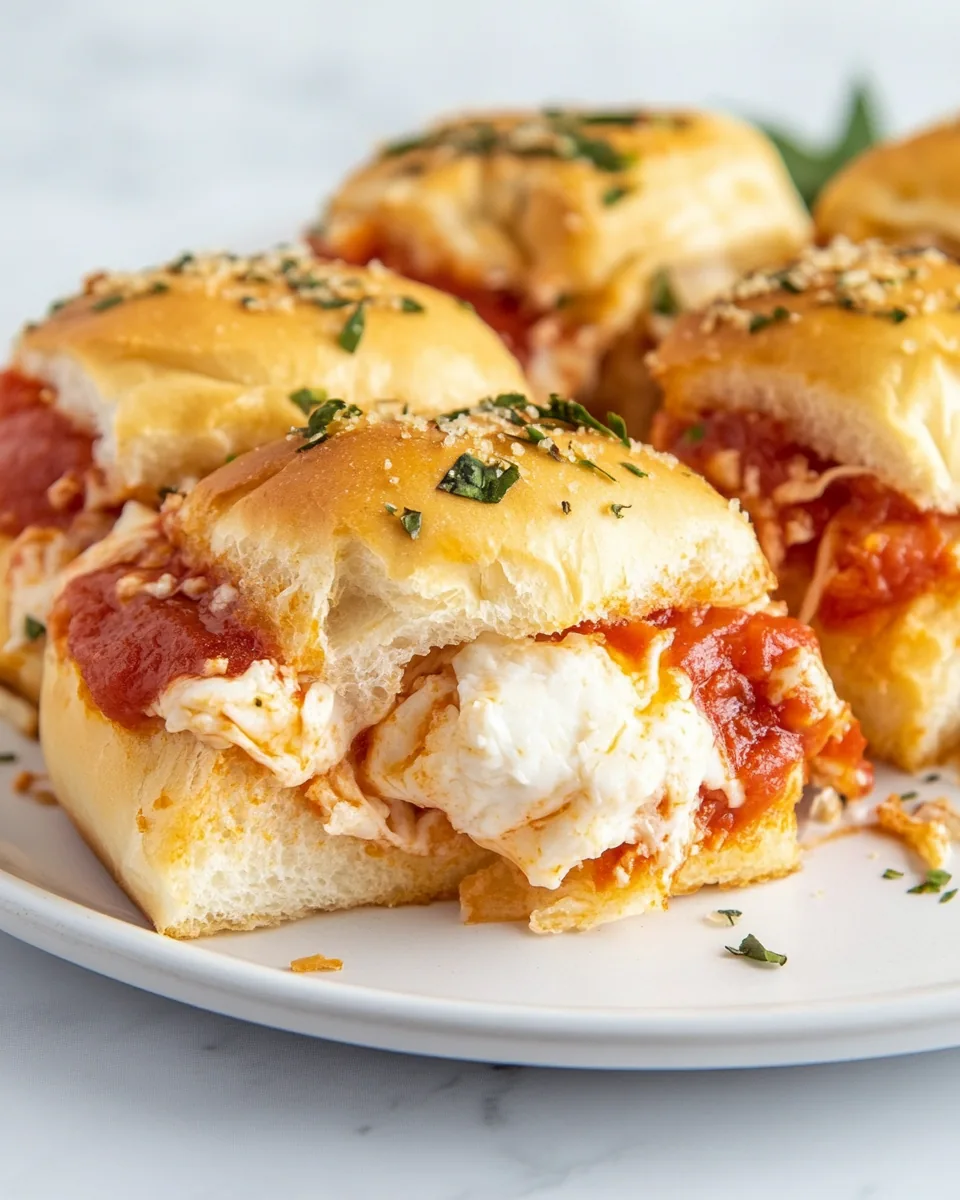
Pizza Sliders
There’s something incredibly comforting about gathering around a plate of Pizza Sliders with friends and family. I remember the first time I made these delightful little bites; it was a spontaneous Friday night when my friends decided to drop by. I had some leftover ingredients from the week and thought, why not? As I layered the flavors, the aroma filled my kitchen, and soon, my guests were eagerly awaiting the first bite. The combination of melted cheese, savory toppings, and soft, sweet rolls created the perfect party food. Serve these at your next gathering, and I guarantee they’ll be a hit!
Recipe Snapshot
30 mins
10 mins
20 mins
Medium
300 kcal
12 g
Keto, Gluten-Free
16 g
Nordic Ware Aluminum Half Sheet Pans
Why You’ll Love This Pizza Sliders
Easy to Make
One of the best things about Pizza Sliders is how simple they are to prepare. You can whip them up in no time, making them perfect for a last-minute get-together. The assembly is straightforward; just layer the ingredients and pop them in the oven.
Customizable
Another reason I love these sliders is the endless customization options. You can switch up the toppings to suit your taste preferences. Whether you prefer classic pepperoni, colorful bell peppers, or even a vegetarian twist, you can make Pizza Sliders your own.
Great for Any Occasion
These sliders are not just for parties; they make a fantastic snack for game day or a fun family dinner. Everyone loves finger foods, and these sliders pack a flavorful punch that appeals to all ages.
Leftover Friendly
If you have leftover ingredients, Pizza Sliders are an excellent way to use them up. You can throw in whatever you have on hand, from extra cheese to assorted veggies, and not waste a thing!
Fun to Eat
Lastly, there’s something undeniably fun about eating sliders. They’re small, portable, and perfect for dipping into your favorite sauces. Whether you serve them with a side of marinara or a spicy ranch, they’re sure to bring joy to your table.
Shopping List for Pizza Sliders
Before diving into the deliciousness of Pizza Sliders, it’s important to gather all the right ingredients. Each component plays a crucial role in creating that irresistible flavor profile we all crave. The combination of sweet rolls, savory sauces, and gooey cheese makes this dish a crowd-pleaser.
- 2 packages of King’s Hawaiian sweet rolls (12 count each) – These rolls are soft and slightly sweet, providing the perfect base for your sliders.
- 1 jar of pizza sauce (13 ounces; or about 1 ½ cups homemade sauce) – This will add the classic pizza flavor and moisture to the sliders.
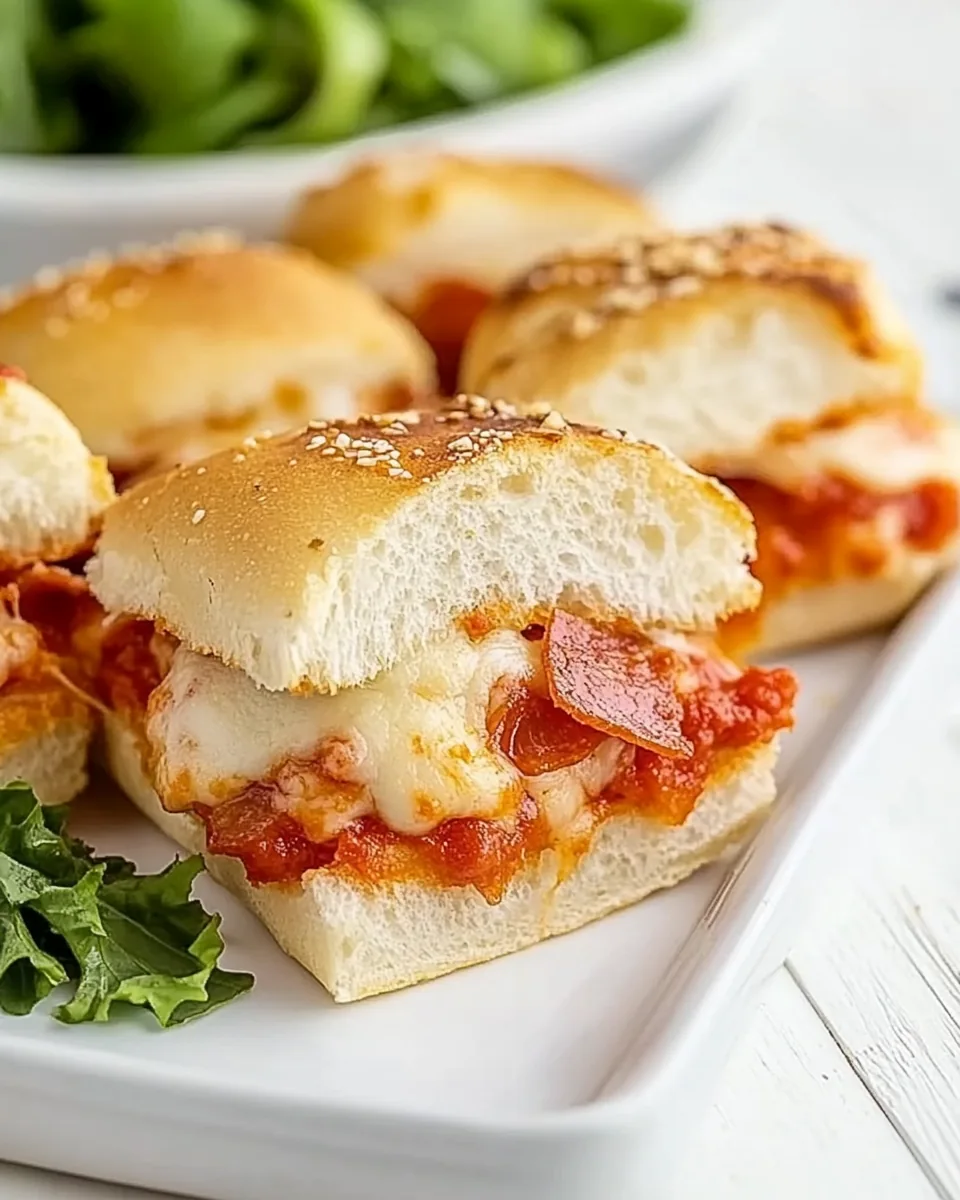
- 8 ounces of sliced pepperoni – A traditional topping that adds a savory element.
- 16 ounces of shredded mozzarella cheese – Creamy and melty, mozzarella is a must for pizza lovers.
- 6-8 ounces of freshly grated parmesan cheese – Adds a rich, nutty flavor that complements the mozzarella.
- 1 ½ teaspoons of pizza seasoning – Enhances the overall flavor with a mix of herbs.
- 2 tablespoons of unsalted butter (melted) – This is brushed over the tops for a golden finish.
- 1 clove of fresh garlic (finely minced) – Adds aromatic depth to the sliders.
- 1 teaspoon of Italian seasoning – A blend that adds even more flavor to your sliders.
- Pinch of salt & pepper – Enhances all the flavors in the dish.
- Thinly sliced bell pepper – For added crunch and sweetness.
- Roasted red pepper – Provides a smoky flavor.
- Thinly sliced onion – Adds sweetness and texture.
- Cooked and crumbled sausage (optional) – A hearty addition that can elevate the sliders.
- …and more!
The Method for Pizza Sliders
Making Pizza Sliders is a delightful experience that fills your kitchen with mouth-watering aromas. Follow these simple steps to create your own batch of delicious sliders that will impress everyone.
- Preheat your oven to 350°F. This is the perfect temperature for melting the cheese and warming the rolls without burning them.
- Spray a large baking dish or a rimmed baking sheet with cooking spray to prevent sticking. This step is crucial for ensuring your sliders come out easily and intact.
- Do not pull the rolls apart; simply use a large serrated knife to slice the rolls in half as you would slice a bagel, separating the tops from the bottoms. This will create a perfect base for your sliders.
- Place the layer of bottoms into the prepared baking pan, cut side up. This ensures they soak up the flavors from the sauce and cheese.
- In a bowl, mix together the mozzarella and parmesan cheeses with the pizza seasoning. This blend of cheeses will create a beautiful, creamy filling.
- Evenly spread about half the pizza sauce on the bottom layer of the rolls. Make sure to cover them thoroughly for maximum flavor.
- Sprinkle half of the cheese mixture over the sauce, ensuring every slider gets a taste of that cheesy goodness.
- Layer the pepperoni over the cheese. Feel free to add extra if you love that meaty flavor!
- Top with the remaining cheese mixture, creating a luscious layer that will melt beautifully.
- Spread the rest of the sauce on the cut side of the roll tops. This will keep them moist and flavorful during baking.
- Brush the tops of the sliders with the mixture of melted butter, garlic, Italian seasoning, and salt and pepper. This adds a wonderful golden color and flavor to the tops.
- Bake for 15 to 20 minutes until the cheese is nice and melty, and the tops are slightly browned. Keep an eye on them; you want that perfect golden brown!
- Optionally, grate some additional parmesan cheese on top immediately after removing the sliders from the oven for an extra touch.
Things Worth Knowing
- Resting Time: Allow sliders to cool for a few minutes after baking. This helps the cheese firm up slightly and makes them easier to cut.
- Ingredient Quality: Using high-quality ingredients like fresh mozzarella and good pizza sauce can elevate the taste significantly.
- Layering: Be generous with the cheese and toppings; these sliders are all about indulgence!
- Serving Style: For a fun twist, serve with a variety of dipping sauces on the side.
Tips and Tricks about Pizza Sliders
If you want to make the most out of your Pizza Sliders, consider these helpful tips. They can enhance the flavors and ensure your sliders turn out perfectly every time.
- Storage: Store any leftover sliders in an airtight container in the fridge. They can last for up to three days.
- Freezing: You can freeze assembled sliders before baking. Just wrap them tightly and store them. When ready to bake, thaw and then cook as directed.
- Pairing: Serve with a fresh garden salad for a complete meal. The crispness of the salad complements the richness of the sliders.
- Custom Toppings: Feel free to get creative with toppings like mushrooms, olives, or even fresh basil.
- Serving Size: These sliders are quite filling, so consider serving half a slider per person if you’re offering a variety of other dishes.
Best Served With
When it comes to serving Pizza Sliders, consider these delightful pairings for a complete meal experience:
- Garlic Bread: The perfect side that complements the cheesy flavors of the sliders.
- Fresh Salad: A light Caesar or garden salad adds a refreshing crunch and balances the richness.
- Soups: Pair with a warm tomato soup for a comforting combination.
- Vegetable Platter: Offer a colorful platter of veggies with hummus or ranch dressing for a healthy touch.
- Dipping Sauces: Serve with marinara, ranch, or garlic sauce for added flavor during your meal.
- Game Day Snacks: Perfect for watching sports, combine sliders with chips and dip for a festive spread.
FAQ
Conclusion
Pizza Sliders are a delightful blend of flavors and textures that create the ultimate comfort food experience. They are perfect for gatherings, game days, or cozy family dinners. I encourage you to give this recipe a try; I promise you won’t be disappointed. It’s a fun, interactive dish that brings people together and satisfies even the biggest appetites!
Pizza Sliders
Ingredients
Equipment
Method
- Preheat your oven to 350°F. This is the perfect temperature for melting the cheese and warming the rolls without burning them.
- Spray a large baking dish or a rimmed baking sheet with cooking spray to prevent sticking. This step is crucial for ensuring your sliders come out easily and intact.
- Do not pull the rolls apart; simply use a large serrated knife to slice the rolls in half as you would slice a bagel, separating the tops from the bottoms. This will create a perfect base for your sliders.
- Place the layer of bottoms into the prepared baking pan, cut side up. This ensures they soak up the flavors from the sauce and cheese.
- In a bowl, mix together the mozzarella and parmesan cheeses with the pizza seasoning. This blend of cheeses will create a beautiful, creamy filling.
- Evenly spread about half the pizza sauce on the bottom layer of the rolls. Make sure to cover them thoroughly for maximum flavor.
- Sprinkle half of the cheese mixture over the sauce, ensuring every slider gets a taste of that cheesy goodness.
- Layer the pepperoni over the cheese. Feel free to add extra if you love that meaty flavor!
- Top with the remaining cheese mixture, creating a luscious layer that will melt beautifully.
- Spread the rest of the sauce on the cut side of the roll tops. This will keep them moist and flavorful during baking.
- Brush the tops of the sliders with the mixture of melted butter, garlic, Italian seasoning, and salt and pepper. This adds a wonderful golden color and flavor to the tops.
- Bake for 15 to 20 minutes until the cheese is nice and melty, and the tops are slightly browned. Keep an eye on them; you want that perfect golden brown!
- Optionally, grate some additional parmesan cheese on top immediately after removing the sliders from the oven for an extra touch.
Notes
- Tip 1: Store any leftover sliders in an airtight container in the fridge. They can last for up to three days.
- Tip 2: You can freeze assembled sliders before baking. Just wrap them tightly and store them. When ready to bake, thaw and then cook as directed.
- Tip 3: Serve with a fresh garden salad for a complete meal. The crispness of the salad complements the richness of the sliders.
- Tip 4: Feel free to get creative with toppings like mushrooms, olives, or even fresh basil.
- Tip 5: These sliders are quite filling, so consider serving half a slider per person if you're offering a variety of other dishes.