Traditional Polish Doughnuts
When I think of comfort food, Traditional Polish Doughnuts come to mind instantly. Growing up in a family that celebrated our Polish heritage, these delightful treats were a staple at every gathering and holiday. The rich aroma of freshly fried dough filled the kitchen, and I could hardly wait to sink my teeth into one. They were always slightly crisp on the outside, fluffy on the inside, and bursting with sweet fillings. Whether it was during winter celebrations or simply a weekend treat, these doughnuts brought everyone together, creating laughter and cherished memories.
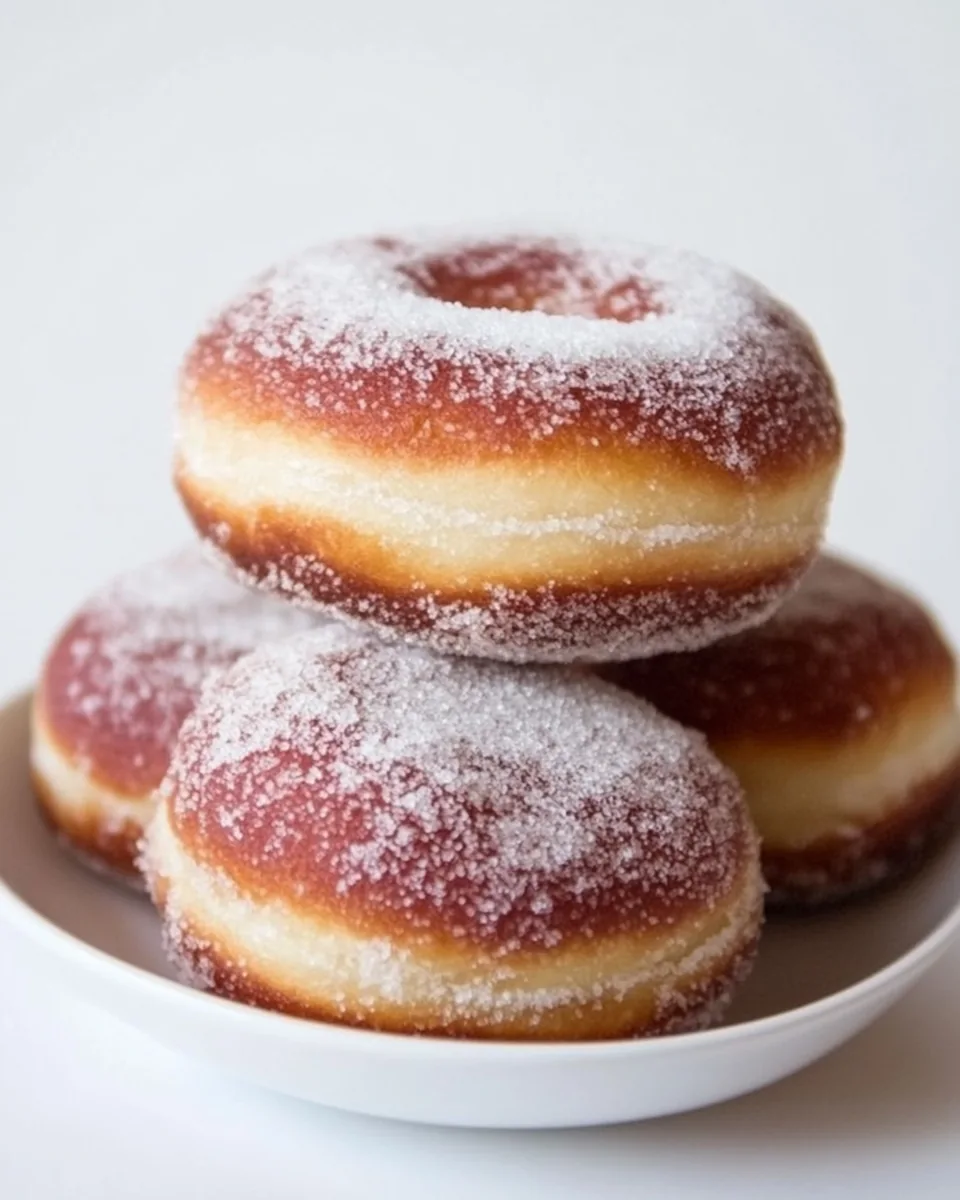
Recipe Snapshot
53 mins
35 mins
18 mins
Medium
250 kcal
4 g
Keto, Paleo, Whole30
12 g
Skillet, Large Pot, Mixing Bowl, Chef’s Knife, Blender, Frying Pan, Food Processor
Why This Traditional Polish Doughnuts Works
They’re Perfectly Sweet
The beauty of Traditional Polish Doughnuts lies in their sweetness. They strike the right balance that makes them ideal for breakfast or dessert. Unlike overly sugary treats, these doughnuts are just sweet enough to satisfy your cravings without overwhelming your taste buds.
Fillings Galore
What’s better than a fluffy doughnut? One filled with delicious surprises! You can choose fillings like poppy seeds, apricots, or even raisins, giving each doughnut its unique character. This variety ensures that there’s something for everyone, making them perfect for gatherings.
A Family Tradition
Making Traditional Polish Doughnuts is more than just cooking; it’s about family connections. My mom taught me the art of dough-making, and now I pass it down to my kids. It’s a wonderful way to bond, share stories, and preserve our culture.
Festive and Fun
These doughnuts are especially popular during festive occasions. Whether it’s a birthday, holiday celebration, or just a cozy family brunch, they add joy to any table. Their delightful appearance and taste make them a star at any event.
Easy to Make
For those hesitant to try dough-making, fear not! The process of creating Traditional Polish Doughnuts is surprisingly simple. With just a few ingredients and some patience, you can whip up a batch in no time, impressing friends and family alike.
What to Gather for Traditional Polish Doughnuts
Cooking is an art, and each ingredient plays a vital role in crafting the perfect Traditional Polish Doughnuts. The combination of ingredients like flour, yeast, and milk creates a rich, soft texture that makes these doughnuts irresistible. Each component contributes to a final result that is fluffy, flavorful, and delightful.
- 2 packages of yeast – Essential for rising, giving the dough its light and airy texture.
- 8 cups of flour – The foundation of the dough, providing structure.
- 4 eggs – Adding richness and helping bind the ingredients.
- 2 tbsp of butter, melted – For a richer flavor and softer texture.
- 3 cups of milk – Moisture and a bit of sweetness.
- 2 tbsp of sugar – Enhances sweetness and aids in browning.
- 1 tbsp of salt – Balances the sweetness and enhances flavors.
- 1 cup of poppy seeds – Adds a unique texture and flavor to the filling.
- 1 cup of raisins (optional, rinsed and drained) – A delightful sweet touch, if you choose to include them.
- 1/3 cup of honey – Natural sweetness that complements the other flavors.
- 1/2 cup of nuts, finely chopped – Adds a nice crunch and flavor.
- 1 tbsp of vegetable oil – For frying, ensuring a perfect golden crust.
- 1 pound of apricots – A popular filling that adds a fruity note.
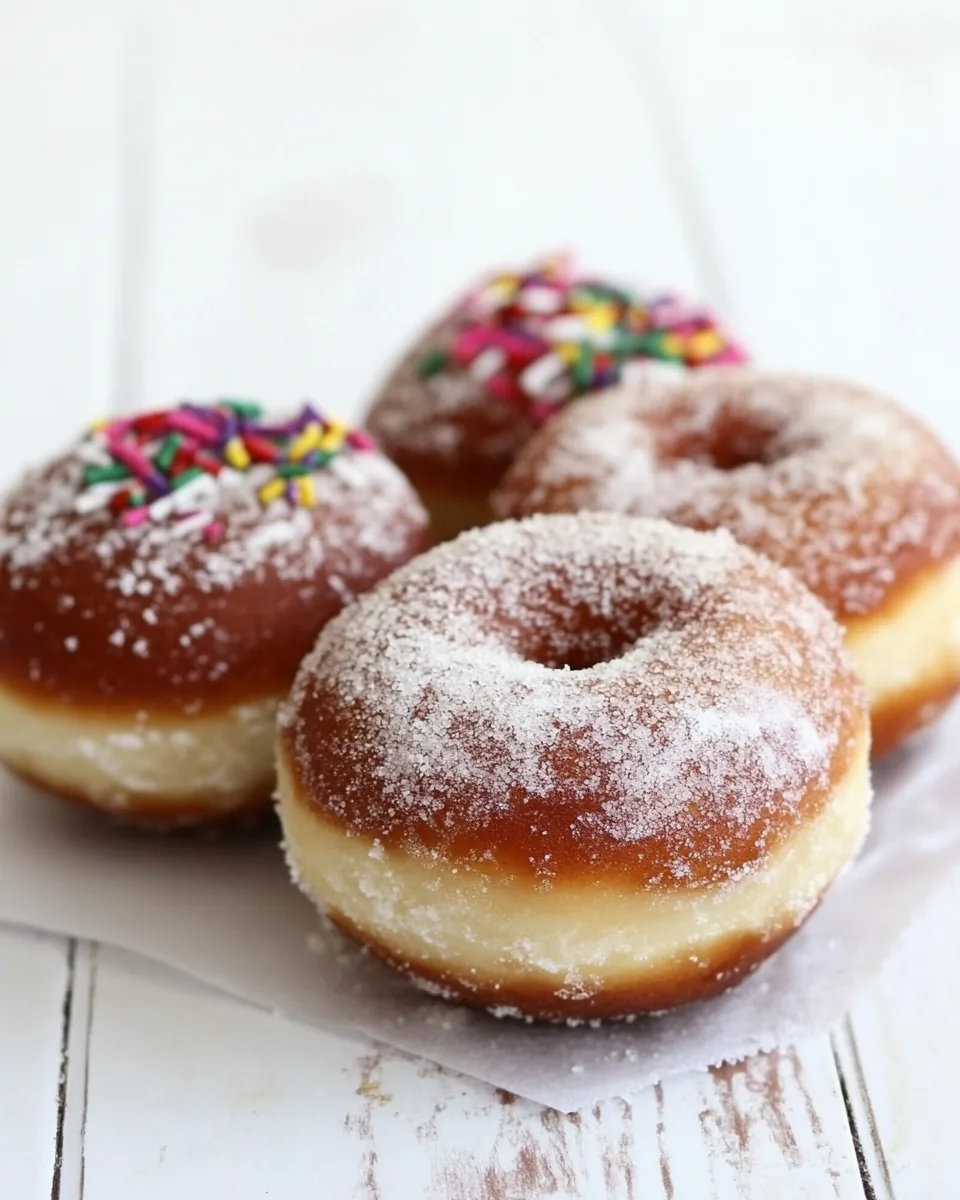
- Sugar to taste – For sprinkling on top for sweetness after frying.
- 1/4 cup of crushed walnuts – Adds richness and flavor to the filling.
- Dash of cinnamon – For that warm, comforting flavor.
- 1 tbsp of lemon juice – Brightens the flavors in the filling.
- 1 lb of prunes – Another option for filling, if preferred.
Cooking Instructions for Traditional Polish Doughnuts
Are you ready to dive into the delicious world of Traditional Polish Doughnuts? The process is not only satisfying but also a wonderful way to bring family together. Let’s get started on this delightful journey.
Begin by dissolving the yeast, following the package instructions. This typically involves mixing it with warm water and letting it sit for about 10 minutes. You want to see it become bubbly and frothy, which indicates it’s active and ready to work its magic.
In a large bowl, add approximately 6 cups (or 750g) of flour. Make a well in the center. This is where the magic will happen! It’s important to have a clean surface to work on, so make sure your bowl is spacious.
Lightly beat the eggs in a separate bowl, then add the melted butter, milk, sugar, and salt. Pour this mixture into the well you created in the flour.
Now, add the frothy yeast mixture to the bowl. Mix everything together until combined, creating a shaggy dough. Don’t worry about perfection at this stage; we’ll knead it into shape.
It’s time to knead! Transfer the dough onto a floured surface and knead until it’s soft and not sticky. This should take about 10 minutes. You want the dough to become smooth and elastic; a little workout never hurt anyone!
Cover the dough with a cloth and let it rise in a warm place until it doubles in size. This usually takes about an hour. Patience is key here, as this step is crucial for texture.
Once it’s risen, punch the dough down gently to release the air. Knead it lightly again before letting it rise for a second time. If you’re short on time, you can use a bread machine to speed up this process.
Next, roll out a small portion of the dough on a lightly floured surface until it’s about half an inch thick. Use a round cutter or a coffee mug to cut out circles.
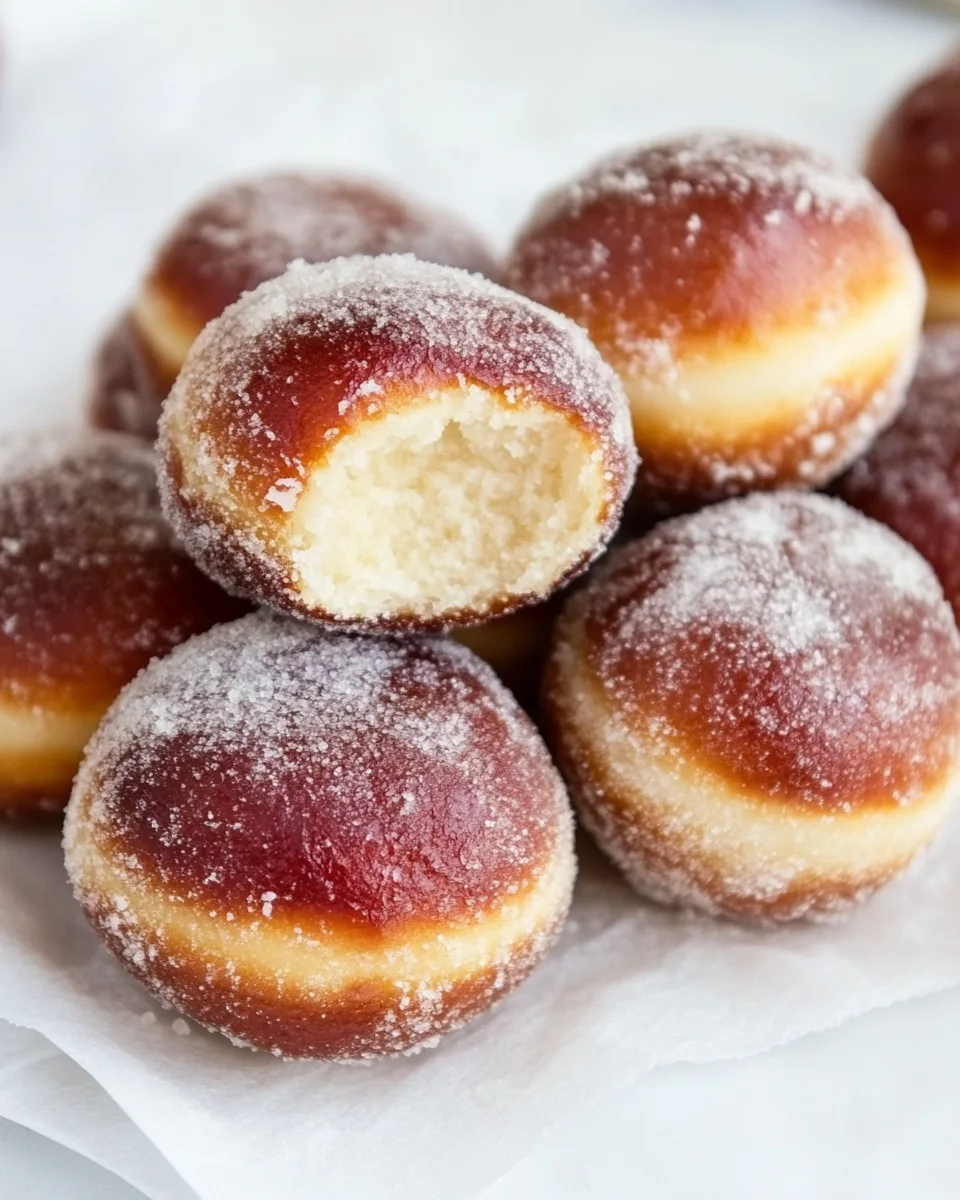
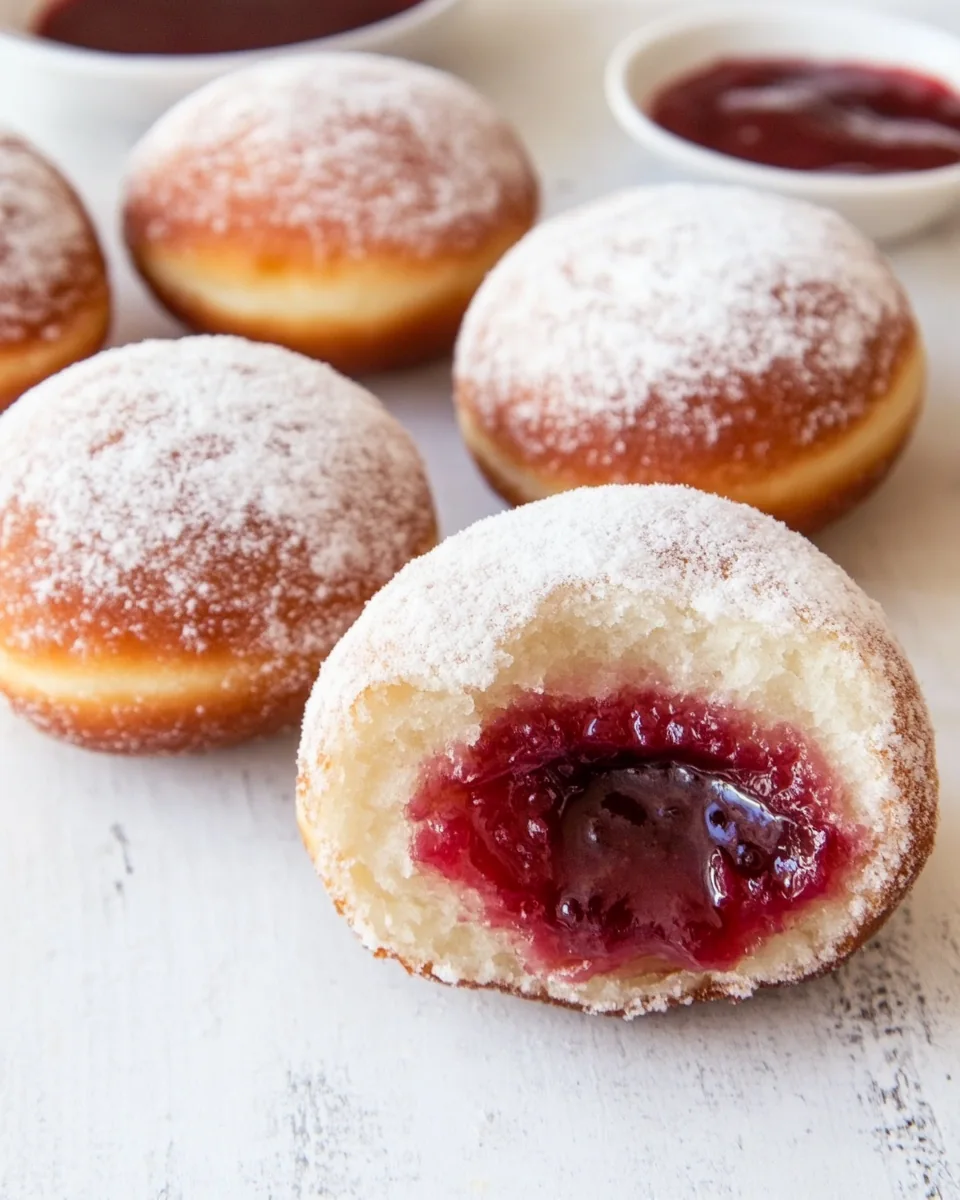
Take a small amount of your chosen filling (like poppy seeds or apricots) and place it in the center of each circle. Fold the edges over to form a pocket, pinching well to seal tightly. Ensure there are no gaps where the filling can escape.
Place the filled doughnuts seam-side down on a floured surface. Cover them and let them rise again for about 15 minutes. Keep an eye on them; you don’t want them to overrise!
While they’re rising, heat up a pot of vegetable oil to about 375° F (190° C). Carefully drop the doughnuts into the hot oil, making sure not to overcrowd the pot. Fry them for about 3 minutes, turning them to brown evenly.
As you remove them from the oil, try to leave as much oil behind as possible and place them on a stack of paper towels to absorb the excess oil. They should be golden brown and smelling heavenly by now!
For the filling, grind the cleaned dry poppy seeds in a coffee grinder. Combine them with the moistened raisins, honey, finely chopped nuts, and a touch of vegetable oil.
For the apricot filling, boil the apricots until soft, then drain and blend until smooth. If you’re using prunes, repeat this blending process with them as well. Each filling will bring a different flavor profile to your Traditional Polish Doughnuts.
Things Worth Knowing
- Temperature Check: Ensure your oil is at the right temperature (375° F/190° C) for frying. Too cool, and the doughnuts will absorb oil; too hot, and they’ll burn.
- Dough Consistency: If your dough feels too sticky, add a little more flour during kneading. If it’s too dry, a splash of milk can help.
- Filling Variations: You can experiment with various fillings! Try adding a splash of lemon juice to the filling for a zesty twist.
- Perfecting the Fry: Turn the doughnuts halfway through frying to achieve an even golden color on both sides.
Helpful Hints
Cooking is a journey, and having some handy tips can make it even more enjoyable! Here are some helpful hints to keep in mind while making Traditional Polish Doughnuts.
- Storage: Allow the doughnuts to cool completely before storing them in an airtight container at room temperature for up to three days.
- Freezing: These doughnuts freeze beautifully! Place them in a single layer on a baking sheet, freeze until solid, then transfer to a zip-top bag for up to three months.
- Pairing: Enjoy these doughnuts with a cup of coffee or tea for a delightful afternoon treat.
- Serving Warm: They taste best when served warm and fresh out of the fryer. If reheating, a quick spin in the microwave can restore some softness.
- Experiment with Fillings: Don’t hesitate to get creative with the fillings! Try different fruits or nuts based on your preference.
What to Serve Alongside Traditional Polish Doughnuts
Pairing Traditional Polish Doughnuts with the right accompaniments enhances the experience. Here are some delightful options to consider:
- Fresh Fruit: Serve with a side of seasonal fruit, like berries or citrus, for a refreshing contrast to the sweetness of the doughnuts.
- Hot Beverages: Coffee, hot chocolate, or herbal teas complement the doughnuts perfectly, creating a cozy atmosphere.
- Whipped Cream: A dollop of whipped cream can elevate your serving, adding creaminess that pairs well with the fluffy dough.
- Ice Cream: For a more decadent dessert, serve them alongside vanilla or chocolate ice cream.
- Breakfast Spread: These doughnuts can also be part of a larger breakfast spread, served with pancakes, eggs, and more!
FAQ
Conclusion
In conclusion, Traditional Polish Doughnuts are more than just a delicious treat; they are a celebration of culture and family traditions. With their unique flavors and delightful textures, they’re bound to impress anyone who tries them. I encourage you to give this recipe a go and experience the joy of creating these delightful doughnuts in your own kitchen. You won’t regret it!
Traditional Polish Doughnuts
Ingredients
Equipment
Method
- Begin by dissolving the yeast, following the package instructions. This typically involves mixing it with warm water and letting it sit for about 10 minutes. You want to see it become bubbly and frothy, which indicates it's active and ready to work its magic.
- In a large bowl, add approximately 6 cups (or 750g) of flour. Make a well in the center. This is where the magic will happen! It’s important to have a clean surface to work on, so make sure your bowl is spacious.
- Lightly beat the eggs in a separate bowl, then add the melted butter, milk, sugar, and salt. Pour this mixture into the well you created in the flour.
- Now, add the frothy yeast mixture to the bowl. Mix everything together until combined, creating a shaggy dough. Don’t worry about perfection at this stage; we’ll knead it into shape.
- It’s time to knead! Transfer the dough onto a floured surface and knead until it’s soft and not sticky. This should take about 10 minutes. You want the dough to become smooth and elastic; a little workout never hurt anyone!
- Cover the dough with a cloth and let it rise in a warm place until it doubles in size. This usually takes about an hour. Patience is key here, as this step is crucial for texture.
- Once it’s risen, punch the dough down gently to release the air. Knead it lightly again before letting it rise for a second time. If you’re short on time, you can use a bread machine to speed up this process.
- Next, roll out a small portion of the dough on a lightly floured surface until it's about half an inch thick. Use a round cutter or a coffee mug to cut out circles.
- Take a small amount of your chosen filling (like poppy seeds or apricots) and place it in the center of each circle. Fold the edges over to form a pocket, pinching well to seal tightly. Ensure there are no gaps where the filling can escape.
- Place the filled doughnuts seam-side down on a floured surface. Cover them and let them rise again for about 15 minutes. Keep an eye on them; you don’t want them to overrise!
- While they’re rising, heat up a pot of vegetable oil to about 375° F (190° C). Carefully drop the doughnuts into the hot oil, making sure not to overcrowd the pot. Fry them for about 3 minutes, turning them to brown evenly.
- As you remove them from the oil, try to leave as much oil behind as possible and place them on a stack of paper towels to absorb the excess oil. They should be golden brown and smelling heavenly by now!
- For the filling, grind the cleaned dry poppy seeds in a coffee grinder. Combine them with the moistened raisins, honey, finely chopped nuts, and a touch of vegetable oil.
- For the apricot filling, boil the apricots until soft, then drain and blend until smooth. If you're using prunes, repeat this blending process with them as well. Each filling will bring a different flavor profile to your Traditional Polish Doughnuts.
Notes
- Tip 1: Allow the doughnuts to cool completely before storing them in an airtight container at room temperature for up to three days.
- Tip 2: These doughnuts freeze beautifully! Place them in a single layer on a baking sheet, freeze until solid, then transfer to a zip-top bag for up to three months.
- Tip 3: Enjoy these doughnuts with a cup of coffee or tea for a delightful afternoon treat.
- Tip 4: They taste best when served warm and fresh out of the fryer. If reheating, a quick spin in the microwave can restore some softness.
- Tip 5: Don’t hesitate to get creative with the fillings! Try different fruits or nuts based on your preference.