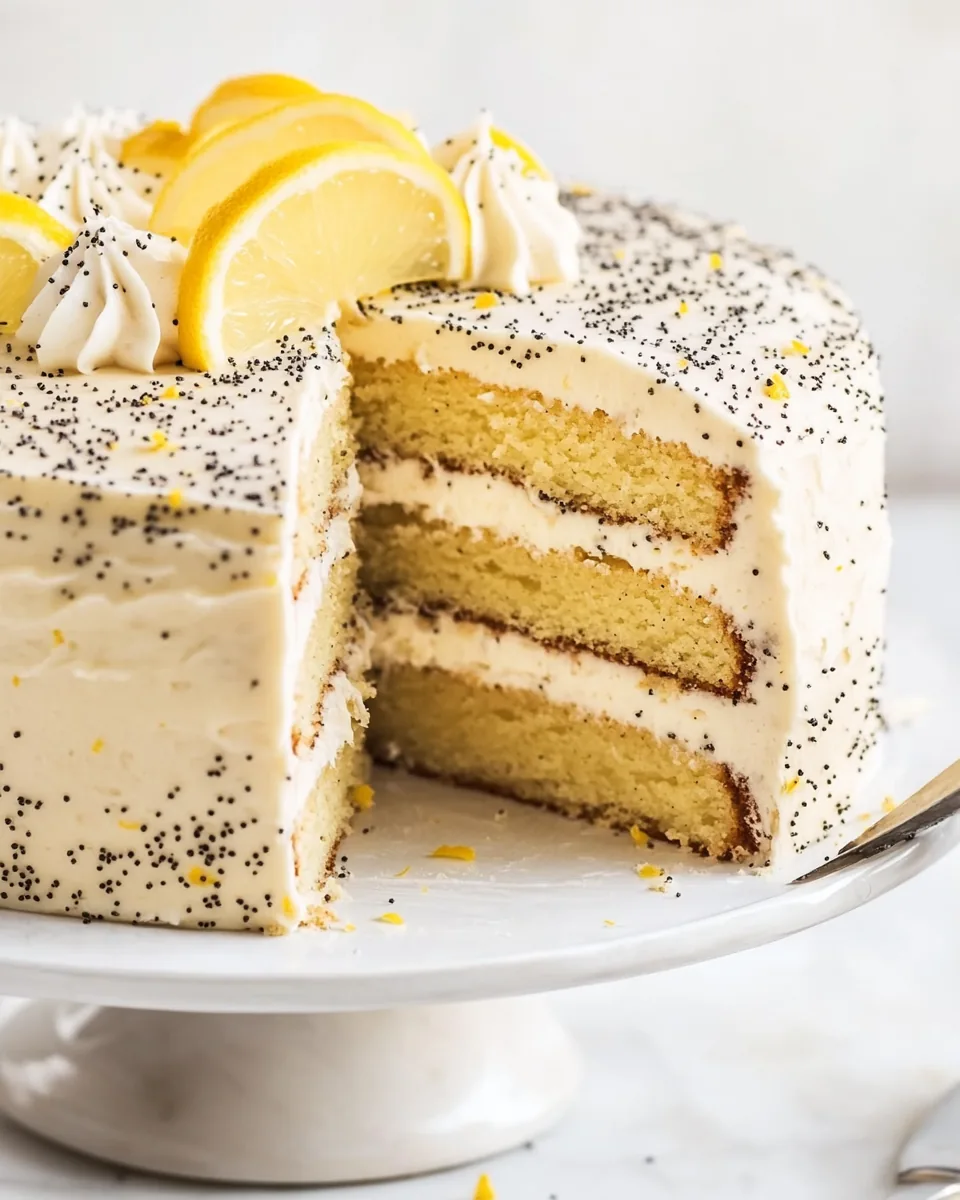
Vanilla Lemon Poppy Seed Layer Cake
There’s something magical about the way a cake can transform an ordinary day into a celebration. The Vanilla Lemon Poppy Seed Layer Cake is one of those delightfully refreshing desserts that always brings a smile. I remember the first time I made this cake; it was for a spring gathering with friends. The air was fragrant with the scent of blooming flowers, and I wanted a dessert that echoed that freshness. This cake, with its bright lemon flavor and crunchy poppy seeds, fit the bill perfectly. As I layered the fluffy cake with rich buttercream and zesty lemon curd, I could hardly wait to share it. The result was an unforgettable moment of joy and laughter, where each slice was met with sheer delight.
Recipe Snapshot
60 mins
0 mins
0 mins
Hard
340 kcal
3 g
Gluten-Free, Low FODMAP
18 g
Oven, Mixing Bowl, Baking Sheet, Frying Pan, Whisk
Why You Need This Vanilla Lemon Poppy Seed Layer Cake
There are countless reasons to fall in love with the Vanilla Lemon Poppy Seed Layer Cake. Here are just a few that I cherish:
1. Perfect Balance of Flavors
The combination of tart lemon and sweet buttery cake creates a delightful balance. The poppy seeds add a subtle crunch, enhancing the overall texture. It’s a flavor profile that’s not just delicious but also refreshing, making it a perfect choice for springtime celebrations.
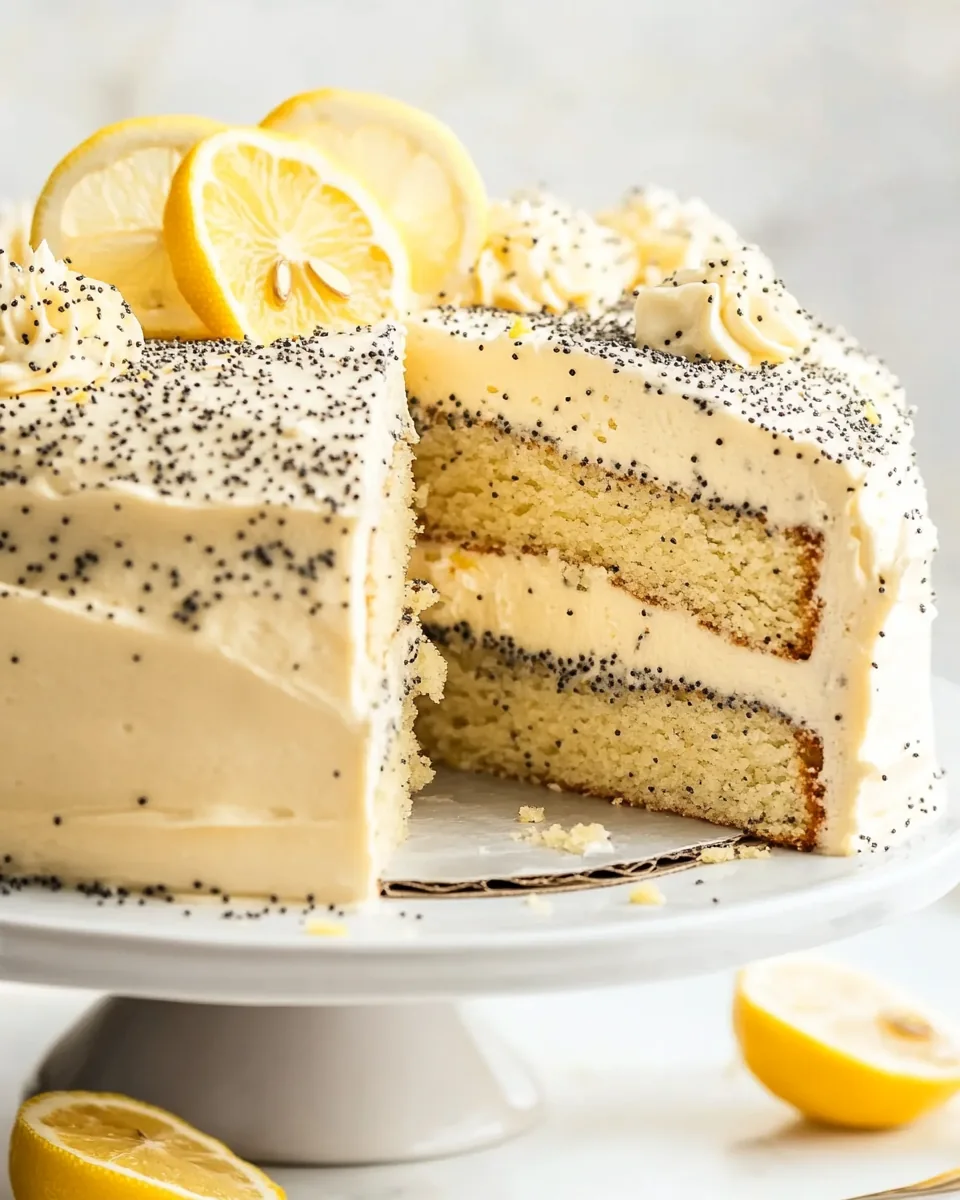
2. A Showstopper for Any Occasion
This cake isn’t just great for everyday enjoyment; it’s a stunning centerpiece for any gathering. Whether it’s a birthday, a bridal shower, or an afternoon tea, the Vanilla Lemon Poppy Seed Layer Cake always impresses. Its beautiful layers and garnish of lemon twists catch the eye and draw everyone in.
3. Easy to Make
Don’t let the layers intimidate you! The process of making this cake is straightforward. With just a few simple steps, you can create a dessert that tastes like it came from a high-end bakery. I love how approachable it is, even for novice bakers.
4. Versatile Decoration Options
One of the best things about this cake is that you can let your creativity shine in the decoration. Whether you want to keep it simple with just a sprinkle of poppy seeds or go all out with fresh berries and edible flowers, the possibilities are endless! Personalizing the cake adds a special touch.
5. Great for Leftovers
If you somehow have any leftovers, they store beautifully in the fridge. The flavors continue to meld, making the cake even tastier the next day. It’s a decadent treat that you can savor for days, keeping the joy of your gathering alive in each slice.
6. A Little Bit of Nostalgia
For many, lemon-flavored desserts evoke a sense of nostalgia, reminding them of sunny days and family gatherings. This cake is perfect for bringing back those cherished memories. Each bite transports you to a warm afternoon spent with loved ones.
Ingredient List for Vanilla Lemon Poppy Seed Layer Cake
When it comes to baking, selecting the right ingredients is crucial to achieving the perfect flavor and texture. In the Vanilla Lemon Poppy Seed Layer Cake, each component plays an important role. The star ingredients like all-purpose flour, granulated sugar, and butter form the base of the cake, while lemon zest and poppy seeds add a vibrant twist. Together, they create a delightful harmony that will leave everyone coming back for more.
- 3¼ cups (406 grams) all-purpose flour: The backbone of any cake, providing structure and texture.
- 2 cups (400 grams) granulated sugar: Sweetens the cake, balancing the tartness of the lemon.
- 2 tablespoons (18 grams) poppy seeds: Adds a unique texture and visual appeal.
- 2 tablespoons (6 grams) lemon zest: Infuses the cake with bright, citrusy flavor.
- 2½ teaspoons (12.5 grams) baking powder: Helps the cake rise and achieve the perfect fluffiness.
- ½ teaspoon (1.5 grams) kosher salt: Enhances the flavors of the cake.
- ¼ teaspoon (1.25 grams) baking soda: Works with the baking powder for a light texture.
- 1 cup (227 grams) unsalted butter, softened: Adds rich flavor and moisture to the cake.
- 1 cup (240 grams) whole milk, room temperature: Keeps the cake moist and tender.
- 3 large eggs (150 grams), room temperature: Bind the ingredients together and add richness.
- 2 teaspoons (8 grams) vanilla extract: A classic flavor that enhances the overall taste.
- ½ cup (160 grams) lemon curd: Provides a deliciously tart filling between the layers.
- Vanilla Buttercream (recipe follows): Creamy frosting that complements the cake beautifully.
- Garnish: poppy seeds, lemon twists: Add an elegant finish to your cake.
Recipe Steps for Vanilla Lemon Poppy Seed Layer Cake
Baking this Vanilla Lemon Poppy Seed Layer Cake is a fun and rewarding experience. You’ll be amazed at how simple it is to create such a show-stopping dessert. Follow these steps closely, and you’ll be rewarded with a beautiful cake that’s sure to impress.
- Preheat your oven to 350°F (180°C). This step is crucial for even baking. While the oven heats up, prepare your baking pans. Spray 3 (8-inch) round cake pans with baking spray that contains flour, ensuring the cakes come out easily after baking. Line the bottoms with parchment paper for extra protection.
- In the bowl of a stand mixer fitted with the paddle attachment, combine the flour, sugar, poppy seeds, lemon zest, baking powder, salt, and baking soda. Whisk these dry ingredients together by hand to ensure they are evenly distributed. This helps prevent any clumps in your batter.
- Add the butter to the mixer bowl. Beat at medium-low speed until the butter is fully incorporated and the mixture resembles coarse crumbs, about 2 minutes. You want to ensure there are no large chunks of butter remaining.
- In a separate medium bowl, whisk together the milk, eggs, and vanilla extract. This mixture should be at room temperature to help the batter combine smoothly.
- With the mixer on low speed, gradually add one-third of the milk mixture to the dry ingredients. Once added, increase the mixer speed to medium and beat until the batter is light and fluffy, which should take about 1 to 2 minutes.
- Continue adding the remaining milk mixture gradually, mixing until well combined. Don’t forget to stop and scrape down the sides of the bowl to ensure everything is incorporated evenly.
- Divide the batter among the prepared cake pans, filling each with about 2 cups (470 grams). Make sure the batter is evenly distributed to ensure uniform baking.
- Place the pans in the preheated oven and bake until a wooden pick inserted in the center comes out clean, which should take about 25 minutes. Keep an eye on them, as oven temperatures can vary.
- Once baked, let the cakes cool in the pans on wire racks for 10 minutes. Then, carefully remove them from the pans and let them cool completely on the wire racks. This cooling step is crucial for a well-structured cake.
- After the cakes are fully cooled, spoon 1 cup (220 grams) of Vanilla Buttercream into a pastry bag and cut a ¼-inch opening in the tip. Level the cooled cake layers if necessary, ensuring they stack evenly.
- Place one layer of cake on a serving plate. Spread ¼ cup (55 grams) of Vanilla Buttercream in a thin layer on top. Use the pastry bag to pipe a small border of buttercream around the edge to create a dam.
- Spread half of the lemon curd within this dam. This adds a burst of flavor and moisture to the cake.
- Top with the second cake layer and repeat the process: spread ¼ cup (55 grams) of buttercream on top, pipe a border, and fill with the remaining lemon curd.
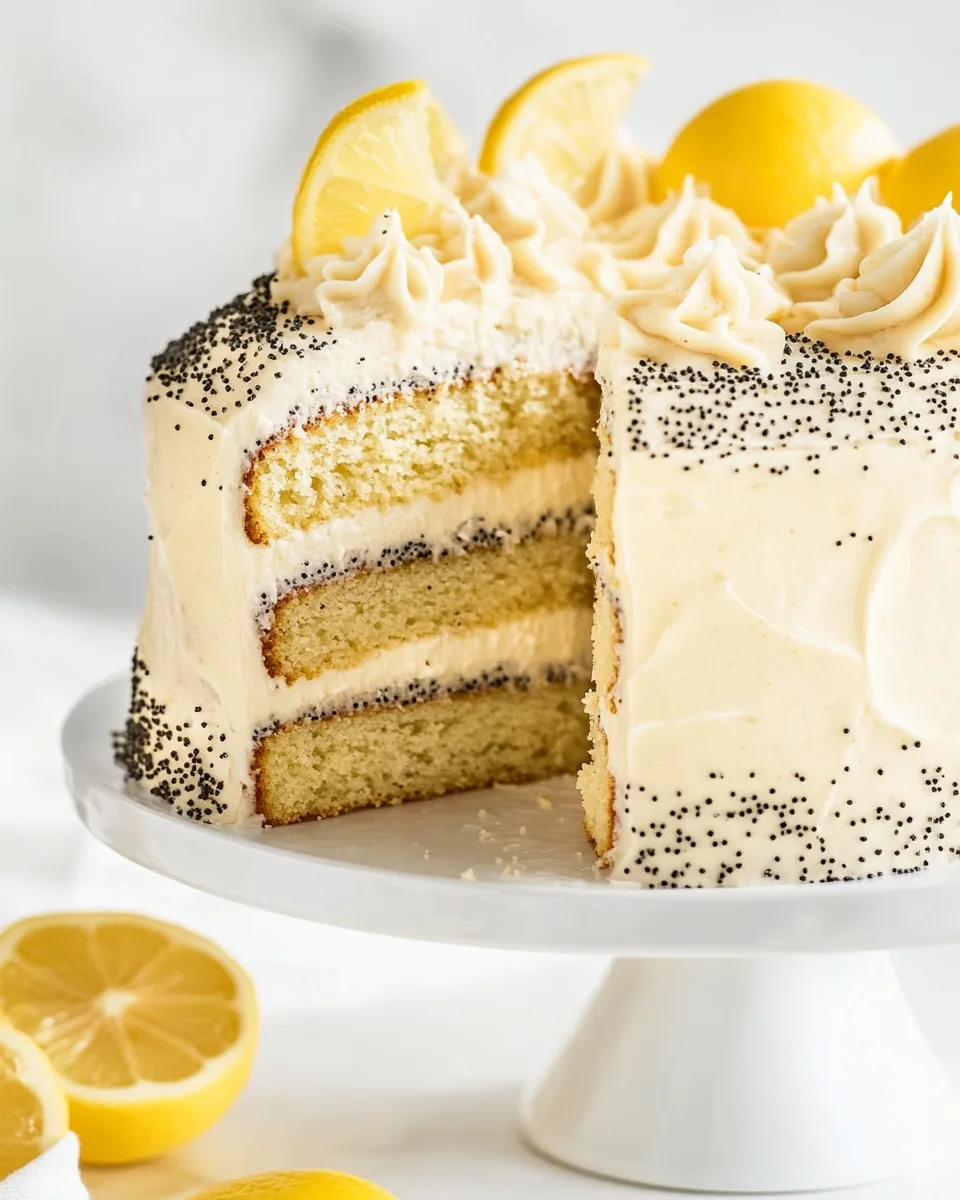
- Finally, place the last cake layer on top and spread the remaining buttercream on the top and sides of the cake. Feel free to be creative with your frosting technique!
- For the finishing touch, garnish with poppy seeds and lemon twists if desired. Refrigerate the cake for 30 minutes before serving. This helps set the layers and makes slicing easier.
- Store any leftovers in an airtight container in the refrigerator for up to 3 days, though I doubt there will be much left!
Things Worth Knowing
- Room Temperature Ingredients: Make sure your butter, milk, and eggs are at room temperature before mixing. This helps achieve a smoother batter and ensures even baking.
- Measuring Flour: For best results, spoon flour into your measuring cup and level it off with a knife. This prevents packing and results in a fluffier cake.
- Avoid Overmixing: Once you add the wet ingredients to the dry, mix just until combined. Overmixing can lead to a dense cake.
- Cake Leveling: If your cake layers dome while baking, use a serrated knife to level them before assembling. This ensures a stable stack and a beautiful presentation.
Ways to Customize
The Vanilla Lemon Poppy Seed Layer Cake is incredibly versatile. You can easily adapt it to fit your taste or occasion. Here are some ways to make it your own:
- Add Different Flavors: Experiment with different citrus fruits like orange or lime in place of lemon for a unique twist.
- Fruit Fillings: Instead of lemon curd, try using raspberry or blueberry preserves for a berry-flavored version.
- Nutty Additions: Consider adding chopped nuts like almonds or walnuts to the batter for added texture and flavor.
- Decorate Creatively: Top the cake with fresh berries, edible flowers, or even a drizzle of citrus glaze for an extra special touch.
- Layered Variations: For a richer cake, add layers of cream cheese frosting between the cake layers along with the lemon curd.
- Smaller Cakes: Instead of a full-size cake, make mini cakes or cupcakes using the same batter for individual servings.
Serve This Vanilla Lemon Poppy Seed Layer Cake With
When it comes to serving the Vanilla Lemon Poppy Seed Layer Cake, the options are endless. Here are some ideas to consider:
- Fresh Fruit: Serve with a side of assorted fresh fruit for a light and colorful contrast to the cake.
- Tea or Coffee: This cake pairs beautifully with a warm cup of tea or coffee, making it perfect for afternoon gatherings.
- Ice Cream: A scoop of vanilla or lemon sorbet can add a delightful chill and extra creaminess to each bite.
- Picnics: This cake is a great addition to outdoor picnics and spring gatherings, providing a refreshing dessert option.
- Special Celebrations: It’s an excellent dessert for birthdays, bridal showers, or any festive occasion where you want to impress.
- Storage Tips: If you have leftovers, store slices in an airtight container in the fridge for up to 3 days. It’s also delicious served cold!
FAQ
Conclusion
The Vanilla Lemon Poppy Seed Layer Cake is a delightful dessert that brings joy to any occasion. Its light, refreshing flavors combined with the crunch of poppy seeds create a memorable treat for your family and friends. I encourage you to try making this cake; it’s not only fun to bake but also delicious to enjoy. You won’t regret it!
Vanilla Lemon Poppy Seed Layer Cake
Ingredients
Equipment
Method
- Preheat your oven to 350°F (180°C). This step is crucial for even baking. While the oven heats up, prepare your baking pans. Spray 3 (8-inch) round cake pans with baking spray that contains flour, ensuring the cakes come out easily after baking. Line the bottoms with parchment paper for extra protection.
- In the bowl of a stand mixer fitted with the paddle attachment, combine the flour, sugar, poppy seeds, lemon zest, baking powder, salt, and baking soda. Whisk these dry ingredients together by hand to ensure they are evenly distributed. This helps prevent any clumps in your batter.
- Add the butter to the mixer bowl. Beat at medium-low speed until the butter is fully incorporated and the mixture resembles coarse crumbs, about 2 minutes. You want to ensure there are no large chunks of butter remaining.
- In a separate medium bowl, whisk together the milk, eggs, and vanilla extract. This mixture should be at room temperature to help the batter combine smoothly.
- With the mixer on low speed, gradually add one-third of the milk mixture to the dry ingredients. Once added, increase the mixer speed to medium and beat until the batter is light and fluffy, which should take about 1 to 2 minutes.
- Continue adding the remaining milk mixture gradually, mixing until well combined. Don't forget to stop and scrape down the sides of the bowl to ensure everything is incorporated evenly.
- Divide the batter among the prepared cake pans, filling each with about 2 cups (470 grams). Make sure the batter is evenly distributed to ensure uniform baking.
- Place the pans in the preheated oven and bake until a wooden pick inserted in the center comes out clean, which should take about 25 minutes. Keep an eye on them, as oven temperatures can vary.
- Once baked, let the cakes cool in the pans on wire racks for 10 minutes. Then, carefully remove them from the pans and let them cool completely on the wire racks. This cooling step is crucial for a well-structured cake.
- After the cakes are fully cooled, spoon 1 cup (220 grams) of Vanilla Buttercream into a pastry bag and cut a ¼-inch opening in the tip. Level the cooled cake layers if necessary, ensuring they stack evenly.
- Place one layer of cake on a serving plate. Spread ¼ cup (55 grams) of Vanilla Buttercream in a thin layer on top. Use the pastry bag to pipe a small border of buttercream around the edge to create a dam.
- Spread half of the lemon curd within this dam. This adds a burst of flavor and moisture to the cake.
- Top with the second cake layer and repeat the process: spread ¼ cup (55 grams) of buttercream on top, pipe a border, and fill with the remaining lemon curd.
- Finally, place the last cake layer on top and spread the remaining buttercream on the top and sides of the cake. Feel free to be creative with your frosting technique!
- For the finishing touch, garnish with poppy seeds and lemon twists if desired. Refrigerate the cake for 30 minutes before serving. This helps set the layers and makes slicing easier.
- Store any leftovers in an airtight container in the refrigerator for up to 3 days, though I doubt there will be much left!
Notes
- Storage: Any leftovers can be stored in an airtight container in the fridge for up to 3 days.
- Freezing: For longer storage, you can freeze the layers individually wrapped in plastic wrap and aluminum foil for up to 2 months.
- Variations: Feel free to experiment with different citrus flavors or fillings!
- Serving Suggestions: This cake pairs beautifully with fresh fruit or a scoop of ice cream.
- Decoration: Get creative with the garnish to match your occasion.