Elderberry Syrup
The first time I made Elderberry Syrup, I was feeling a little under the weather and wanted something soothing. As I boiled the dried elderberries with water, cinnamon, cloves, and ginger, the aroma filled my kitchen, creating an inviting atmosphere. It was as if the warmth of the spices was wrapping around me like a cozy blanket, instantly lifting my spirits. The golden syrup that emerged was not only delicious but also packed with health benefits. Whenever I have a cold, this homemade syrup becomes my go-to remedy. Plus, it’s such a simple process that I can’t help but share it with friends and family. They often ask for the recipe, and I’m proud to tell them how easy it truly is!
Recipe Snapshot
60 mins
0 mins
0 mins
Easy
60 kcal
0.1 g
Keto, Paleo, Whole30
0 g
Saucepan, Large Pot, Mixing Bowl, Chef’s Knife, Frying Pan, Wooden Spoon, Whisk
Why You’ll Love This Elderberry Syrup
A Perfect Natural Remedy
One reason I love making Elderberry Syrup is its rich history as a natural remedy. Elderberries have been used for centuries for their immune-boosting properties. Whenever I feel a sniffle coming on, I reach for this syrup instead of over-the-counter medications.
Simple Ingredients
The ingredients in Elderberry Syrup are straightforward and accessible. You don’t need any fancy components; just dried elderberries, water, cinnamon, cloves, ginger, and honey. This simplicity means I can easily whip it up without a trip to the store. Knowing exactly what’s in my syrup brings me peace of mind.
Deliciously Versatile
Another aspect I adore is how versatile Elderberry Syrup is. You can drizzle it over pancakes, stir it into yogurt, or even mix it into a warm cup of tea. The sweet, spiced flavor is delightful, and it elevates so many dishes!
Customizable Recipe
This recipe is also highly adaptable. If you want a sweeter syrup, you can adjust the amount of honey to your liking. Feel free to experiment with additional spices like nutmeg or vanilla for a unique twist. Every batch can be a little different, which keeps things exciting.
Health Benefits
Let’s not forget the health benefits! Elderberry Syrup is known for its anti-inflammatory and antioxidant properties. It can help alleviate cold and flu symptoms, making it a fantastic addition to your wellness toolkit. I always feel a sense of comfort knowing I’m nourishing my body with something natural.
Make Ahead
Finally, you can make a large batch of Elderberry Syrup and store it in your fridge for up to three weeks. This means you have a dependable remedy on hand whenever you need it. I love having that little bottle waiting for me, ready to soothe my throat or boost my immune system!
What to Gather for Elderberry Syrup

Creating Elderberry Syrup is about selecting the right ingredients that blend together to make a soothing and flavorful concoction. Each item plays a crucial role: the dried elderberries form the base, while the spices enhance the flavor and health benefits. Together, they create a syrup that’s not only delicious but beneficial for your health.
- Dried Elderberries: The star of our syrup, these small berries are packed with vitamins and antioxidants. They can be found at health food stores or online, and their rich flavor is what gives the syrup its unique taste.
- Water: The essential liquid that extracts the flavors and nutrients from the elderberries and spices.
- Ground Cinnamon: This warming spice adds a lovely depth of flavor, complementing the sweetness of the syrup.
- Ground Cloves: With their potent and fragrant aroma, cloves enhance the syrup’s flavor profile and offer additional health benefits.
- Fresh Ginger: A slice of fresh ginger brings a delightful kick and warmth to the syrup, making it even more comforting.
- Honey: A natural sweetener that balances the flavors and adds its own health benefits, honey is the perfect finishing touch.
Making Elderberry Syrup
Making Elderberry Syrup is a delightful process that requires just a few steps, and you’ll be rewarded with a delicious syrup that can be enjoyed in many ways. Let’s get started!
Begin by combining the dried elderberries, water, ground cinnamon, ground cloves, and fresh ginger in a medium-sized saucepan. Use a saucepan that’s large enough to allow for boiling without spilling over. Set the heat to high and bring the mixture to a boil. You’ll notice the vibrant color of the elderberries and the comforting scent of the spices filling your kitchen. This is the exciting part, as you’re just moments away from making your syrup!
Once the mixture reaches a rolling boil, lower the heat to a gentle simmer. Allow it to simmer for about 25 to 30 minutes. During this time, keep an eye on the consistency of the liquid; it should reduce by about half. You’ll see the color intensify, and the elderberries will soften, releasing their essence into the water. Stir occasionally to prevent anything from sticking to the bottom of the pan.
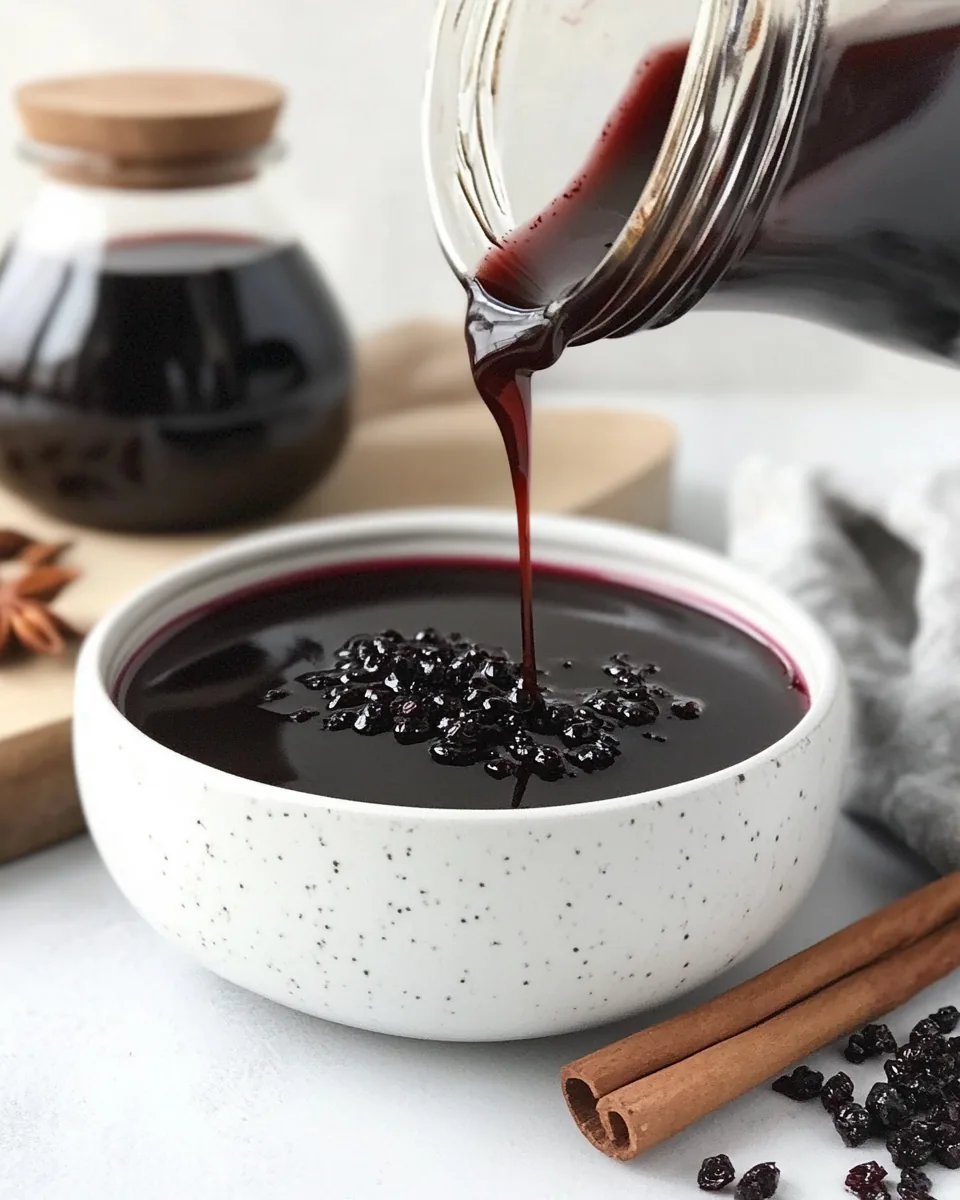
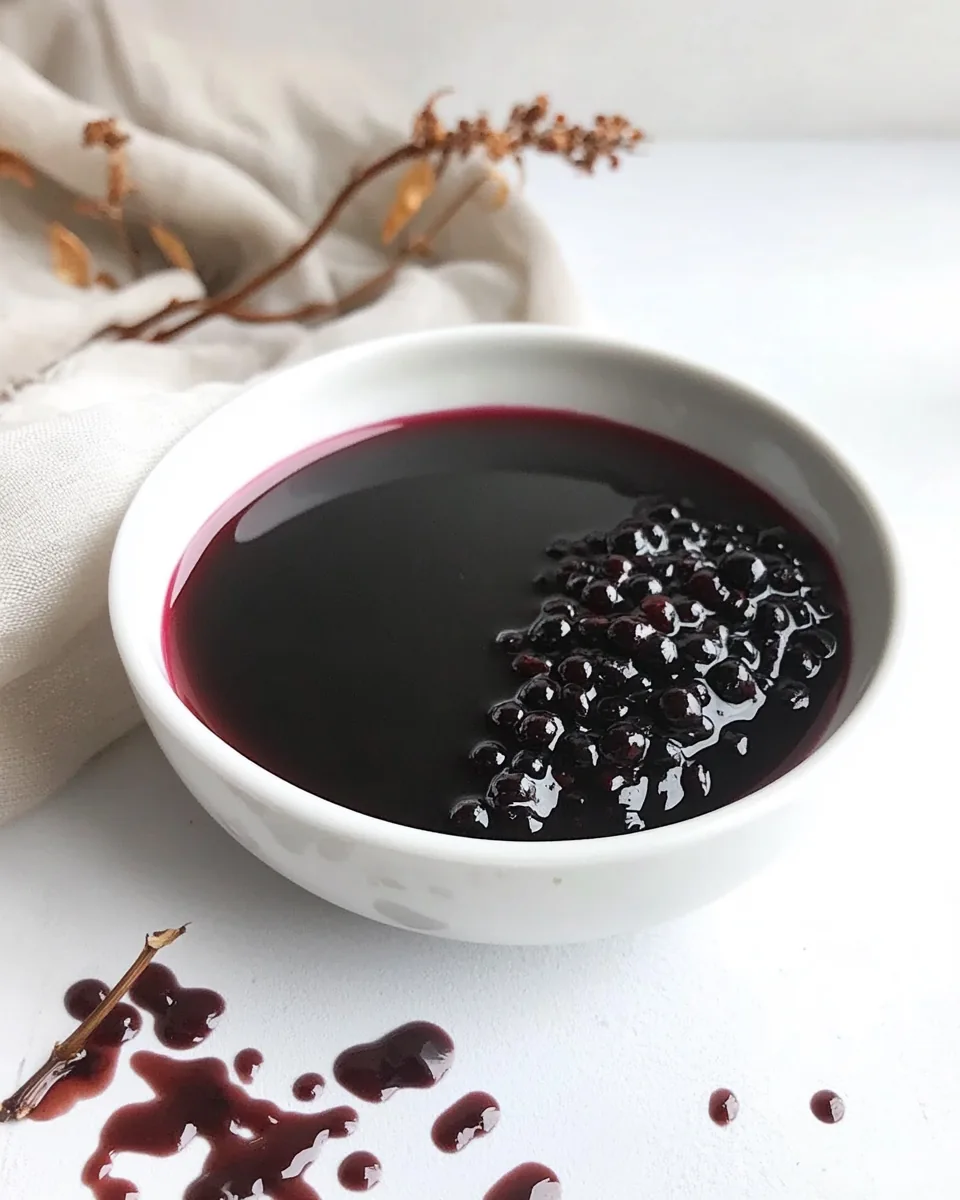
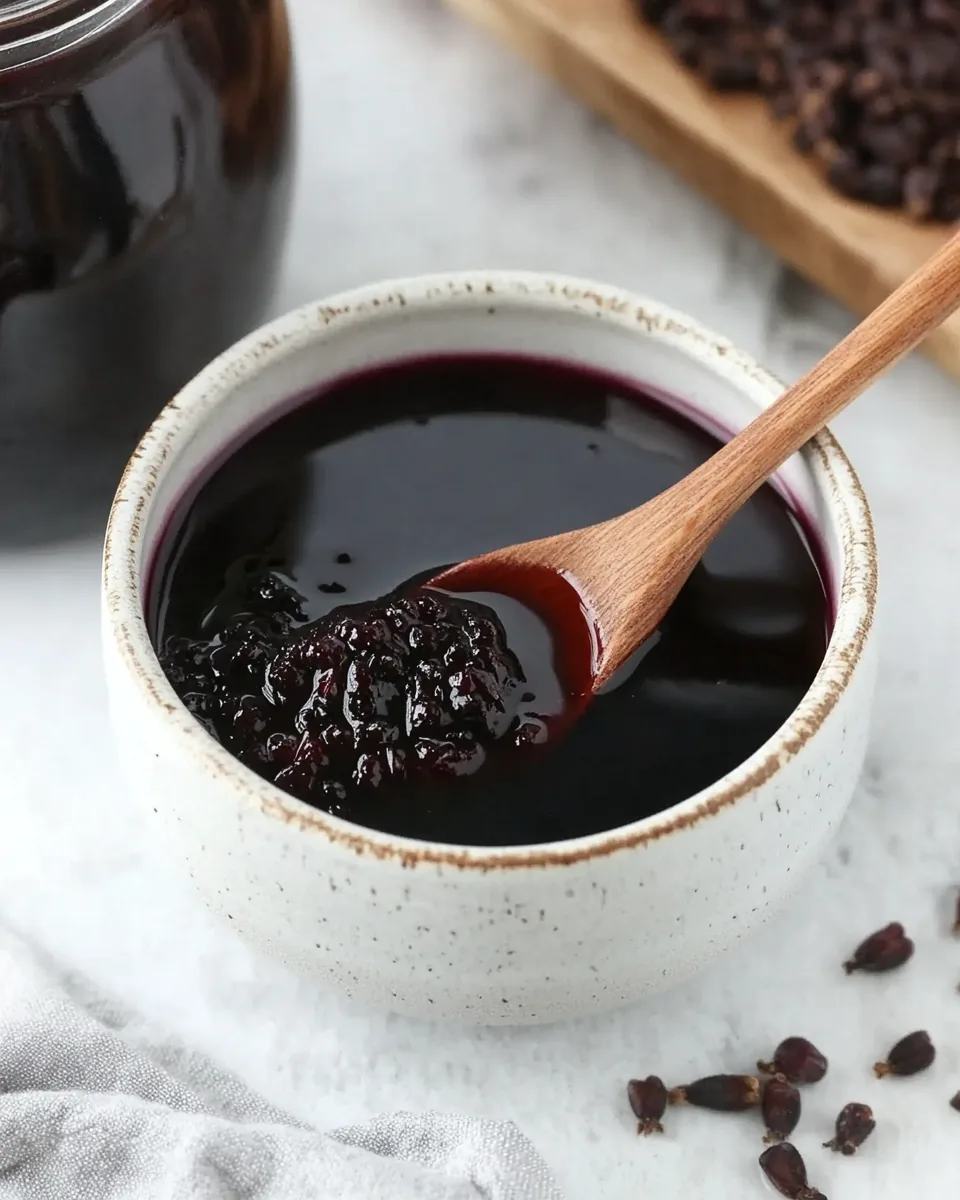
When the simmering time is complete, pour the cooked mixture through a fine mesh strainer into a clean bowl. This step helps separate the elderberries from the liquid. Use the back of a spoon to press down on the berries in the strainer, ensuring you extract as much juice as possible. The resulting liquid should be a deep, rich color. Discard or compost the leftover pulp in the strainer.
Allow the strained elderberry juice to cool to room temperature. This is an important step, as you don’t want to add the honey when the liquid is still hot. The cooling process will also help develop a more robust flavor in your syrup.
Once cooled, stir in the honey, using a whisk to incorporate it smoothly. This will sweeten the syrup and enhance its flavor. You may adjust the sweetness to your preference by adding more or less honey.
Finally, transfer your Elderberry Syrup into a sealed glass jar. Make sure you choose a jar that’s easy to pour from and store. Label the jar with the date so you can keep track of its freshness.
This syrup should keep well in the fridge for about 2 to 3 weeks. If you find yourself with more syrup than you can use, don’t worry! You can freeze any extras in ice cube trays for convenient portions. Simply thaw overnight in the fridge when you need more syrup. Enjoy your homemade Elderberry Syrup in various ways!
Things Worth Knowing
- Storage: Store your Elderberry Syrup in a sealed glass jar in the refrigerator. It should last for about 2 to 3 weeks.
- Freezing: You can freeze any extra syrup in ice cube trays. This way, you can pop out a cube whenever you need a dose!
- Adjust Sweetness: Feel free to adjust the amount of honey based on your taste preferences. More honey will yield a sweeter syrup.
- Experiment: Don’t hesitate to experiment with different spices and flavors. Try adding nutmeg or even a splash of lemon for a zesty twist.
- Health Benefits: Enjoy the immune-boosting properties of elderberries. It’s a natural remedy for colds and flu.
Helpful Hints
Here are some helpful tips that will make your experience even better when making Elderberry Syrup.
- Storage: Always store your syrup in a sealed glass jar in the refrigerator. This will help keep it fresh for up to three weeks.
- Freezing: If you make more syrup than you can use within the shelf life, consider freezing some in ice cube trays. This way, you can take out just what you need without thawing the whole batch.
- Pairing: Elderberry Syrup pairs wonderfully with herbal teas. Add a spoonful to your favorite tea for an immune-boosting drink.
- Variations: Feel free to experiment with different flavors like adding lemon or orange juice for a citrus twist.
- Batch Size: This recipe should yield roughly 1.5 cups of syrup. Adjust the quantities if you want to make a larger or smaller batch.
- Health Awareness: While Elderberry Syrup is great for most people, always check with your healthcare provider if you have any concerns or conditions.
Serving This Elderberry Syrup
Serving Elderberry Syrup opens up a world of possibilities. Here’s how you can enjoy it:
- As a Remedy: Take a tablespoon each day during cold and flu season for an immune boost.
- In Beverages: Mix it into hot water or herbal tea to create a warm, soothing drink.
- Pancake or Waffle Topping: Drizzle it over pancakes or waffles for a delicious breakfast treat.
- Yogurt Addition: Stir a spoonful into your morning yogurt for added sweetness and flavor.
- Cocktails and Mocktails: Use it as a sweetener in cocktails or mocktails for a unique flavor profile.
- Gifts: Consider bottling some Elderberry Syrup as gifts for friends and family, especially during the holidays!
FAQ
Conclusion
In conclusion, Elderberry Syrup is a delightful and healthful addition to your home remedies. Its rich history and numerous health benefits make it a must-try, especially during the cold season. I encourage you to give this simple recipe a go; not only will you be making something delicious, but you’ll also be investing in your health. Enjoy the process of creating your syrup and the comfort it brings to you and your loved ones.
Elderberry Syrup
Ingredients
Equipment
Method
- Begin by combining the dried elderberries, water, ground cinnamon, ground cloves, and fresh ginger in a medium-sized saucepan. Use a saucepan that’s large enough to allow for boiling without spilling over. Set the heat to high and bring the mixture to a boil. You’ll notice the vibrant color of the elderberries and the comforting scent of the spices filling your kitchen. This is the exciting part, as you’re just moments away from making your syrup!
- Once the mixture reaches a rolling boil, lower the heat to a gentle simmer. Allow it to simmer for about 25 to 30 minutes. During this time, keep an eye on the consistency of the liquid; it should reduce by about half. You’ll see the color intensify, and the elderberries will soften, releasing their essence into the water. Stir occasionally to prevent anything from sticking to the bottom of the pan.
- When the simmering time is complete, pour the cooked mixture through a fine mesh strainer into a clean bowl. This step helps separate the elderberries from the liquid. Use the back of a spoon to press down on the berries in the strainer, ensuring you extract as much juice as possible. The resulting liquid should be a deep, rich color. Discard or compost the leftover pulp in the strainer.
- Allow the strained elderberry juice to cool to room temperature. This is an important step, as you don’t want to add the honey when the liquid is still hot. The cooling process will also help develop a more robust flavor in your syrup.
- Once cooled, stir in the honey, using a whisk to incorporate it smoothly. This will sweeten the syrup and enhance its flavor. You may adjust the sweetness to your preference by adding more or less honey.
- Finally, transfer your Elderberry Syrup into a sealed glass jar. Make sure you choose a jar that’s easy to pour from and store. Label the jar with the date so you can keep track of its freshness.
Notes
- Tip 1: Store your syrup in a sealed glass jar in the refrigerator. This will help keep it fresh for up to three weeks.
- Tip 2: If you make more syrup than you can use within the shelf life, consider freezing some in ice cube trays. This way, you can take out just what you need without thawing the whole batch.
- Tip 3: Elderberry Syrup pairs wonderfully with herbal teas. Add a spoonful to your favorite tea for an immune-boosting drink.
- Tip 4: Feel free to experiment with different flavors like adding lemon or orange juice for a citrus twist.
- Tip 5: This recipe should yield roughly 1.5 cups of syrup. Adjust the quantities if you want to make a larger or smaller batch.
- Tip 6: While Elderberry Syrup is great for most people, always check with your healthcare provider if you have any concerns or conditions.