Decorate Sugar Cookies with Royal Icing
The art of decorating sugar cookies is a beloved tradition for many, and I can’t help but feel a special joy when I dive into the world of Decorate Sugar Cookies with Royal Icing. It all began one chilly afternoon, as I watched my kids eagerly await their turn to create colorful masterpieces on warm, fragrant sugar cookies. The kitchen was alive with laughter, sprinkles, and a little bit of chaos. I still remember the first time we tried our hand at it, transforming simple cookies into festive works of art, all thanks to royal icing. The satisfaction of seeing their faces light up when they reveal their creations is something I cherish deeply.
Recipe Snapshot
60 mins
0 mins
0 mins
Medium
150 kcal
1g g
Vegan, Gluten-Free, AIP
5g g
Wooden Spoon, Food Processor
Why This Decorate Sugar Cookies with Royal Icing Stands Out
It’s a Form of Expression
One of the things I love most about Decorate Sugar Cookies with Royal Icing is the endless possibilities for creativity. Every cookie can tell a story, inspired by themes ranging from holidays to personal memories. You can allow your imagination to run wild, whether it’s a birthday celebration or a cozy winter gathering.
Perfect for All Occasions
These cookies aren’t just tasty; they’re also perfect for any occasion! Birthdays, holidays, or even just a rainy day – there’s never a bad time to whip up some sugar cookies and go wild with icing. Each batch not only satisfies a sweet tooth but also brings people together.
A Fun Activity for Everyone
What I appreciate most about decorating cookies is that it’s a fun activity for everyone. Young ones can unleash their creativity with colorful icing while adults can refine their skills. It’s a great way to bond with family and friends, and you’re left with beautiful cookies to enjoy together.
Gifting with Love
Decorated cookies make thoughtful gifts! Imagine presenting a beautifully decorated box of cookies to a friend, complete with designs that reflect their personality. The joy and love wrapped up in a simple cookie make it a heartfelt present, perfect for any occasion.
Learning and Patience
Getting the technique right with royal icing takes practice, which is another reason I adore this process. It’s a wonderful reminder that art is not just about perfection; it’s about progress and patience. With each cookie I decorate, I learn something new, getting closer to that ideal design.
Creating Lasting Memories
Decorating sugar cookies is an experience I cherish. It’s more than just baking; it’s about creating lasting memories with loved ones. I often find myself reminiscing about those laughs and shared moments long after the cookies have been eaten. Whether they end up a little crooked or perfectly shaped, the memories made while decorating are what truly count.
Main Ingredients for Decorate Sugar Cookies with Royal Icing

The ingredients for Decorate Sugar Cookies with Royal Icing are quite simple yet essential for achieving that delightful finish. Each component plays a significant role in the flavor and decoration. The sugar cookies are the canvas, and the royal icing is the paint, allowing for vibrant colors and intricate designs. Together, they create a perfect blend of taste and artistry.
- Sugar cookies – The base of this recipe, these cookies are sweet and buttery, providing the perfect canvas for decorating.
- Royal Icing – This icing creates a smooth surface that can be colored and piped to achieve stunning designs.
- Icing bottles or pastry bags – Essential tools for applying icing with precision.
- Funnel – Helpful for filling bottles with icing without mess.
- Toothpicks – Useful for popping air bubbles in the icing and for fine-tuning designs.
- Decorative elements – Think sprinkles and candied beads to give your cookies that extra sparkle and flair!
Making This Decorate Sugar Cookies with Royal Icing
Now that you have your ingredients, let’s dive into the exciting process of decorating! This might seem a little intimidating at first, but trust me, once you get the hang of it, you’ll enjoy every minute. Follow these detailed steps, and soon you’ll create beautiful sugar cookies that impress everyone.
Begin by preparing your sugar cookies. Make sure they are fully cooled before you start decorating. A warm cookie can cause the icing to melt, which is not what you want. If you have baked your cookies ahead of time, place them in an airtight container to keep them fresh before decorating.
Next, it’s time to make your royal icing. You’ll want to start with a batch of stiff icing for outlining your cookies. Mix together powdered sugar, meringue powder, and a bit of water until you achieve a thick, spreadable consistency. If you’re unsure about the texture, use the “10-second rule” to test it.
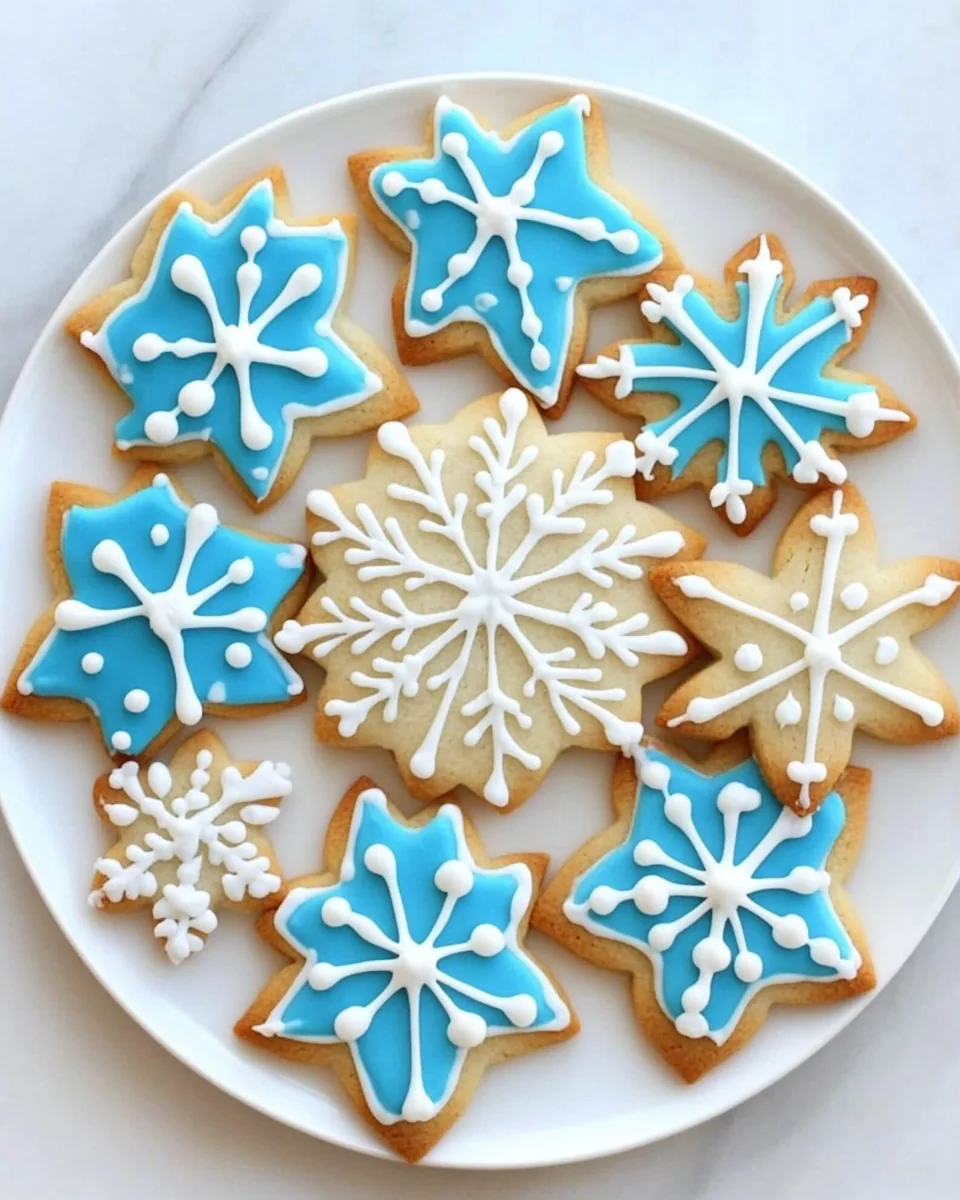
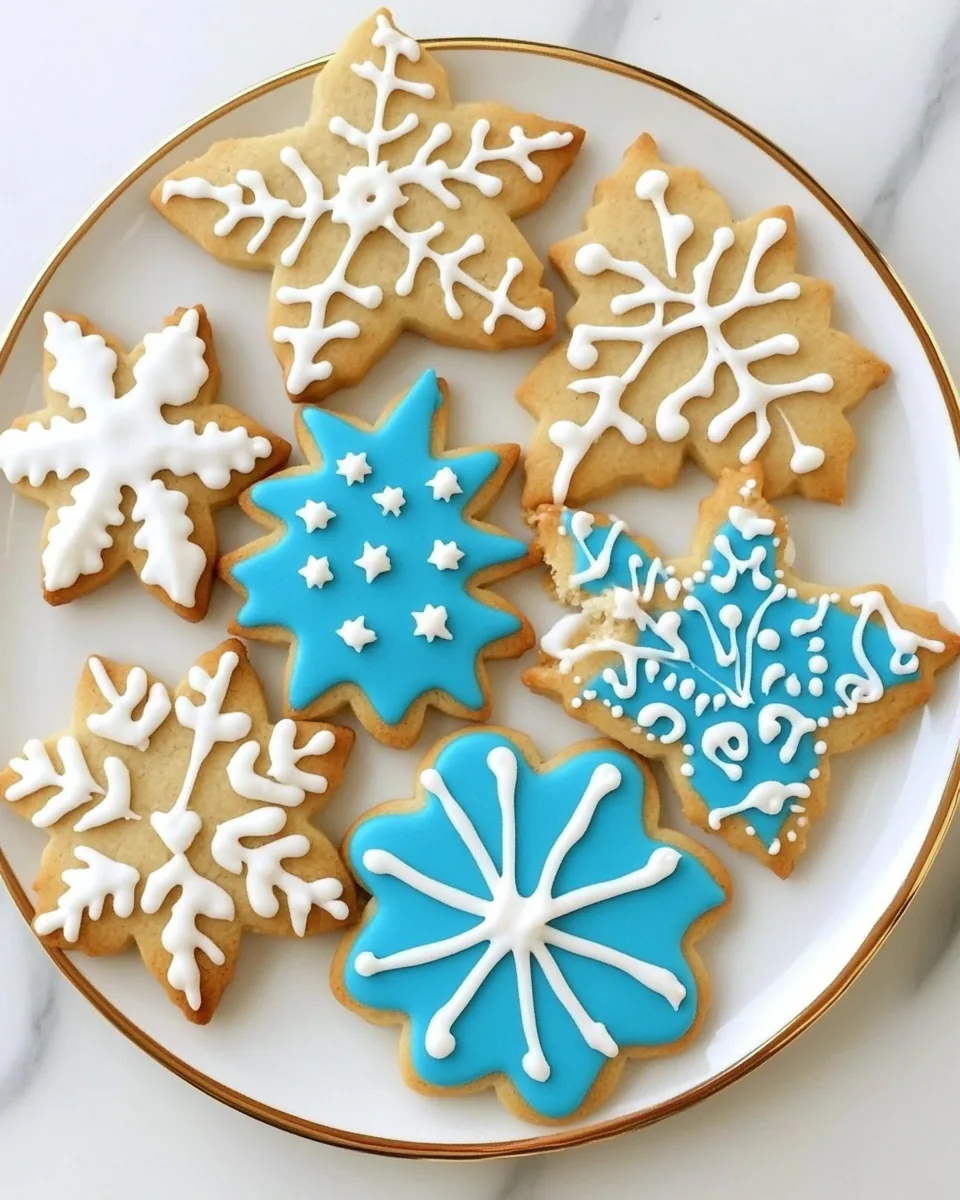
Once your outline icing is ready, color it as desired. For this project, I chose a vibrant blue for Hanukkah. Use gel food coloring to achieve the desired hue without altering the icing’s consistency too much.
Fill your first icing bottle with the outline icing. Use a funnel to avoid spills as you pour. Once filled, attach a small round decorating tip to the bottle.
Now, it’s time to outline your cookies! Using the bottle, carefully trace around the edges of each cookie. This will create a barrier that prevents the flood icing from spilling over the sides. Take your time, ensuring that each outline is even.
After you’ve outlined your cookies, let them dry for about 15 to 20 minutes. This will help create a solid foundation for the flood icing.
For flooding, you’ll want a thinner consistency of icing. Gradually add water to your remaining royal icing until it reaches a more fluid state. Remember to keep testing it with the “10-second rule,” aiming for about a 10- to 15-second smooth out time.
Fill your second icing bottle with the flood icing. You can add more color if you wish to create vibrant designs. Attach a wider tip to the bottle for this step.
Begin filling the center of the outlined cookies with the flood icing. Start by squeezing gently and filling the center, letting the icing spread naturally to the edges formed by your outline. Use a toothpick to nudge icing into corners and pop air bubbles.
Once the cookies are covered with flood icing, set them aside to dry for at least 3 hours, or up to overnight for best results. This will allow the icing to harden and create a smooth surface for detailing.
After your flood icing has dried, it’s time for the fun part: detailing! Prepare another batch of royal icing, this time with a thicker consistency. Use this for your detailed decorations.
Using the same method as before, fill a bottle with detail icing. Use a small round tip for intricate designs. You can now add dots, lines, and whatever else your creative heart desires!
As you go, keep a damp paper towel handy to cover the tips of your icing bottles. This prevents the icing from drying out and clogging your tips.
Once you’ve completed your designs, allow the cookies to dry completely. Again, patience is key here. The longer they dry, the better they’ll hold their shape and decoration!
Finally, enjoy your beautifully decorated cookies! Share them with family and friends, or save them for yourself. Either way, they’re sure to be a hit!
Things Worth Knowing
- Drying Time: Icing needs time to set properly. Allow at least 3 hours for flood icing and longer for detailed icing to ensure everything stays intact.
- Texture Control: Achieving the right consistency can be tricky. Remember to add water gradually to maintain the desired texture.
- Color Mixing: Using gel food coloring can help you achieve vibrant hues without changing the icing’s consistency.
- Practice Patience: Don’t rush the decorating process. It takes time to master piping techniques, so be gentle with yourself!
- Storage: Keep decorated cookies in a cool, dry place for best longevity. Avoid stacking, as the icing can be fragile.
Change It Up

If you’re feeling adventurous, there are many ways to customize your sugar cookie decorating experience! Here are some great ideas to inspire you:
- Flavor Variations: Experiment with different flavorings in your sugar cookies, such as almond or lemon, for a delightful twist.
- Color Themes: Match your icing colors to specific holidays or events for a themed cookie spread.
- Sprinkle Selection: Use an array of sprinkles, edible glitter, or even edible flowers for an extra touch of glamour.
- Cookie Shapes: Try using different cookie cutters to create unique shapes for various occasions.
- Holiday Themes: Tailor your decorations to fit seasonal celebrations by using seasonal colors and designs.
- Interactive Activities: Host a cookie decorating party where guests can create their own designs, making it a fun group activity!
What to Serve Alongside Decorate Sugar Cookies with Royal Icing
When it comes to serving your beautifully decorated cookies, the possibilities are endless! Here are some thoughtful ideas to enhance your cookie experience:
- Hot Beverages: Pair cookies with warm drinks like hot cocoa or tea, making them the perfect afternoon treat.
- Seasonal Celebrations: Serve your cookies during holidays like Christmas or Halloween for festive fun.
- Gift Box: Create a curated gift box of your decorated cookies for friends and family, adding a personal touch to any occasion.
- Sweet Snack Table: Present these cookies at parties as part of a larger sweet table, alongside cupcakes and candies.
- Creative Displays: Use decorative platters or tiers to display your cookies attractively at gatherings.
- Brunch Delight: Include sugar cookies in a brunch spread for a delightful mix of sweet and savory.
FAQ
Conclusion
Decorating sugar cookies is more than just a fun activity; it’s a chance to be creative and share joy with loved ones. The Decorate Sugar Cookies with Royal Icing recipe is perfect for any occasion, encouraging you to express your artistic flair while creating delicious treats. So gather your supplies and start decorating today; you’ll find that the process is just as enjoyable as the final product!
Decorate Sugar Cookies with Royal Icing
Ingredients
Equipment
Method
- Begin by preparing your sugar cookies. Make sure they are fully cooled before you start decorating. A warm cookie can cause the icing to melt, which is not what you want. If you have baked your cookies ahead of time, place them in an airtight container to keep them fresh before decorating.
- Next, it’s time to make your royal icing. You’ll want to start with a batch of stiff icing for outlining your cookies. Mix together powdered sugar, meringue powder, and a bit of water until you achieve a thick, spreadable consistency. If you’re unsure about the texture, use the “10-second rule” to test it.
- Once your outline icing is ready, color it as desired. For this project, I chose a vibrant blue for Hanukkah. Use gel food coloring to achieve the desired hue without altering the icing's consistency too much.
- Fill your first icing bottle with the outline icing. Use a funnel to avoid spills as you pour. Once filled, attach a small round decorating tip to the bottle.
- Now, it’s time to outline your cookies! Using the bottle, carefully trace around the edges of each cookie. This will create a barrier that prevents the flood icing from spilling over the sides. Take your time, ensuring that each outline is even.
- After you’ve outlined your cookies, let them dry for about 15 to 20 minutes. This will help create a solid foundation for the flood icing.
- For flooding, you’ll want a thinner consistency of icing. Gradually add water to your remaining royal icing until it reaches a more fluid state. Remember to keep testing it with the “10-second rule,” aiming for about a 10- to 15-second smooth out time.
- Fill your second icing bottle with the flood icing. You can add more color if you wish to create vibrant designs. Attach a wider tip to the bottle for this step.
- Begin filling the center of the outlined cookies with the flood icing. Start by squeezing gently and filling the center, letting the icing spread naturally to the edges formed by your outline. Use a toothpick to nudge icing into corners and pop air bubbles.
- Once the cookies are covered with flood icing, set them aside to dry for at least 3 hours, or up to overnight for best results. This will allow the icing to harden and create a smooth surface for detailing.
- After your flood icing has dried, it’s time for the fun part: detailing! Prepare another batch of royal icing, this time with a thicker consistency. Use this for your detailed decorations.
- Using the same method as before, fill a bottle with detail icing. Use a small round tip for intricate designs. You can now add dots, lines, and whatever else your creative heart desires!
- As you go, keep a damp paper towel handy to cover the tips of your icing bottles. This prevents the icing from drying out and clogging your tips.
- Once you’ve completed your designs, allow the cookies to dry completely. Again, patience is key here. The longer they dry, the better they’ll hold their shape and decoration!
- Finally, enjoy your beautifully decorated cookies! Share them with family and friends, or save them for yourself. Either way, they’re sure to be a hit!