Ingredients
Equipment
Method
- Begin by preparing your sugar cookies. Make sure they are fully cooled before you start decorating. A warm cookie can cause the icing to melt, which is not what you want. If you have baked your cookies ahead of time, place them in an airtight container to keep them fresh before decorating.
- Next, it’s time to make your royal icing. You’ll want to start with a batch of stiff icing for outlining your cookies. Mix together powdered sugar, meringue powder, and a bit of water until you achieve a thick, spreadable consistency. If you’re unsure about the texture, use the “10-second rule” to test it.
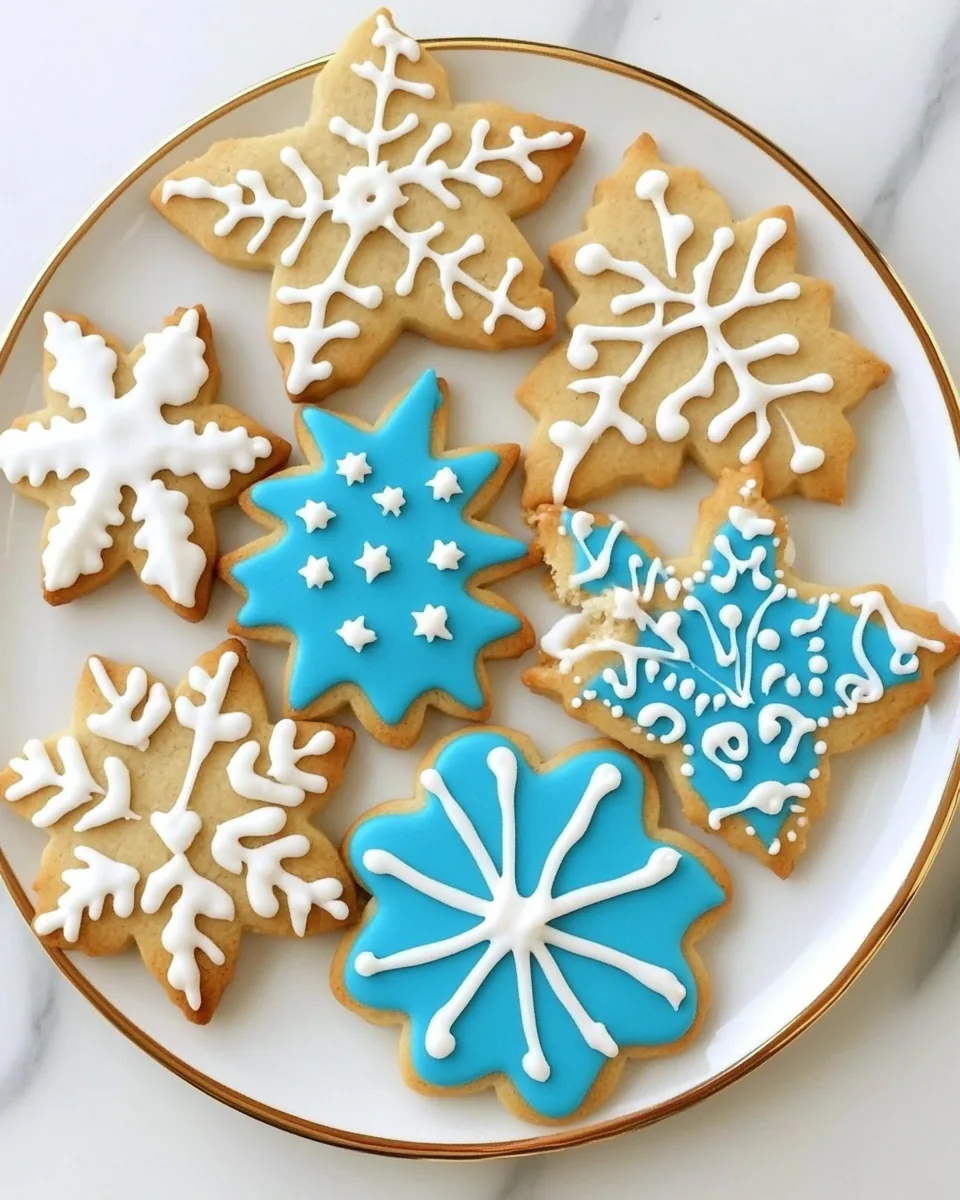
- Once your outline icing is ready, color it as desired. For this project, I chose a vibrant blue for Hanukkah. Use gel food coloring to achieve the desired hue without altering the icing's consistency too much.
- Fill your first icing bottle with the outline icing. Use a funnel to avoid spills as you pour. Once filled, attach a small round decorating tip to the bottle.
- Now, it’s time to outline your cookies! Using the bottle, carefully trace around the edges of each cookie. This will create a barrier that prevents the flood icing from spilling over the sides. Take your time, ensuring that each outline is even.
- After you’ve outlined your cookies, let them dry for about 15 to 20 minutes. This will help create a solid foundation for the flood icing.
- For flooding, you’ll want a thinner consistency of icing. Gradually add water to your remaining royal icing until it reaches a more fluid state. Remember to keep testing it with the “10-second rule,” aiming for about a 10- to 15-second smooth out time.
- Fill your second icing bottle with the flood icing. You can add more color if you wish to create vibrant designs. Attach a wider tip to the bottle for this step.
- Begin filling the center of the outlined cookies with the flood icing. Start by squeezing gently and filling the center, letting the icing spread naturally to the edges formed by your outline. Use a toothpick to nudge icing into corners and pop air bubbles.
- Once the cookies are covered with flood icing, set them aside to dry for at least 3 hours, or up to overnight for best results. This will allow the icing to harden and create a smooth surface for detailing.
- After your flood icing has dried, it’s time for the fun part: detailing! Prepare another batch of royal icing, this time with a thicker consistency. Use this for your detailed decorations.
- Using the same method as before, fill a bottle with detail icing. Use a small round tip for intricate designs. You can now add dots, lines, and whatever else your creative heart desires!
- As you go, keep a damp paper towel handy to cover the tips of your icing bottles. This prevents the icing from drying out and clogging your tips.
- Once you’ve completed your designs, allow the cookies to dry completely. Again, patience is key here. The longer they dry, the better they’ll hold their shape and decoration!
- Finally, enjoy your beautifully decorated cookies! Share them with family and friends, or save them for yourself. Either way, they’re sure to be a hit!
Notes
In this tutorial I decorated Hanukkah holiday cookies. Of course, you can use this decorating process for any holiday, or just because! Let loose your inner artist and get creative. It's fun, and I find it strangely relaxing... almost like a meditation. The resulting cookies are like little pieces of art, almost too beautiful to eat! They make great gifts.