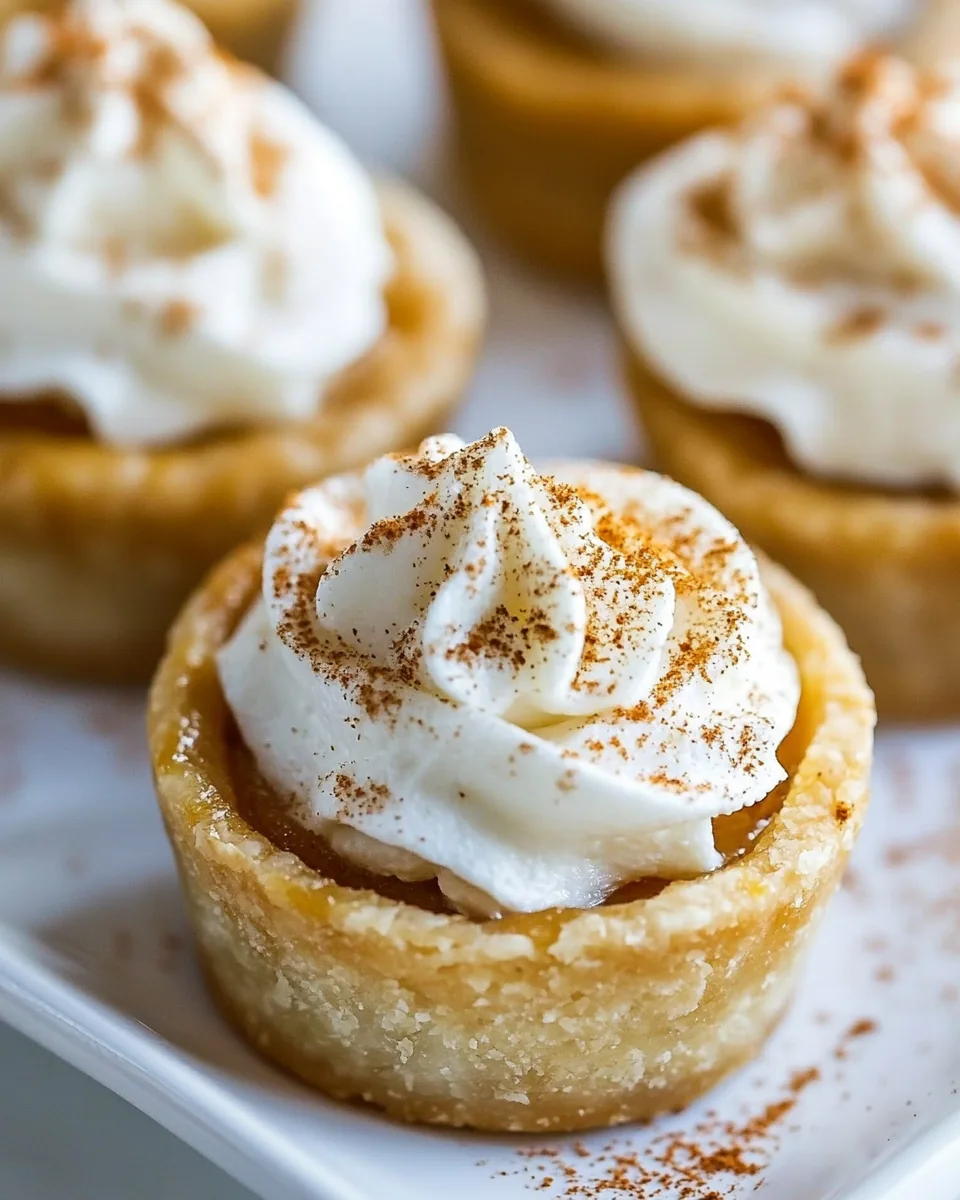
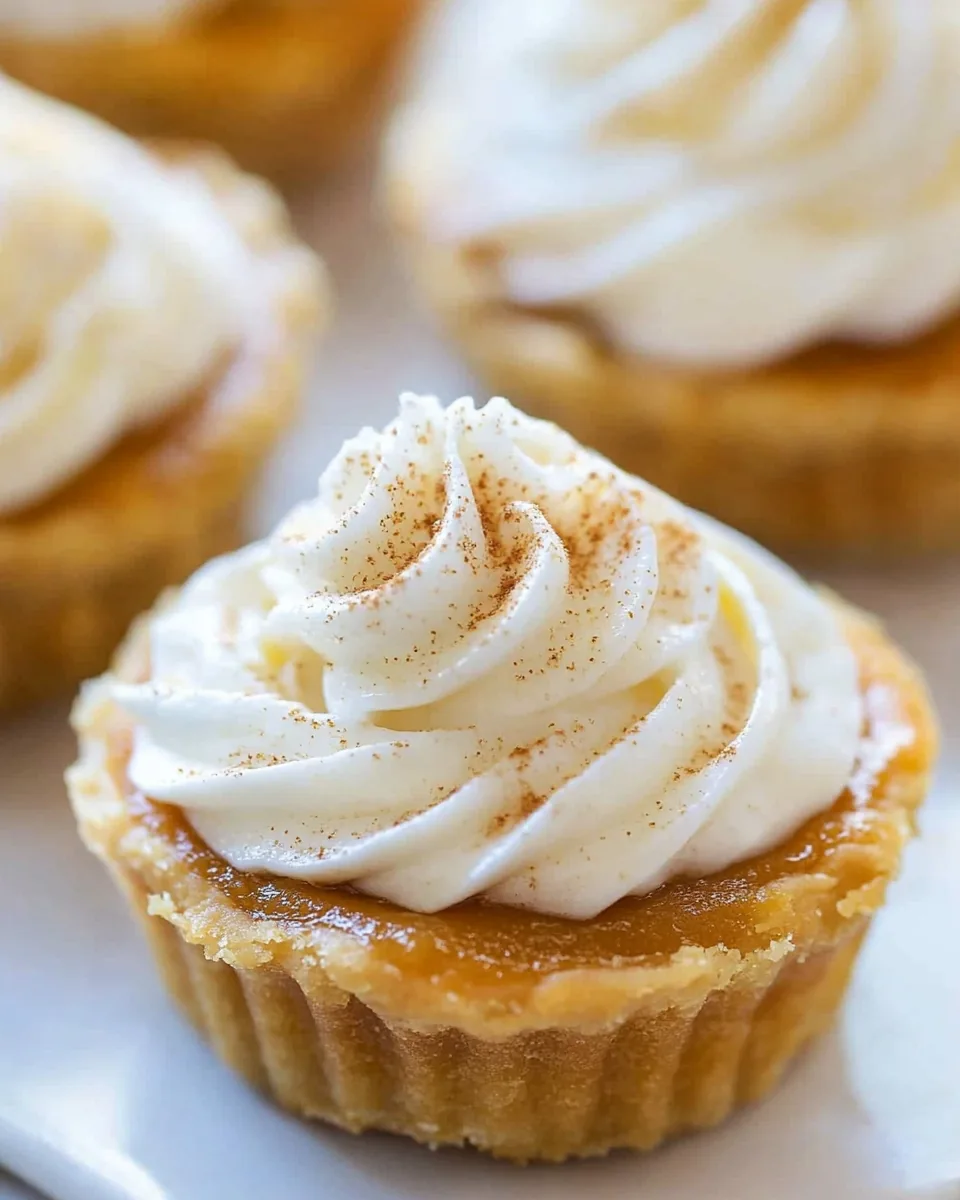
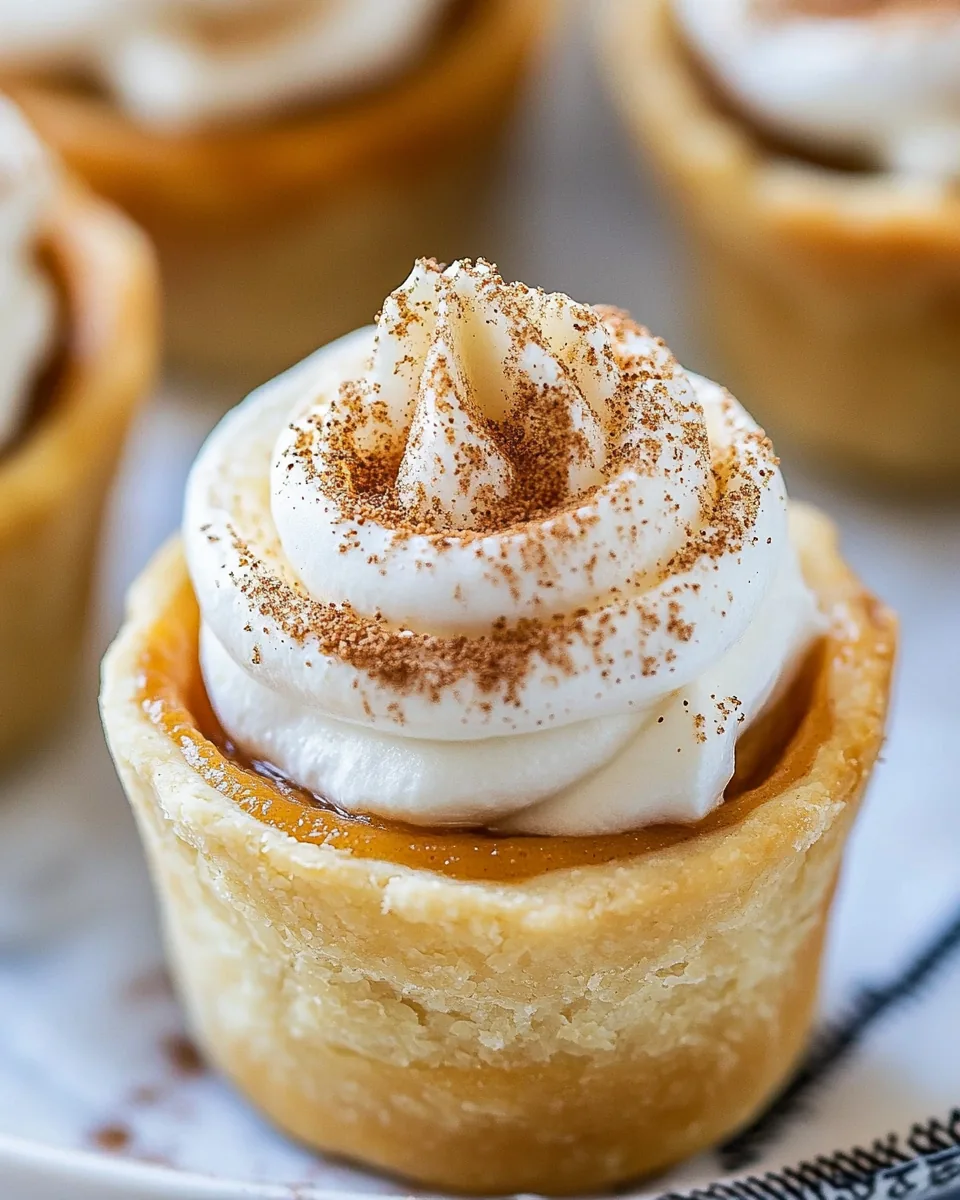
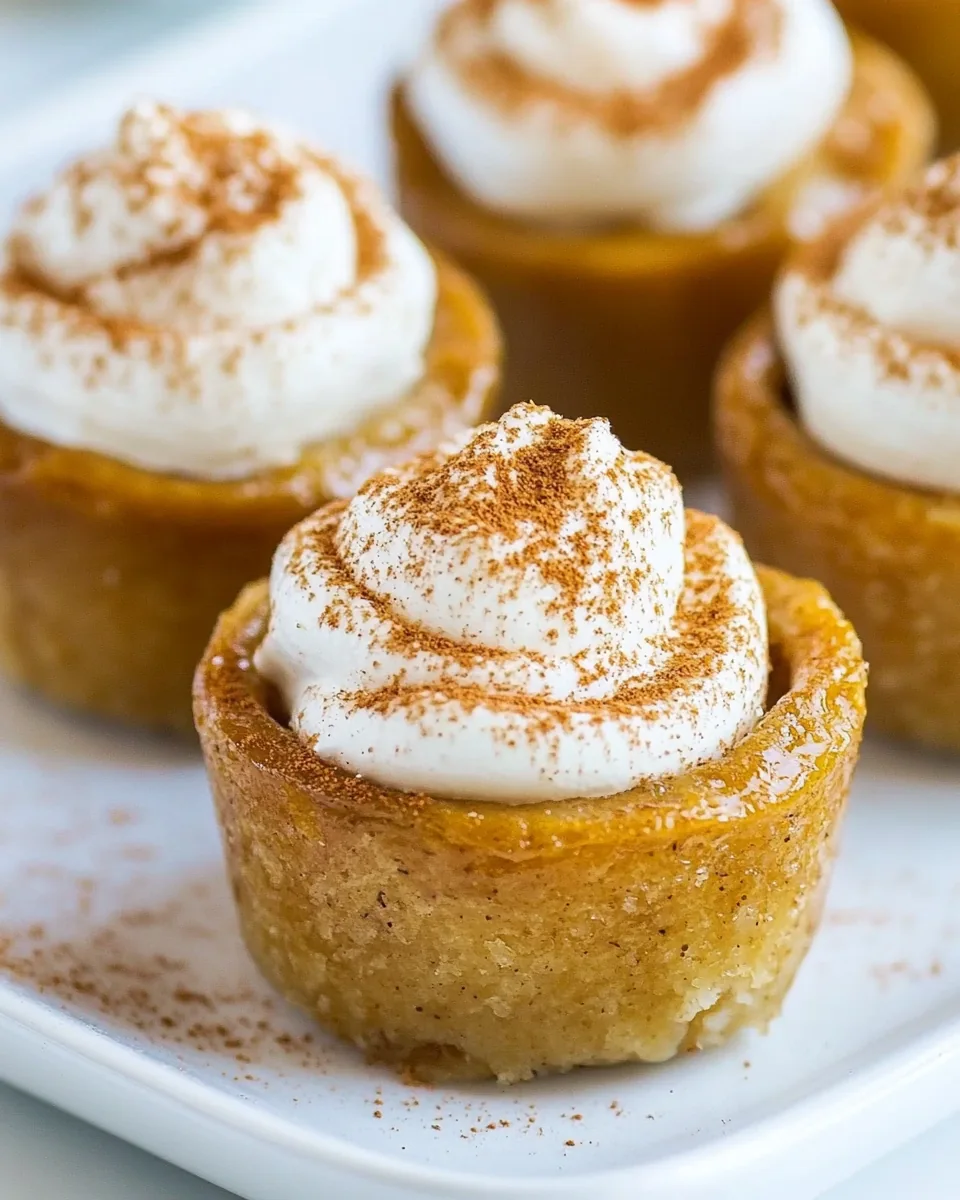
Mini Pumpkin Pies
Every fall, as the leaves begin to change and the air turns crisp, I find myself craving the sweet, spiced flavors of autumn, and nothing satisfies that craving quite like Mini Pumpkin Pies. These little gems are more than just a dessert; they’re a piece of seasonal joy that brings back memories of family gatherings and festive celebrations. I can still remember the aroma of fresh pumpkin pie wafting through the house, a signal that the holidays were upon us. Making Mini Pumpkin Pies is not just about the flavors; it’s about the experience of gathering with loved ones, sharing stories, and creating cherished memories around the kitchen table.
These delightful pies are perfect for any occasion, from Thanksgiving dinners to cozy fall get-togethers. The best part? They’re incredibly easy to make, even if you’re short on time. With a few simple ingredients, you can whip up a batch of these adorable mini pies that will impress your guests and satisfy your sweet tooth. Each bite is a wonderful combination of creamy pumpkin filling, warm spices, and a flaky crust that crumbles just right. What’s not to love?
As someone who enjoys the art of baking, I find joy in the little details—like perfectly rolling out the dough or watching the pies rise in the oven. Whether you use store-bought crusts for convenience or make your own from scratch, the end result is the same: a lovely treat that captures the essence of fall in every bite. So let’s dive into this delicious recipe for Mini Pumpkin Pies and create something truly special together!
Recipe Snapshot
60 mins
25 mins
35 mins
Medium
210 kcal
2 g
Gluten-Free, Low FODMAP
10 g
Baking Sheet, Frying Pan, Whisk
What You’ll Enjoy About This Mini Pumpkin Pies
Perfect for Fall Gatherings
These Mini Pumpkin Pies are the perfect addition to any fall gathering. Their bite-sized nature makes them easy to serve and share, ensuring that everyone gets a taste of the season’s sweetness.
A Twist on Tradition
While traditional pumpkin pie is a beloved classic, these mini versions put a fun spin on that recipe. They offer all the comforting flavors of the original but in a more accessible and appealing size.
Kid-Friendly and Fun
Kids love these mini treats! They’re a great way to get children involved in the kitchen; they can help with rolling out the dough and filling each crust, making for a memorable family activity.
Make-Ahead Magic
One of my favorite things about Mini Pumpkin Pies is that they can be made ahead of time. Prepare these pies a day or two in advance, and you’ll free up your schedule for more family fun!
Endless Customization Options
Feel free to get creative with your Mini Pumpkin Pies. You can add different spices, incorporate chocolate, or even top them with a variety of whipped cream flavors. The possibilities are endless!
Shopping List for Mini Pumpkin Pies
When it comes to making Mini Pumpkin Pies, the ingredients play a crucial role in crafting that perfect flavor profile. Each component is carefully selected to complement the others, creating a harmonious blend of sweetness and spiciness that captures the essence of fall. The key players here are the pumpkin puree, which provides the rich base; the warm spices like cinnamon and pumpkin pie spice, which add depth; and the heavy whipping cream, which gives the filling its creamy texture. Together, they work magic in these little pies.
- 1 homemade pie crust disk or 2 store-bought pie crust rolls: The foundation of your mini pies, offering that irresistible flaky texture.
- 15 oz pumpkin puree: The star ingredient that lends the characteristic flavor and vibrant color to the filling.
- 1 large egg: Helps bind the filling together, adding richness and structure.
- 1 large egg yolk: Enhances the creaminess of the filling.
- 1/2 cup packed light brown sugar: Adds sweetness and a hint of molasses flavor to the filling.
- 1/4 cup granulated sugar: Balances the sweetness and enhances the overall flavor.
- 1 tsp pumpkin pie spice: A blend of warm spices that captures the essence of fall.
- 1/2 tsp cinnamon: Enhances the warmth and aroma of the filling.
- 1/4 tsp salt: Balances and enhances the sweetness of the other ingredients.
- 1 tsp vanilla extract: Adds a subtle depth of flavor.
- 3/4 cup evaporated milk (6 oz): Contributes to the creamy texture of the filling.
- 1 cup heavy whipping cream: Creates a luxurious texture in the filling and is also used for topping.
- 3 Tbsp granulated sugar: Sweetens the whipped cream topping.
- 1/2 tsp vanilla extract: Enhances the flavor of the whipped cream.
How to Assemble Mini Pumpkin Pies
Making Mini Pumpkin Pies is a delightful process that combines simple steps with the joy of baking. You’ll find each step is straightforward, allowing you to enjoy the experience as much as the tasty results. Let’s get started!
Unroll your pie crusts or roll out your homemade pie dough on a floured surface until it’s about 1/8 inch thick. Use a cookie cutter or the lid from a wide-mouth quart-sized jar to cut out circles that are about 3 1/2 inches in diameter. You should get around 12 disks total. If you’re using homemade dough, don’t worry if you have scraps; simply re-roll them to create more disks.
Grease a 12-count non-stick muffin pan lightly with cooking spray. Carefully place your dough rounds inside each cup, molding them to fit the shape of the muffin cups. Make sure the edges are secure to hold the filling.
In a large mixing bowl, combine the pumpkin puree, egg, egg yolk, brown sugar, granulated sugar, pumpkin pie spice, cinnamon, salt, and vanilla extract. Whisk everything together until smooth and well-blended.
Gradually pour in the evaporated milk, continuing to whisk until the mixture is completely combined. You want a smooth, creamy filling that’s ready to be divided among the crusts.
Evenly divide the filling between the muffin cups, filling each one almost to the top. It’s okay if they’re filled right up; they’ll rise slightly while baking.
Preheat your oven to 350°F (175°C) before placing the muffin pan inside. Bake for 30 to 40 minutes or until the tops of the crusts turn golden brown. Keep an eye on them: homemade crusts may take closer to 40 minutes, while store-bought will bake faster.
Once they’re done, remove the pan from the oven and let the pies cool in the pan for about 10 minutes. This will help them set slightly before you try to remove them.
Run a knife or a cake release tool around the edges of each pie to help release them from the pan. Carefully transfer the pies to a wire rack and allow them to cool completely to room temperature.
When they’re cool, you can get creative! Pipe some whipped cream on top and dust with a sprinkle of cinnamon for that extra festive touch. To make the whipped cream, beat the heavy cream for about a minute until soft peaks form, then add the granulated sugar and the vanilla extract. Beat again until it’s nice and pipeable, but don’t overbeat it!
Serve your delicious Mini Pumpkin Pies and watch them disappear! You’ll love sharing this seasonal treat with family and friends.
Things Worth Knowing
- Pie Crust Tips: If you’re making your own pie crust, ensure it’s chilled before rolling for the best texture.
- Filling Consistency: The filling should be smooth and homogeneous; whisking well is key for the right texture.
- Cooling Time: Allowing pies to cool completely helps the filling set, making the pies easier to handle.
- Whipped Cream Secrets: For perfectly whipped cream, start with cold cream and a chilled bowl.
How to Switch It Up
There are so many ways to customize your Mini Pumpkin Pies to suit your taste or special occasions! Here are some fun ideas to get you started:
- Storage: If you have any leftovers, store them in an airtight container in the fridge for up to 3 days.
- Freezing: Yes, you can freeze these mini pies! Simply wrap them tightly in plastic wrap and store in the freezer for up to 2 months. When ready to eat, thaw them in the fridge overnight.
- Pairing: These mini pies are perfect for fall gatherings and Thanksgiving celebrations. Serve them alongside a warm drink like cider or coffee.
- Flavor Variations: Experiment with different spices like nutmeg or ginger for unique flavor profiles.
- Topping Ideas: Try topping them with chocolate shavings or caramel sauce for a decadent twist.
Serve This Mini Pumpkin Pies With
When it comes to serving your Mini Pumpkin Pies, the possibilities are delightful and diverse! Here are some suggestions:
- Fresh Whipped Cream: Top each pie with a generous dollop of whipped cream for a classic touch.
- Cinnamon Dusting: A light dusting of cinnamon on top adds extra flavor and a festive look.
- Autumn Salads: Pair these mini pies with a fresh salad featuring seasonal ingredients like apples, walnuts, and cranberries for a well-rounded meal.
- Warm Spiced Drinks: Serve with warm apple cider or spiced tea to enhance the seasonal experience.
- Thanksgiving Feast: They make a great addition to your Thanksgiving dessert table alongside traditional dishes.
- Casual Gatherings: Perfect for fall get-togethers and casual gatherings with family and friends.
FAQ
Conclusion
In conclusion, Mini Pumpkin Pies are a delightful way to celebrate the flavors of fall. Their cute size and rich, creamy filling make them a crowd-pleaser at any gathering. I encourage you to give this recipe a try and enjoy the joy it brings to your table!
Mini Pumpkin Pies
Ingredients
Equipment
Method
- 1. Unroll your pie crusts or roll out your homemade pie dough on a floured surface until it’s about 1/8 inch thick. Use a cookie cutter or the lid from a wide-mouth quart-sized jar to cut out circles that are about 3 1/2 inches in diameter. You should get around 12 disks total. If you’re using homemade dough, don’t worry if you have scraps; simply re-roll them to create more disks.
- 2. Grease a 12-count non-stick muffin pan lightly with cooking spray. Carefully place your dough rounds inside each cup, molding them to fit the shape of the muffin cups. Make sure the edges are secure to hold the filling.
- 3. In a large mixing bowl, combine the pumpkin puree, egg, egg yolk, brown sugar, granulated sugar, pumpkin pie spice, cinnamon, salt, and vanilla extract. Whisk everything together until smooth and well-blended.
- 4. Gradually pour in the evaporated milk, continuing to whisk until the mixture is completely combined. You want a smooth, creamy filling that’s ready to be divided among the crusts.
- 5. Evenly divide the filling between the muffin cups, filling each one almost to the top. It’s okay if they’re filled right up; they’ll rise slightly while baking.
- 6. Preheat your oven to 350°F (175°C) before placing the muffin pan inside. Bake for 30 to 40 minutes or until the tops of the crusts turn golden brown. Keep an eye on them: homemade crusts may take closer to 40 minutes, while store-bought will bake faster.
- 7. Once they’re done, remove the pan from the oven and let the pies cool in the pan for about 10 minutes. This will help them set slightly before you try to remove them.
- 8. Run a knife or a cake release tool around the edges of each pie to help release them from the pan. Carefully transfer the pies to a wire rack and allow them to cool completely to room temperature.
- 9. When they’re cool, you can get creative! Pipe some whipped cream on top and dust with a sprinkle of cinnamon for that extra festive touch. To make the whipped cream, beat the heavy cream for about a minute until soft peaks form, then add the granulated sugar and the vanilla extract. Beat again until it’s nice and pipeable, but don’t overbeat it!
- 10. Serve your delicious Mini Pumpkin Pies and watch them disappear! You’ll love sharing this seasonal treat with family and friends.