Banana Leather
Have you ever tried Banana Leather? It’s a simple yet delightful treat that encapsulates the taste of ripe bananas in a chewy, snackable form. I remember the first time I made this dish; it was a sunny afternoon, and I had a bunch of overripe bananas sitting on my counter. Instead of letting them go to waste, I decided to create something fun and healthy for my kids. The aroma of the bananas gently baking in the oven filled my home, and soon enough, the kids were gathered around, eager to taste this new creation. Making Banana Leather is not just about the end product; it’s about the experience and the joy of transforming simple ingredients into something magical.
Recipe Snapshot
1 hr 55 mins
0 mins
115 mins
Medium
150 kcal
1g g
Keto, Paleo, Whole30
0g g
Chef’s Knife, Oven
What Makes This Banana Leather Special
Healthy Alternative to Snacks
One of the main reasons I love Banana Leather is that it’s a healthier alternative to many commercially available snacks. Instead of reaching for chips or candy, you can enjoy a sweet treat that’s rich in nutrients and natural sugars. It’s an excellent way to sneak some fruit into your diet without the fuss.
Perfect for Meal Prep
This recipe is fantastic for meal prepping. You can make a large batch of Banana Leather and store it for later. It’s a great on-the-go snack for busy days or school lunches, ensuring you always have something nutritious at hand.
Simple Ingredients
With just bananas as the main ingredient, Banana Leather is incredibly easy to make. You don’t need any fancy equipment or complicated procedures. Just slice and bake, and you’re good to go!
Versatile Flavor
You can play around with flavors by adding spices like cinnamon or even a touch of nutmeg. Feel free to experiment with adding other fruits or even a bit of cocoa powder for a chocolate twist. The possibilities are endless!
Great for Kids
Kids love Banana Leather! It’s fun to eat, and they can help with the preparation. My children love slicing the bananas, and it’s a great way to get them involved in the kitchen. They feel proud to share their creation with family and friends.
Environmentally Friendly
This recipe also helps minimize food waste, which is something I’m passionate about. Instead of tossing out overly ripe bananas, you can turn them into a delightful snack. It’s a win-win for your taste buds and the planet!
Ingredients You’ll Need for Banana Leather
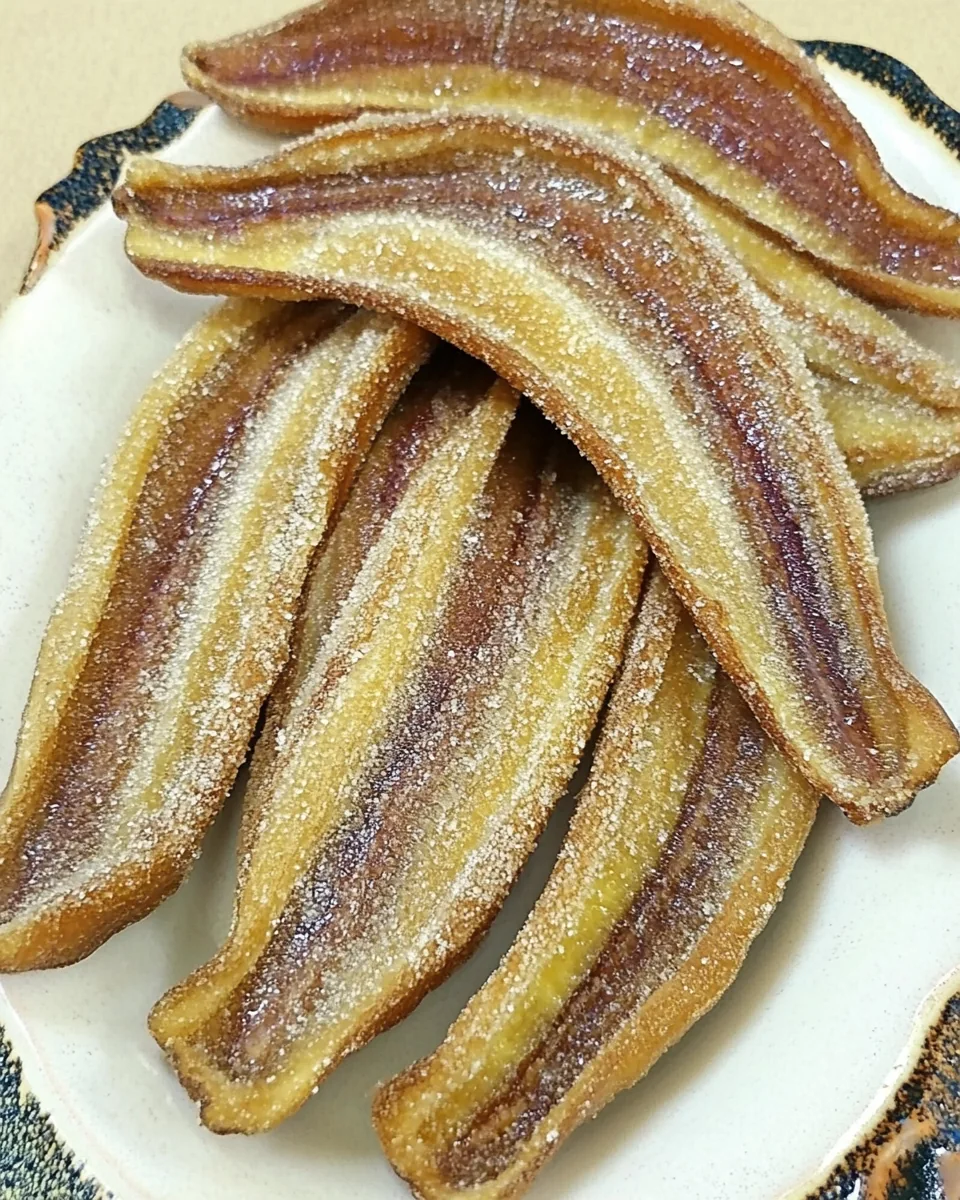
When it comes to making Banana Leather, less is more. The primary ingredient is, of course, bananas. This simple fruit provides not only the flavor but also the natural sweetness that makes this recipe stand out. You only need a few ingredients, which work together beautifully to create a chewy, flavorful snack that everyone will love.
- Bananas: The star of the show! Choose ripe bananas for the best flavor. They should be slightly overripe, as the sugars will be more pronounced, resulting in a sweeter banana leather.
Recipe Steps for Banana Leather

Making Banana Leather is a delightful process that fills your kitchen with the sweet aroma of baking bananas. The steps are straightforward, allowing you to enjoy this healthy snack in no time. Let’s dive into the fun!
Preheat your oven to 250°F. This low temperature ensures that the bananas dry out slowly, preserving their flavor and color. A steady, warm oven is crucial to achieving that perfect chewy texture.
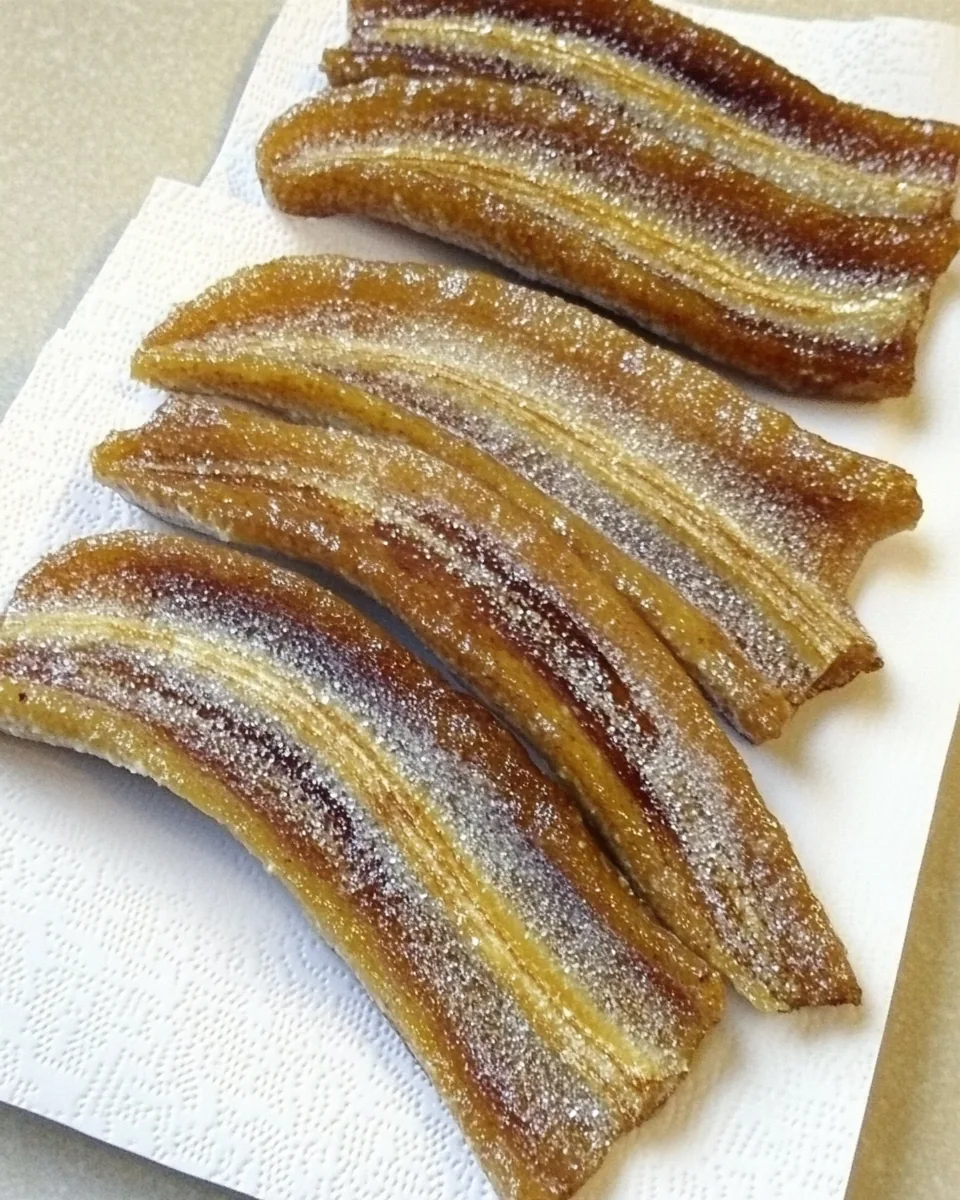
Slice the bananas lengthwise into 1/8 inch strips. Make sure to keep the slices uniform for even baking. You can also cut them into smaller pieces if you prefer bite-sized chunks.
Line a baking sheet with a Silpat or parchment paper. This step prevents the banana leather from sticking and makes for easier cleanup. It’s important to have a non-stick surface to allow the bananas to dry properly.
Arrange the banana strips on the baking sheet in a single layer. Avoid overlapping the strips, as this can cause uneven drying. Each slice needs space to breathe and dehydrate efficiently.
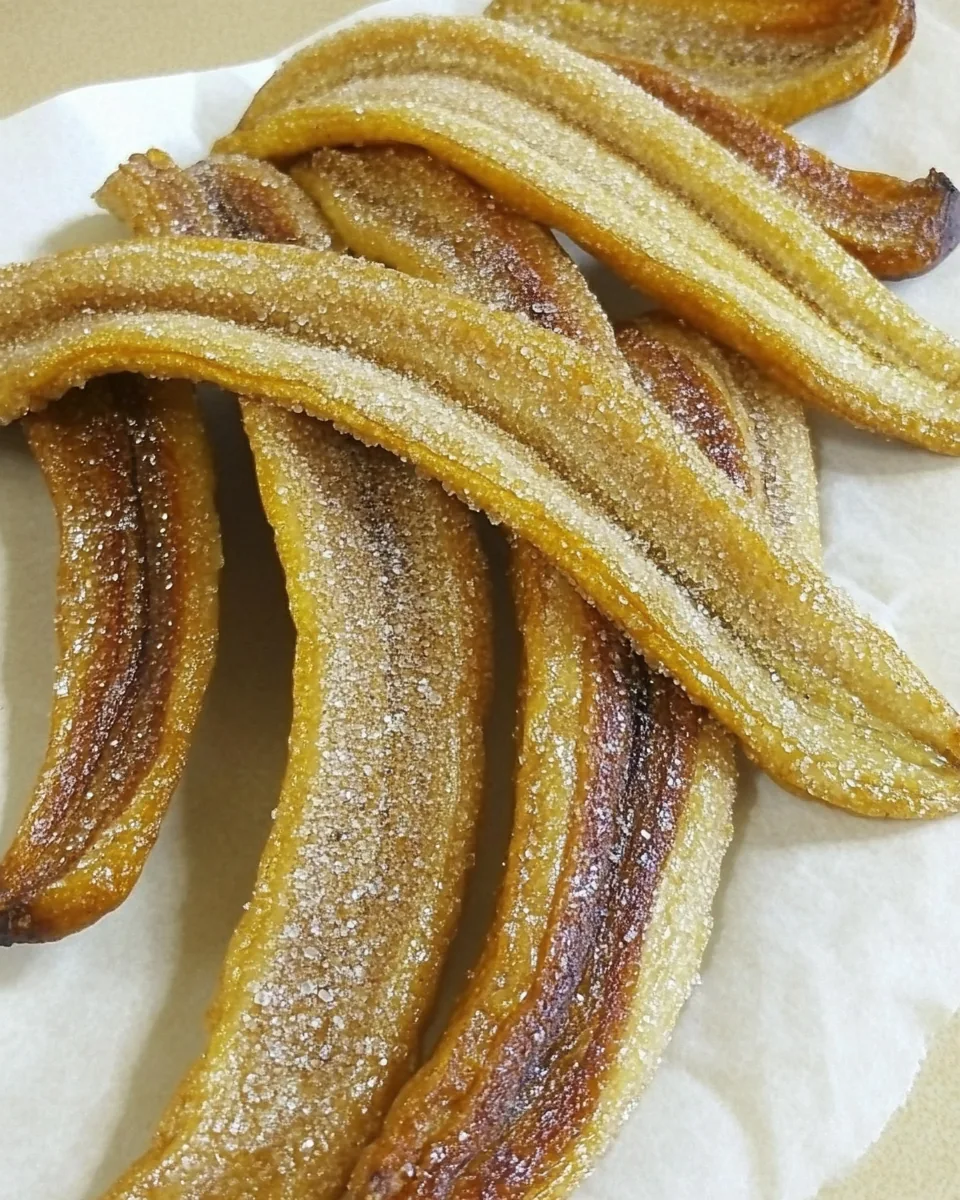
Place the baking sheet in your preheated oven and bake for about 1 hour and 15 minutes. Keep an eye on them towards the end; the bananas should look slightly leathery and feel pliable when done.
Once they are ready, remove the banana leather from the oven and let them cool. This cooling phase is essential, as they will continue to firm up as they cool down.
When cooled, peel the banana leather off the baking sheet. You can cut them into strips or squares, depending on how you wish to serve them. Enjoy your homemade treat!
Things Worth Knowing
- Choosing Ripe Bananas: For the best flavor, use fully ripe bananas that have brown spots on the peel. These will sweeten as they bake.
- Storage: Store your banana leather in an airtight container at room temperature. They can also be refrigerated for extended freshness.
- Flavor Boost: Feel free to sprinkle cinnamon or a touch of nutmeg before baking for a flavor twist.
- Batch Preparation: This recipe can be easily doubled or tripled, depending on how many overripe bananas you have. Make a large batch and enjoy them throughout the week!
Ways to Adapt This Recipe
There are so many fun ways to adapt Banana Leather for different tastes and preferences. Here are some ideas to get you started!
- Mix with Other Fruits: You can blend in other fruits with the bananas before slicing. Consider adding strawberries or mango for a unique flavor combination.
- Chocolate Drizzle: Drizzling melted dark chocolate over the top of the cooled banana leather can elevate the treat to a new level.
- Nuts and Seeds: Add chopped nuts or seeds to the top of the banana leather before baking for added crunch and nutrition.
- Spicy Kick: A sprinkle of cayenne pepper or chili powder can add a surprising heat that complements the sweetness of the bananas.
- Homemade Gifts: Wrap up pieces of banana leather in decorative bags for a thoughtful, homemade gift for friends and family.
Serving Suggestions
When it comes to serving Banana Leather, the options are as varied as they are delicious. Here are some suggestions to make the most of this delightful snack:
- On-the-Go Snack: Pack pieces of banana leather for a quick and healthy snack during your busy day.
- Lunchbox Treat: Include banana leather in your child’s lunchbox as a nutritious and fun surprise.
- Post-Workout Fuel: After an exercise session, enjoy banana leather as a quick energy boost.
- Party Favor: Cut into fun shapes and serve at parties or gatherings for a unique treat.
- Accompaniment to Breakfast: Pair with yogurt or oatmeal for added sweetness and texture during breakfast.
- Seasonal Snacks: Make banana leather throughout the year to enjoy the taste of summer even in winter!
FAQ
Conclusion
In conclusion, Banana Leather is a wonderful way to transform overripe bananas into a healthy, chewy snack. It’s easy to make, versatile, and a hit with kids and adults alike. I encourage you to give it a try, as you’ll be pleasantly surprised by how delicious and satisfying it is. Plus, it’s a fantastic way to reduce food waste while enjoying a homemade treat!
Banana Leather
Ingredients
Equipment
Method
- Preheat your oven to 250°F. This low temperature ensures that the bananas dry out slowly, preserving their flavor and color. A steady, warm oven is crucial to achieving that perfect chewy texture.
- Slice the bananas lengthwise into 1/8 inch strips. Make sure to keep the slices uniform for even baking. You can also cut them into smaller pieces if you prefer bite-sized chunks.
- Line a baking sheet with a Silpat or parchment paper. This step prevents the banana leather from sticking and makes for easier cleanup. It’s important to have a non-stick surface to allow the bananas to dry properly.
- Arrange the banana strips on the baking sheet in a single layer. Avoid overlapping the strips, as this can cause uneven drying. Each slice needs space to breathe and dehydrate efficiently.
- Place the baking sheet in your preheated oven and bake for about 1 hour and 15 minutes. Keep an eye on them towards the end; the bananas should look slightly leathery and feel pliable when done.
- Once they are ready, remove the banana leather from the oven and let them cool. This cooling phase is essential, as they will continue to firm up as they cool down.
- When cooled, peel the banana leather off the baking sheet. You can cut them into strips or squares, depending on how you wish to serve them. Enjoy your homemade treat!