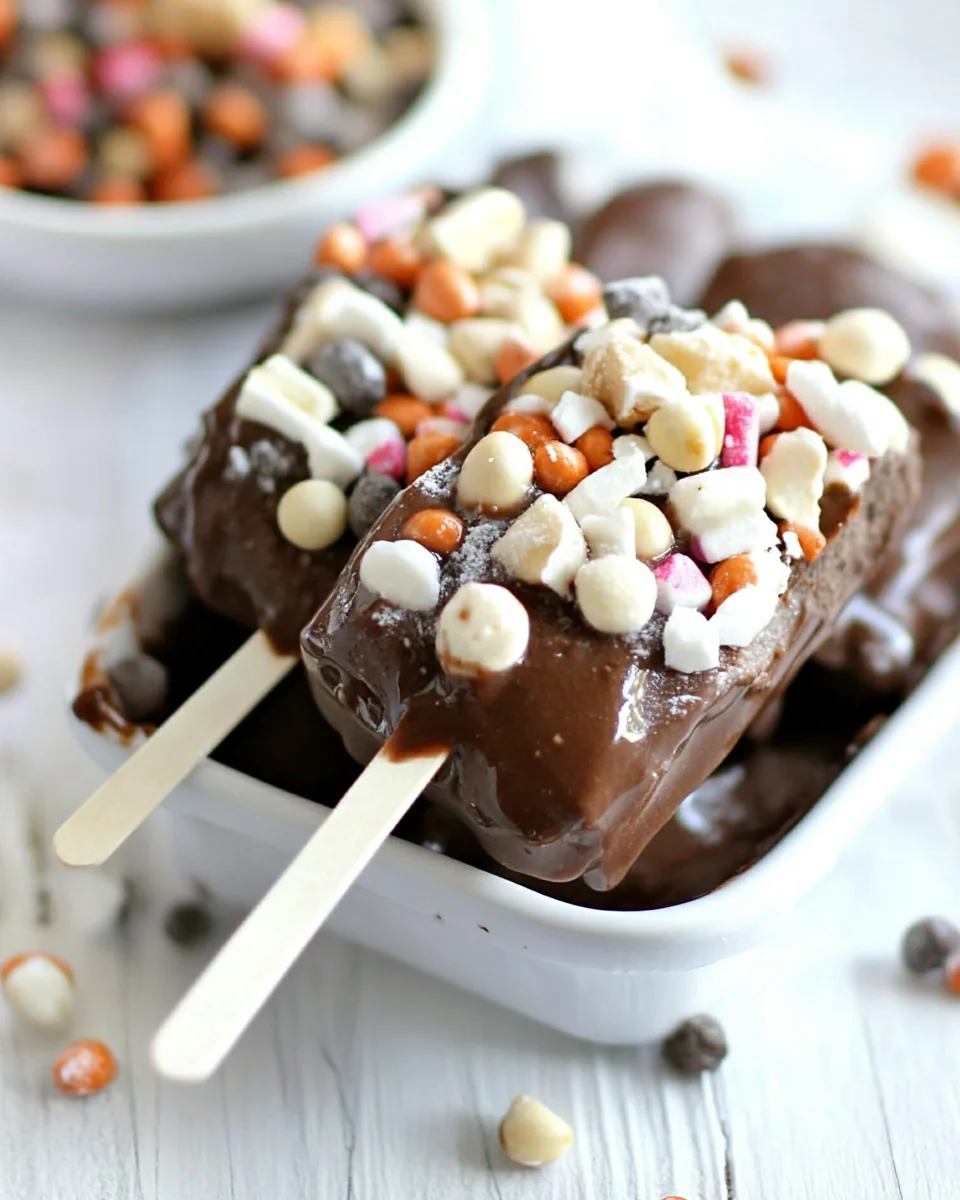
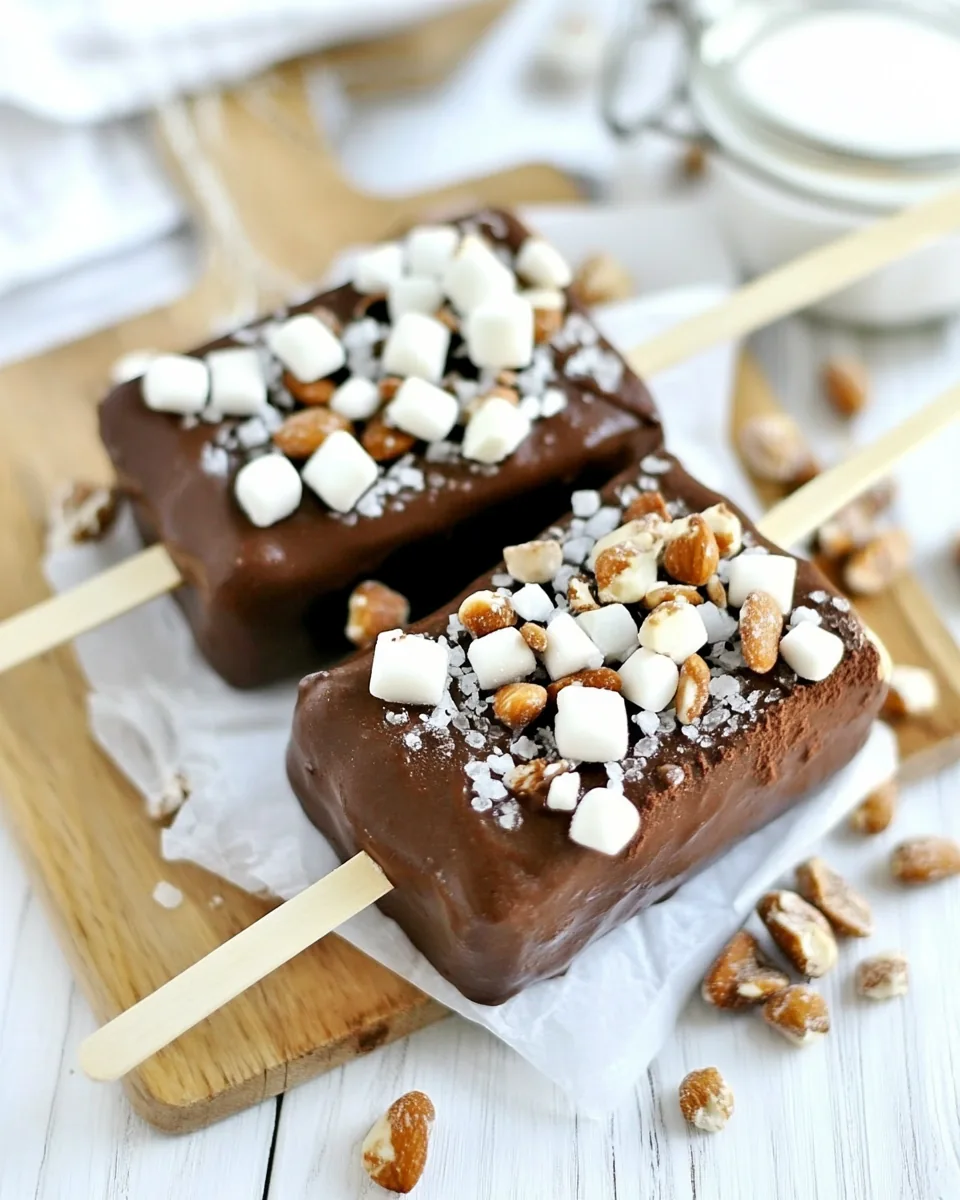
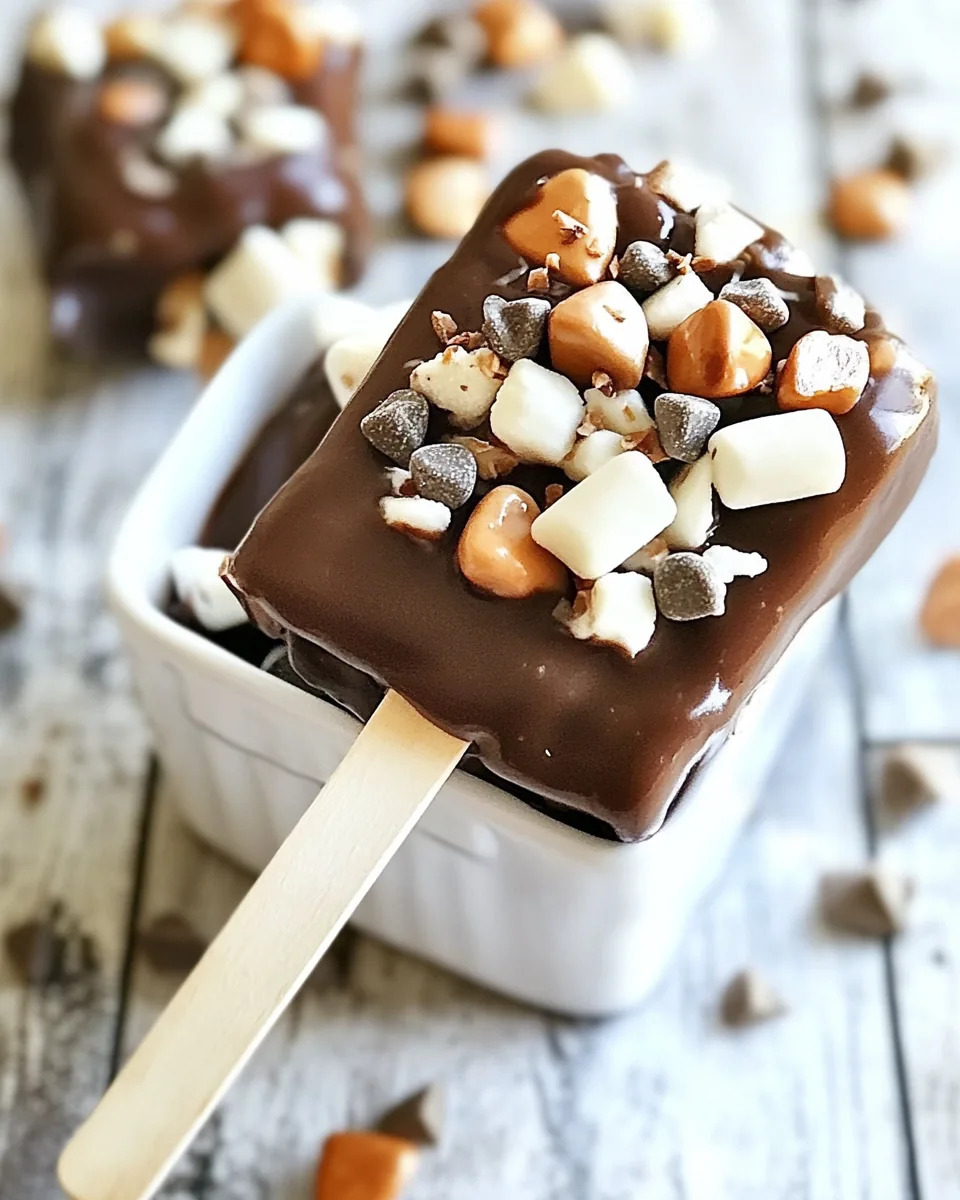
Rocky Road Pudding Pops
There’s something magical about summer treats, especially when they remind you of childhood. The Rocky Road Pudding Pops are a nostalgic delight that takes me back to hot afternoons spent enjoying frozen sweets. As a kid, my favorite ice cream flavor was always rocky road, with its mix of chocolate, nuts, and gooey marshmallows. Now, as an adult, I’ve recreated that flavor in these irresistible pudding pops, and trust me, they’re just as delicious as you remember. With minimal effort, you can whip up a batch of these creamy, chocolatey pops that are perfect for satisfying that sweet tooth on a warm day. Best of all, they’re a hit with kids and adults alike!
Recipe Snapshot
10 mins
10 mins
0 mins
Easy
180 kcal
3 g
Keto, Gluten-Free, Low FODMAP
5 g
Mixing Bowl, Chef’s Knife, Wooden Spoon, Whisk
What Sets This Rocky Road Pudding Pops Apart
They’re Incredibly Easy to Make
One of the main reasons I love making Rocky Road Pudding Pops is that they require very little time and effort. With just a few simple steps, you can have a delicious treat ready to freeze. All you need are the ingredients, a mixing bowl, and a popsicle mold. It’s that easy!
Perfect for Summer Gatherings
These pops are a fantastic addition to any summer gathering. Whether you’re hosting a barbecue or a birthday party, serving Rocky Road Pudding Pops is sure to impress your guests. They’re fun, tasty, and perfect for cooling down in the heat.
Customizable for Everyone
What I love about these pops is how easily you can customize them. If you want to add a different twist, feel free to swap out the nuts or chocolate chips for your favorites. You can even try adding a swirl of peanut butter or caramel for an extra treat!
A Guilt-Free Indulgence
Unlike traditional ice cream, these pudding pops are made with low-fat chocolate milk and other wholesome ingredients, making them a lighter option. So you can enjoy a satisfying dessert without the guilt. They’re a delightful way to indulge your sweet cravings while still keeping things somewhat healthy.
Fun for the Whole Family
Making Rocky Road Pudding Pops can be a fun family activity. Get the kids involved in the preparation, and let them help mix the ingredients and pour them into the molds. It’s a great way to teach them about cooking and enjoy some quality time together.
Everything You Need for Rocky Road Pudding Pops
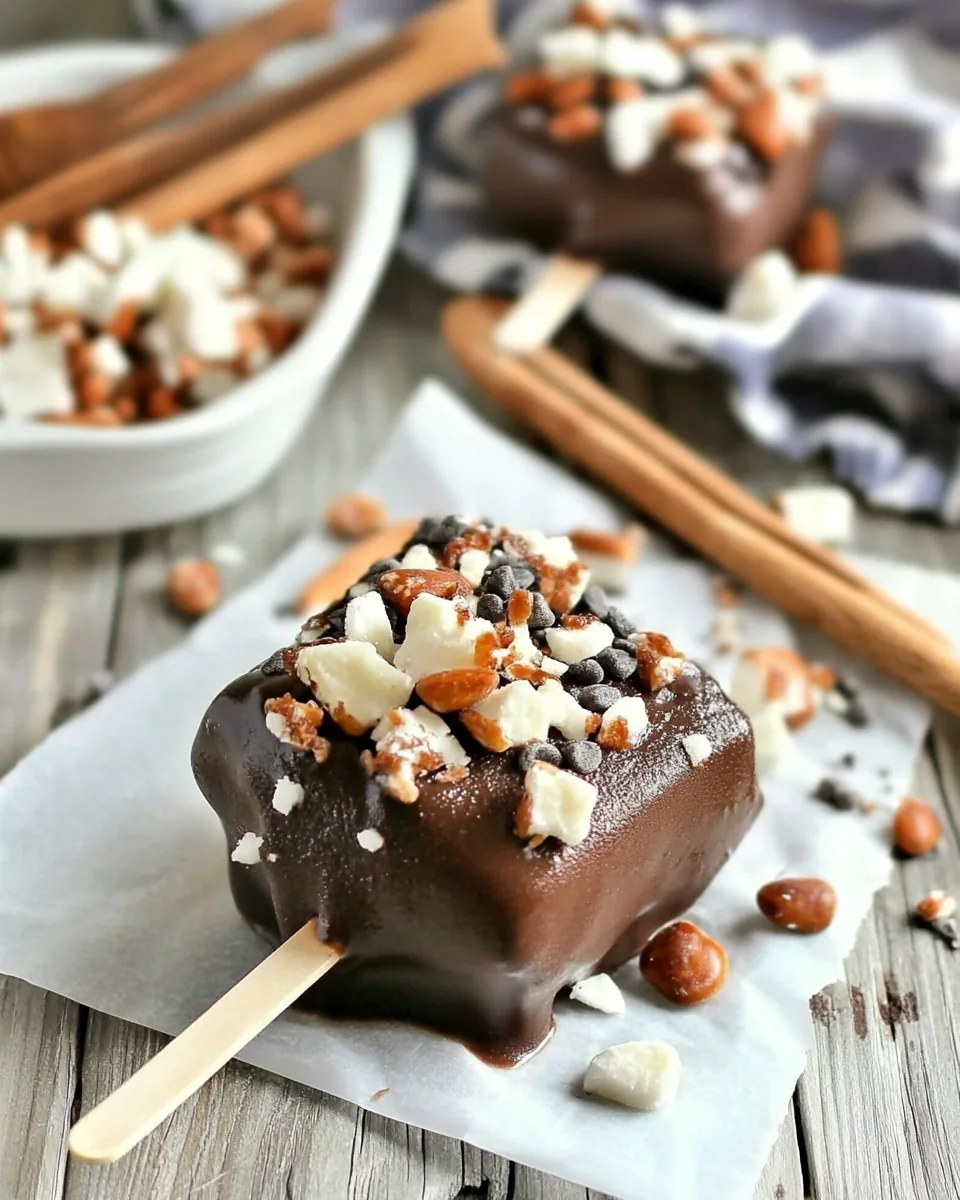
These ingredients come together beautifully to create the creamy, rich flavor that we all love about rocky road desserts. Each component plays a vital role in achieving the perfect balance of taste and texture. From the smoothness of the chocolate pudding to the crunch of the almonds, every bite is a delightful experience!
- 2 cups TruMoo low-fat chocolate milk: This serves as the base of our pudding pops, providing a rich chocolate flavor with less fat.
- 3.9 oz chocolate pudding mix: The star ingredient that gives these pops their creamy consistency and intense chocolatey taste.
- 1/2 cup miniature chocolate chips: Adds delightful little bursts of chocolate throughout each pop.
- 3/4 cup miniature marshmallows: These delicious soft bites introduce a sweet, chewy texture that contrasts beautifully with the creaminess.
- 1/4 cup roughly chopped almonds: Giving a satisfying crunch, they round out the rocky road experience.
Rocky Road Pudding Pops Instructions
Making these Rocky Road Pudding Pops is a breeze! Follow these simple steps, and you’ll be enjoying your own homemade frozen treats in no time. Let’s get started!
- Begin by combining the chocolate milk and chocolate pudding mix in a mixing bowl. Whisk them together vigorously for about two minutes until the mixture is smooth and fully combined. The key here is to ensure there are no lumps, so whisk it well!
- Once your pudding mixture is ready, gently fold in the miniature chocolate chips, miniature marshmallows, and roughly chopped almonds. This step is the most fun as you see all the delicious ingredients coming together. Make sure everything is evenly distributed.
- Next, carefully spoon the mixture into your popsicle molds. Fill them up to the top but leave a little space to allow for expansion as they freeze.
- Insert the popsicle sticks into each mold. Make sure they are positioned upright in the center so they freeze properly.
- Place the molds in the freezer and allow them to freeze for at least four hours. It’s best to leave them overnight if you can resist the temptation!
- When you’re ready to enjoy your Rocky Road Pudding Pops, run warm water over the outside of the molds for a few seconds. This will help loosen the pops from the sides, making them easier to pull out.
- Carefully remove the popsicles and serve them immediately. You can also store any extras in a labeled container in the freezer, but I bet they won’t last long!
Things Worth Knowing
- For the best taste: Use high-quality chocolate milk and pudding mix. The flavor difference is noticeable!
- Experiment with flavors: You can customize your pudding mix for other variations, such as vanilla or butterscotch.
- Ensure proper freezing: Make sure your freezer is set to the right temperature to ensure even freezing.
- Check consistency: Before pouring into molds, the pudding mixture should be thick but pourable.
Customization Ideas
One of the best parts about making Rocky Road Pudding Pops is the opportunity for customization. Here are some ideas to make them your own!
- Storage: Keep leftover pops in an airtight container in the freezer to maintain their texture and flavor.
- Freezing: You can freeze these pops for up to two months, making them perfect for pre-preparation!
- Pairing: These pops are delicious on their own, but you can serve them with whipped cream or fresh berries for added presentation.
- Variations: Try using different types of nuts, such as pecans or walnuts. You could also use different chocolate types like dark or white chocolate.
- Serving size: Feel free to adjust the recipe for larger batches if you’re hosting a party.
Serve This Rocky Road Pudding Pops With
When it comes to serving Rocky Road Pudding Pops, you have plenty of options to consider. Here are some great ideas:
- Fresh fruit: Serve these pops with a side of fresh strawberries or raspberries for a refreshing contrast.
- Ice cream: Pair them with a scoop of vanilla ice cream for an extra treat.
- Chocolate sauce: Drizzle some warm chocolate sauce over the pops for an indulgent dessert experience.
- Whipped cream: A dollop of whipped cream on top can add a lovely creaminess and make them feel more like a sundae.
- Summer parties: These pops are perfect for backyard barbecues or birthday parties, making them a fun and festive dessert.
- Picnics: Take them along for a picnic in the park for a sweet frozen treat while enjoying the outdoors.
FAQ
Conclusion
The Rocky Road Pudding Pops are a sweet and creamy twist on a classic favorite that’s perfect for summer enjoyment. I encourage you to give them a try; they’re easy to make and a delightful way to cool down on a hot day. You’ll love sharing these pops with family and friends, and they might just become your new favorite frozen treat!
Rocky Road Pudding Pops
Ingredients
Equipment
Method
- Combine the chocolate milk and chocolate pudding mix in a mixing bowl. Whisk for two minutes until smooth.
- Fold in the miniature chocolate chips, miniature marshmallows, and roughly chopped almonds until evenly distributed.
- Spoon the mixture into popsicle molds, filling them to the top.
- Insert popsicle sticks and freeze for at least four hours.
- Run warm water over the molds to loosen the pops before removing.