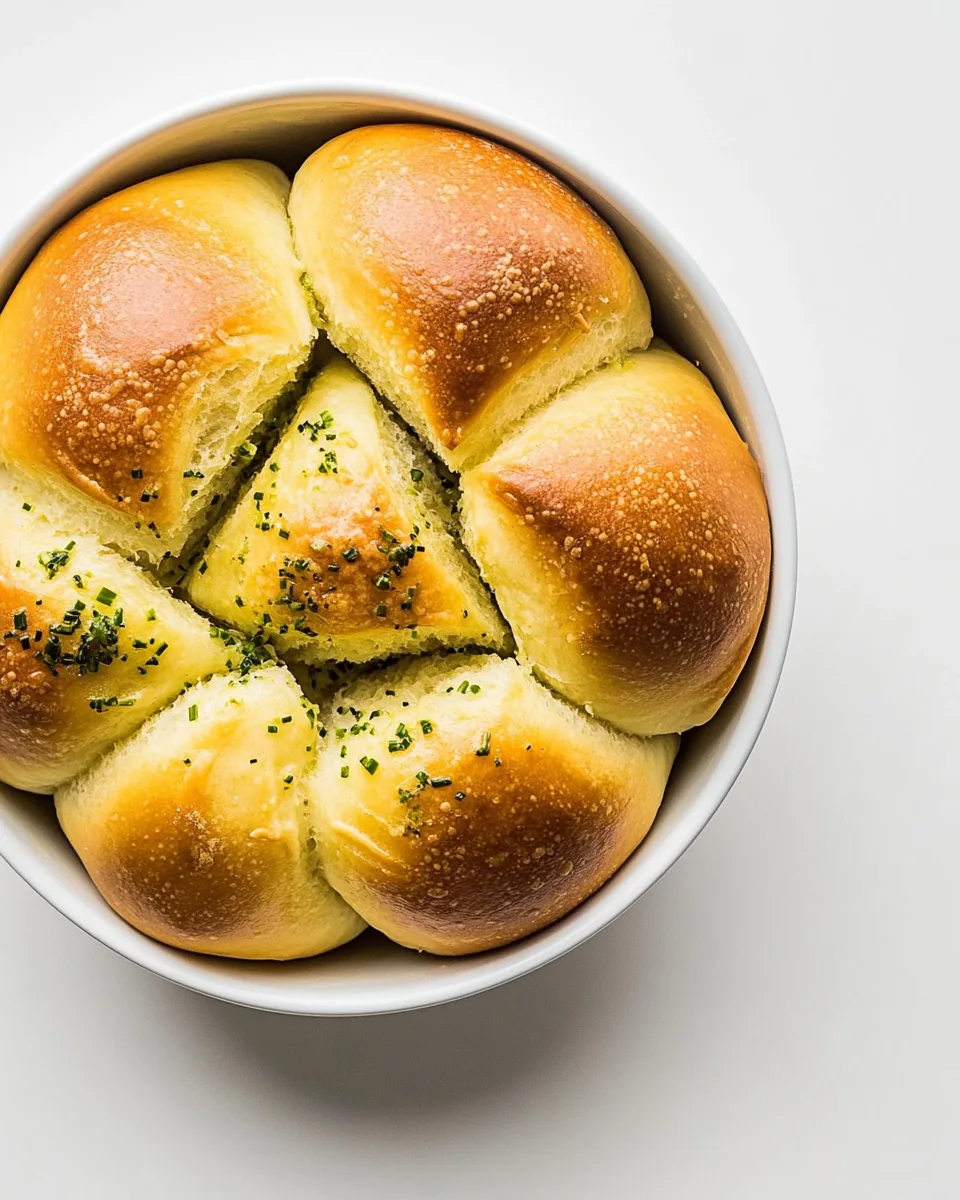
Sour Cream and Chive Clover Rolls
There’s something truly special about baking fresh bread at home, especially when it comes to a delightful treat like Sour Cream and Chive Clover Rolls. I still remember the first time I attempted to make these rolls. It was a chilly spring afternoon, and the scent of warm bread filled my kitchen, wrapping me in a comforting embrace. The anticipation grew as I watched the dough rise, transforming into fluffy clouds of goodness. The subtle hint of sour cream combined with the vibrant chives creates an incredible flavor that elevates these rolls to another level. Each bite is soft and buttery, and they pair beautifully with almost any meal.
What makes these rolls even more special is the way they come together. The process of mixing and kneading the dough feels therapeutic, and there’s joy in shaping each little clover ball. I often make these rolls for family gatherings, where everyone eagerly awaits the moment they emerge from the oven, golden brown and begging to be devoured. Whether slathered with a bit of butter or enjoyed straight from the pan, Sour Cream and Chive Clover Rolls have become a staple in my household, and I can’t wait to share this recipe with you.
Recipe Snapshot
60 mins
0 mins
0 mins
Medium
200 kcal
4 g
Gluten-Free
9 g
Oven, Grater, Mixing Bowl, Baking Sheet, Chef’s Knife, Frying Pan, Wooden Spoon, Whisk
What Sets This Sour Cream and Chive Clover Rolls Apart
Comfort in Every Bite
What sets Sour Cream and Chive Clover Rolls apart is their unique texture, which is both tender and rich. The inclusion of sour cream not only adds moisture but also a slight tang, making these rolls unforgettable.
Perfect for Any Occasion
These rolls are incredibly versatile, making them a fantastic addition to any meal. Whether it’s a cozy dinner or a festive celebration, they always create a warm atmosphere.
Family-Friendly Fun
Baking with family is such a joyful experience. Kids love shaping the little dough balls, and it’s a great way to introduce them to the magic of baking. You’ll cherish the memories made in the kitchen.
Make-Ahead Delight
One of my favorite aspects of this recipe is that you can prepare the dough in advance. Just let it rise, shape it, and store it in the fridge overnight. It’s perfect for busy days.
Simple Ingredients, Big Flavor
With just a handful of basic ingredients, you’ll create rolls that taste gourmet. The combination of flour, sour cream, and fresh chives is a match made in heaven.
Butter Makes Everything Better
Lastly, don’t forget the garlic-chive butter brushed on top before serving! It adds an extra layer of flavor that’s simply irresistible.
Ingredients You’ll Need for Sour Cream and Chive Clover Rolls
Creating these rolls starts with gathering a few key ingredients that work harmoniously together. The combination of all-purpose flour, sour cream, and chives creates a delightful flavor profile that sets these rolls apart. The granulated sugar adds a hint of sweetness, while instant yeast ensures they rise beautifully. Each ingredient plays a vital role in achieving the perfect texture and taste.
- 3¼ to 3½ cups (406 to 438 grams) all-purpose flour, divided – Essential for structure, this flour gives the rolls their delightful chewy texture.
- 3 tablespoons (36 grams) granulated sugar – A touch of sweetness that balances the flavors.
- 1 tablespoon (9 grams) kosher salt – Enhances the flavor of the rolls.
- 2¼ teaspoons (7 grams) instant yeast – The secret to soft and fluffy rolls.
- 1 teaspoon (2 grams) ground black pepper – Adds a hint of spice.
- ½ cup (120 grams) plus 1 tablespoon (15 grams) water, divided – Needed to help form the dough.
- ½ cup (120 grams) sour cream – Gives the rolls incredible moisture and flavor.
- ¼ cup (57 grams) unsalted butter, cubed – Richness that makes these rolls irresistible.
- 2 large eggs (100 grams), room temperature and divided – Adds richness and helps with leavening.
- 3 tablespoons (9 grams) finely chopped fresh chives – Fresh herbs bring a burst of flavor.
- Garlic-Chive Butter (recipe follows) – This compound butter is the finishing touch!
- 1 cup (227 grams) unsalted butter, room temperature – Used in the garlic-chive butter for a velvety texture.
- 2 tablespoons (6 grams) finely chopped fresh chives – For flavor in the garlic butter.
- 2 cloves (6 grams) garlic, grated – Adds a pungent kick to the butter.
- 1 teaspoon (3 grams) kosher salt – Brings all the flavors together in the butter.
- ½ teaspoon (1 gram) ground black pepper – Complements the garlic and chives.
How to Make Sour Cream and Chive Clover Rolls
Making Sour Cream and Chive Clover Rolls is a rewarding experience that fills your home with a heavenly aroma. Follow these steps, and you’ll soon be enjoying freshly baked rolls straight from your oven. Let’s dive into the delightful process!
- In the bowl of a mixer, whisk together 1½ cups (188 grams) of flour, 3 tablespoons granulated sugar, 1 tablespoon kosher salt, 2¼ teaspoons instant yeast, and 1 teaspoon ground black pepper by hand until combined. This mixture is the foundation for your rolls. Attach the dough hook and gradually add the remaining flour.
- In a medium saucepan, heat ½ cup (120 grams) of water, sour cream, and ¼ cup (57 grams) of unsalted butter over medium-low heat, stirring frequently until the butter melts. Use an instant-read thermometer to ensure the temperature reaches between 120°F (49°C) and 130°F (54°C). This step is crucial as it activates the yeast.
- Once the butter is melted, add the sour cream mixture and 1 egg (50 grams) to the flour mixture. Beat at medium-low speed until combined, stopping to scrape the sides of the bowl. This is an exciting moment as the dough begins to take shape!
- Gradually add 1¾ cups (219 grams) of flour and the chopped chives to the mixture. Keep mixing until just combined. It’s important not to over-mix at this stage.
- Now, increase the mixer speed to medium and beat until a soft, elastic dough forms, which should take about 6 to 10 minutes. The dough should pull away from the sides of the bowl and gather around the dough hook. You can test its elasticity by stretching a small piece; it should stretch thin without tearing.
- If the dough is too sticky, you can add the remaining ¼ cup (31 grams) of flour one tablespoon at a time until it reaches the right consistency. You want the dough to be soft and manageable.
- Lightly spray a large bowl with cooking spray, place the dough inside, and turn it to grease the top. Cover the bowl and let it rise in a warm, draft-free place (about 75°F/24°C) until doubled in size, which should take about 30 to 45 minutes.
- While the dough is rising, spray a 12-cup muffin pan with cooking spray. This will help the rolls come out easily once baked.
- Once the dough has risen, turn it out onto a clean surface. Divide the dough into 36 portions, each weighing about 21 grams, and shape each portion into a ball. Place three dough balls into each prepared muffin cup. Cover and let them rise again in a warm place until puffed, about 30 minutes.
- Preheat your oven to 375°F (190°C). The warm oven will create the perfect environment for baking and browning.
- In a small bowl, whisk together the remaining 1 egg (50 grams) and 1 tablespoon (15 grams) of water. Brush this mixture onto the dough balls. This will give your rolls a beautiful golden color when baked.
- Bake the rolls until they’re golden brown, about 10 to 12 minutes. Use an instant-read thermometer to check that the internal temperature reaches at least 190°F (88°C). This ensures they’re fully cooked.
- Once out of the oven, immediately brush the rolls with the garlic-chive butter. Serve warm with the remaining butter. Enjoy the fruits of your labor!
- To make the garlic-chive butter, stir together all the ingredients in a small bowl until smooth and refrigerate in an airtight container for up to two weeks.
Things Worth Knowing
- Proofing is Key: Make sure your dough rises well. If your kitchen is too cool, find a warm spot to encourage the yeast to activate.
- Texture Check: The dough should be soft and elastic. If it feels too sticky, don’t hesitate to add a little more flour.
- Baking Temperature: Always preheat your oven. This ensures even baking and the right texture.
- Storage: Store any leftover rolls in an airtight container at room temperature for up to three days.
Helpful Hints
When it comes to baking Sour Cream and Chive Clover Rolls, having a few helpful hints can make all the difference in the world. Here are some tips to ensure your baking experience goes smoothly.
- Storage: Leftover rolls can be kept in an airtight container at room temperature for up to three days. For longer storage, consider freezing them.
- Freezing: You can freeze the baked rolls. Just wrap them tightly in plastic wrap and then in aluminum foil. They can be stored in the freezer for up to three months.
- Pairing: These rolls are fantastic served with soups, salads, or as a side to your favorite main dish. They also shine at brunch!
- Customize: Feel free to add other herbs or spices to the dough for a unique twist. Rosemary or thyme could complement the flavors beautifully.
- Freshness: Always use fresh chives for the best flavor. If you can, chop them just before adding them to the dough.
- Serving Warm: These rolls are best served warm out of the oven. Consider making them just before your meal.
How to Serve Sour Cream and Chive Clover Rolls
When it comes to serving Sour Cream and Chive Clover Rolls, the possibilities are endless! Here are some delightful ideas to inspire you:
- As a Side Dish: These rolls pair perfectly with hearty soups or stews. Their soft texture complements creamy or spicy dishes beautifully.
- For Breakfast: Serve them warm with butter and jam for a delightful breakfast treat. They’re also excellent alongside scrambled eggs.
- At Gatherings: Whether it’s a holiday dinner, barbecue, or family gathering, these rolls will impress your guests and bring everyone together.
- During Brunch: Their delightful flavor makes them a hit at brunches, especially when served with a variety of spreads.
- Storage Tips: Keep any leftovers in an airtight container. They can last up to three days at room temperature but can also be frozen for longer storage.
- Seasonal Pairings: These rolls are great year-round, but they shine in spring and summer when fresh chives are at their best.
FAQ
Conclusion
In conclusion, Sour Cream and Chive Clover Rolls are a delightful treat that showcases the perfect balance of flavors and textures. Their fluffy, buttery goodness makes them a standout addition to any meal. I encourage you to try your hand at making these rolls; they are sure to become a favorite in your home as they have in mine. Happy baking!
Sour Cream and Chive Clover Rolls
Ingredients
Equipment
Method
- In the bowl of a mixer, whisk together 1½ cups (188 grams) of flour, 3 tablespoons granulated sugar, 1 tablespoon kosher salt, 2¼ teaspoons instant yeast, and 1 teaspoon ground black pepper by hand until combined. Attach the dough hook and gradually add the remaining flour.
- In a medium saucepan, heat ½ cup (120 grams) of water, sour cream, and ¼ cup (57 grams) of unsalted butter over medium-low heat, stirring frequently until the butter melts. Use an instant-read thermometer to ensure the temperature reaches between 120°F (49°C) and 130°F (54°C). This step is crucial as it activates the yeast.
- Once the butter is melted, add the sour cream mixture and 1 egg (50 grams) to the flour mixture. Beat at medium-low speed until combined, stopping to scrape the sides of the bowl. This is an exciting moment as the dough begins to take shape!
- Gradually add 1¾ cups (219 grams) of flour and the chopped chives to the mixture. Keep mixing until just combined. It’s important not to over-mix at this stage.
- Now, increase the mixer speed to medium and beat until a soft, elastic dough forms, which should take about 6 to 10 minutes. The dough should pull away from the sides of the bowl and gather around the dough hook. You can test its elasticity by stretching a small piece; it should stretch thin without tearing.
- If the dough is too sticky, you can add the remaining ¼ cup (31 grams) of flour one tablespoon at a time until it reaches the right consistency. You want the dough to be soft and manageable.
- Lightly spray a large bowl with cooking spray, place the dough inside, and turn it to grease the top. Cover the bowl and let it rise in a warm, draft-free place (about 75°F/24°C) until doubled in size, which should take about 30 to 45 minutes.
- While the dough is rising, spray a 12-cup muffin pan with cooking spray. This will help the rolls come out easily once baked.
- Once the dough has risen, turn it out onto a clean surface. Divide the dough into 36 portions, each weighing about 21 grams, and shape each portion into a ball. Place three dough balls into each prepared muffin cup. Cover and let them rise again in a warm place until puffed, about 30 minutes.
- Preheat your oven to 375°F (190°C). The warm oven will create the perfect environment for baking and browning.
- In a small bowl, whisk together the remaining 1 egg (50 grams) and 1 tablespoon (15 grams) of water. Brush this mixture onto the dough balls. This will give your rolls a beautiful golden color when baked.
- Bake the rolls until they’re golden brown, about 10 to 12 minutes. Use an instant-read thermometer to check that the internal temperature reaches at least 190°F (88°C). This ensures they’re fully cooked.
- Once out of the oven, immediately brush the rolls with the garlic-chive butter. Serve warm with the remaining butter. Enjoy the fruits of your labor!
- To make the garlic-chive butter, stir together all the ingredients in a small bowl until smooth and refrigerate in an airtight container for up to two weeks.
Notes
- Tip 1: Leftover rolls can be kept in an airtight container at room temperature for up to three days. For longer storage, consider freezing them.
- Tip 2: You can freeze the baked rolls. Just wrap them tightly in plastic wrap and then in aluminum foil. They can be stored in the freezer for up to three months.
- Tip 3: These rolls are fantastic served with soups, salads, or as a side to your favorite main dish. They also shine at brunch!
- Tip 4: Feel free to add other herbs or spices to the dough for a unique twist. Rosemary or thyme could complement the flavors beautifully.
- Tip 5: Always use fresh chives for the best flavor. If you can, chop them just before adding them to the dough.