In the bowl of a mixer, whisk together 1½ cups (188 grams) of flour, 3 tablespoons granulated sugar, 1 tablespoon kosher salt, 2¼ teaspoons instant yeast, and 1 teaspoon ground black pepper by hand until combined. Attach the dough hook and gradually add the remaining flour.
In a medium saucepan, heat ½ cup (120 grams) of water, sour cream, and ¼ cup (57 grams) of unsalted butter over medium-low heat, stirring frequently until the butter melts. Use an instant-read thermometer to ensure the temperature reaches between 120°F (49°C) and 130°F (54°C). This step is crucial as it activates the yeast.
Once the butter is melted, add the sour cream mixture and 1 egg (50 grams) to the flour mixture. Beat at medium-low speed until combined, stopping to scrape the sides of the bowl. This is an exciting moment as the dough begins to take shape!
Gradually add 1¾ cups (219 grams) of flour and the chopped chives to the mixture. Keep mixing until just combined. It’s important not to over-mix at this stage.
Now, increase the mixer speed to medium and beat until a soft, elastic dough forms, which should take about 6 to 10 minutes. The dough should pull away from the sides of the bowl and gather around the dough hook. You can test its elasticity by stretching a small piece; it should stretch thin without tearing.
If the dough is too sticky, you can add the remaining ¼ cup (31 grams) of flour one tablespoon at a time until it reaches the right consistency. You want the dough to be soft and manageable.
Lightly spray a large bowl with cooking spray, place the dough inside, and turn it to grease the top. Cover the bowl and let it rise in a warm, draft-free place (about 75°F/24°C) until doubled in size, which should take about 30 to 45 minutes.
While the dough is rising, spray a 12-cup muffin pan with cooking spray. This will help the rolls come out easily once baked.
Once the dough has risen, turn it out onto a clean surface. Divide the dough into 36 portions, each weighing about 21 grams, and shape each portion into a ball. Place three dough balls into each prepared muffin cup. Cover and let them rise again in a warm place until puffed, about 30 minutes.
Preheat your oven to 375°F (190°C). The warm oven will create the perfect environment for baking and browning.
In a small bowl, whisk together the remaining 1 egg (50 grams) and 1 tablespoon (15 grams) of water. Brush this mixture onto the dough balls. This will give your rolls a beautiful golden color when baked.
Bake the rolls until they’re golden brown, about 10 to 12 minutes. Use an instant-read thermometer to check that the internal temperature reaches at least 190°F (88°C). This ensures they’re fully cooked.
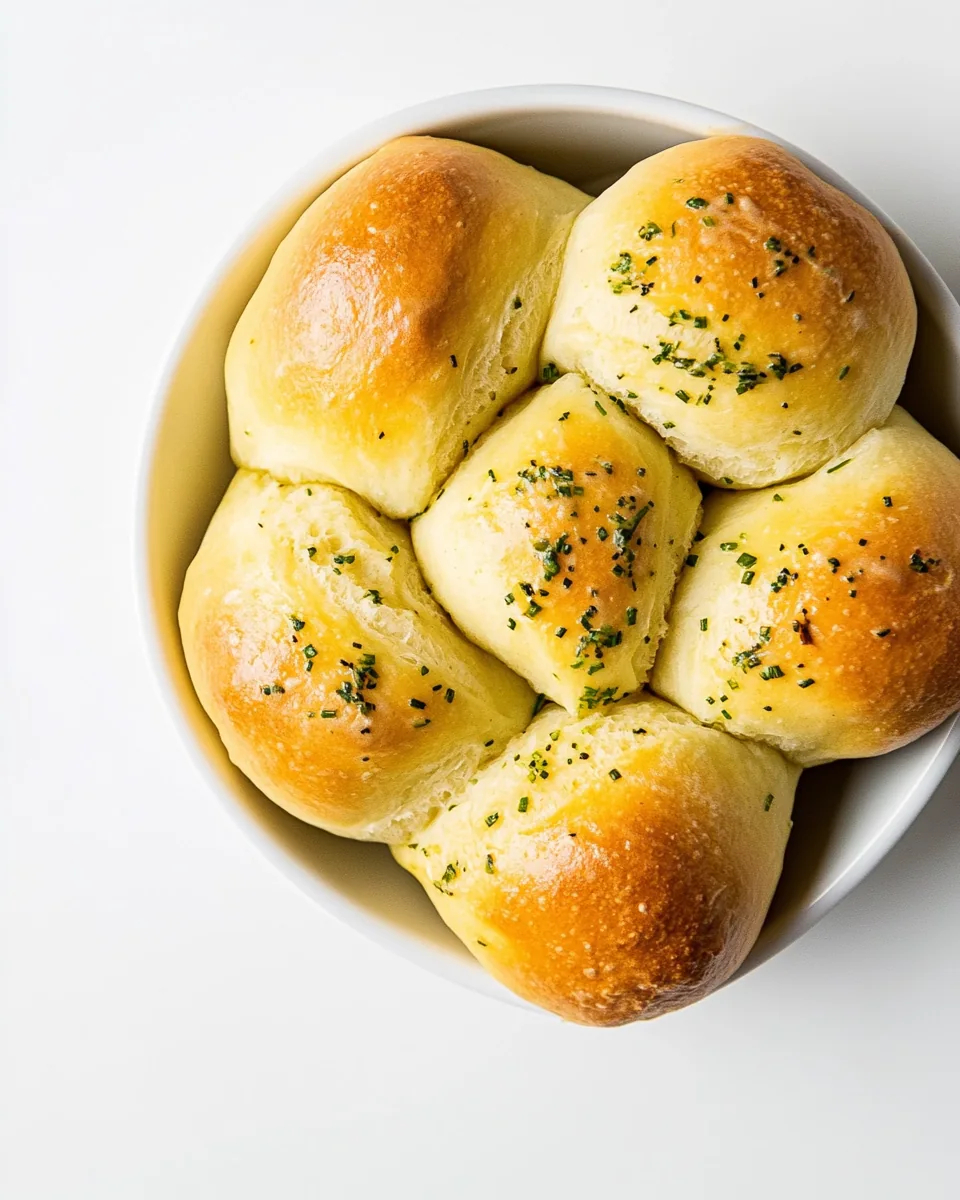
Once out of the oven, immediately brush the rolls with the garlic-chive butter. Serve warm with the remaining butter. Enjoy the fruits of your labor!
To make the garlic-chive butter, stir together all the ingredients in a small bowl until smooth and refrigerate in an airtight container for up to two weeks.