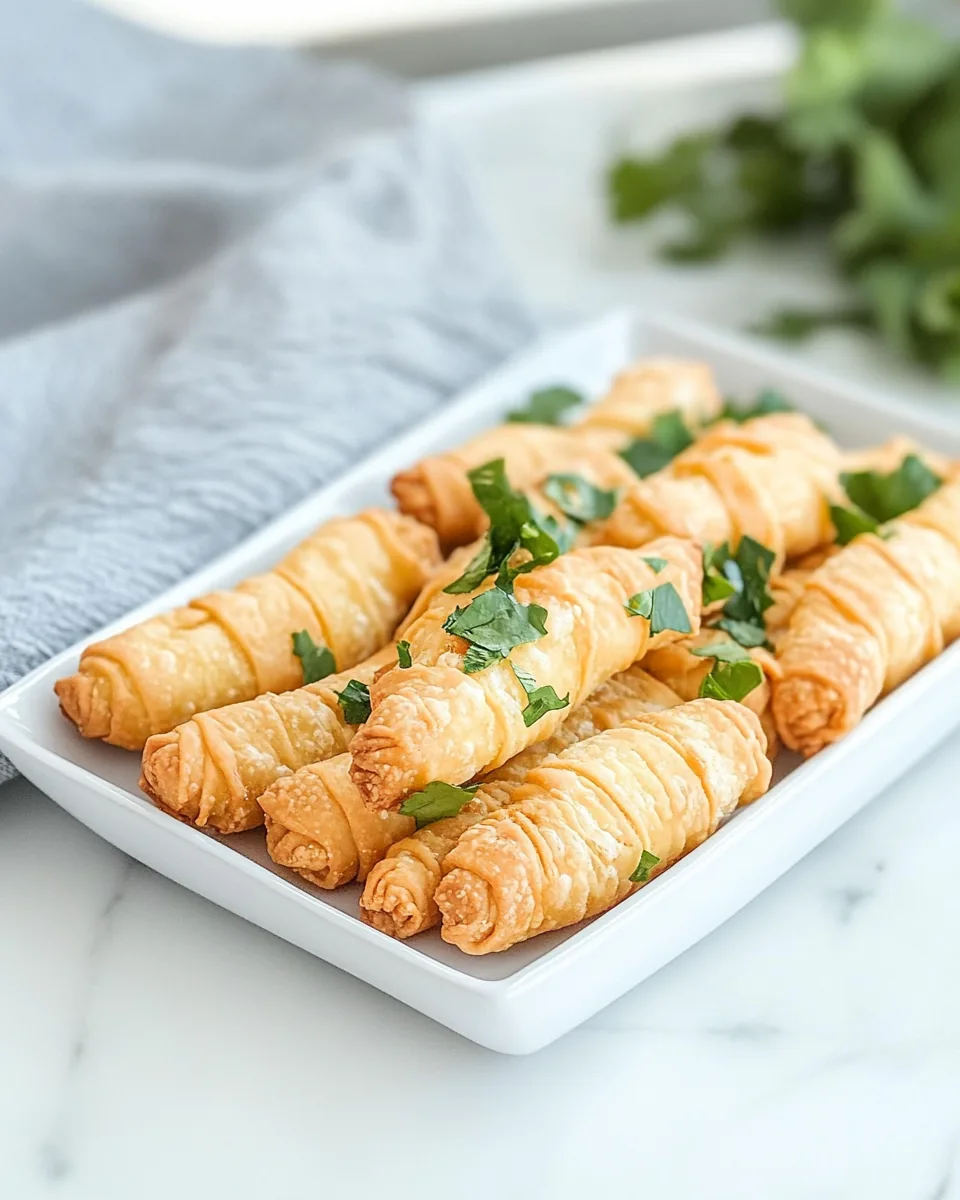
Tequeños
Growing up, I had a special affinity for the delicious and cheesy delight known as Tequeños. Every family gathering was a chance to indulge in these treats, which always brought smiles and satisfied cravings. I remember my aunt expertly frying them in a bubbling cauldron of oil, the aroma wafting through the house, inviting everyone to the kitchen. The golden-brown, crispy exterior gave way to a gooey, melted cheese center. They were a staple at birthdays, gatherings, and even quiet evenings at home. Making Tequeños is not just a recipe; it’s a cherished tradition that encapsulates love, warmth, and the joy of sharing delicious food with others.
Recipe Snapshot
25 mins
10 mins
15 mins
Medium
200 kcal
6 g
Gluten-Free, Low FODMAP
9 g
Mixing Bowl, Skillet
What’s Great About This Tequeños
A Taste of Tradition
What makes Tequeños so special is their rich cultural heritage. Originating from Venezuela, they represent a fusion of flavors and textures that perfectly complement each other. The crispy dough encasing the melted cheese is a delightful contrast that keeps everyone coming back for more.
Perfect Snack for Any Occasion
These treats are incredibly versatile, making them ideal for any gathering. Whether it’s a casual get-together or a festive feast, Tequeños can elevate the atmosphere and satisfy a crowd’s hunger. They are perfect for parties, movie nights, or even as a delicious appetizer before a meal.
Cheesy Goodness
Who doesn’t love cheese? The semi-solid white cheese used in Tequeños melts beautifully, creating a gooey center that oozes out with every bite. It’s pure comfort food that warms the soul. You can experiment with different types of cheese to find your favorite combination!
Easy to Make
Don’t let the thought of making pastry from scratch intimidate you! The dough for Tequeños is quite simple to prepare. With just a few ingredients, you can create a delightful treat that will impress your family and friends. It’s a fun cooking project that can be enjoyed together!
Customizable Fillings
The beauty of Tequeños is that you can get creative with the fillings. While the traditional cheese is delicious, you could add herbs, or even a touch of spice to cater to your taste preferences. This makes them a fabulous canvas for experimenting with flavors.
Perfectly Portable
Last but not least, Tequeños are easy to transport, making them the perfect snack to bring to potlucks or picnics. They can be enjoyed hot or at room temperature, so you can prepare them ahead of time and serve them whenever you’re ready.
What’s In This Tequeños
The ingredients in Tequeños come together to create a harmonious blend of flavors and textures. Each component plays a crucial role in achieving that perfect bite. From the crispy outer layer to the gooey cheese center, these ingredients are key players in this delightful dish.
- 2 cups all-purpose flour: The foundation of the dough, providing structure and texture.
- 1/2 teaspoon salt: Enhances flavor and balances the sweetness of the dough.
- 1/4 teaspoon baking powder: Adds a slight lift to the dough, keeping it light and airy.
- 1 large egg: Binds the ingredients together and enriches the dough.
- 2 tablespoons unsalted butter, melted: Adds richness and flavor to the dough.
- 1/2 cup warm water: Helps to bring the dough together, creating a smooth consistency.
- 16 ounces semi-solid white cheese, cut into 1/2-inch thick sticks: The star ingredient that gives Tequeños their signature cheesy goodness.
- Vegetable oil for frying: Essential for achieving that perfect crispy exterior.
Putting Together Tequeños
Making Tequeños is a delightful experience that I always look forward to. The process is straightforward and allows you to savor each step as you prepare these scrumptious treats. Let’s dive into the delicious details!
In a large mixing bowl, combine flour, salt, and baking powder. Stir them together until well mixed.
Incorporate the egg and melted butter into the dry ingredients. Mix thoroughly until you achieve a cohesive mixture.
Gradually add warm water to the mixture, kneading it until a smooth dough forms. The dough should be soft yet elastic, not too sticky.
Cover the dough and let it rest for 10 minutes. This resting period allows the gluten to relax, making it easier to roll out.
Roll out the dough on a floured surface to a thickness of about 1/4 inch. Cut it into strips, approximately 1 inch wide. This is where the magic begins!
Take each cheese stick and wrap it with a strip of dough, ensuring you seal the edges well. This is crucial to prevent the cheese from leaking during frying.
In a deep fryer or large pot, heat oil to 350°F. Be sure to monitor the temperature to achieve that perfect crispy goodness.
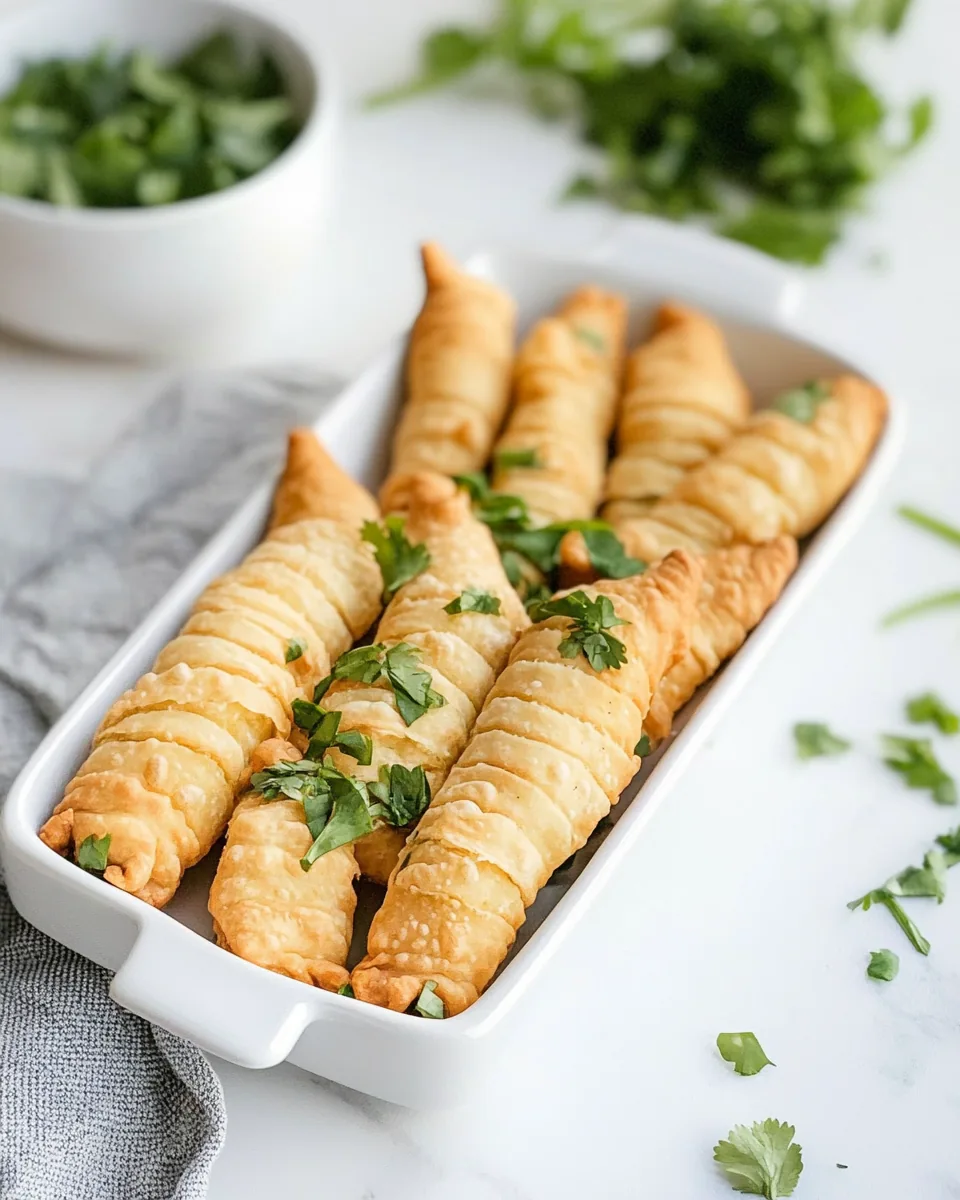
Fry the Tequeños in batches until golden brown, about 3 to 5 minutes. Keep an eye on them to ensure they don’t overcook!
Once they are beautifully golden, drain them on paper towels to remove excess oil. This step is vital for keeping them crispy.
Things Worth Knowing
- Don’t rush the resting time: Allowing the dough to rest is essential for achieving the perfect texture.
- Watch the oil temperature: Maintaining the right temperature will result in crispy, golden Tequeños.
- Seal the edges properly: Ensuring the edges are sealed will prevent any cheese from leaking out during frying.
- Use a thermometer: A kitchen thermometer can help you accurately gauge the oil temperature for frying.
Variations to Try
Exploring variations of Tequeños can be a fun culinary adventure! Here are some great ideas to spice things up and personalize your experience.
- Add herbs: Incorporate fresh herbs like cilantro or parsley into the dough for added flavor.
- Experiment with cheese: Try different cheeses or a mix for a new flavor profile, such as mozzarella or cheddar.
- Stuff with vegetables: Add diced veggies or spices to the cheese for a delicious twist.
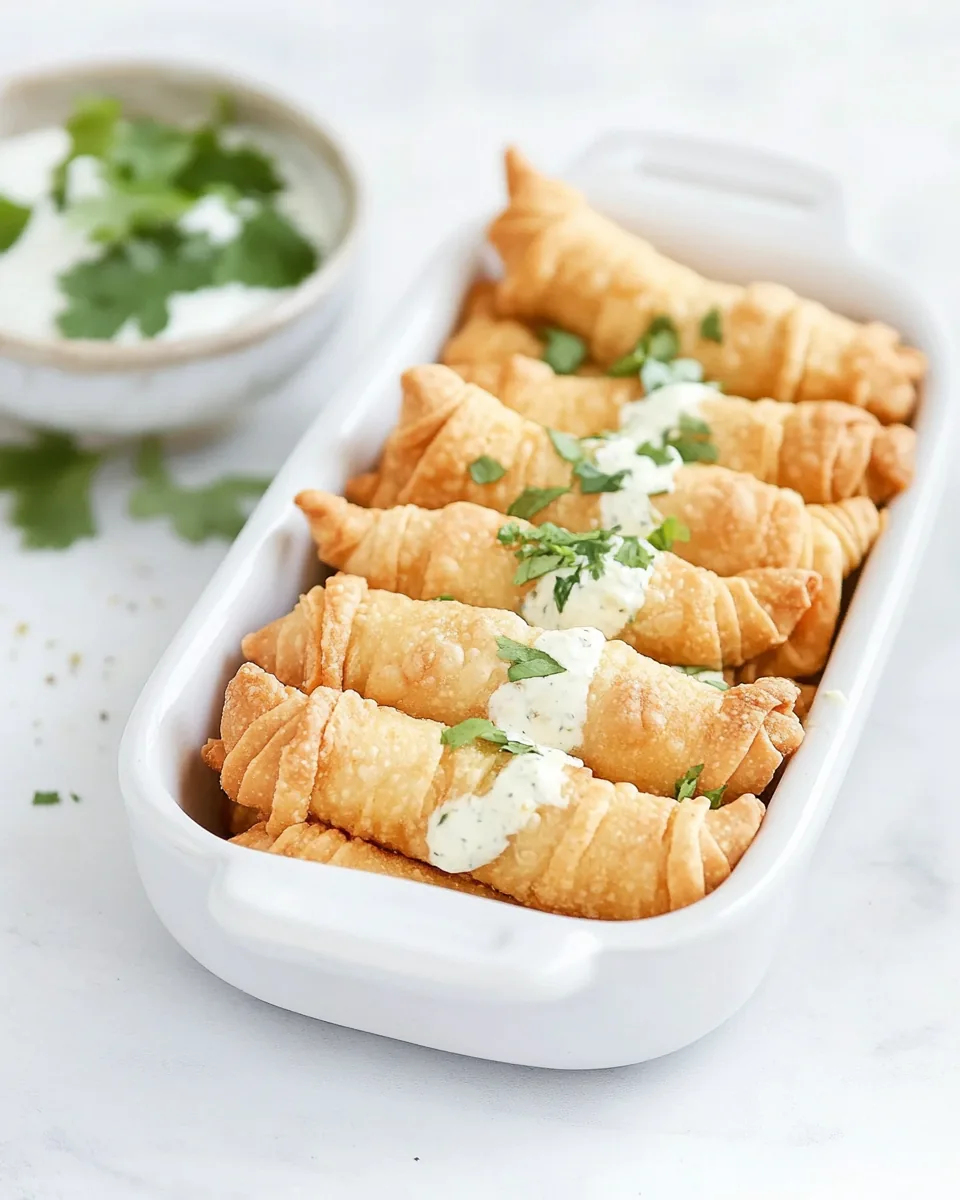
- Make a dipping sauce: Pair with guacamole, salsa, or a creamy dipping sauce for an extra layer of flavor.
- Try different shapes: Instead of traditional sticks, cut the dough into fun shapes for a playful presentation.
- Experiment with spices: Add a pinch of paprika or cayenne to the dough for a bit of heat.
- Play with sizes: Make mini Tequeños for bite-sized snacks or larger ones for a filling treat.
Serving Options for Tequeños
When it comes to serving Tequeños, the possibilities are endless! They are incredibly versatile and can fit seamlessly into various occasions. Here are some fantastic serving ideas:
- Appetizer for gatherings: Serve Tequeños at parties as a crowd-pleasing appetizer that guests will love.
- Snack for movie nights: Enjoy these cheesy treats while watching your favorite films for a cozy night in.
- Pair with beverages: They go wonderfully with fizzy drinks or tropical juices, making them a refreshing side option.
- Perfect for picnics: Pack Tequeños for a picnic lunch, where they can be enjoyed at room temperature.
- Flexible side dish: Pair them with salads or grilled veggies for a light dinner option.
- Seasonal favorites: During holidays, they make a great addition to festive meals or family reunions.
- Store leftovers: If you have any leftovers, store them in an airtight container in the refrigerator for up to three days.
FAQ
Conclusion
In summary, Tequeños are an irresistible snack that brings comfort and joy to any occasion. Their perfect blend of crispy dough and gooey cheese makes them a treat you won’t want to miss. I encourage you to try making these tasty bites at home; you and your loved ones will be glad you did. With their endless customization possibilities, Tequeños can easily become a beloved staple in your culinary repertoire.

Tequeños
Ingredients
Equipment
Method
- In a large mixing bowl, combine flour, salt, and baking powder. Stir them together until well mixed.
- Incorporate the egg and melted butter into the dry ingredients. Mix thoroughly until you achieve a cohesive mixture.
- Gradually add warm water to the mixture, kneading it until a smooth dough forms. The dough should be soft yet elastic, not too sticky.
- Cover the dough and let it rest for 10 minutes. This resting period allows the gluten to relax, making it easier to roll out.
- Roll out the dough on a floured surface to a thickness of about 1/4 inch. Cut it into strips, approximately 1 inch wide. This is where the magic begins!
- Take each cheese stick and wrap it with a strip of dough, ensuring you seal the edges well. This is crucial to prevent the cheese from leaking during frying.
- In a deep fryer or large pot, heat oil to 350°F. Be sure to monitor the temperature to achieve that perfect crispy goodness.
- Fry the Tequeños in batches until golden brown, about 3 to 5 minutes. Keep an eye on them to ensure they don't overcook!
- Once they are beautifully golden, drain them on paper towels to remove excess oil. This step is vital for keeping them crispy.